One thing to keep in mind with mainframe adventure games is they were often experienced by players of that period in a state of “under construction”. This started directly with Crowther who left a literal “under construction” sign in the lower parts of his cave, where one of the exits simply crashes the game. This was kept to an extent by Woods (who left “under construction” in at Witt’s End) but Woods also had one release that included his own “under construction” sign, where the troll bridge would later be.
David Lebling’s map of the “250 point” variant of Adventure, at his GDC 2014 postmortem of Zork.
While the most recent version of a game (as complete as the authors have made it) is generally what modern players have, someone playing Acheton in 1978 (directly on campus at Cambridge) would not have the same gameplay as someone playing Acheton in 1981. It’s easy to forget we aren’t dealing with static works but moving targets, and David Lebling (see image above) only played a partial version of Crowther/Woods before starting on Zork.
This causes an extra issue: is what we are seeing not working because the author hasn’t implemented it yet, or is it a puzzle to be solved? In exploring the regions visitable by the train in Thissala (two very small, one very large) this question came up multiple times.
It’s not common to see literal Under Construction signs in games any more, although this area blocking off one direction of a street is from the 2026 demo for Nirvana Noir.
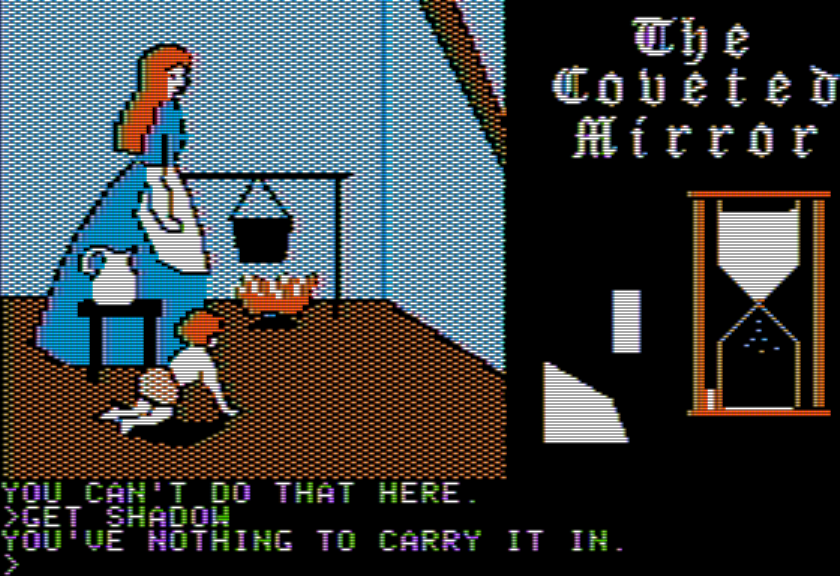
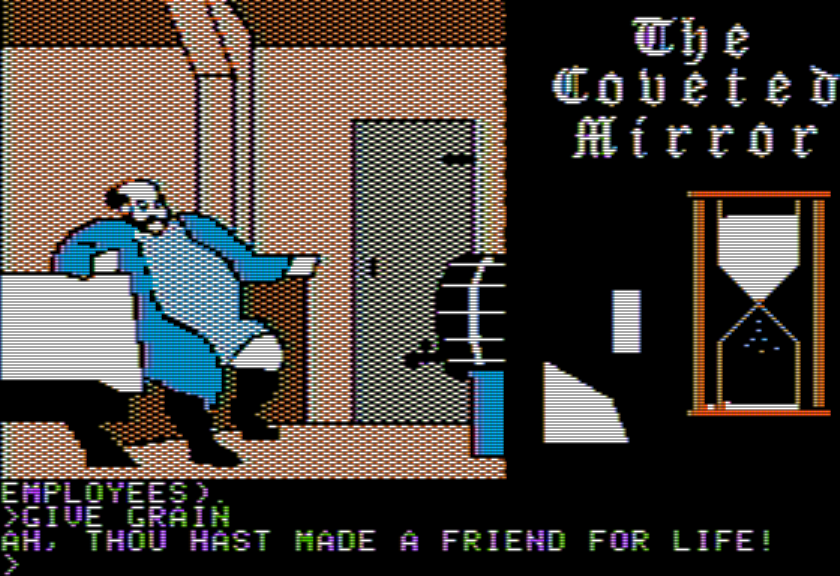
Before getting to that train, one issue that Rob mentioned in the comments (which I hadn’t even really dealt with yet due to a bug). Specifically, this has to do with the donation box at the church, which has a CHEVY key inside. As long as you don’t take the key, you are able to pick up the box.
Inside the old church
You are standing inside of an old village church. The interior of the church is lit from light filtering through the stained class windows high in the roof. Towards the front of the church you can see a small pulpet, behind which are rows of benches. Immediately in front of you is a small, brown, walnut table, that stands about 3 feet high.
On the table, is a beautiful veneer box, with a slot cut in the top.
SCORE
You currently have 0 out of 750 points, requiring 13 moves
You current classification is ABSOLUTE MORON.
GET BOX
Taken.
SCORE
You currently have 5 out of 750 points, requiring 15 moves
You current classification is ABECEDARIAN.
The change in points means it counts as a treasure (which goes… ???) Trying to make it out with the box results in death.
OUT
Old Church
NE
There is a loud crash of thunder, and as the sound reverberates through the lands, echoing off Minor and Major mountains, a deep dietal voice rumbles “THOU SHALL NOT STEAL”. There is a flash of lightening and as the bolt strikes you you find yourself still outside the old church …Unfortunately, you are now a pile of ashes, or to put it more simply … you are dead.
Notice there’s an extra turn here for you to do something (suggesting maybe there’s a puzzle-action here to survive) but is there really? Or is this an incomplete puzzle? Especially suggestive of the puzzle being unfinished is the fact that taking the CHEVY key out results in the player not being able to pick up the box (it is now described as fixed in place) which is clearly a bug, and putting the key back in doesn’t fix the problem.
Given there’s no clear place where treasures go I’m fine stalling on thinking about this anyway and moving on to the train station. I never was able to win the fight against the three enemies in the “niche” so I don’t know what clearing that space out does.
ATTACK PIRATE WITH SCIMITAR
Though you hit the pirate, it is still alive
The pirate, with an evil gleam in his eye, strikes and slashes, but you still live.
The giant rat circles … He bites you squarely … and you feel the life running out of you
The niche is not important for boarding the train; you can just wait at the regular station for long enough and it will show up. It seems to be on a two-hour cycle. When the game’s time is on 1:00 (or 3:00, 5:00, 7:00, etc.) the train visits the main station. At the half hour, it reaches “River’s End”, at the next hour it reaches “Dry Gulch”, and at the next half hour after that it reaches “Stark Beach” before returning back to the main train station.
WAIT
It is now 13:0
Now arriving on track number one, the VS+EL local train.
BOARD
Welcome aboard the VS+EL Railroad. Have a nice trip.
Main station (aboard the VS+EL)
This is the main station of the Very Short and Extremely Local railroad (the VS+EL RR). There is a small station house to the east of here.
WAIT
It is now 13:5
Main station (aboard the VS+EL)
This is the main station of the Very Short and Extremely Local railroad (the VS+EL RR). There is a small station house to the east of here.
WAIT
It is now 13:10
In the tunnel (aboard the VS+EL)
WAIT
It is now 13:15
Emerging from the tunnel (aboard the VS+EL)
You are emerging from a large tunnel dug in the base of Major Mountain. Behind you, you can see the entrance carved from the rock. In front of you is a large field.
For reasons that will become quickly clear, I’m getting River’s End (first stop) and Stark Beach (third stop) out of the way first before discussing Dry Gulch.
This map is the entirety of River’s End:
I wish I could say this area is clue-laden or at least filled with potential, but this really comes off as a stub that the authors intended to get back to.
Oceanside station
There is a small station platform here. To the distant south, you can see the ocean
Sitting at the station is the VS+EL local train
SW
Access trail
You have reached the access trail to Oceanside station. The station is on the branch line of the Very Short and Extremely local railroad
SW
Winding path
The path heads northeast/southwest
SW
Oceanside beach
You are standing on a small sandy beach along the shore. There is a trail heading northeast from here
Maybe there’s a boat or some other secret with the beach? DIG is a verb although the game very specifically asks you to have a shovel.
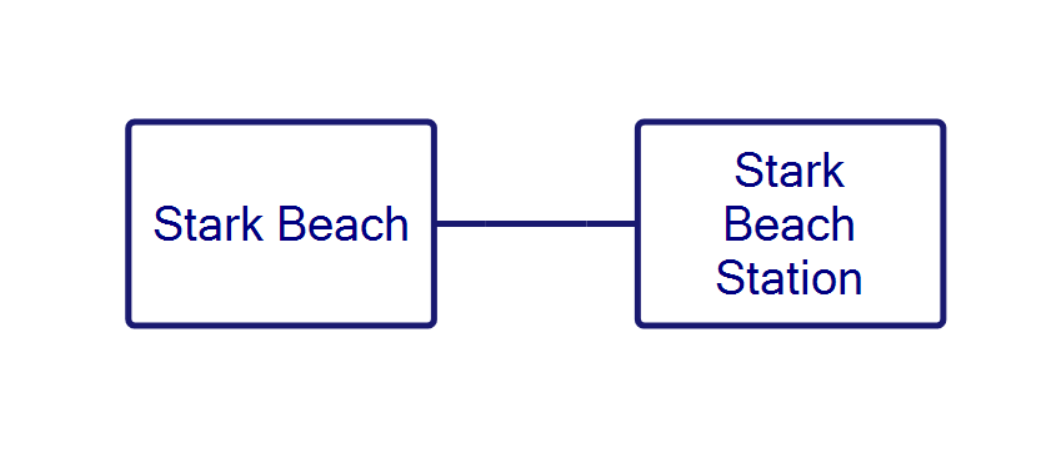
Stark Beach is similarly barren map-wise…
…although at least there’s more work put into the room description.
Stark Beach Station
Stark beach is known for it abundance of nude bathers and party people. To the west is a path that leads off to the beach.
Sitting at the station is the VS+EL local train
W
There is a rumbling sound and a distant whistle from a VS+EL RR train.
Stark Beach
Directly in of you, though seperated from you by a chain link fence, is a sandy white beach. Many beautiful women, and handsome men normally can be seen bathing in the nude, running around the beach, playing games of tag, and thoroughly enjoying themselves. There is a large bar at one end of the beach, where more naked men and women usually lounge and sipping tall cool drinks. At the other end of the beach there is a series of small tents where various men and women can go off to be alone. This is a way of life here at Stark Beach … when it is sunny … but it is overcast … threatening to rain … there is no one to be seen … and the fence is closed … too bad.
Lying in the sand here, is a beautiful silver bracelet, obviously dropped by a bather in a hurry to get to the fun.
I can’t tell if this is meant as a puzzle, a stub for further expansion (that never occurred), or a complete encounter. At least this location does dispense a treasure (the silver bracelet) although I have no way of getting it back out of the mountain past the gnomes. (You would think the teleporter from the parking lot at the start would do it, but I still have yet to get that working.)
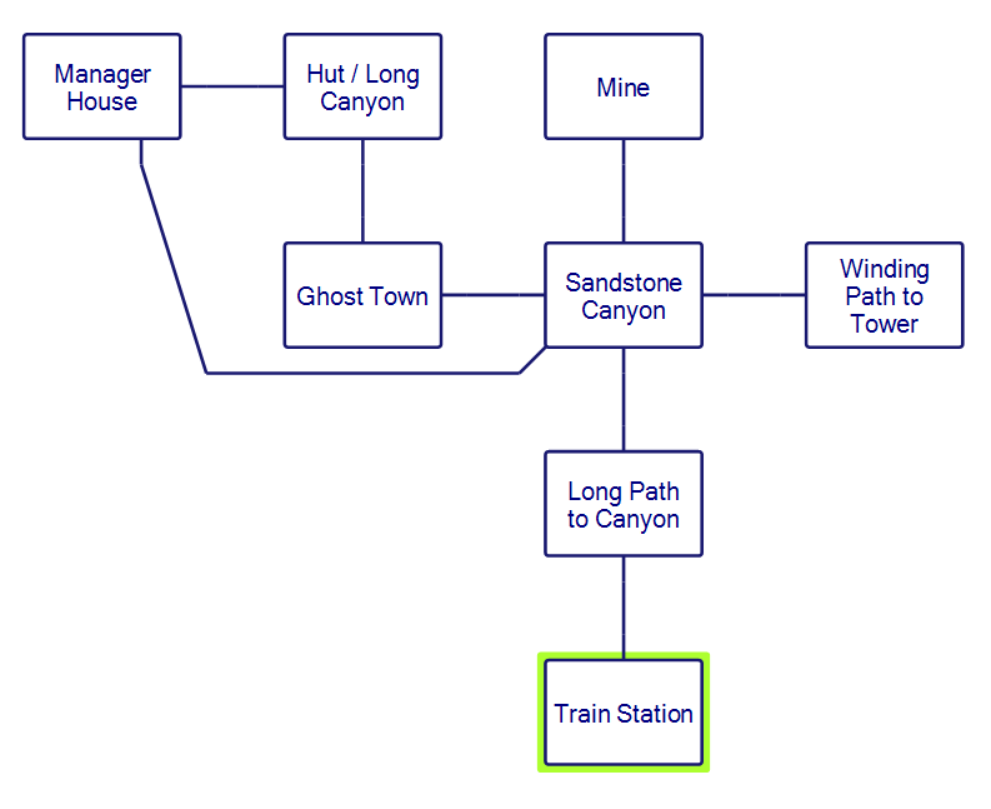
In wild contrast stands the second slot in between the two beaches, Dry Gulch. In fact, while I would normally provide the full map, in the interests of actually getting a post out, I’m just providing part of it. There are parts that just keep going and lots of exits that lead to a boulder maze so testing every exit takes a while. Keeping in mind I’m not done interconnecting yet, here’s the general meta-map I have so far:
Leaving the train station just gives a straight shot to the north for a while:
Path in the middle of the Desert
You are standing on a north-south path in the middle of a bare and otherwise trackless desert. All around you are drab and dun-coloured sand dunes which stretch as far as the eye can see to the east and west. The sun is blazing down, and the air over the dunes shimmers with heat. A warm dry breeze is blowing, driving a layer of fine gritty sand and dust across the dunes and the path. There appears to be a range of mountains to the distant north, but it’s difficult to judge distances in the heat-haze; the image shimmers so much that it could be a mirage.
N
Path in the middle of the Desert
You are standing on a north-south path in the middle of a bare and otherwise trackless desert. All around you are drab and dun-coloured sand dunes which stretch as far as the eye can see to the east and west. The sun is blazing down, and the air over the dunes shimmers with heat. A warm dry breeze is blowing, driving a layer of fine gritty sand and dust across the dunes and the path. There is a range of mountains to the north, and it’s not too far away !
N
Entrance to sandstone Canyon
You are standing at the entrance of a large canyon cleft in the sandstone rocks of a mountain range. The walls of the canyon are steep and unclimable. The high and craggy mountains stretch away to the east and west of where you are standing. There seems to be a faint track leading along the foot of the mountains. A well beaten path stretches across the bleak desert to the south, and extends to the north through the centre of the canyon.
While the game has three authors, I suspect all of this section is by one author, and one who is keen on lovingly describing outdoor geology. Perhaps the thought process went: Crowther made a realistic cave, so let’s make a realistic desert.
Coloured rock canyon
You are standing on a North-South track in the middle of a sandstone canyon. The rock walls on either side are veined and banded with varied hues of sandstone, mainly reddish shades which lie between roseate and ocherous, but with occasional streaks of bluish-gray and green, which seem to indicate the bedding-planes of an upper Triassic, or possibly lower Lias, series of sediments. The colours appear to be glowing in the strong sunlight. It is altogether a beautiful and somewhat awe-inspiring sight.
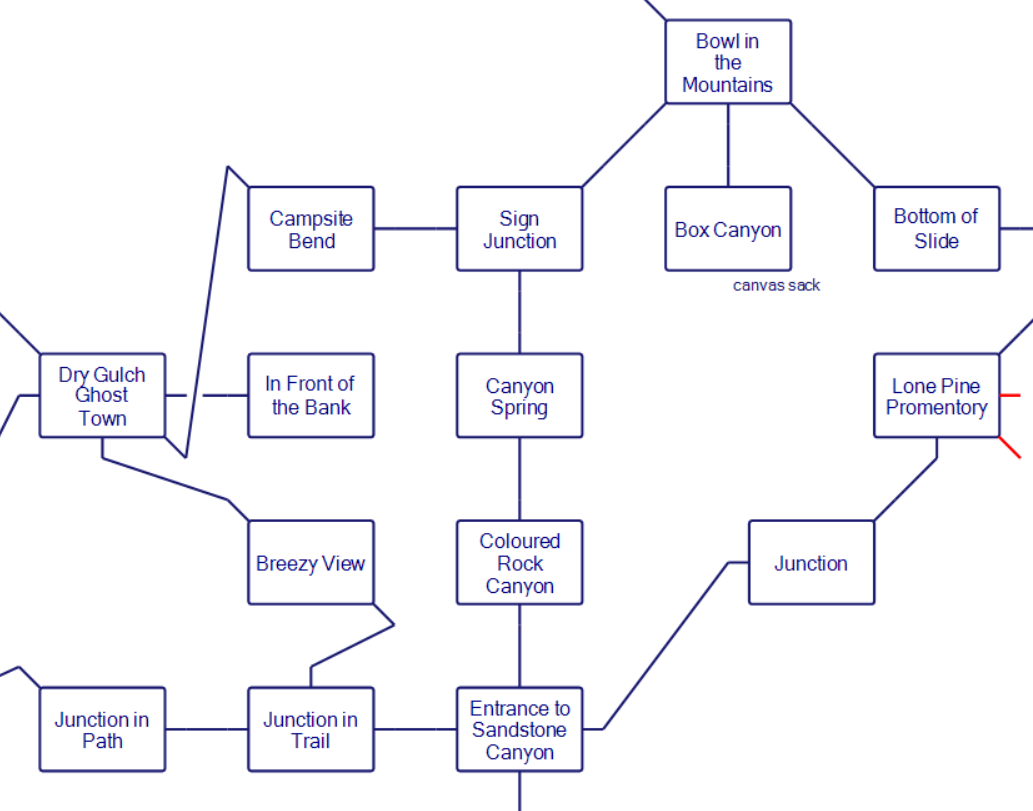
A map of the central coloured rock canyon area:
The two red-marked exits lead to a boulder maze which I’ll talk about later (other exits lead to the same). While there’s plenty of long descriptions there’s very little here to do, other than swipe a “canvas sack” which seems to serve like the sack from Zork (it increases your inventory capacity). I incidentally tried hiding the prayer box from God by using the sack and it didn’t work.
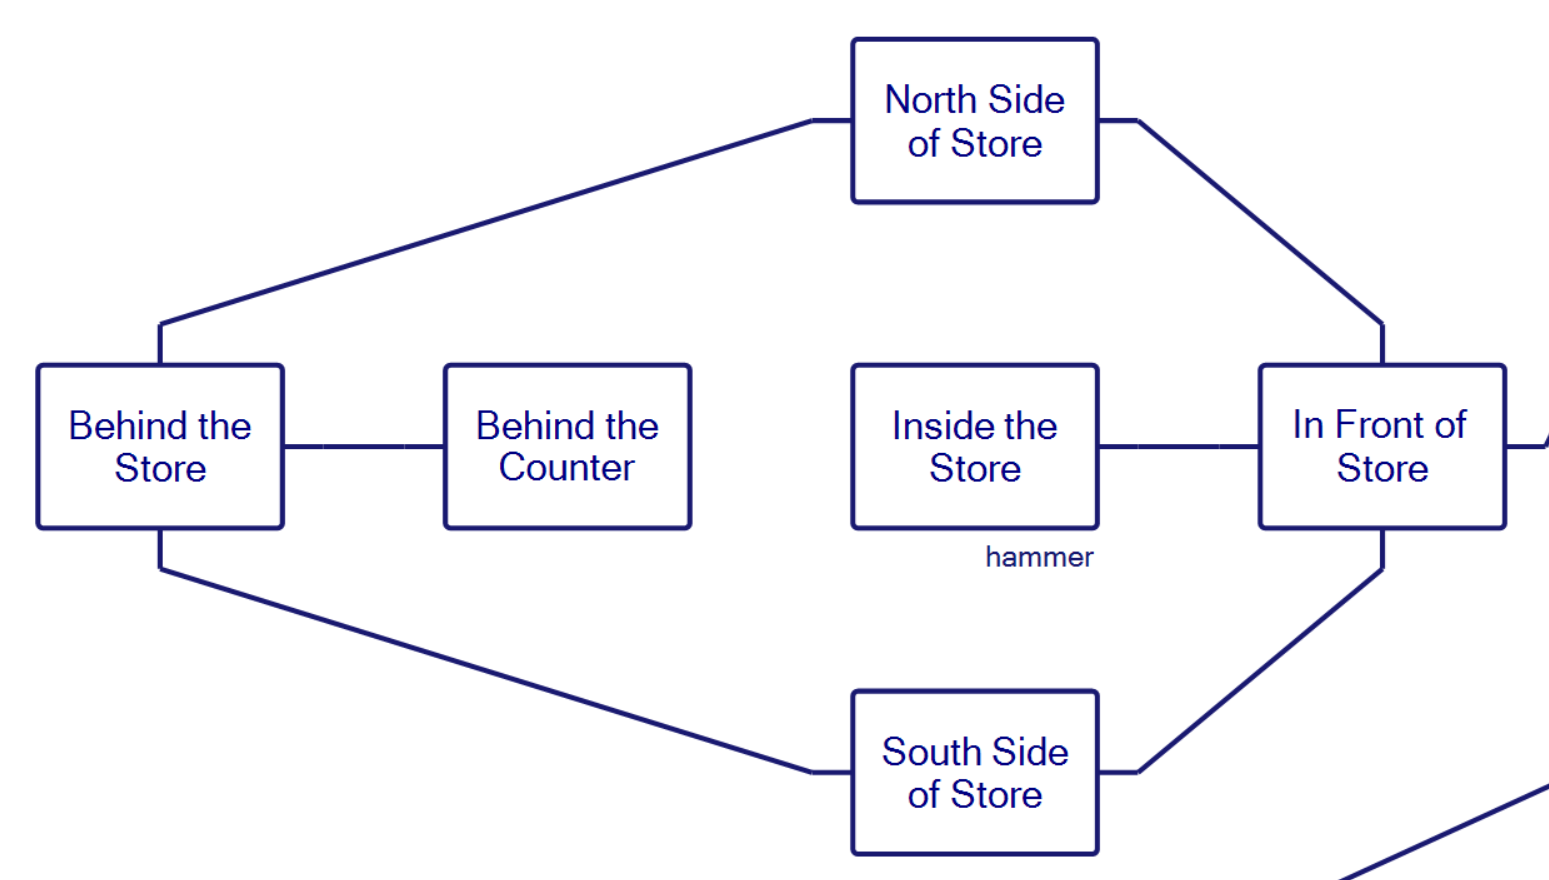
To the northwest is a ghost town with two buildings, a bank (which seems to be truly and completely shuttered) and a general store. The only reason for the general store to exist, despite it having a map which allows going in an alternate exit…
…seems to be to get a hammer by smashing a case.
In front of store
You are standing in front of the Drygulch Equipment & Clothing (DEC) store, a large building which is partly ruinous and which has obviously seen better days, but which is at least still standing. Behind the wooden boardwalk at the front of the store is an adobe brick facade which is sadly chipped and crumbling. There are two windows and a door in the front of the building.
IN
Inside the store
The inside of this abandoned drygoods store has the musty odour which a wood and abobe structure acquires with long neglect. A high old-fashioned service counter runs north-south across the width of the store, effectively barring entrance to the back from this side. There is sufficient light coming in from the grimy windows and open door in the eastern wall to see the rest of the room quite clearly. Though the frontage is a substantial adobe brick wall, the rest of the store is built from dry wooden planking.
Against one wall of the room is a large glass display case.
It contains:
a geological hammer
BREAK CASE
The glass of the display case shatters into millions of glass splinters that fall between the cracks of the floor
We’ve certainly had game maps before with lots of window dressing (like The Hermit’s Secret) but the long prose means the empty space here feels very different: like the author of this section was making a simulation with game elements as an afterthought (perhaps literally, in that they intended to add things on a later pass). If you bypass the ghost town on a canyon rim path (or go by a hut I’ll show in a moment) you reach a Manager’s House where the incomplete aspect really becomes obvious.
Front of Goblin Mine Manager’s house
You are on a trail which runs along the southern rim of an east-west
canyon. Dug into the dirt of the hill slope beside the trail is the
rather imposing entrance hole of the habitation of the Goblin who manages
the Goblin Mine.
IN
Entrance hall
There is a doorway to the north, and a plain walled hallway extends to
the south.
S
Hallway
The corridor -like hallway extends to the north and south. There is a
doorway on the east side.
E
Study
That’s a room with no description at all! A trophy room and a kitchen are similarly left with no description.
Some of the locations lead to a maze. It is a classical “drop the objects to map” style.
You are lost amongst the giant boulders on a mountain plateau.
W
You are lost amongst the giant boulders on a mountain plateau.
N
You are lost amongst the giant boulders on a mountain plateau.
I’m missing a few exits on my map (given here with the objects I dropped at various spots), but I can say there is nothing here to find.
The sole purpose (other than making the map a pain overall) seems to be to lead to a “Windy view” where there is nothing of note other than scenery.
Windy view
You are standing on a small trail on the shoulder of a mountain. There is a magnificent view from here across a wild and windy mountain landscape composed of many colours of sandstone rocks. The mountains are cut into by a maze of twisting canyons. From where you stand you can go either north or east around the shoulder of the mountain. A very steep rockslide begins here and fans out south and west below you to the bottom of a distant canyon.
Look, I’m never thrilled when yet another maze-mapping happens in one of these games, but at least even a treasure at the end gives some tinge of reward. (Or earlier in this game, it was satisfying to find the mysterious cube at the center of a maze, which turned out to be the “respawn point” after dying.) When the map just exists for its own sake, I feel like I’m spinning my wheels.
I’m going to save the remainder of the desert when I get it finally final, but a few notes:
1. The east side of the central canyon leads to a “slide” which goes by a rusty key (haven’t found a use for yet, including taking back to the post box) and leads through many rooms up to a “tower”. The tower seems to serve no purpose beyond being scenery.
Where two paths meet before a ruined tower …..
High on a lost and rocky mountain ridge, open to the blue and windy sky, two paths from southeast and southwest meet before a roofless tower of broken stone dark built of massive granite blocks, alien to this land of honey coloured stone. The crumbling arch where once a door did swing lies open to the north of where you stand.
N
Inside roofless tower of broken stone ……
The walls rear high, but, shattered at the top, reveal the welcome light of open sky. Here below, surronded by these massive sombre walls, is dark and chill, except where one diffused beam of welcome light reveals the shadowed southern entrance arch.
It’s still possible some of these places will have purposes that eventually reveal themselves, but my game-sense is currently telling me no, there’s a tower here because the author thought it would make good scenery.
2. Near the Ghost Town, to the north, is a hut. Just like the Tower, no apparent purpose.
Hut
You are on an east-west portion of a winding trail which goes along the northern rimwall of a long brownish canyon. There is a small and somewhat delapidated hut beside the trail here.
IN
Hut
Diagonal beams of light from the harsh sun outside come through the cracks in the warped and twisted planks. This place appears to have been at one time the residence of a prospector or miner, now left to fall to ruin.
3. Near a Sweetwater Spring is the mine. I still have more to explore so I will report back later, but so far I haven’t found anything except more rooms.
Sweetwater spring
You are beside a small spring of clear water which bubbles up from the canyon floor. The canyon runs in a southeast-northwest direction. There are small trees growing all over the canyon floor on all sides except the west, where an extremely steep fan-shaped rockslide is piled up against the southwest wall of the canyon. The slide goes all the way up to the rim.
NW
In front of a mine
You are at the end of a canyon in front of a mine with a large iron door, and there is, chiseled into the stone, the legend
“PETEY COOPER’S OPAL MINE”
above the door. Up against the east wall of the canyon there seems to be the ruins of a building. There are piles of rubble and mining spoil all around. A fitful warm wind blows swirls of rock dust around your feet.
N
Inside mine entrance
You are standing just inside the entrance to an opal mine. To the south the sunlight spills in through the doorway onto the rocky floor. The mine passage heads north from here and begins to twist about.
Other than that, I’ve got all the same obstacles from before (skittish hen, post box, bank, curtain, power box, enemies in the niche) and I do suspect at least one of the items I’ve been nabbing in the desert will eventually help. However, I also suspect I’m running out of runway here, and the game is eventually going to reach a hard stop which may or may not be passable. For example, one room has a north exit mentioned in the room description that simply doesn’t work: does it lead to a single place or a full new area? Based on my calculation earlier with the exploration stat, there should be more rooms in the code out there, but that doesn’t mean I’ll be able to reach them.
Last time I left off on getting immediately killed by a pirate when entering a niche at the train station. Predictably, you can also get killed by waiting for the train in the track while not going west into the niche.
It is now 13:5
There is a rumbling sound and a distant whistle from a VS+EL RR train.
WAIT
It is now 13:10
You have just been run over by a VS+EL RR train.
There are no other exits. I ran through my item list (rope, pendant, charm, keys, can opener, strange coin, beers, tuna syrian, scimitar, disks, plus the random items from the underground I mentioned last time) and while testing the STATUS command I found that eating the tuna syrian maxes out the player’s power.
STATUS
Current power level: 0
Current coordination level: 0
Current magic level: 0
Current wisdom level: 0
Current knowledge level: 0
EAT TUNA SYRIAN
mm..mmm… That sure did taste good
STATUS
Current power level: 100
Current coordination level: 0
Current magic level: 0
Current wisdom level: 0
Current knowledge level: 0
This seemed quite promising, and indeed it allowed surviving entering the niche and not getting killed right away. Unfortunately, the niche has a pirate, a spider, and a rat, and I have yet to take down all three before dying. This may simply be an RNG battle and I need to throw myself at it enough times.
ATTACK PIRATE WITH SCIMITAR
Your attack misses the pirate.
The pirate, with an evil gleam in his eye, strikes and slashes, but you still live.
The giant rat attacks … his teeth make contact with you … you are weakened … but alive
The hairy spider attacks … he gets you … but you are still alive
ATTACK PIRATE WITH SCIMITAR
Though you hit the pirate, it is still alive
The pirate, with an evil gleam in his eye, strikes and slashes, but you still live.
The giant rat attacks … his teeth make contact with you … you are weakened … but alive
The hairy spider attacks … but he misses
I’ve managed to kill two out of the three but not all three. I probably could keep track of STATUS while fighting in multiple runs to figure out the optimal order of killing the three enemies. I’d love to increase my “coordination” stat but the only thing I’ve been able to do is make it go down to -2 (there are two beers, drinking each one drops that stat by 1).
The giant rat circles … He bites you squarely … and you feel the life running out of you
As the darkness of death fades, and the light intensifies, you find yourself falling quickly at first then slower, then slower still until you find yourself looking down on a strange land. Below is a river, a long river, so long that even at this height the river stretches forever. About 1 mile from each bank of the river is a tall mountain range. You slow more until you are about 1 foot from the ground, and then you lite gently on the surface of an eerie world.
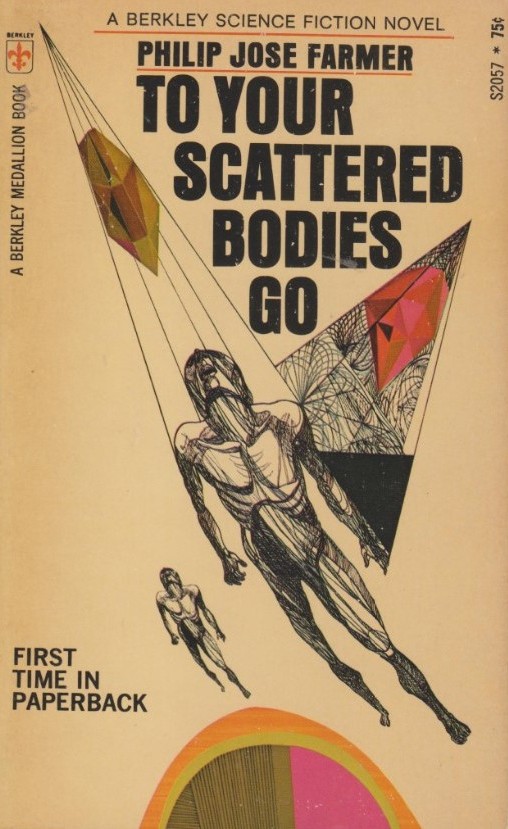
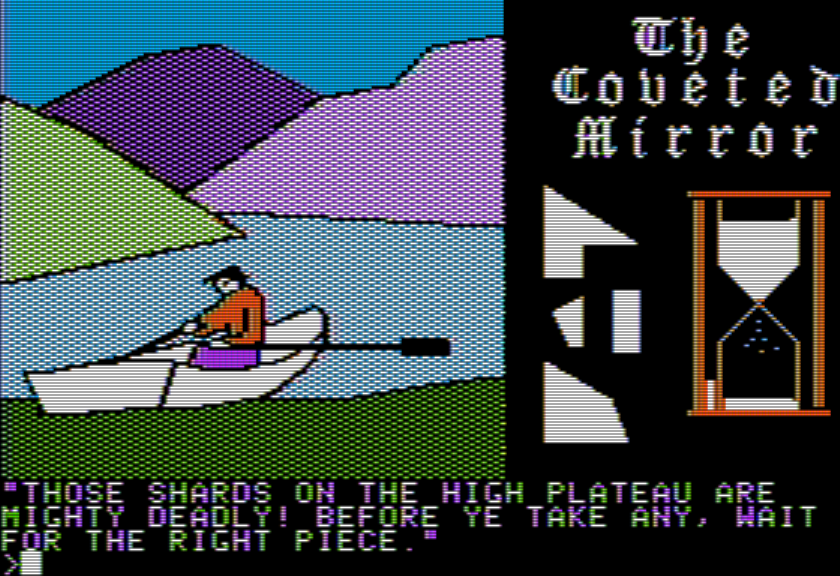
Rather than focus on that, I decided to roll with dying and see what would happen. I wasn’t reading closely enough before but it became quite clear the authors have sent the player to Riverworld.
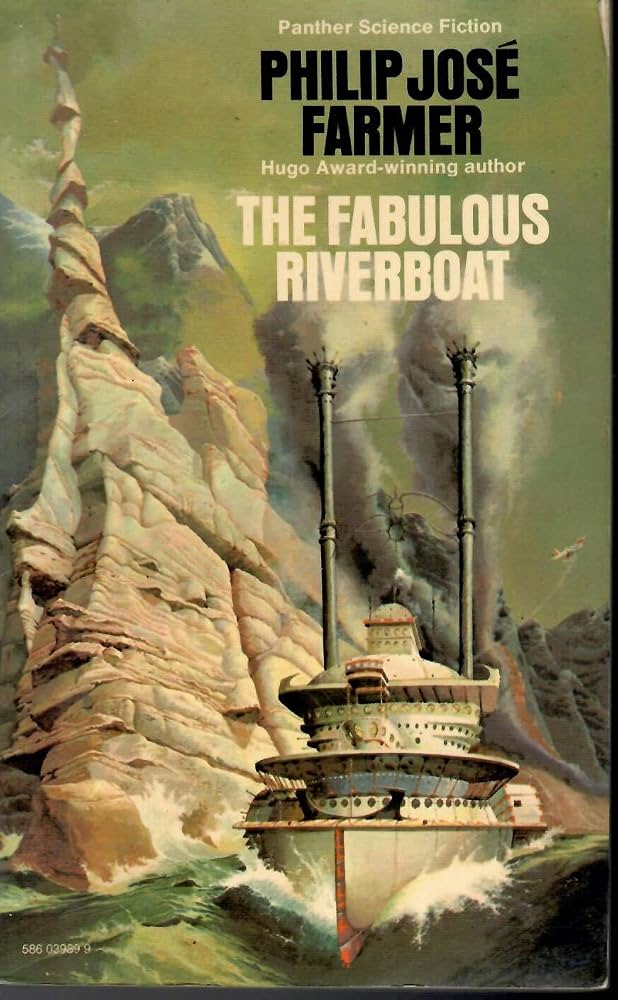
Riverworld is a series by Philip José Farmer which technically dates back to the 50s (when he first made some published stories, which were meant to be published, but the publisher vanished into the ether) but is mostly associated with his series of novels starting in 1971. When they die, people are sent to a planet with a seemingly endless river; the first book follows the explorer Richard Francis Burton immediately upon dying, including meeting up with Alice Liddell (of Alice in Wonderland fame); Alice later kills Hermann Göring. The second book involves Samuel Clemens (Mark Twain) wanting to build a riverboat.
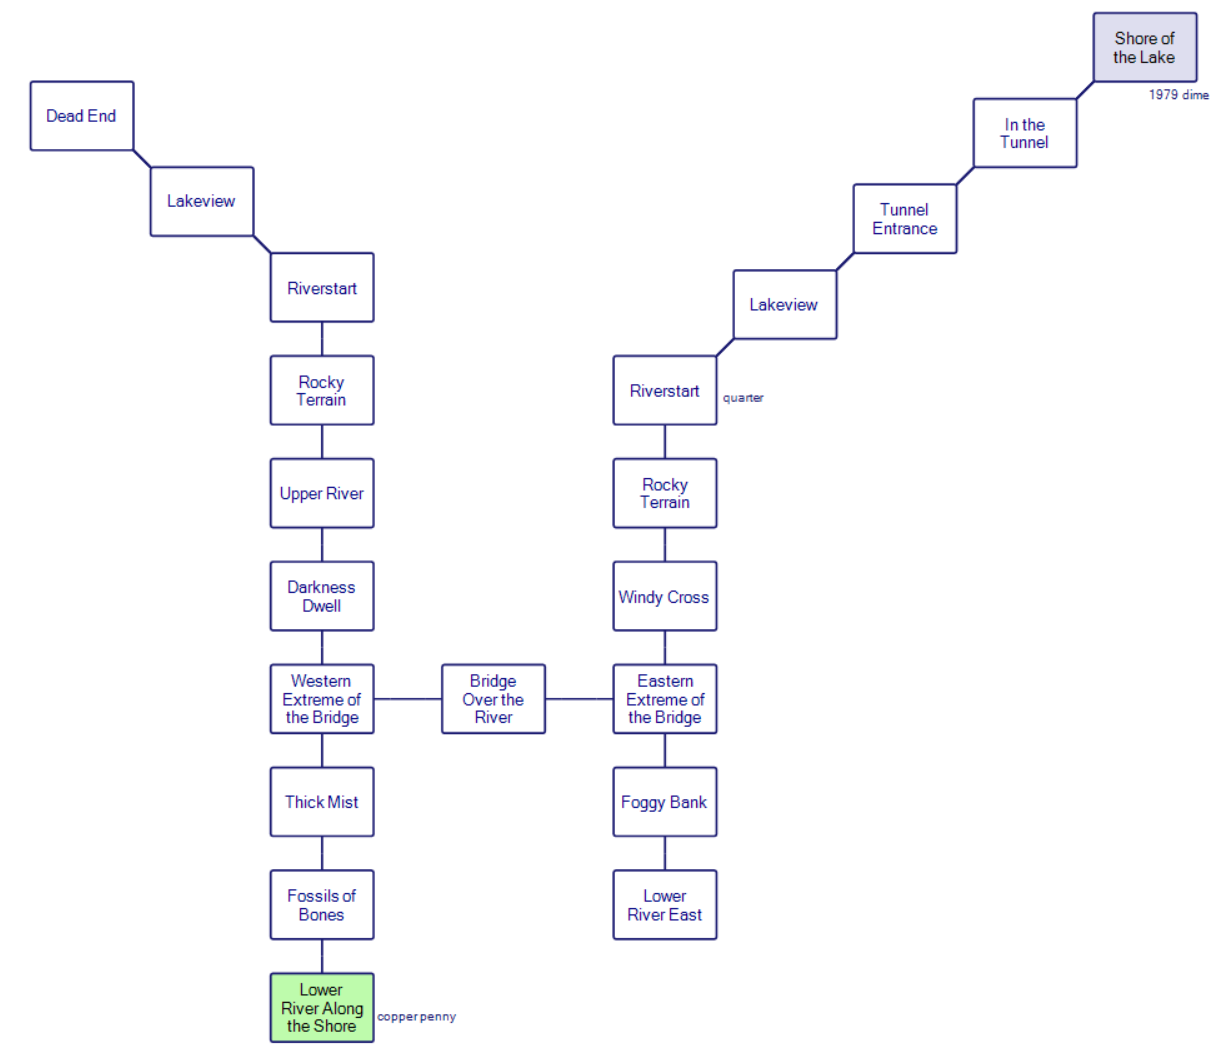
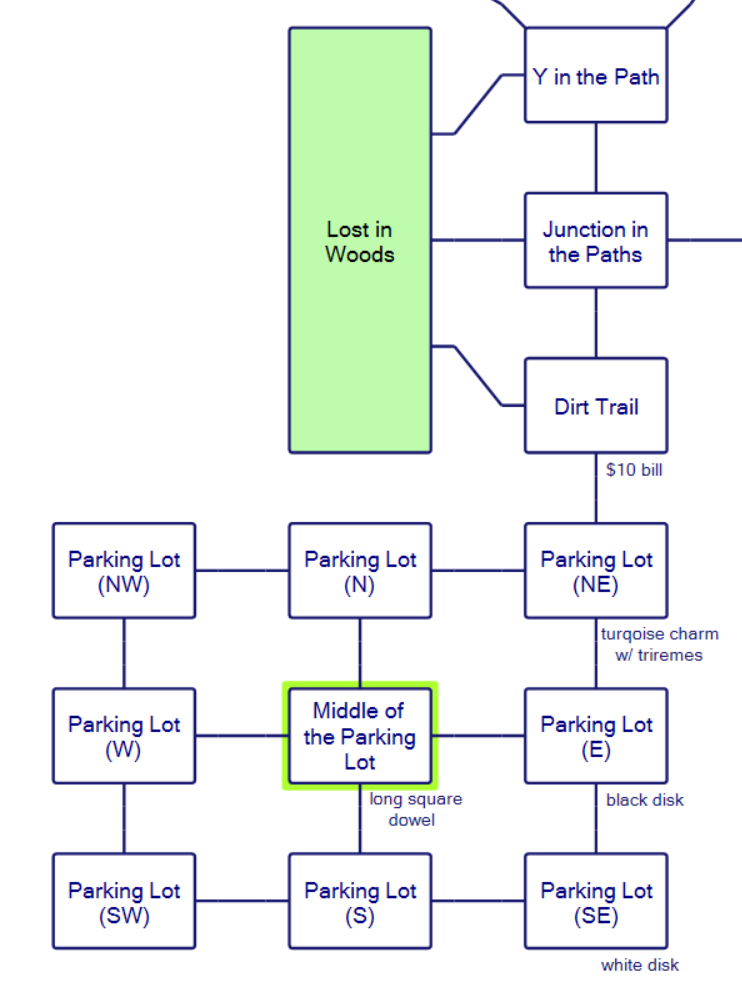
There are no historical figures here: we’re on a river, and we died, and we need to get out.
There’s some randomization (which I haven’t seen anywhere else in the game); the green position is where I started once, but there seems to be more than one potential landing place. Additionally, there’s a penny, dime, and quarter marked for their locations during one of my visits, but they, too, can be randomly distributed. For example, I found the penny once at the far northwest, at the “dead end”.
Fossils of bones
Molded into the ground rocks around you feet are the fossils of many a human that has been committed to the Riverworld. When resurrection fails, the bones are piled here by others, until they decay, or become fossilized.
NORTH
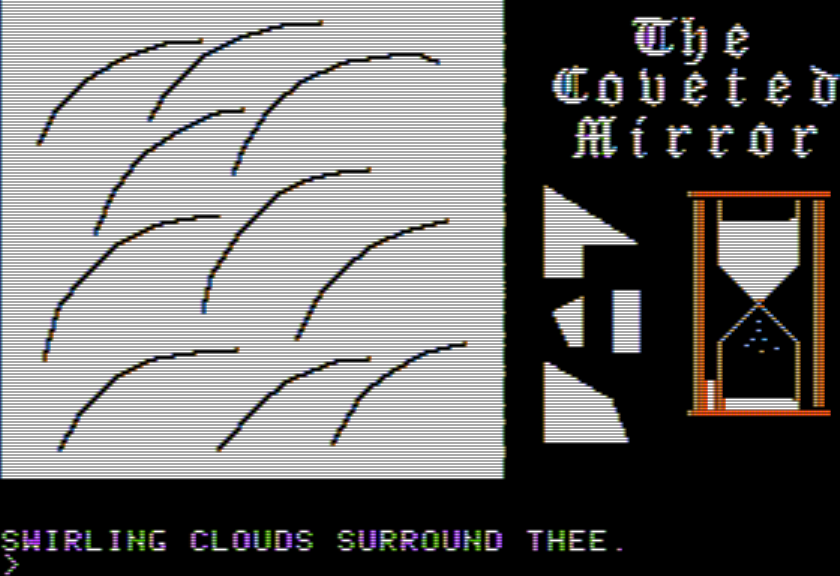
Thick mist
The ground, and the river, are almost undistiguishible here due to the dense fog that surrounds you. Upstream, you can barely make out what appears to be a bridge heading to the other side of the river.
The game follows the same pattern of “view” rooms (like the Volcano View in Adventure) by adding a Lakeview.
You are on a path that continues northeast and southwest. Directly in front of you is a large lake, that has a mountain range forming its perimeter. The lake is hundreds of feet below you and there is no trail leading down to it. In the middle of the lake is a large tower that stretches up into the clouds. From here you can barely make out the details of the tower, however, you can see that it is silver, and has a platform at lake level.
Weirdly, all the various “environmental effects” like the crows and the rhinos still can appear. I was incorrect before: it seems like these effects literally can happen in any room with no restriction, including in the afterlife.
Riverstart
As the terrain becomes more mountainous, the river comes to its head receiving its waters from the large lake directly in front of you. A low fog prevents you from seeing much on the lake. There is a path here leading to the northeast, and another leading downstream.
A silence of monks noisely passes
To the far northeast (marked in blue on my map) is a shore with a boat. It took significant work to be able to enter the boat; Rob mentioned in the comments the game specifically wants BOARD, and with no noun.
Inside the little boat
You are standing inside the little boat that floats on the great lake at the end of the river. There are two buttons here, on marked “T” and the other “S”, although no explanations are given.
This immediately was followed with more parser suffering as I eventually found the game doesn’t recognize T BUTTON but rather wants “T” BUTTON, with the quote marks there.
PUSH “T” BUTTON
Beep
WAIT
It is now 13:10
After a momentary delay, the boat glides off quietly towards the tower
There’s a prominent tower in Riverworld but it is at the north pole, so I’m unclear if this is meant as a reference. Also, the boat may be a reference to the second book, even though that’s a very different boat.
The island adds some new fresh hell to the parser battle by asking you to move with “clockwise” and “counterclockwise”.
DISEMBARK
The Silver tower
You have reached the silver tower in the middle of the lake. You are standing on the lake level platform. The platform continues around the tower at this level in both the clockwise and counterclockwise direction. There is a second platform visible high above your head
Resting in the water against the tower is a small boat
If the start point is “south”, there’s a rusted ladder on the “west” side, but the one on the “east” side is solid enough to climb.
Base of a stainless steel ladder
There is a stainless steel ladder here leading up to the upper platform.
U
Top of the stainless steel ladder
You are standing on the upper platform which continues clockwise and counterclockwise from here.
CLOCKWISE
Silver curtain of light
You are standing on the entrance platform that leads into the silver
tower. Inside you can see a large room approximately 10x10x10.
IN
Inside the silver room.
You are standing inside of a 10x10x10 room with silver walls. As you enter, the door behind you disappears. The room is illuminated with an eerie glow. One one wall is a small box with three slots on the top one small, one medium, and one large, and a slot on the bottom.
This is sort of a mini-episode which makes the puzzle straightforward: as you’ve lost all your items held while dying, the only items available are the penny, dime, and quarter. They go in the different slots by size (dime in small, penny in medium, quarter in large, and if you put something too large in a particular slot it won’t fit).
PUT DIME IN SMALL SLOT
Clunk … ding!
PUT PENNY IN MEDIUM SLOT
Clunk … ding!
PUT QUARTER IN LARGE SLOT
Clunk … ding!
There is sound faintly resembling that found in B-movies when the angels appear. There is a deep rumble beneath your feet … In the wall you are facing, there is a slowly widening circle of lights, and as the circle gets larger, the lights in the cube dim, and the hum gets lower but louder. As the lights circumference becomes tangent with the edge of the cube, the wall disappears, revealing a large room outside.
Inside the silver room
You are inside a humming silver cube (approximately 10 feet on each side).
Going OUT leads back to the humming cube. So this resolves the purpose of the humming cube building, meaning aboveground there’s still the mystery of the hen, the bank, and (maybe) where the treasures go.
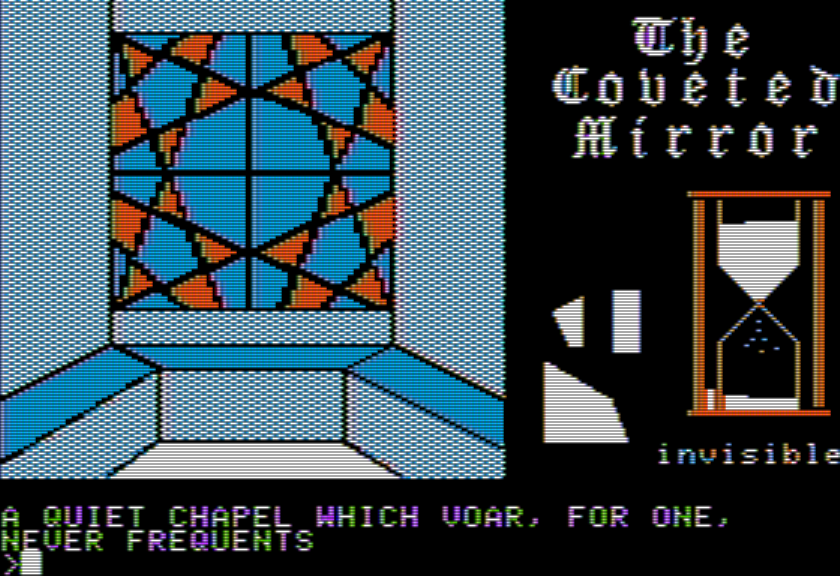
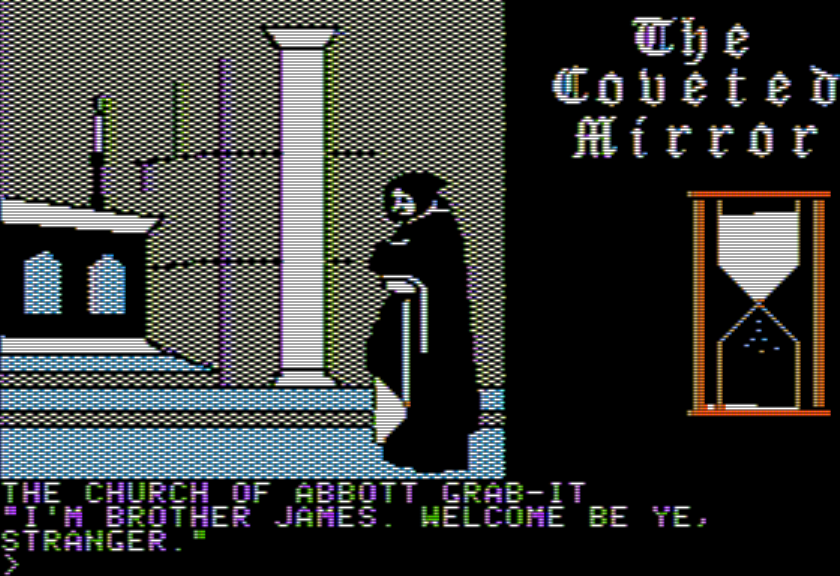
Rob made vague comments that there’s something important with the church, but the only item with a noun even recognized is the box that had the CHEVY key. I tried, from a fresh start, dropping a treasure in the box but doing so just caused the score to drop from 5 to 0 (the triremes charm at the start counts).
Inside the old church
You are standing inside of an old village church. The interior of the church is lit from light filtering through the stained class windows high in the roof. Towards the front of the church you can see a small pulpet, behind which are rows of benches. Immediately in front of you is a small, brown, walnut table, that stands about 3 feet high.
On the table, is a beautiful veneer box, with a slot cut in the top.
SCORE
You currently have 5 out of 750 points, requiring 31 moves
You current classification is ABECEDARIAN.
OPEN BOX
The box is now open.
GET KEY
Taken.
PUT CHARM IN BOX
Done.
CLOSE BOX
The box is now closed.
SCORE
You currently have 0 out of 750 points, requiring 37 moves
You current classification is ABSOLUTE MORON.
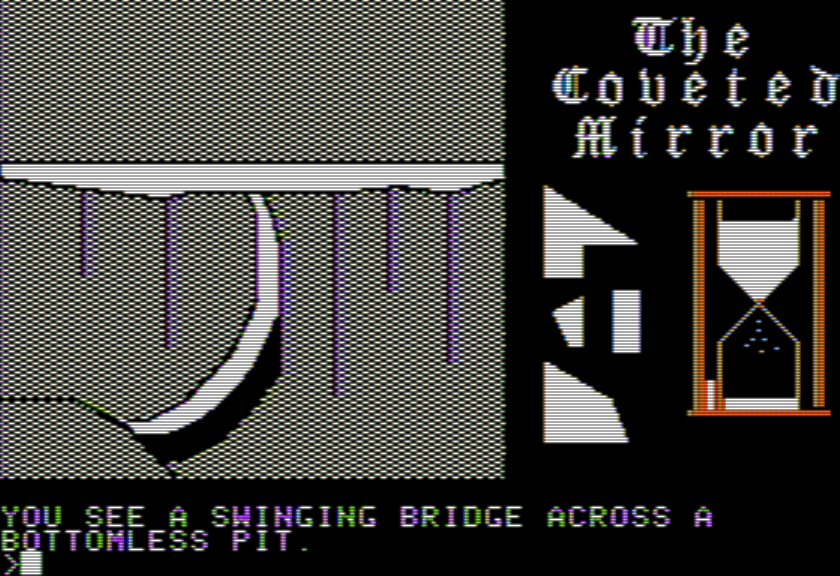
There otherwise isn’t any room that seems score-worthy. It’s not a rush at the moment (I’m clearly not deep in the game yet) but it would be nice to be sure about just because of logistical coordination (that is, if I have a big pile of items, where should it go to be most efficient?) One last issue specifically with treasure is that back at the mountain, if you try to go over the bridge the opposite way (the one that signal flags needed to be used to open) you will get stopped if you are holding any treasure. This seems intended to keep treasures from coming out of the cave, but this even applies to any treasures you brought in yourself (like the previously-mentioned charm).
Major mountain ledge
The drawbridge is in the closed position, forming a path accross to Minor mountain
N
A little gnome stops you and says …”You may not leave carrying any valuables. They must be left behind.” Then he disappears.
Next time, I’ll try to deal with the monster trio (which may just be a matter of throwing clones at the problem until RNG goes my way) and get on board the train.
While I have explored the cave some and will share my results, I have not gotten that much farther; I’m intentionally saving part of the game for a later post, because I want to focus on the parser, world model, and trying to work around the game’s bugs.
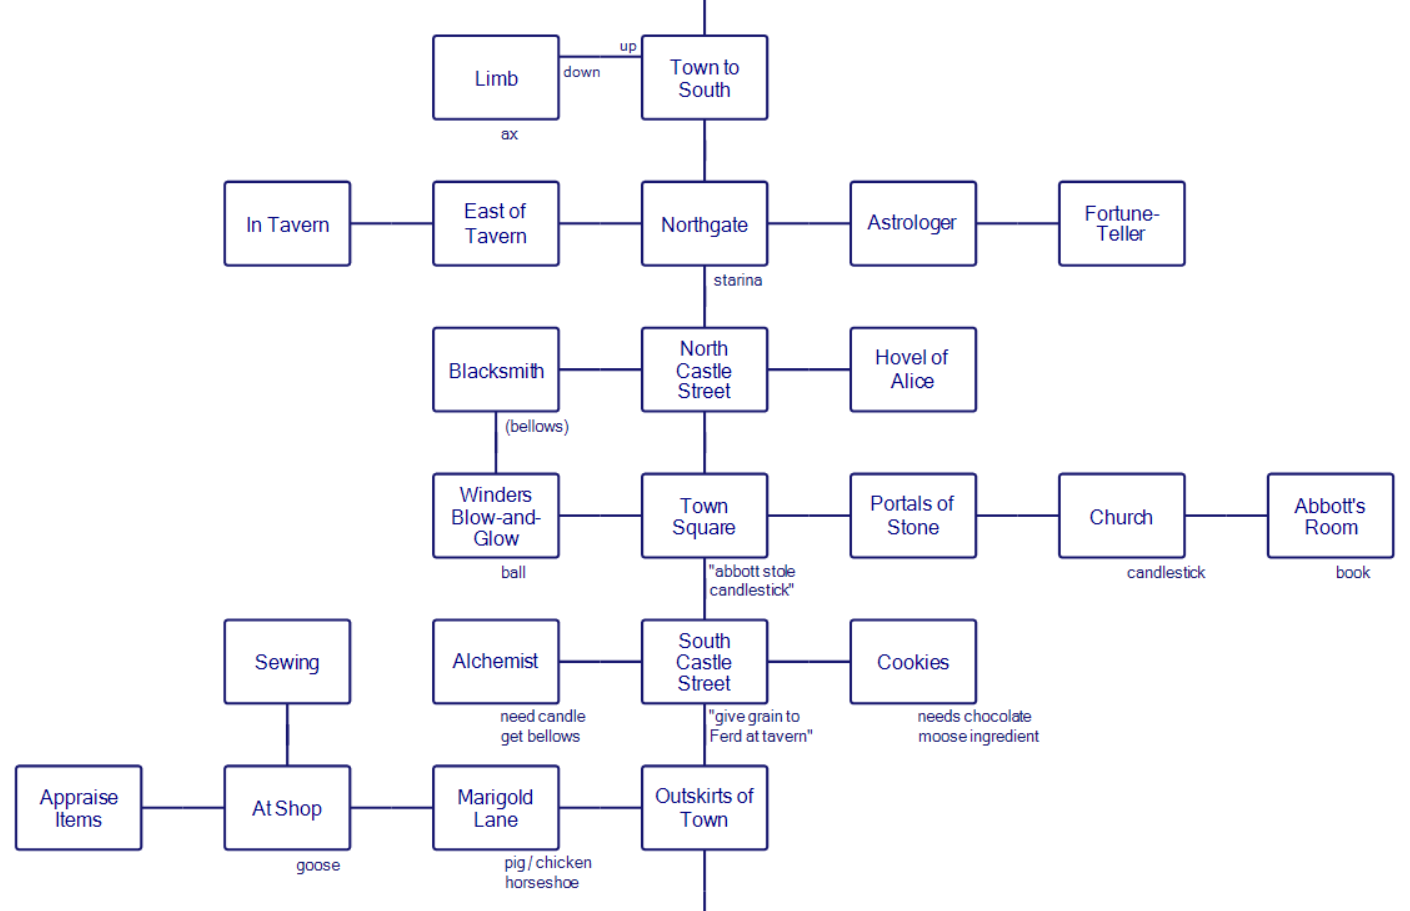
Before getting into all those things (and the cave itself), one brief bit of business from the town that I had trouble mapping. Aula in the comments pointed out an alternate map idea, and once I realized what the authors were going for, I was able to fix it into a pleasingly symmetrical shape.
(Mind you, it’s still not fully logical; it seems like you should be able to go straight from the Old Post Office to the Restaurant given the paths intercrossing out from them, but I’ll take comprehendability over absolute geographic sense.)
With that out of the way, I tried visiting and solving as much as I could before depositing a giant stack of inventory right in front of the cave entrance and saving my game. This turned out to be a major problem.
Cave entrance
You are standing on a ledge on major mountain. The ledge is about six feet wide here and heads west around the mountain. There is a cave cut into the side of the mountain.
There is a long rope with knots here
There is a beautiful oak pendant with a cloud carved on its face here
There is a copper key here
There is a CHEVY key here
There is some dried out corn here
There is a pair of large signal flags here
There is a miner’s helmet here
There is a can opener here
There is a strange coin here
There is a full bottle of Brador beer here
There is a full bottle of Grolsch beer here
There is a tuna syrian here
There is a scimitar here
There is a square dowel here
There is a sheet of parchment here
There is a turquoise charm here
There is a white disk with black writing here
There is a black disk with white writing here
(The scimitar I neglected to mention last time — it’s lying near the mountain, and based on the game including stats I assume is used for combat, like the sword in Zork.)
SAVE
Filename: start
Error — filename must be less than 28 characters
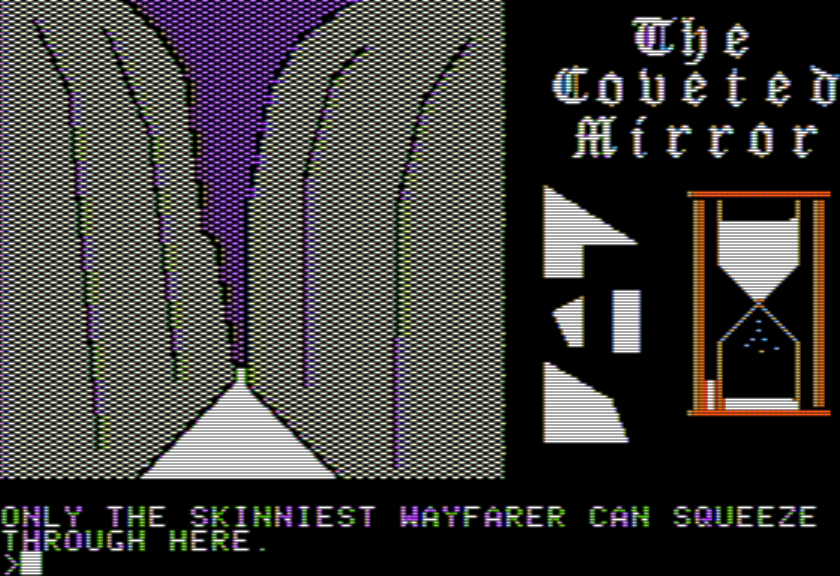
…uh oh. I tried various iterations, like single characters, or going past 28 characters, but no joy. What mysteriously worked was going one step to the west.
W
Major mountain ledge
The drawbridge is in the closed position, forming a path accross to Minor mountain
SAVE
Filename: start
Game saved
This seems to be the threshold where the various messages about crows and so forth stop showing up. If the same file structure from Ferret holds, this is a break between “part 1” and “part 2” of the game, in order to cope with memory limits; in Ferret, the game managed by having a linear structure that forced you along with its parts, unloading previous parts as you loaded the next one and never going backwards. In this case, you very definitely can go backwards, so there must be some clever maneuvering behind the scenes to jump between areas.
At least that’s my theory. I found after further testing that the major mountain ledge is the only location I could save my game. Additionally, it meant I had a strange item in my inventory.
You are currently carrying:
@Sitting at the station is the VS+EL express train
More experimentation is required (and I haven’t tried saving in every single room in the game, yet) but I’ll tolerate this for now; just note this is a serious pain because it applies to both saving and reloading games. (Rob has an alternate method that I haven’t been able to get work. I suspect some emulator-level shenanigans here, as opposed to an “authentic” bug.)
Before making it that far, we need a working light source. The helmet with a light of course is suggestive, but LIGHT HELMET and TURN ON HELMET and SWITCH HELMET and many other variants I tried didn’t work. I finally came across “turn helmet on” which I think may be a first for this blog.
TURN ON HELMET
What a ridiculous thing to try and do
TURN HELMET ON
The light on the helmet is now on.
(That is, verb-noun is the standard, and “turn on” is sort of a two-word verb; having the “on” afterwards is the highly unusual part. Also, the “ridiculous thing” obviously isn’t ridiculous; this reflects a danger of parsers trying to be sassy in their error messages.)
Heading on in…
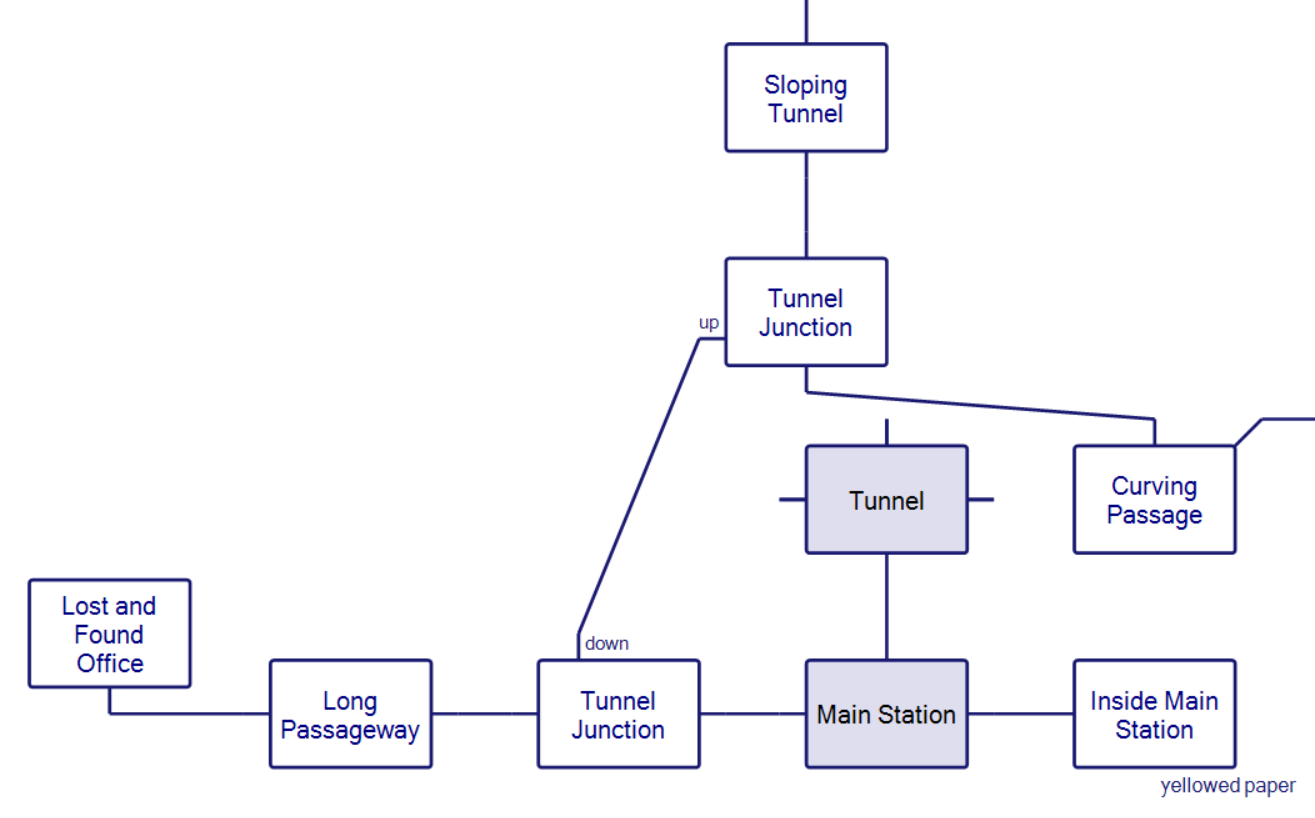
…immediately there’s a branch upward going to an east-west tunnel. This tunnel represents a train station. To the west is a “lost and found office” which suggests some way of getting back items due to unfortunate shenanigans.
The VS+EL RR Lost and Found Office.
Here, items dropped by passengers of the VS+EL are collected so that they can be reclaimed by them. There is a doorway leading out to the south.
To the east is the station itself, including a paper giving times.
Main station
This is the main station of the Very Short and Extremely Local railroad (the VS+EL RR). There is one track here that enters from a tunnel to the south, and exits into a tunnel to the north. There is a small station house here.
IN
Inside Main Station
You are standing inside the main station of the VS+EL Railroad.
On the floor is a yellowed paper.
GET PAPER
Taken.
READ PAPER
THE VERY SHORT AND EXTREMELY LOCAL RAILROAD TIME SCHEDULE
(subject to change without notice)
Main Station ………………….a :00 d :09
River’s End station ………….. a :30 d :34
Dry Gulch Halt ………………. a :55 d :03
Stark Beach station ………….. a :30 d :34
You can follow the track north. Trying to go into a side notch resulted in death:
In the railroad tunnel
You are in a very dark tunnel which is used by the VS+EL RR. At various points along the east wall of the tunnel, there are places to stand in in case a train happens to come along.
GO WEST
In a notch in the wall
The pirate moves in for the kill. He lunges at you and wounds you
fatally. Oh the blood … the death
As the darkness of death fades, and the light intensifies, you find yourself falling quickly at first then slower, then slower still until you find yourself looking down on a strange land. Below is a river, a long river, so long that even at this height the river stretches forever. About 1 mile from each bank of the river is a tall mountain range. You slow more until you are about 1 foot from the ground, and then you lite gently on the surface of an eerie world.
The train destinations are what I’m postponing the exploration on for now. The land of the dead also is fairly large, and I found one treasure just lying around while moving around at random.
Darkness dwell
This section of the river bank has been name Darkness dwell because of the minimal amount of light found here. Most of the river edge is illuminated from some source above, but for some reason, this is not so here.
On the ground is a 1979 dime
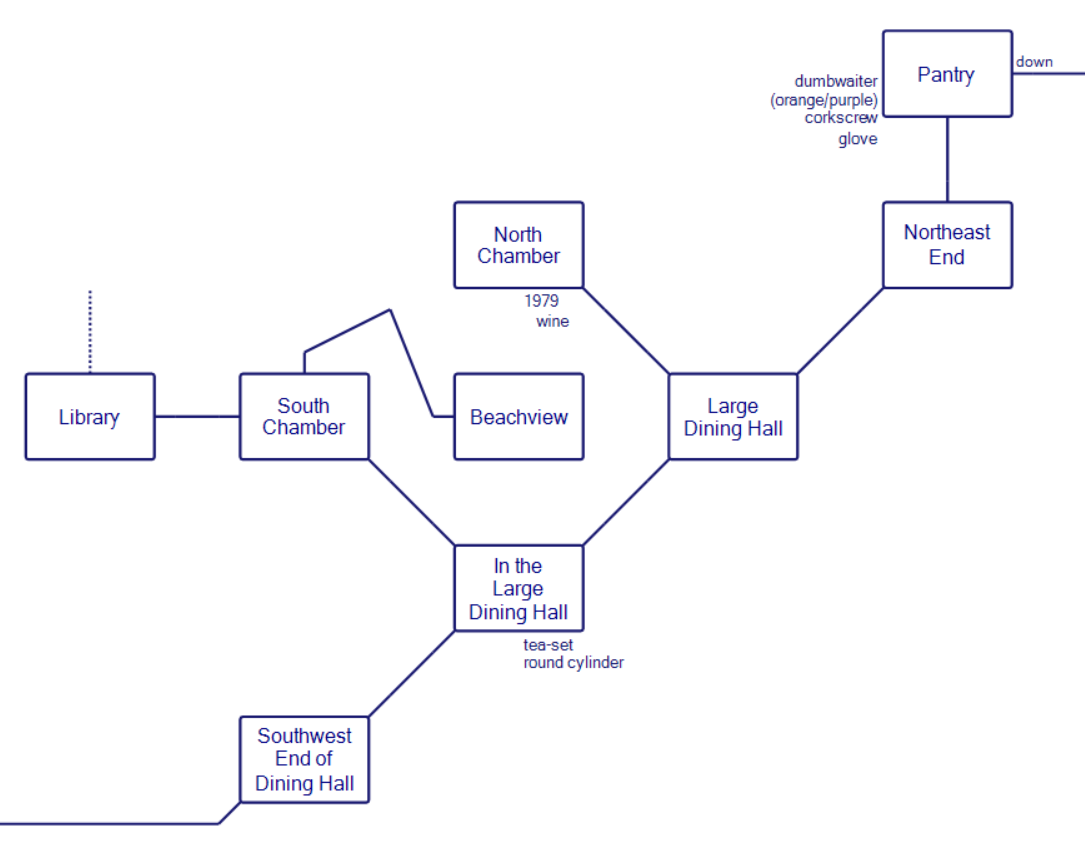
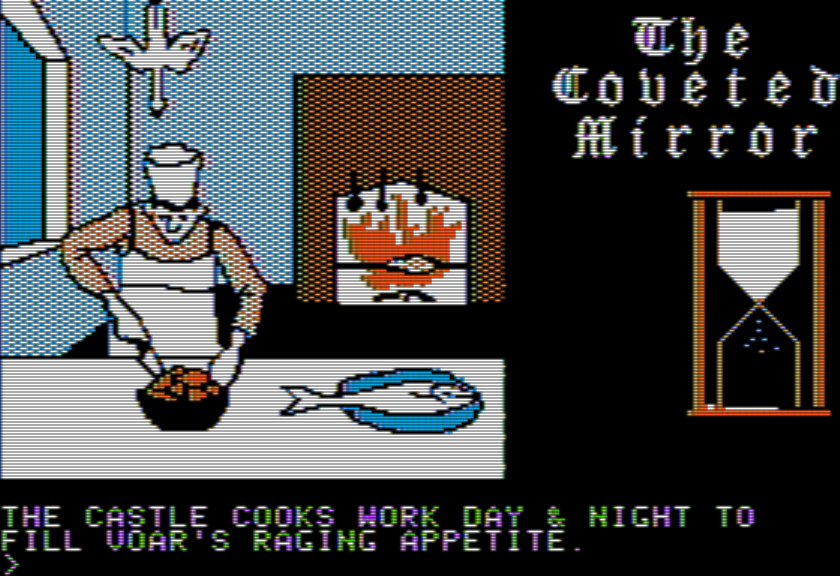
Going back to the cave we’re in and avoiding the upward branch, the tunnel swerves back around to get a dining room / living quarters area.
The middle of the dining hall has a curious device which seems to be in the department of “describe a real object and make the puzzle trying to figure out what it’s saying”. I think it’s an engine, maybe? (That would make sense based on the CHEVY key.)
Southwest end of the great dining hall
This is the great dining hall of the kings that is mentioned in local folklore. The dining hall stretches off for almost 50 feet. There is a doorway leading south out of the room.
NE
In the large dining hall
You are in the large dining hall, which continues to the northeast and the southwest. There is a doorway to the northwest. There is a oak table here, with decorative carvings in the top and four long legs.
Set on the table is a beautiful pewter tea-set.
On your right is a round cylinder with a square hole in it. All over it you notice small depressions.
A side branch leads to a “beach view” which is taking the “volcano view” idea again of making a real long room description. Also there’s nudity, like Warp.
Beachview
You have come out upon a small terrace that overlooks a sandy white beach many many feet below. After diner, and some entertainment, it is told that the king and queen would come out on this terrace to observe the moonlight and stars. However, being that this is daytime, the view is quite different. In the distance, on the beach, near the water, many beautiful women, and handsome men can be seen bathing, apparently in the nude. However at this distance it is pretty hard to make any details out. The people are running around the beach, playing games of tag, and thoroughly enjoying themselves. There is a large bar at one end of the beach, where more naked men and women are lounging around sipping tall cool drinks. At the other end of the beach there is a series of small tents where various men and women are constantly entering and leaving, most smoking some sort of thin cigarette, obviously quite content with their lives. There is a railroad station located directly in front of the beach, the sign on the front is marked “Stark Beach Station”, however it is impossible to see if there are any trains at the station. There is a doorway back into the tunnel to the west.
Only a little adjacent of here is a library, and one of the few puzzles from this section: there’s a curtain with hooks.
Library
This is the king’s library. Along each wall are shelves of books on all subjects, some old, and some new. Breaking the shelving on the east wall is a doorway, and on the north wall, a set of curtains.
Next to the curtains, on each side, are small hooks to hold the curtains
Sitting on one of the library shelves is a hardbound book
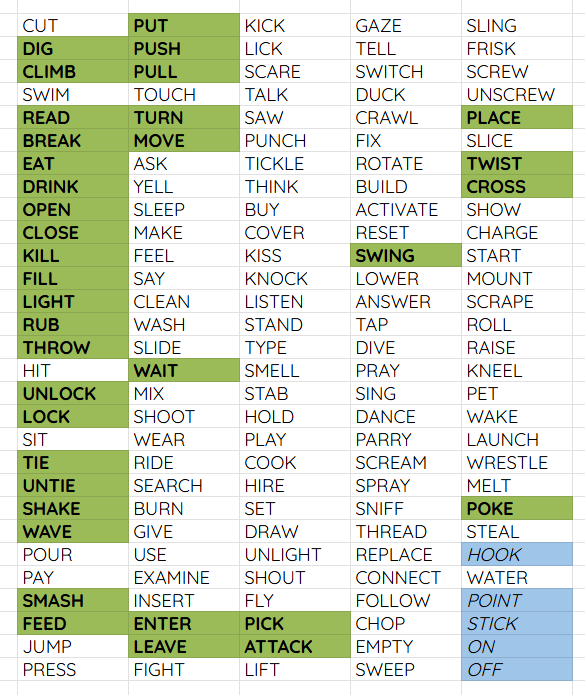
I have not been able to move the hooks, but I haven’t tried doing much with my items yet. I did a run through my verb list to see if anything was helpful.
POKE seems really promising, especially because it asks you to provide an object, but it asks for more detail:
POKE HOOKS WITH SCIMITAR
You must specify where on the hooks you want to poke
POKE END OF HOOKS WITH SCIMITAR
Sorry … I could not parse that
The game, incidentally, claims some aspects of the parser are superior to Adventure and Zork. I don’t know what they mean by this. It certainly has full-sentence capability but in the kind where it wants very specific sentences, guess-the-phrase on top of guess-the-verb.
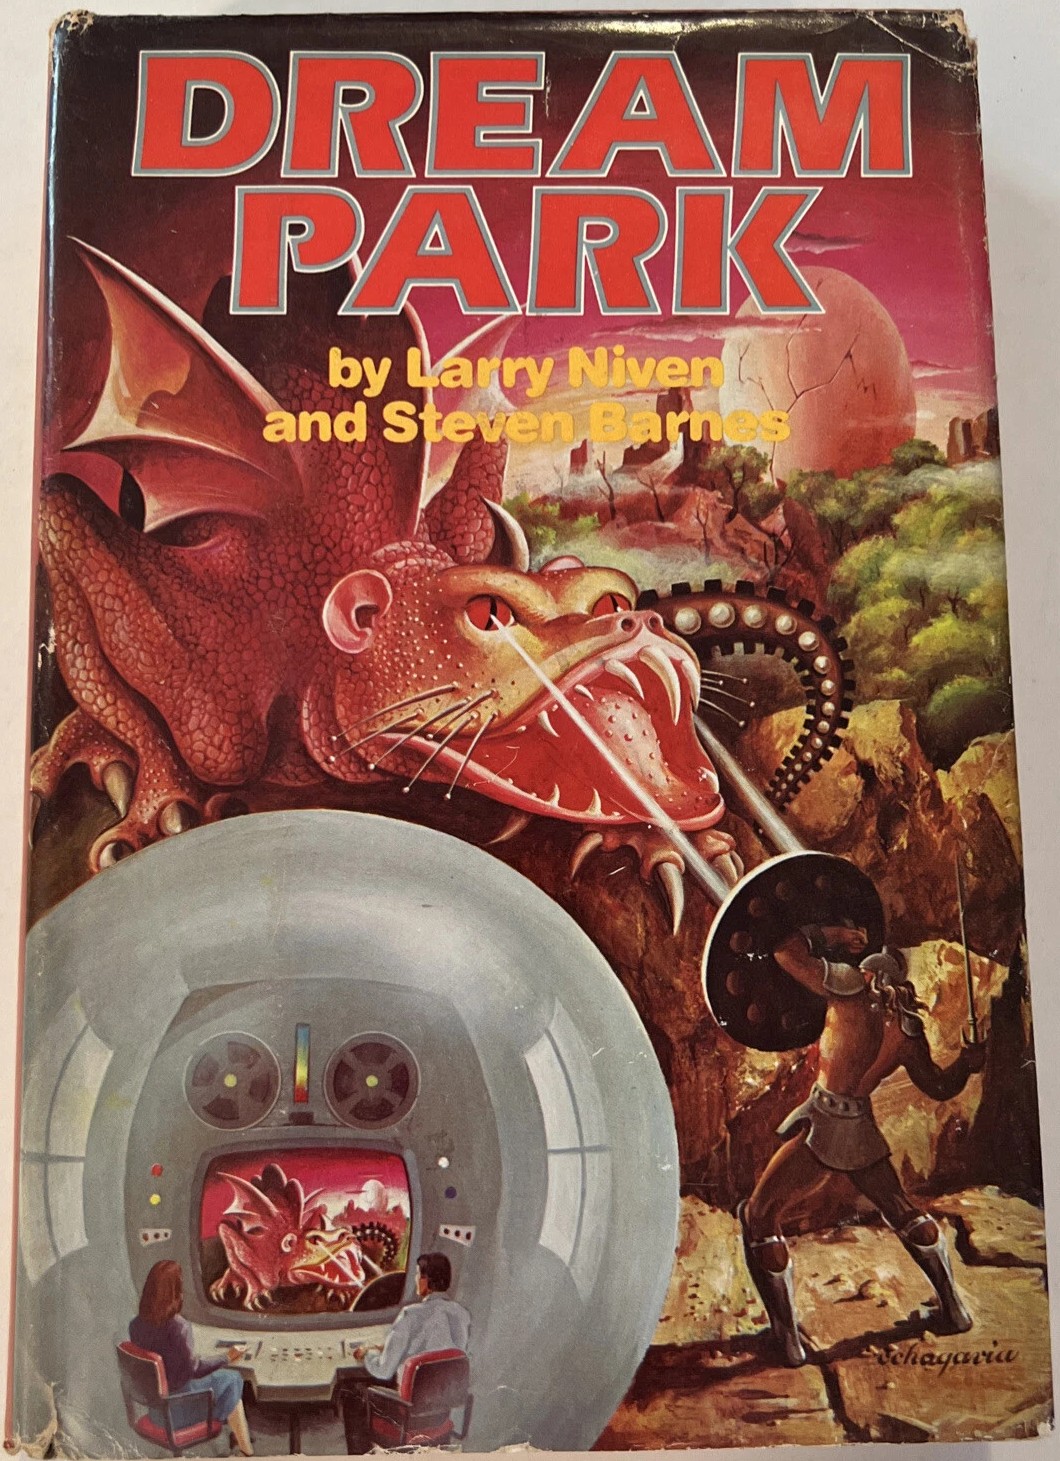
At least READ BOOK works.
DREAMPARK by Larry Niven and Stephen Barnes
This is a book about a fantasy theme park kind of like Westworld, and things go awry kind of like Westworld. Given how cursory the mention is there might be some reference I need to know about, so I’ll eventually report in after I’ve read the book.
Past the dining hall (and an extra 1979 wine you can nab) is a pantry with a corkscrew, a rubber glove, and a dumbwaiter. There are colored buttons that presumably control the dumbwaiter, but it isn’t working by default.
Pantry
You are in the pantry off of the great dining hall. Here, as food was prepared in the lower kitchen, many servants would carry dishes out to the king and queens, and their royal audience. There is a doorway to the south, and a set of stairs to the east. In the northern wall, set in the stone, is a dumbwaiter. Next to the dumbwaiter is a pair of buttons, one orange, and the other purple.
Hanging on one of the walls is a corkscrew.
Inside the dumbwaiter, you can see the platform that raises up and down
Resting on the table, is a rubber glove
(I was unable to open the wine with the corkscrew, but again, the parser is a terrible struggle and I may just be phrasing things wrong.)
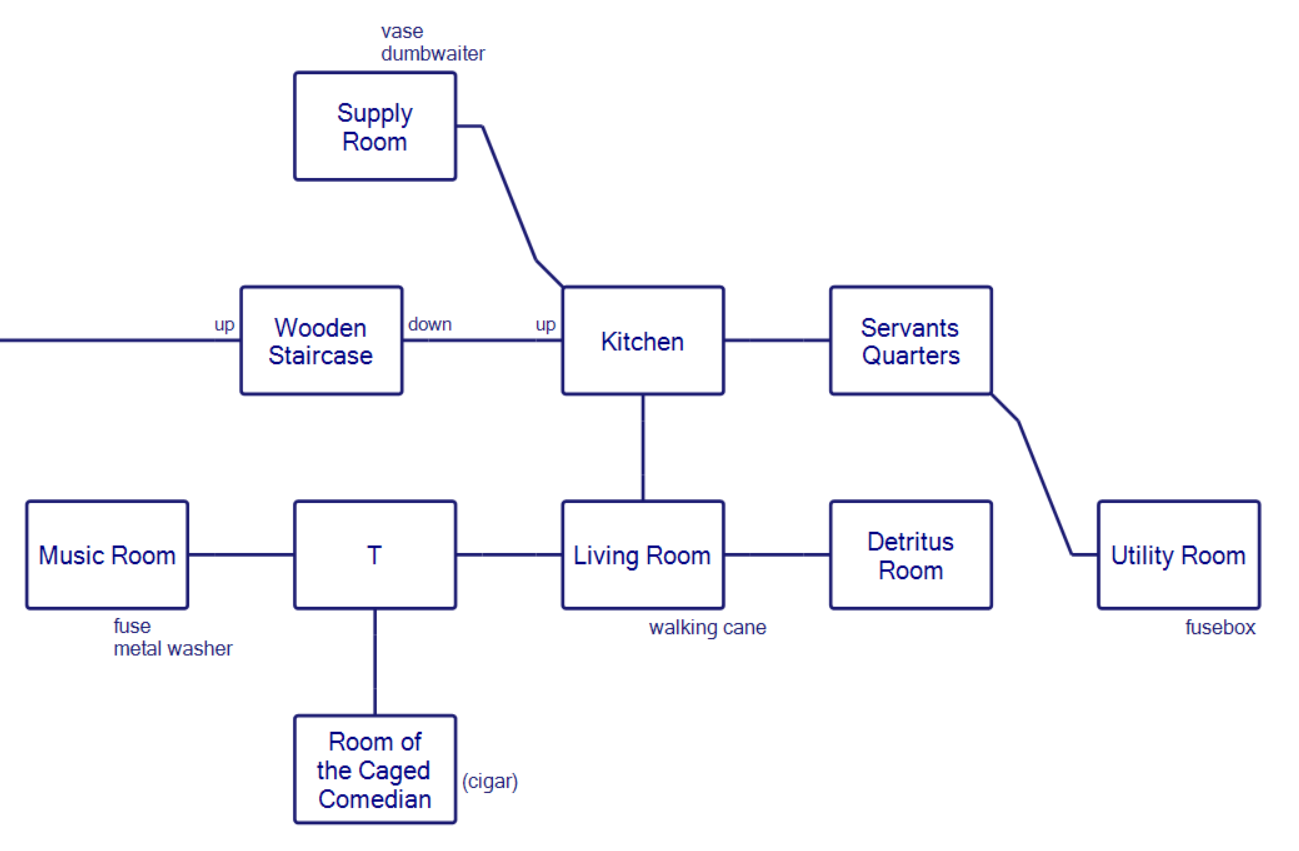
Down the stairs mentioned in the pantry is a kitchen and various other related rooms:
The kitchen describes one exit being to the north, but there is no exit to the north. I’m needing to test every single exit in every single room because with this much jank you simply can’t trust room descriptions to be totally accurate.
Kitchen
This is the subterranean kitchen in which food was prepared for service in the King’s dining room. There are doorways off to the north, south, and east, and a narrow passage off to the northwest.
To the northwest you can’t carry much (other than your helmet) and there’s a crystal vase inside I presume is a treasure. As you might predict, it is impossible to carry out; the dumbwaiter is there, so I assume the puzzle is simply to get the dumbwaiter working.
Supply room
You are in a small supply room off of the kitchen. There are a series of shelves lining one wall, and a dumbwaiter against an other. There is a narrow passage to the east, leading back to the kitchen.
Resting on one of the shelves is a beautiful crystal vase.
There’s a fuse elsewhere, and a “utility room” with a fuse box, so I would think the two would go together!
Utility room
You are in a small room that contains the controls for the water and air heating and cooling systems. The controls however are frozen solid, and the faceplates describing their functions are missing.
There is a doorway to the west, and a small fuse box in one corner.
My first struggle was even being able to refer to the “small fuse box”; neither “small”, nor “fuse”, nor “box”, nor “small box”, nor even “fuse box” work. (GET FUSE BOX > I see no box here.) Having dealt with enough games that play fast and loose with their vocabulary, I came across FUSEBOX (all as one word, not like the game displays it!)
GET FUSEBOX
It is securely fastened to its surroundings
Huzzah! Except I still wasn’t able to translate this into replacing a busted fuse; the game doesn’t allow LOOK IN FUSEBOX (even though it does work as a command, and is mentioned in the help) nor does it let you OPEN the fusebox. So I assume one just replaces the right fuse in order to fix the dumbwaiter and get the vase, but I have no way of implementing that yet.
Three last things to mop up: a walking cane (described as having a “loop at one end”) and a metal washer (no extra description at all) and one puzzle I technically sort of solved. There’s a comedy club, with a bad comedian. It almost seems like a “circle-of-hell” situation.
The room of the caged comedian
This room was used by the king and his guest as an entertainment room. There are a couple of large chairs at one end of the room, which is separated from the other half by steel bars (thus forming a cage).
W
You can’t go there
The commedian behind the cage leans over and says:
“When I was in college, I took my girlfriend to a dog show…. and she own first prize.”
E
You can’t go there
The commedian behind the cage leans over and says:
“I used to ask my mother if I could go out ice-skating … she used to tell me ‘wait till it gets a little warmer'”
I was simply testing out directions (since none are described, even) and this led me to waiting in the room long enough that the comedian offered a cigar.
The comic, impressed by your endurance, says “Hey … give that person a cigar … anyone who can stand my jokes desires a prize”
So I’ve got a cigar on top of everything else. This is one of the largest and most random sets of objects I’ve had to juggle in an adventure game. I’m just hoping this mostly goes the Time Zone route and makes the matches between object and puzzle easy to find when they happen; having this many objects all at once plus complex combinations could be a bear. Ferret did get this size of inventory but also was segmented in such a way that the object count didn’t go out of control (…plenty of other things did, though).
To summarize the problems underground:
1.) dealing with the train (which I assume will lead to brand-new large areas giving my mapping a further workout)
2.) the hooks at the library (is this a parser issue?)
3.) the fuse box/fusebox (also a parser issue?)
There’s still a locked post box, the bank, the hen who is skittish, and the strange humming cube to deal with aboveground. I’m also 99% sure now this is a gather-the-treasure-in-one-spot game, but I don’t know yet how to definitely be sure something is a treasure, nor where it should go to get credit.
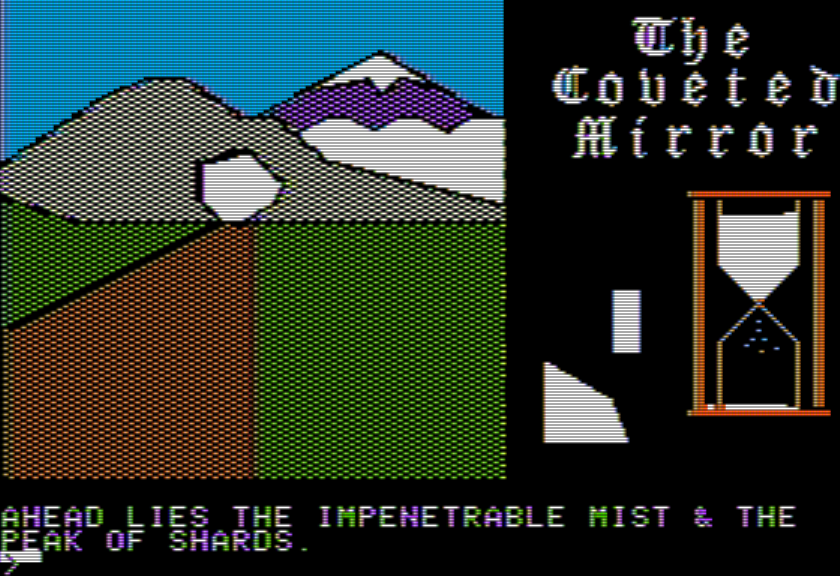
As is tradition with one of these gigantic cave-delving based games — and there is cave-delving, even though it wasn’t clear at first — let’s spend some time outside first.
To recap from last time, the game starts with you in a parking lot with little direction. Nearby is a dowel rod, a charm with triremes, two disks that allegedly allow teleportation (when magically charged), and a $10 bill. Going west from the road with the bill (and the two to the north) gets you lost in a forest.
The lost-in-forest part that I didn’t map before turned out to be unmappable. You just alternate between “you are hopelessly lost in the woods” and “you are lost hopelessly in the woods” no matter which directions you go, and then you get pulled out by a ground keeper. That doesn’t mean it is necessarily a red herring — maybe there’s some magical item that applies while there — but it could be. I don’t know how similar this game is to Ferret yet in that sense.
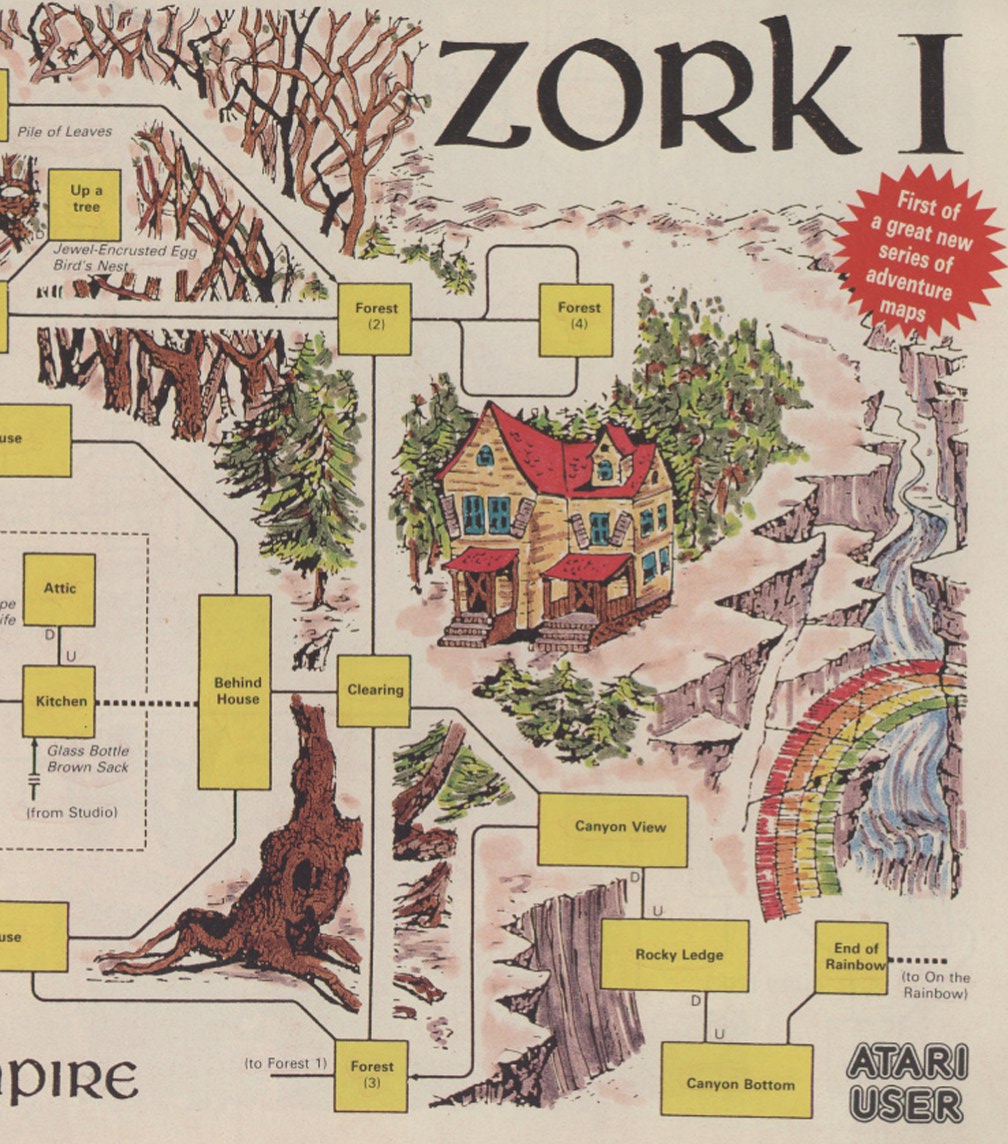
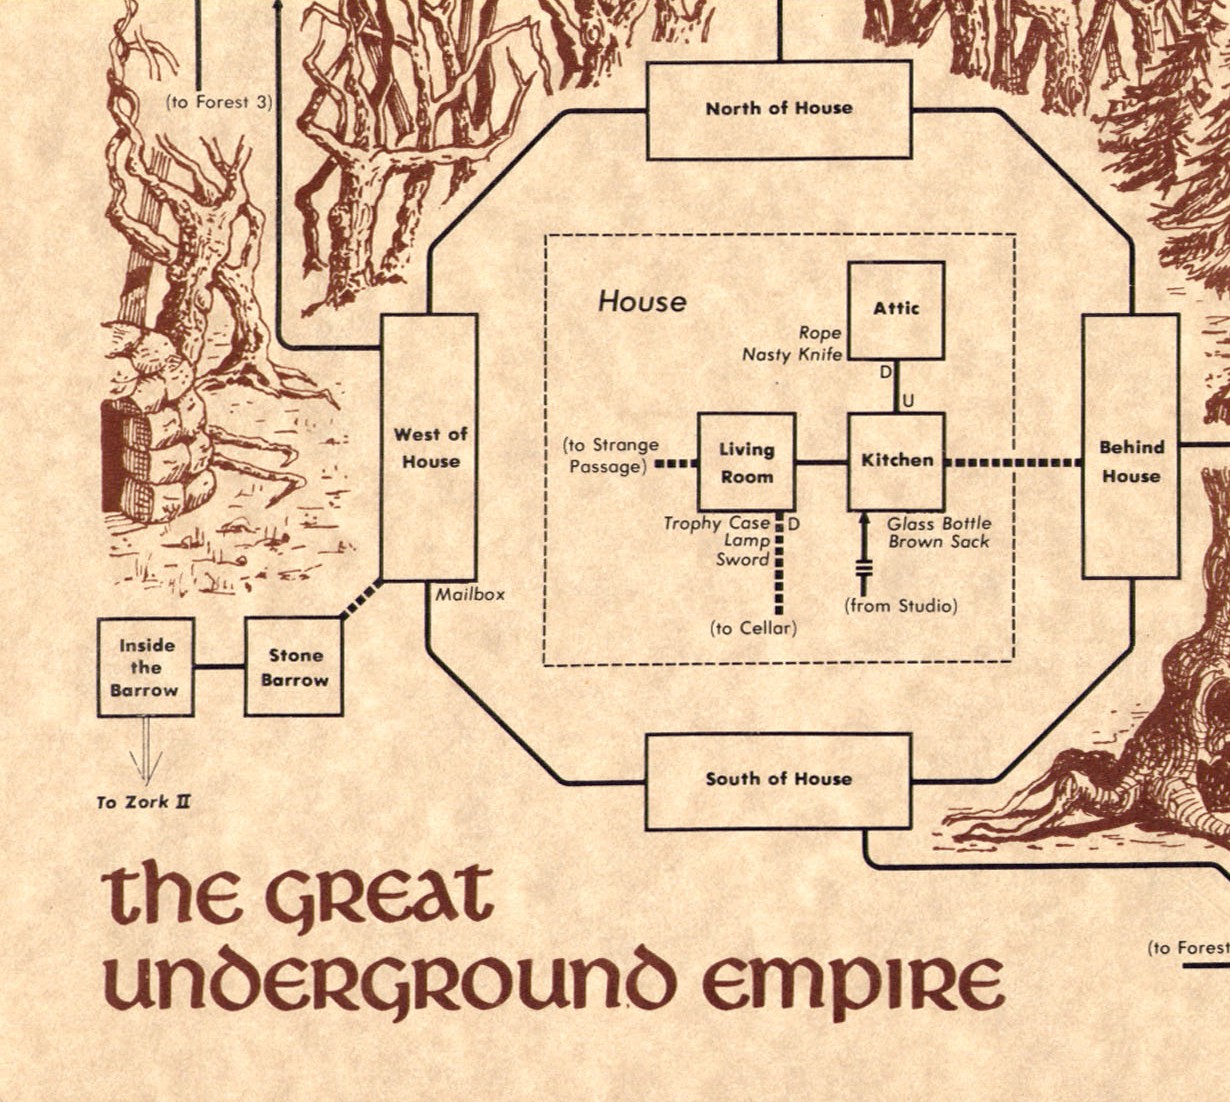
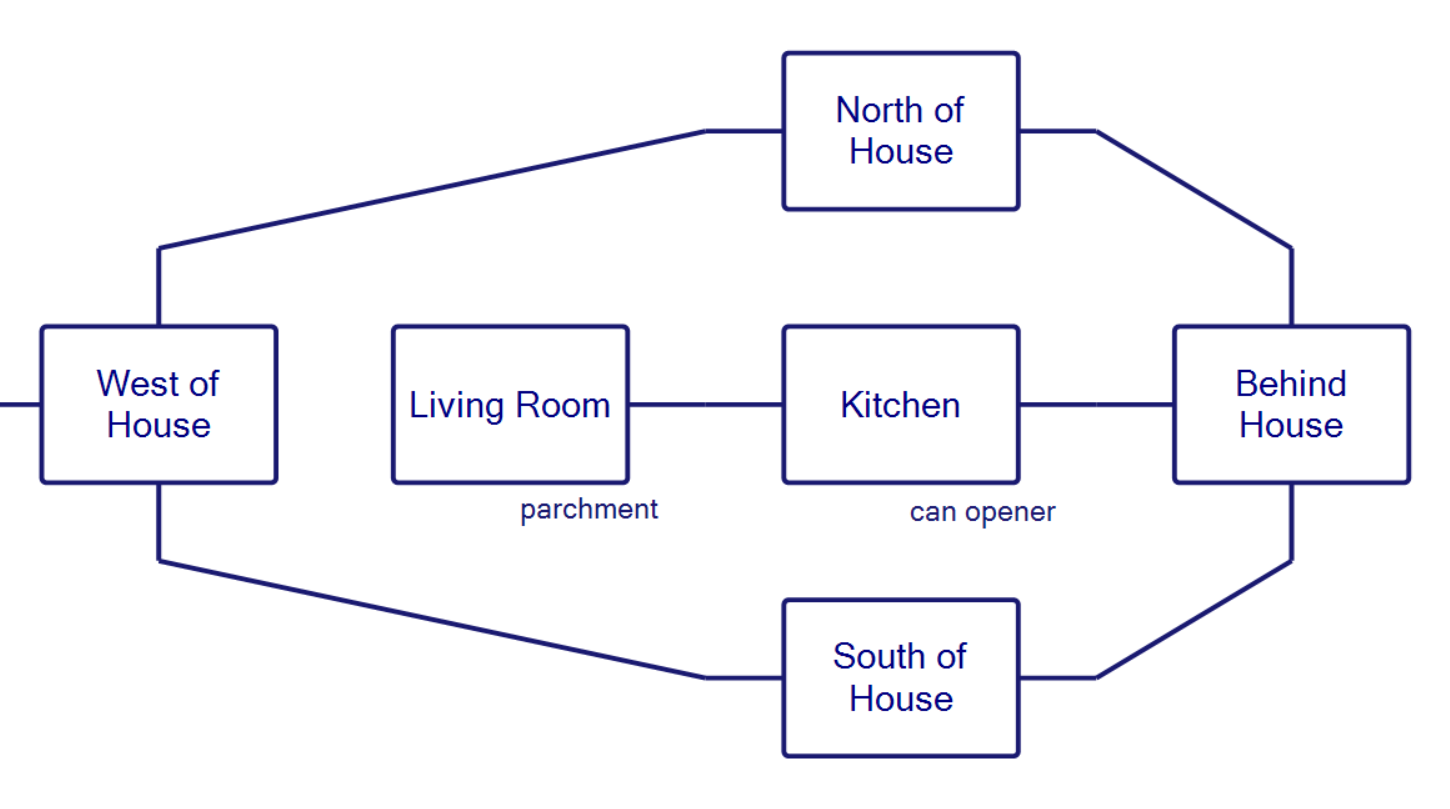
Going east leads to the white house from Zork, but with the stairs rotted away and only a can opener and a parchment left behind. The parchment indicates a great evil to be defeated (which I’ll explore the lore of in a later post) and that we need to find a magical flute.
WARNING: We may never reach the flute. Rob played this last year and was not able to visit all the rooms (based on the exploration counter) but there are bugs that need working around and possible some puzzles obtuse enough that we’ll need the crowd here to help out. Assuming no endgame, the goal is to simply get as high a “knowledge” score as possible.
Colorized version of the Zork I map with the “white” house. Atari User April 1987, from Atarimania.
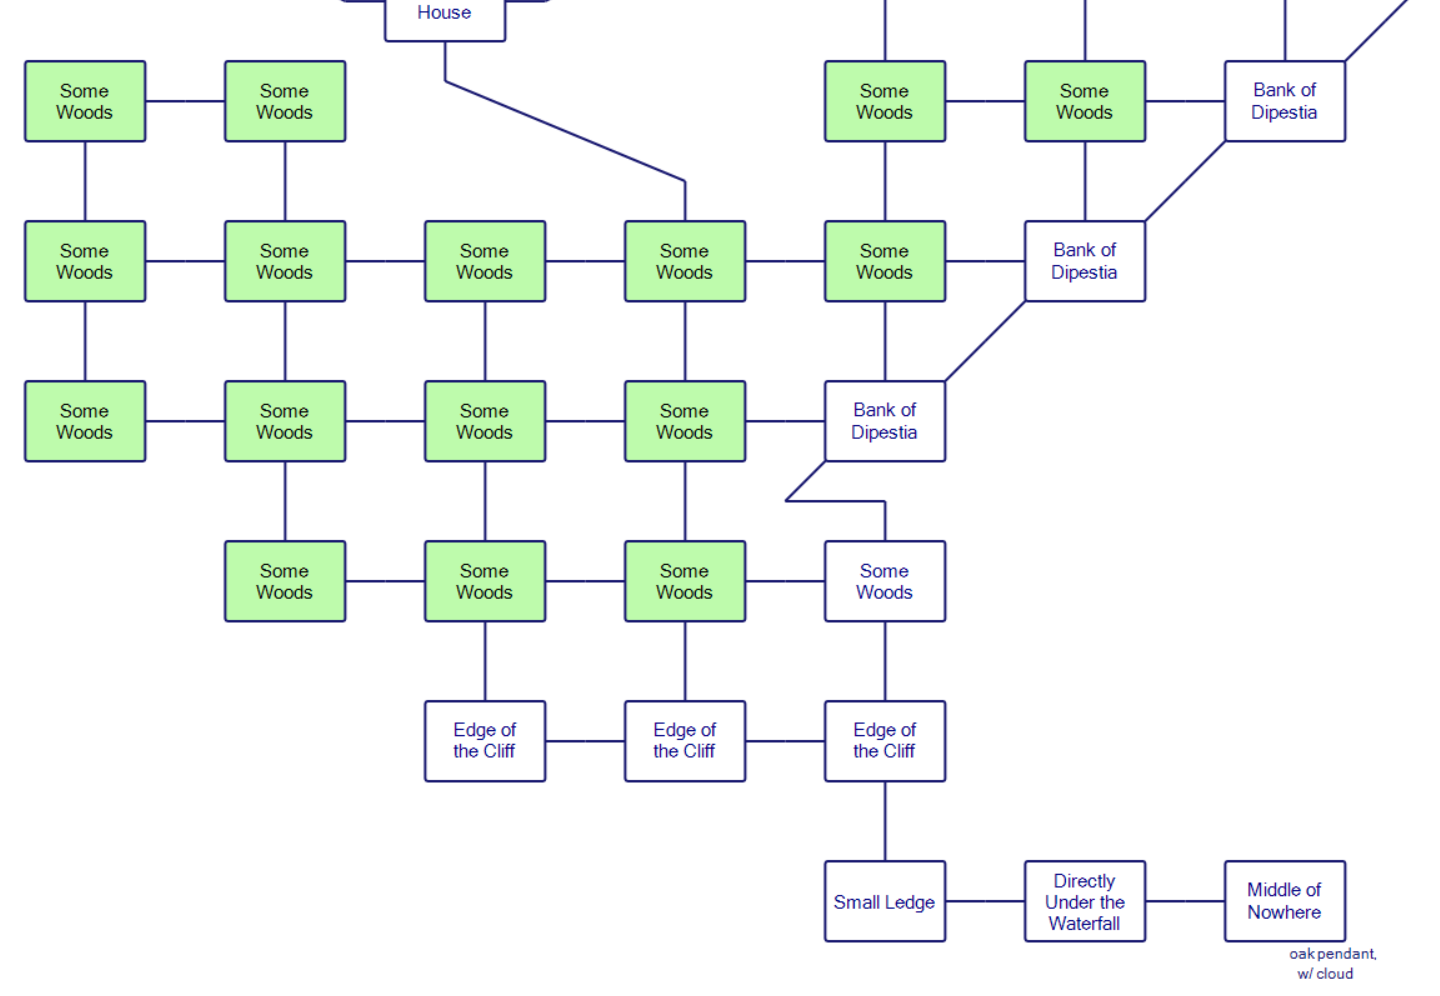
What I hadn’t realized when I first encountered it (I hadn’t thoroughly tested exits yet) is that the forest behind the house (and even, to an extent, the waterfall) is copied off of Zork as well. This means there is a whole new outside section attached to the house. I’ll break it up into South Side Forest and East Side Forest.
The South Side Forest is fairly uneventful, but it’s worth noting that when you try to go to the far west, there’s a fence and the parking lot seen past it; this is a game which tries to form connectivity across its landscape (and isn’t afraid to put down a whole grid of “filler” rooms to make things match up).
To the south there’s a cliff; if you follow the cliff you can get to a waterfall.
There is a set of rock steps leading down onto a narrow ledge below which passes under the waterfall caused by the river Dipestia (to your east) falling over the cliff. The sound of the fall is almost deafening here.
D
Small ledge on the cliff
You are standing on a narrow ledge. The ledge leads east from here and passes directly under the waterfall. Although you may get wet, it appears safe to pass along.
E
Directly under the waterfall
Here the ledge passes directly under the waterfall and continues east. The wall of the cliff and the ground beneath your feet are damp. The sound of the waterfall is almost deafening.
E
Middle of nowhere
You are standing on a small obtrusion sticking out of the cliff. To the east is the narrow path from where you came. Behind you is the cliff. In all other directions is nothing but open air. Looking out from the cliff there is nothing, and looking down reveals no bottom to the base of the cliff.
On the ground is a oak pendant with the image of a cloud carved on the front surface.
The oak pendant with the image of a cloud carved on the front surface goes with the triremes charm, most likely; any bets if we’ll find a fire necklace and a rock on a ring?
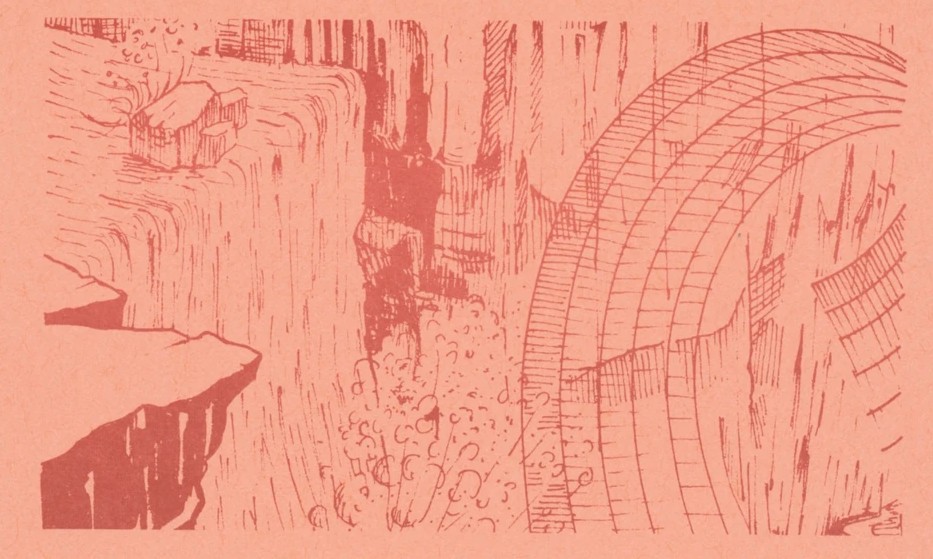
Aragain Falls postcard, Zork User Group, via the Zork Wiki. The waterfall is southeast of the house just like Zork; there’s no obvious waterfall or other secret exit in Thissala.
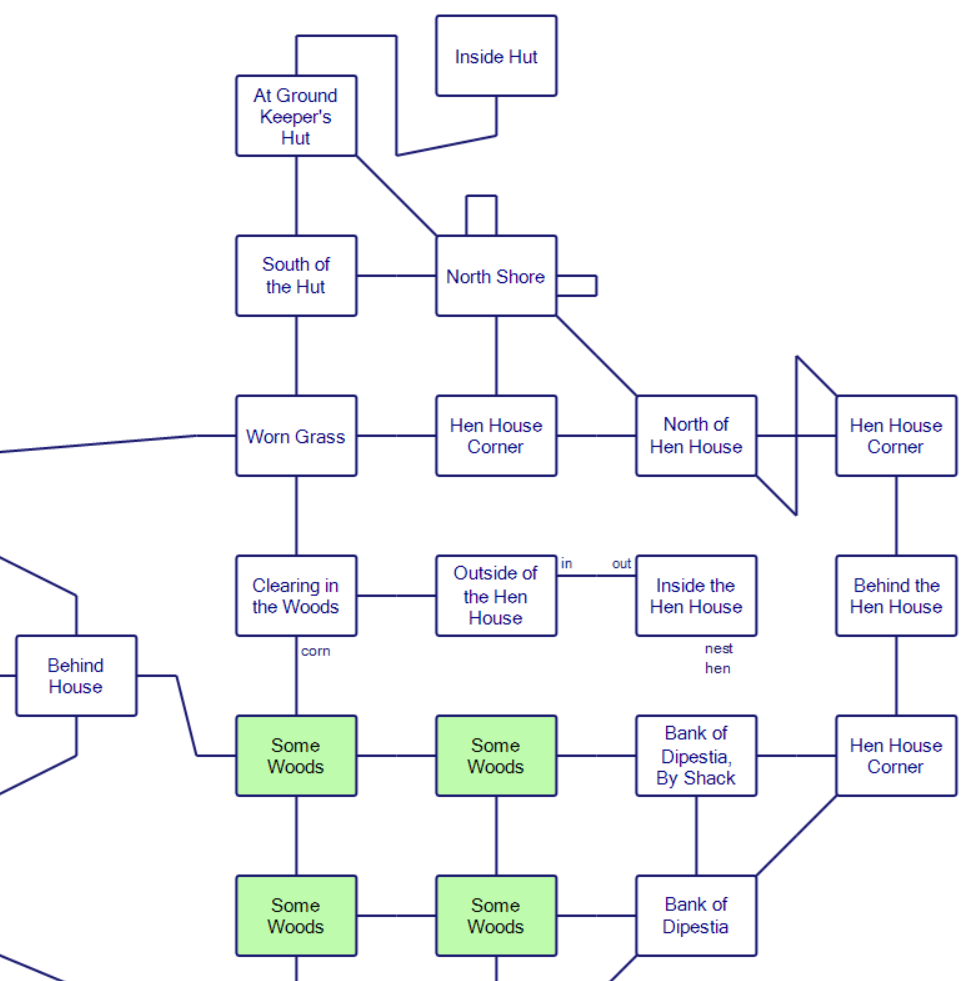
The East Side forest is mostly also “filler” rooms, although it has the ground keeper’s hut and a henhouse.
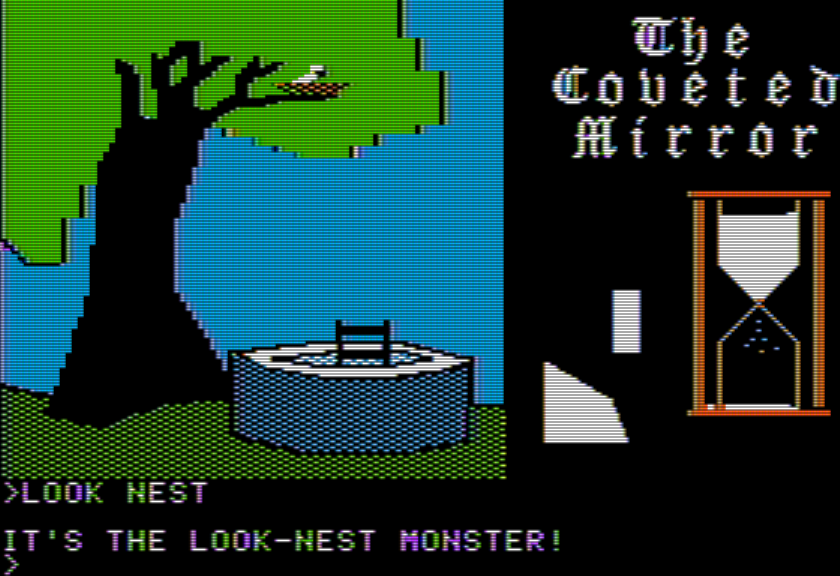
There’s some corn near the henhouse and you might think to feed the corn to the hen, but the hen is “too nervous”. I assume there’s a puzzle here; there’s no obvious golden egg to steal or the like, though.
Clearing in the woods
Lying on the ground here, is a small pile of dried out corn.
GET CORN
Taken.
E
Outside of the Hen House
You are standing outside of a small shack which is used as a hen house. There is a ramp leading up into the building, which has no door to allow the hens to come in and go out. The place is obviously still being used for it has a certain air about it to indicate so.
IN
Inside the hen house
There are two windows in the hen house, one looking east, one looking north, both overlooking the river, and a long ledge along the south wall
Sitting on the shelf is a small nest
It contains:
A large hen, quietly staring at you.
FEED HEN
The hen does not trust you, and refuses the food.
The keeper’s hut is empty, and that’s even after the rescue from getting lost. Again not sure what kind of game we’re dealing with here, but I at least get the sense this is just for environmental flavor (and to motivate a person suddenly showing up).
Ground keeper’s hut
Directly in front of you to the north is the ground keeper’s hut. Because the weather is so warm, there is no door covering the doorway
N
Inside the ground keeper’s hut
You are standing inside of the keeper’s hut. There is one window to the north that overlooks the great Dipestia river. Beyond the river you can see a large mountain. There is a doorway to the south
Barring any secret exits or ways to fly past the cliff (which wouldn’t be surprising) that leaves the original dirt path as the only way to go. It leads to a “Y” in the path: “One leg leads northeast, another northwest, and the path also heads south.” Northwest leads to a town and mountains after, so let’s deal with northeast first.
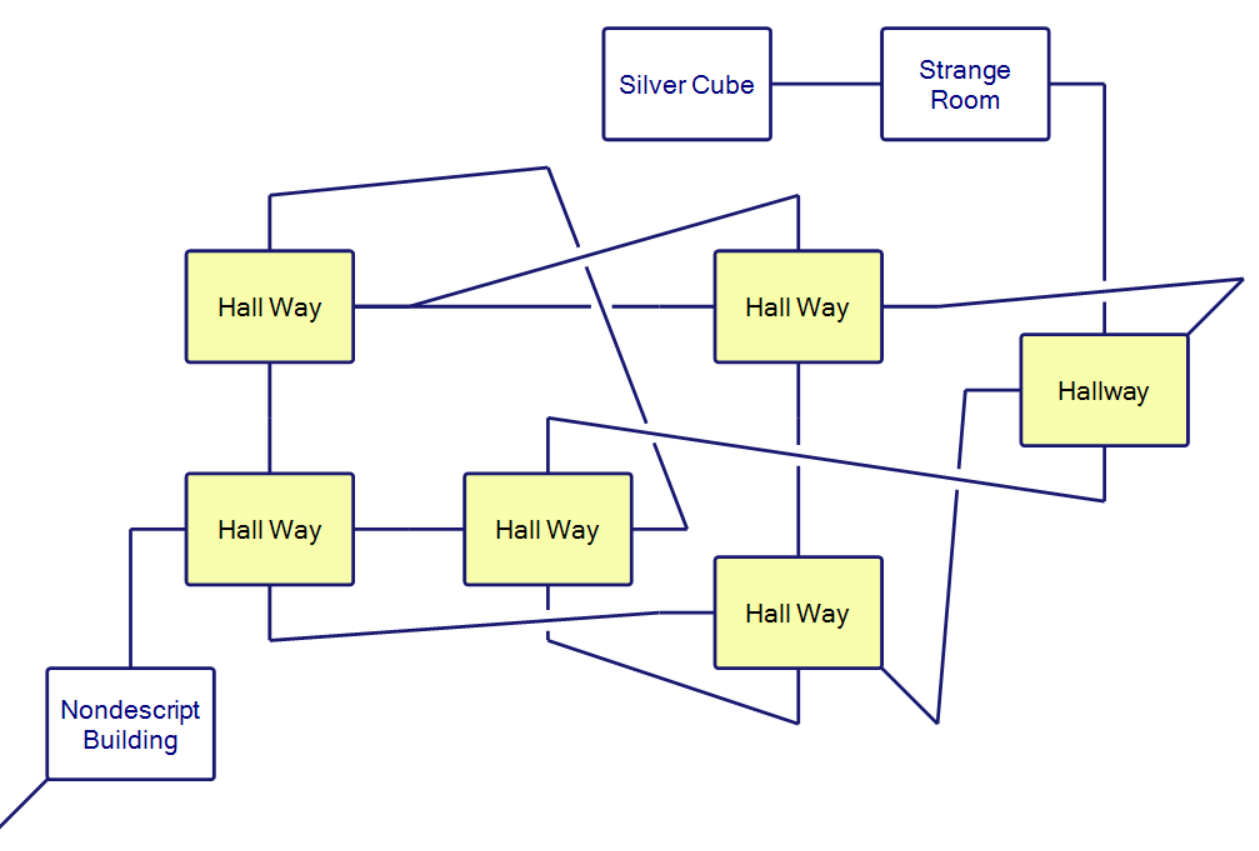
Non-descript building
You are standing in front of a rather non-descript building made of brick. There are many small windows along each side of the building.
There is an open doorway into the building to the north, from which you can hear a dull hum.
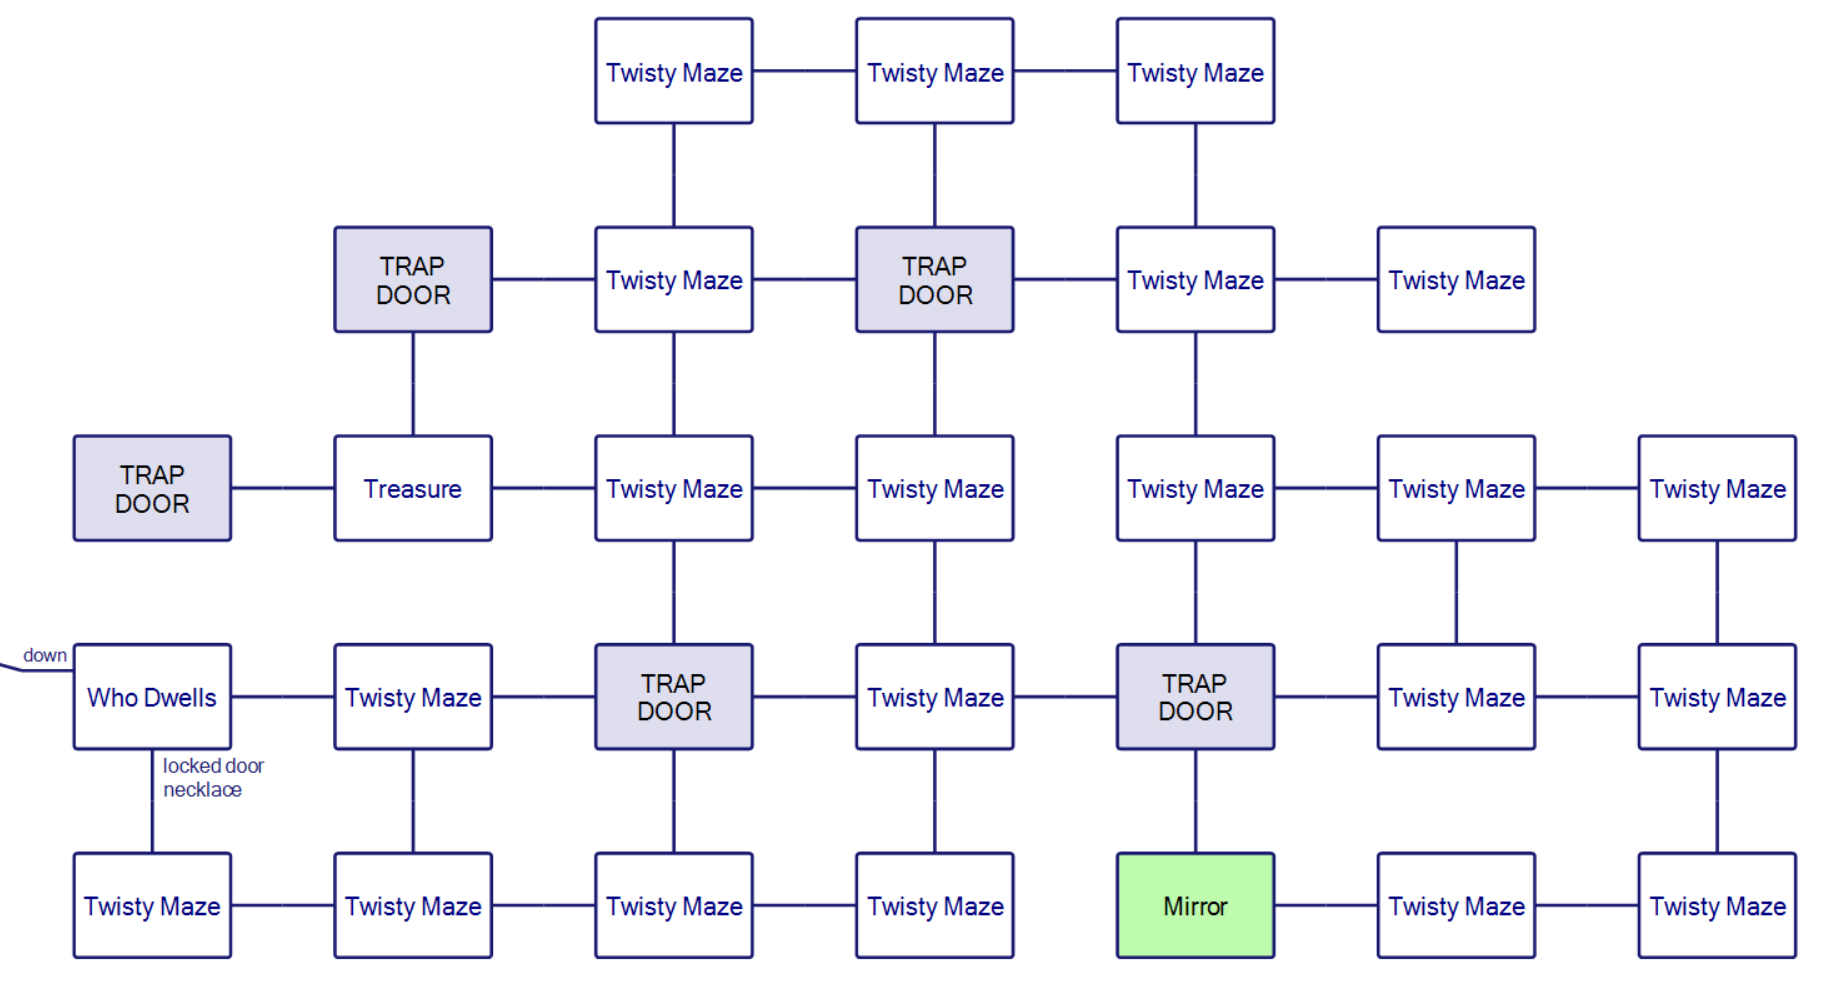
The building is mostly a maze.
The interesting part is (if you consult the map) you can make it to the center of the maze just by going north, but you can’t get out by just going south. Originally I thought I might have been trapped in by a “hum” sound that permeates throughout, but it’s just a classical maze that can be mapped by dropping objects.
You are in a hall way of the non-descript building.
There is a dull humming noise that appears to come from everywhere.
N
You are in a hallway of the non-descript building.
The humming noise is louder than normal here, and appears to be coming from the room to the north.
N
Strange room
You are in the eastern part of a large, strange room. There is nothing here except the doorway out to the east. The humming is intense here.
A murder of crows fly overhead, appearing from the north and vanishing to the south
(The murder of crows can show up anywhere — the game does not recognize outside vs. inside.)
W
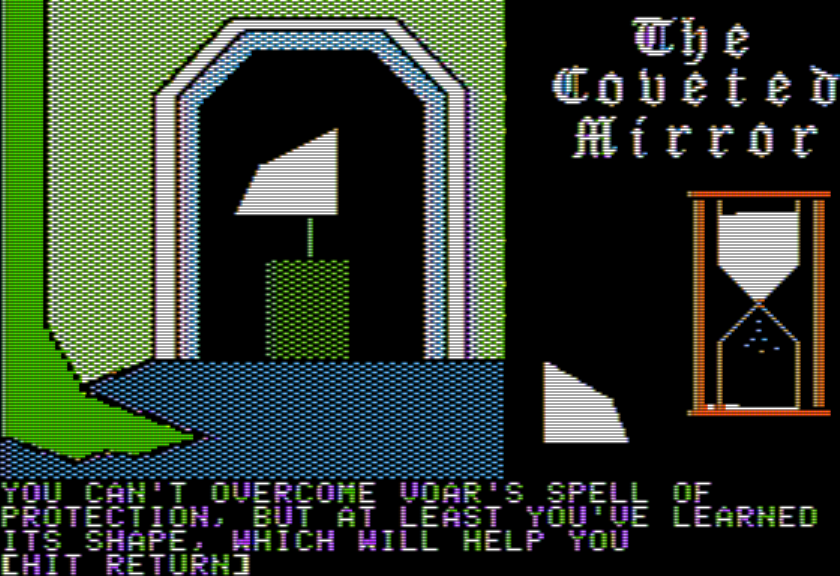
Silver Cube
This is the western half of the strange room. Directly in front of you is a large silver cube, with each side approximately 10 feet long. The humming is coming from the cube, although not from the inside … the actual cube is humming. There are no openings in the cube, no handles, and no writings on the cube.
The cube has no obvious entrances and can’t be taken. I’m not sure yet what to do here. It’s the most blatantly magical aspect to the game so far.
Returning back to the Y junction and heading northwest leads to “T” junction, with a branch that seems intended to invoke the Volcano View from Crowther/Woods.
Riverview
You are standing on a small peninsula that juts out into the swift river “Dipestia” (loosely translated it means division protecting from pestiferous spirits). As far as the eye can see, in either direction, the river is uncrossable. The far north bank is edged by a heavily overgrown field dense in timothy and flora unlike any other. The field is in the shadow of a great snow capped mountain which causes a crepuscular glow to illuminate the ground. Upstream to the west, the field narrows as the river curls around the mountain. Downstream, the field abruptly ends at a forest which, unlike the forest on the southern bank, with its trees of bole and fawn, consists of an incredible blend of color, surpassing even that of deciduous trees in autumn, adding blue and white, and colors that are indescribeable. Directly across the river various wild animals graze insouciantly on the riparian plants. To the southwest is a dirt path. Through a clearing in the trees on the southern bank, in the distance, can be seen an unaturally straight edge of reddish-brown.
I don’t think the game is filled with descriptions like this; in Crowther/Woods this is a reward of sorts for getting deep enough into the caves, whereas here it serves more to build the initial atmosphere. I appreciate the game gives a source for “Dipestia” even though the etymology is imaginary (it could be adjacent to something real, of course, if anyone has a suggestion).
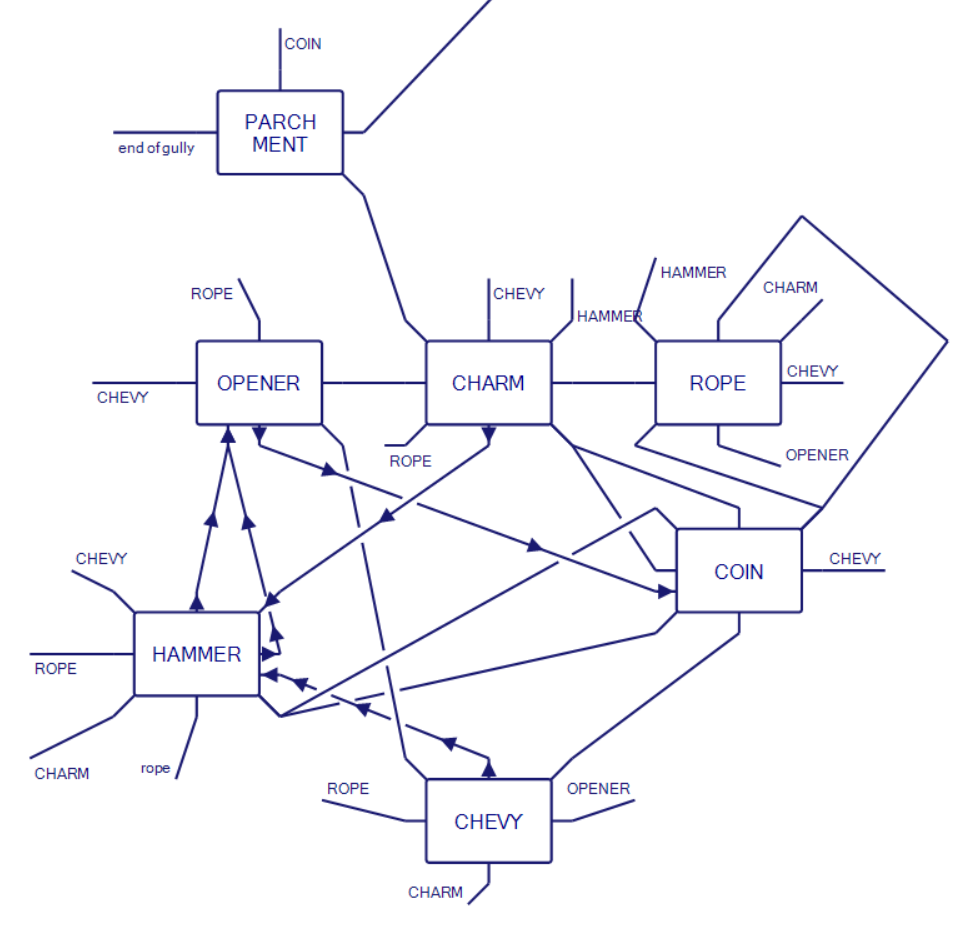
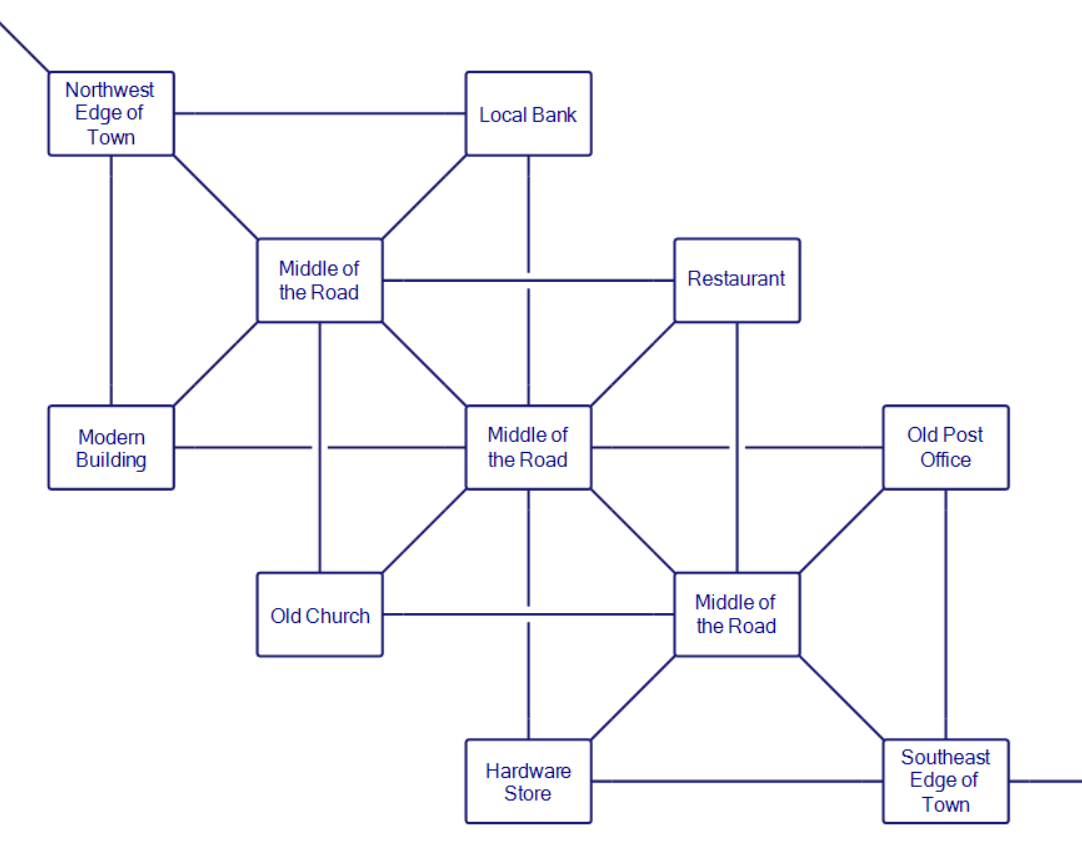
Past the view is the town, where the map is very messy and I can’t promise this is 100% free of errors.
My guess is the authors (or single author responsible for this spot) had a “real” map they were trying to render into text-adventure form but it naturally came out messy; I still don’t know what’s with the weird swerve around the Restaurant, going southwest to end up on a road to the “east”, though. It could be a simple error that was never fixed, but there’s enough strange paths I would say at least some of it has to be intentional.
I should also emphasize — and it is easy to miss this because some games stick solely with compass directions — that in/out are directions in play, and you can’t enter most of the buildings without those two directions.
Hardware Store
The old village hardware store stands much the way it did 50 years ago. The building is made of wood planks, painted red. There are no windows visible from where you stand, however there is a doorway in directly in front of you.
IN
Inside the hardware store
The old hardware store has a plank and peg floor. All of the original furniture has been removed. There is only one door in the room, and that leads outside
Lying here is a long rope with knots tied in it at regular intervals.
There is a copper key here
Resting on the counter is a miner’s helmet. The helmet has a powerful light on the top.
The buildings have a curious abandoned-but-not-abandoned feel going on with them; clearly the groundskeeper is around (and we’ll run into a gnome in a second) so the owner of the hardware store is just fine with us taking things? Or maybe we’re just being very bold in stealing?
The copper key incidentally goes to a “modern” building in the southwest part of town which is still cryptic, even though I’ve solved what may be the only puzzle associated with it.
Modern building
You are standing outside of an comparitively modern building. There is a sign on the building above the door that reads “Bura di change”.
The door into the Bura is closed
UNLOCK DOOR
Click.
OPEN DOOR
The door is now open.
IN
Inside the Bura di change
The room is completely devoid of furniture. There is a small slot cut out in the north wall. Above it is written “IN”. A door leads out.
The door is currently open
The $10 bill fits in the slot. If you make the deposit, you get a “strange looking coin” with no further description.
There is a strange whirling sound from within the wall, which is followed by a short grinding noise. Then from the slot in which you put the dollar, a strange looking coin drops out, and falls to the floor by your feet
Next to the modern building is an “old church”. It has a box with its own slot; opening the box reveals a key marked CHEVY (which I would presume goes to a car, but I haven’t seen a car). The restaurant with the confused exits includes a couple items waiting for you to snatch:
Inside the restaurant
The resturant furniture has for the most part been removed. There is, however, a small counter and a stool left; these were not removed because they are attached firmly to the floor
Resting on a shelf in the corner is a full bottle of Brador
On the shelf is a full bottle of Grolsch
On the shelf is a tuna syrian with everything (hold the mushrooms)
(Both bottles have beer.)
The food (“tuna syrian with everything”) just lets you eat it, which brings up the softlock-or-not question: are we supposed to eat the food, or are we supposed to save it for later? I of course always save it, but every once in a while I’ve hit a puzzle where eating a consumable gives extra energy (The Hobbit being the most notable game where not eating food led to trouble).
Finally there’s a post office (with a single deposit box I haven’t been able to unlock)…
Inside the Old Post Office
You are standing inside of the old post office. Against one wall is a counter. This is was at one time a very busy post office (according to local lore) but now it is deserted. All of the postboxes have been destroyed except for one, which has a set of buttons on the front with a large brass faceplate around them, and a hinge on the left side.
The post office box is securly closed.
open box
The box is apparently locked.
…and a bank.
Inside the local small bank
Fastened against the wall in the corner is a set of chairs. Secured to the floor is a small counter that was at one time used by townfolk to fill out deposit and withdrawl slips. On the north wall is a button marked in letters now barely visible “Ring bell for service”. In the corner of the room is a staircase going down.
Surrounding the stairway down, is a metal cage, with a closed door
in the front
IN
A little gnome pops out and says “Sorry … you cannot enter without the appropriate withdrawl form”
The gnome makes me think we are again dealing with the ghost-geography of Zork making itself felt.
From the gamebook Zork 2: The Malifestro Quest. Image from Internet Archive.
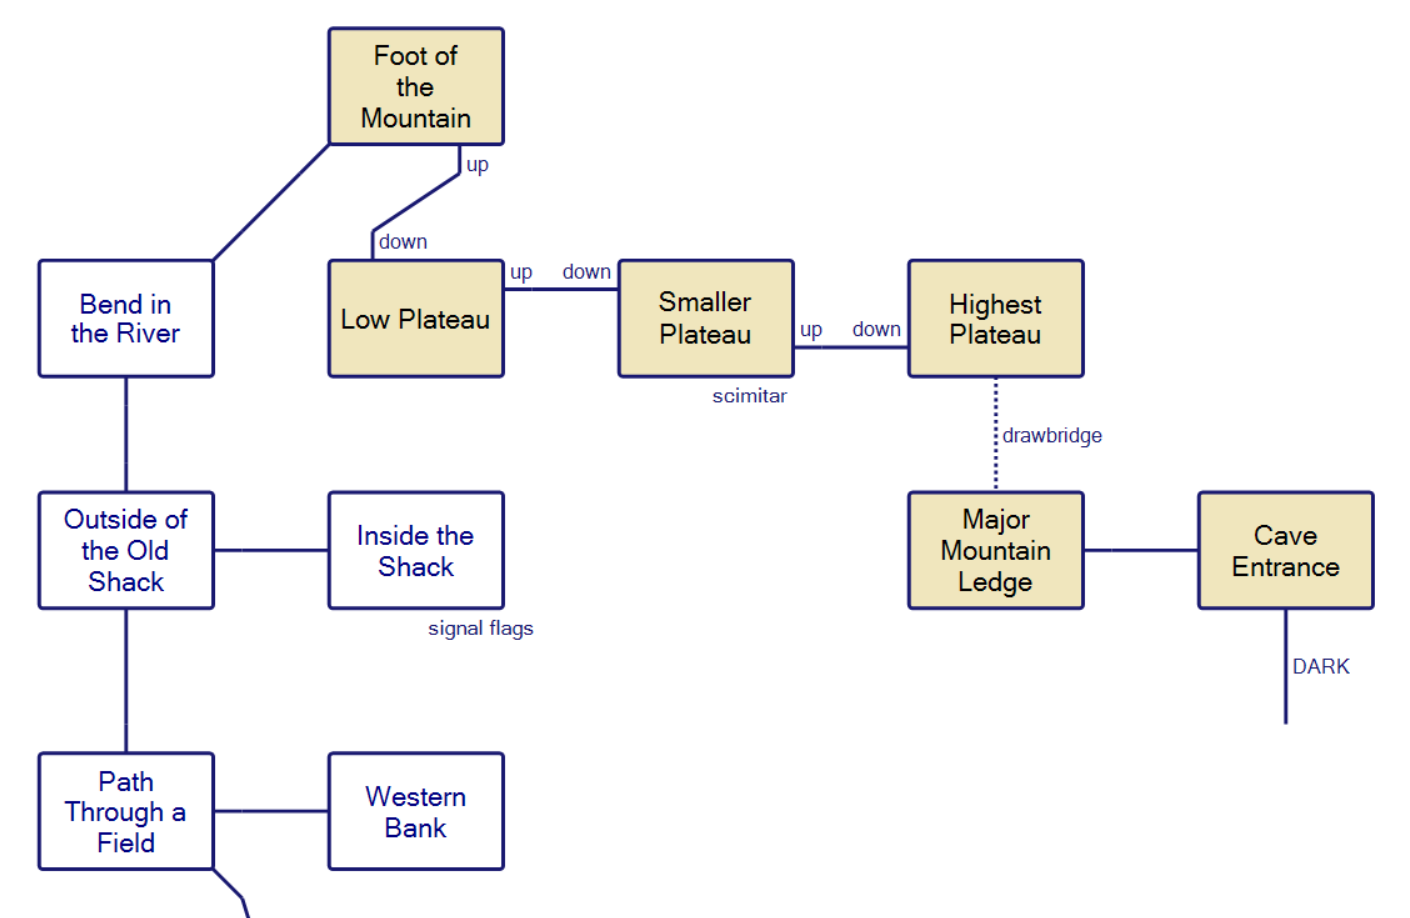
That’s nearly everything outside (at least nearly everything until I find I accidentally missed an exit, leading to another 50 rooms or so) but at the northwest side of town we can go further, eventually to the mountains.
Along the way up to the mountains there’s a “shack” with some signal flags.
Path through a field
You are walking throught a large field, along a winding path heading southeast and north. The field seems to extend forever to the west, but to the east you can see a very large mountain. There is also the sound of water coming from the east.
N
Outside of the old shack
You are standing outside of an old, rundown shack with no windows visible from where you stand. There is a doorway in facing you, but the door has obviously fallen off of its hinges and is no where to be seen.
E
Inside the little shack
Although there are no lamps, there is enough light from the eastern window to see. On the wall, written in ink, is a message that says “Peter Mac slept here”. The place smells of Jameson’s Irish Whiskey.
Propped up against one wall in the shack is a pair of large signal flags.
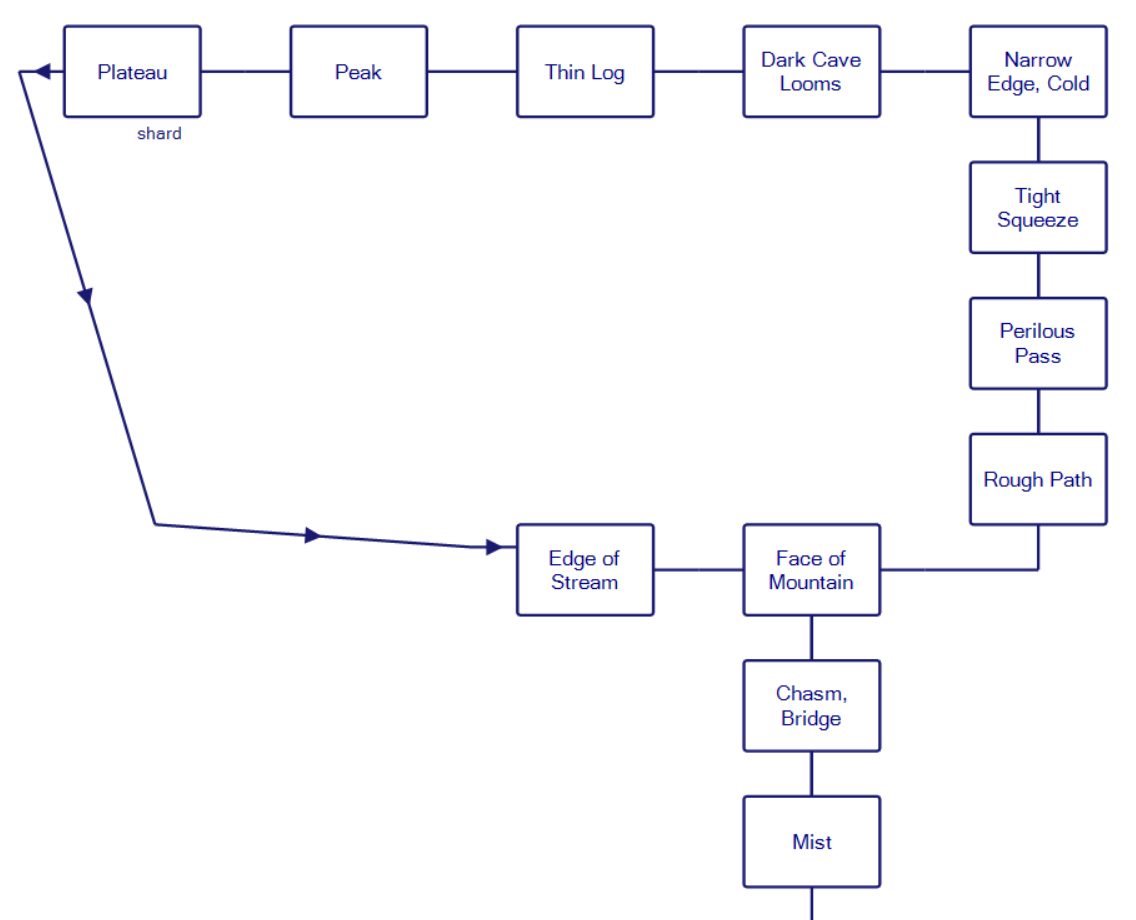
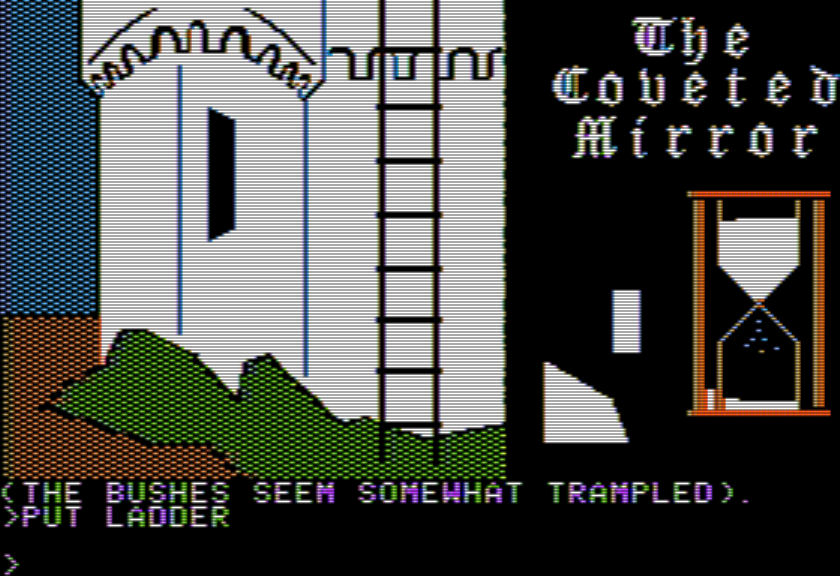
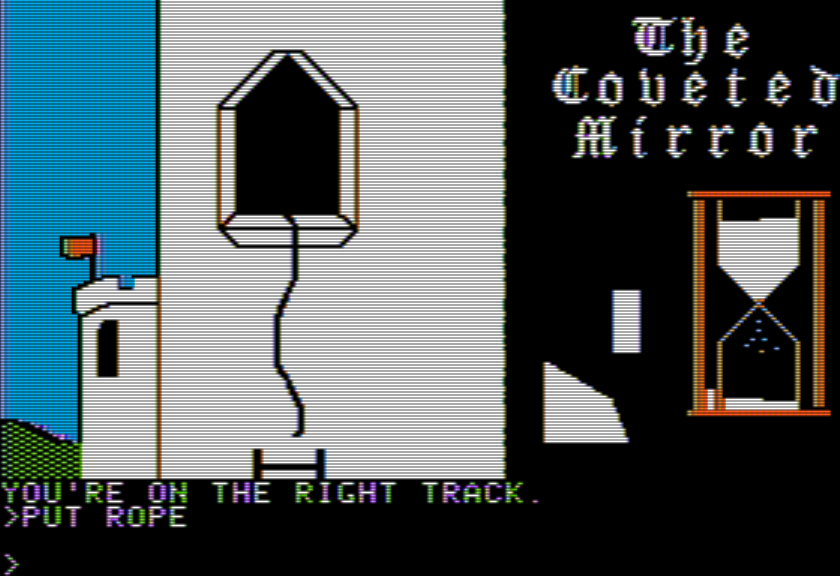
The signal flags get used shortly after: there’s a climb up the mountain, but at top top there’s a drawbridge controlled by a gnome.
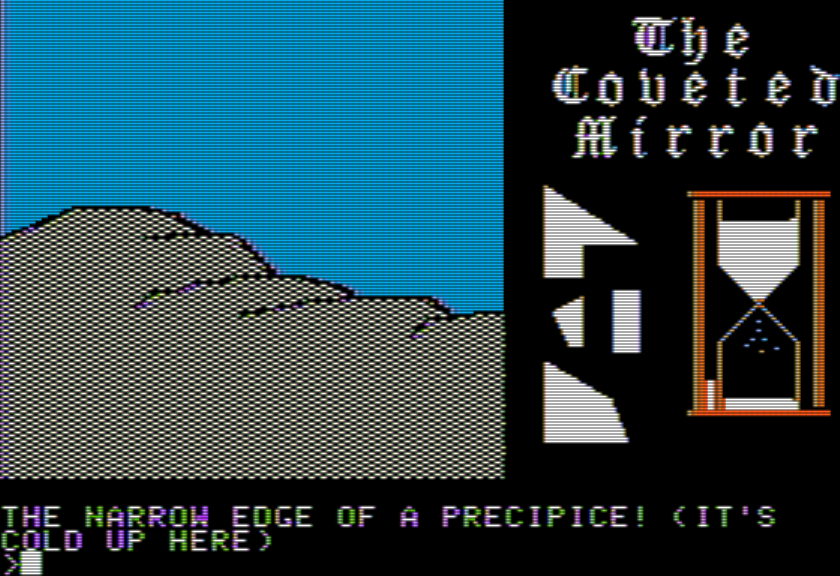
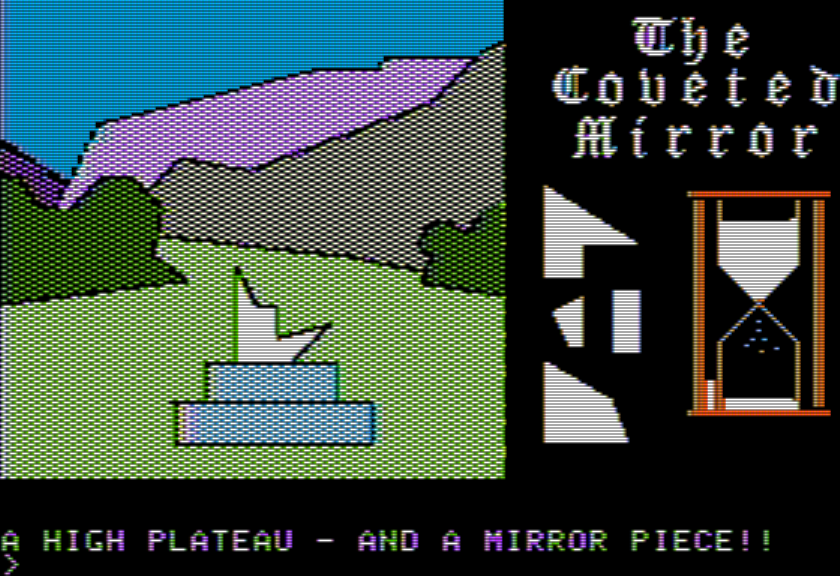
Highest plateau
You are on the highest plateau, which is considerably larger than the two lower ones. Directly below you you can see the Dipestia which flows from the NE to the SW where it curls around Major mountain, to south. Across, but higher up the northern face of other mountain, there is an observation booth with what appears to be a small gnome looking out at you using binoculars. Directly below the observation booth, at the level of the ledge you are on, is a wooden drawbridge.
The drawbridge is in the open position, making it impossible to cross over to Major mountain
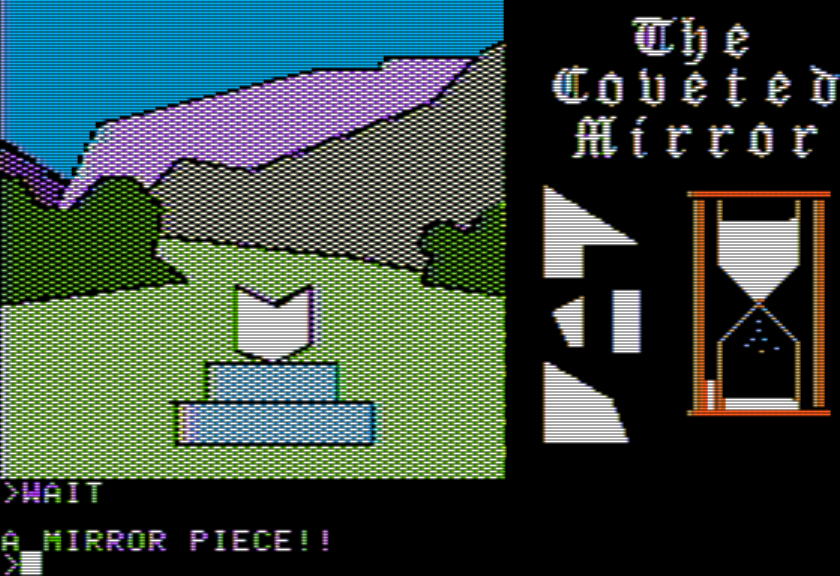
WAVE FLAGS
It is obvious that the little gnome saw you waving the flags for he waves back at you. He then disappears into his observation hut. A second later, there is the sound of great motors turning and slowly the drawbridge lowers into place.
S
Major mountain ledge
You are standing on a ledge on major mountain. The ledge is about eight feed wide, and heads east around the mountain. Above you you can see a small observation booth. Accross the river is Minor mountain.
There is a drawbridge here, anchored into the face of Major mountain.
The drawbridge is in the closed position, forming a path accross to Minor mountain
E
Cave entrance
You are standing on a ledge on major mountain. The ledge is about six feet wide here and heads west around the mountain. There is a cave cut into the side of the mountain.
S
Sloping tunnel
You are in a long sloping tunnel that heads south into the depths of the cave
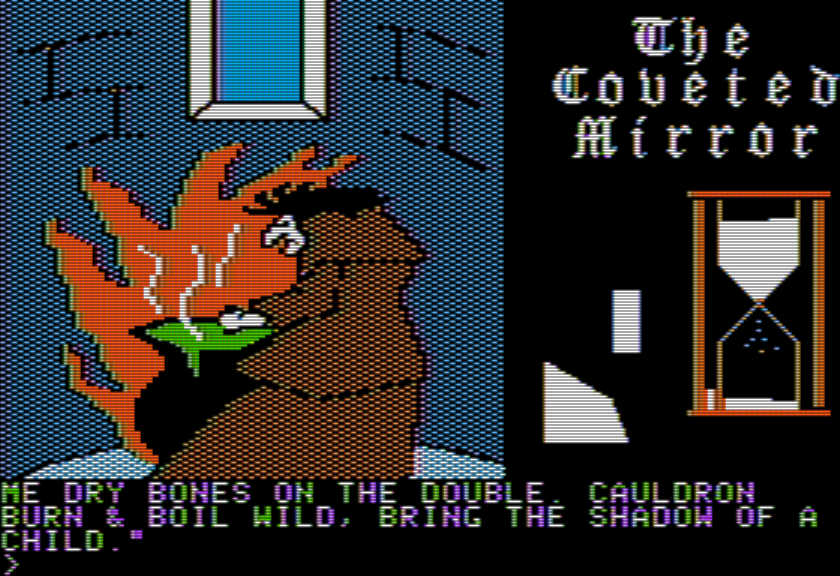
The cave that follows is dark; the game warns of danger if you don’t have a light source. This leads to the first time I’ve died in the game. (The game is much gentler than Ferret in general, telling you about falling down a cliff being a bad idea rather than describing a grim plummet.)
You were warned. Without the light you seem to have gotten yourself killed.
As the darkness of death fades, and the light intensifies, you find yourself falling quickly at first then slower, then slower still until you find yourself looking down on a strange land. Below is a river, a long river, so long that even at this height the river stretches forever. About 1 mile from each bank of the river is a tall mountain range. You slow more until you are about 1 foot from the ground, and then you lite gently on the surface of an eerie world.
Thick mist
The ground, and the river, are almost undistiguishible here due to the dense fog that surrounds you. Upstream, you can barely make out what appears to be a bridge heading to the other side of the river.
The main thing I’m not clear on yet is if this is a “Treasure Hunt” in the capitalized sense, where the goal is to gather specific items and if you find 50 of the right ones you open you reach the endgame (…presuming it works). More exploration next time! And maybe a few more substantial puzzles; so far getting the strange coin and getting the drawbridge to move have been my only wins.
Public attention, as well as the attention of groups such as this, has been focused on the design and application of large, expensive “super computers.” Our national preoccupation with size and power makes this fact understandable. However, the minicomputer, which I define as a stored program computer selling for under twenty-five thousand dollars, is deserving of much more serious attention than it has heretofore been given.
— Robert L. Hooper, from a paper presented at the 1968 Fall Joint Computer Conference
In the late 1960s, there was a technological gold rush in “small computers”. The PDP-8, developed at DEC by a team led by Edson de Castro, gave in 1965 both proof of concept and proof of market that a computer meant for a desk rather than a room was now feasible.
By the end of the decade, small computer companies sprouted up in the legions; the Tracy Kidder book Soul of a New Machine claims “one every three days” in 1968 which is a bit of an exaggeration but not by much. You can compare it to the dot-com boom of the late 1990s; you could also compare it to the dot-com bubble popping, since most of these companies died.
The gold rush wasn’t restricted to the US; the Nixdorf 820 was from Germany. Image via the Computer History Museum.
A list of minicomputers from 1968 to 1972 includes plenty of companies (…Linolex, Minicomp, Multidata…) with “no data” indicating they were amongst the fallen.
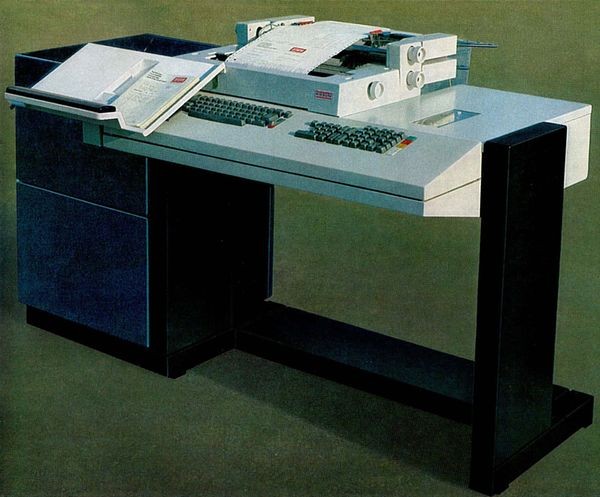
The top competitor to DEC was spun out of DEC itself, as Edson de Castro, allegedly annoyed he couldn’t go forth with a new 16-bit design for a computer, left to form his own company (taking some DEC people with him), Data General. They made their public debut late in 1968 with a system they called the NOVA.
The roll-out was at the Joint Computer Conference in December, where they had the mock-up unit above (finished two days before the conference started). One of the founders, Henry Burkhardt III, programmed it with Spacewar, demonstrating it was just as capable as a room-filling PDP-1. The conference was full of a technical audience and this is who they sold it to. They were just inside the front doors, across from IBM.
(The conference included Engelbart doing his “Mother of All Demos” which — in addition to showing off the invention of the mouse — showed hypertext, word processing, video graphics, and even collaborative editing in the style of modern Google Docs. You can watch a video circa 1968 here. It was purely for showing off research, which gives a good notion of the audience; you can find other sessions from the same conference here.)
Despite Data General having fantastic pedigree on their technology, poaching from DEC itself, it was still hard to stand out, and Data General went for pizzazz. The brochure I clipped the picture from above also included glamour photographs of the C-suite, trying to make them look like harbingers of a new age.
The President (de Castro) and one of the Vice-Presidents (Herbert J. Richman).
Contrast with a DEC pamphlet at the same time, which only includes one picture on the front, and is mostly text and a chart showing sales growth.
Their combination of competent technology and edgy marketing pushed them to the forefront of the market, and they went public at lightning speed (November 1969).
NOVA computers ready to ship in 1969, in “Building 1”. From Interface, May 1983, Data General’s internal magazine.
They got a reputation as the “bad boys” of the industry; a modern analogy would be to tech companies with the motto “move fast and break things”. Even from the very start they hired people with little guidance; consider the early programmer John Henderson hired from Bell Labs:
So Burkhardt gave him [Henderson] a pile of rough technical data on the NOVA and some examples of other companies’ software documentation and told him to go write some software manuals. It was a textbook example of how to mismanage a newly hired employee: assign a poorly defined, highly frustrating job, provide very little guidance, no well-thought-out schedule, and then ignore the “new hire” for weeks. But, Henderson loved it. He thrived in this atmosphere, and worked outrageous hours. Data General got a huge pay-off on its investment in giving a talented young person a chance to tackle challenging problems with very little bureaucratic interference. The process was to be repeated time and time again.
As Bill Foster (at Data General in 1976-1979, their greenest years) explains:
I was given very few orders from my boss. Just get the job done. I loved reporting directly to the president of the company — Edson de Castro, The Captain. The founder of what by 1976 had become one of the most exciting and successful computer companies in the world. Although I had a great job at Hewlett Packard I was way down the totem pole at that huge company. At DG I was close to the top. Close to being a star!!
At HP you felt secure, no matter how bad you screwed up. It would have taken an act of bloody murder to get fired. The contrast with DG was extreme. Employees were kept on edge. Your job was simple: help the company make a profit — that’s why you’re here. We were all given a lot of rope. But if you screwed up just take that rope and hang yourself before someone does it to you. It was clear that everyone was expendable.
The general chaotic handling of management really set in when Data General was ready to upgrade from 16-bit architecture to 32-bit architecture, and there were two competing teams within the company working on the same thing. This is the source of the events from the book Soul of a New Machine, and while the history is somewhat relevant to today’s game (the current existing version is on 32-bit) it’s past our scope. This is because our authors came from a different group altogether.
Instructions for the Eclipse MV/8000, the 32-bit project that was actually finished. The group was meant to only update the system without bit change but did the modification secretly, and kept compatibility with 16-bit systems. Image from Internet Archive.
Thissala’s authors were David Auerbach, Paul Chiasson, and Peter Macaulay, all members of Data General’s Corporate Systems Engineering Group. They were not working on new system architecture (or causing havoc with unreachable goals for new system architecture). If you don’t know what a Corporate Systems Engineering Group is, there’s a Data General job posting from Computerworld (September 15, 1980) that explains the idea:
CSE is a systems support group responsible for software support activities which require centralized control and are worldwide in scope. as such it provides a unique opportunity to provide technical leadership and direction through a team of sophisticated software professionals, over a broad range of state-of-the-art products.
In other words, they worked on the custom technical support for businesses. Of the three authors (David Auerbach, Paul Chiasson, and Peter Macaulay) I haven’t seen any mentioned in the literature on Data General, and in general Peter Macaulay is the only one that I’ve been able to find at all. He was born in Belfast, Northern Ireland, and went to Manchester for an Electrical Engineering degree, followed by a Master’s at Brunel.
In 1978, Peter’s spirit of adventure brought him across the Atlantic to the United States, where he made his home in Bellingham, MA. His love for exploration never waned, from piloting small aircraft to sailboats, hiking in the mountains of Ireland, New England, and Japan, he was always eager to embrace new cultures and experiences.
There’s still time for more historical information to surface, as this will be a multi-post game. It is allegedly very large. It claims 1000 rooms and 400 objects. The reason for the “claims” there is that the game seems to be unfinished; it is possible there are portions designed but too broken to reach; it is even possible the 1000 rooms/400 objects were planned but not fully made. We have version 0.60 which was ported to 32-bit Eclipse and the change notes read like a work in progress, including this:
The monster are again wondering the different sections. They will attack, but with no strength as of now. There was a bug reported that I believe is now fixed. This should prove or disprove this.
There’s instructions here how to play and some extra historical context by Rob on how the game was discovered; in 2025 the Novas are Forever site started uploading a series of drive dumps, and one of them had a number of lost items, like a novel variant of Adventure, a multi-player RPG called Quest, and an early version of Ferret. Prior to last year, Thissala was entirely unknown and not written about in any histories at all. (This is despite Soul of a New Machine making a big deal out of Crowther/Woods Adventure; there was a strong culture around the game at Data General. I’ll get into that connection more when I’m deeper in the game and have more context.)
ASIDE: I incidentally recommend the link in that post by gschmidl which already has everything set up to play Quest; change the third to last line in the mv.ini file which talks about Quest into
EXPECT “\n)”; SEND “dir :games\r”; CONT
which will land you (after booting the emulator up with mv mv.ini) into the games directory. You can then type games to get a menu or enter the name of the game you want directly. You still will want to follow Dan’s instructions for quitting out: type bye, pick y on the prompt, and then q for a total shutdown.
One extra caveat is that the game has “idle” messages if you don’t type for a while, which is annoying when you’re adding to notes or a map in a second window. I used the program Game Pauser to alleviate this (somewhat).
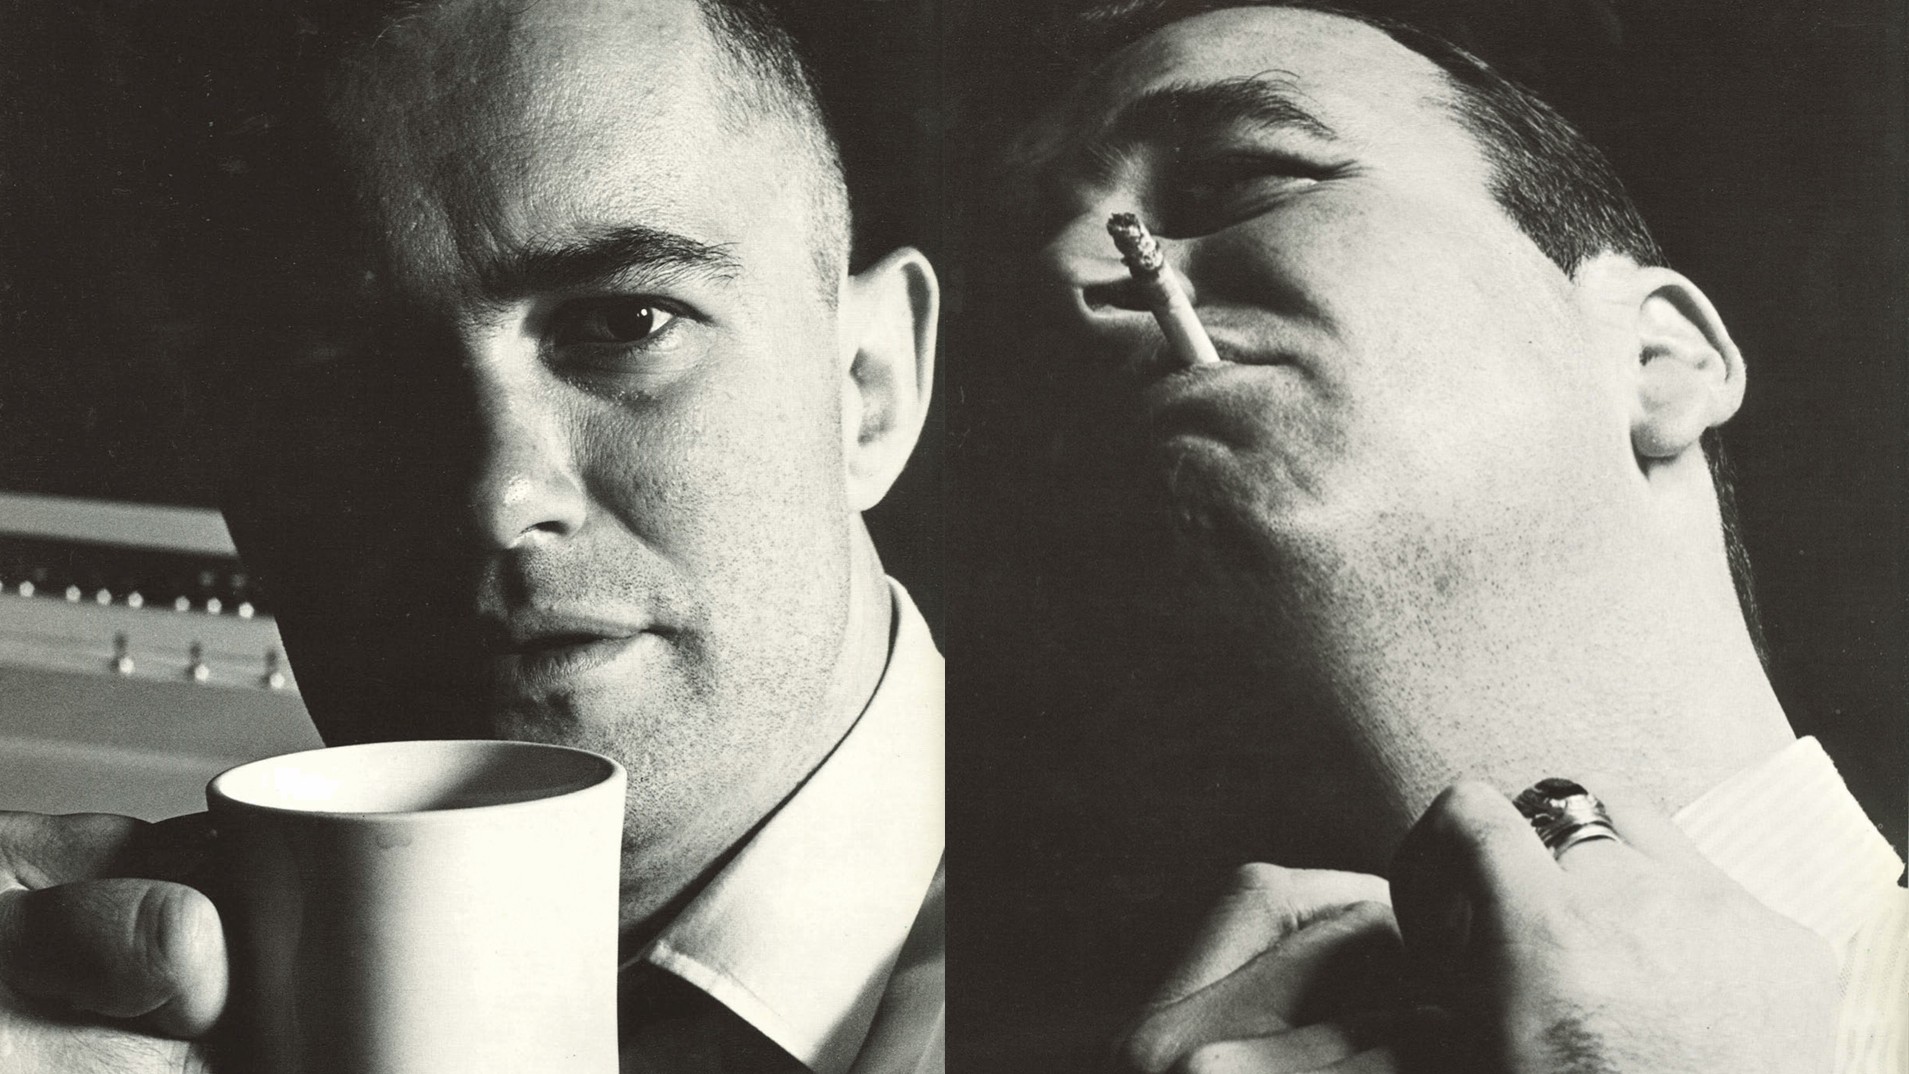
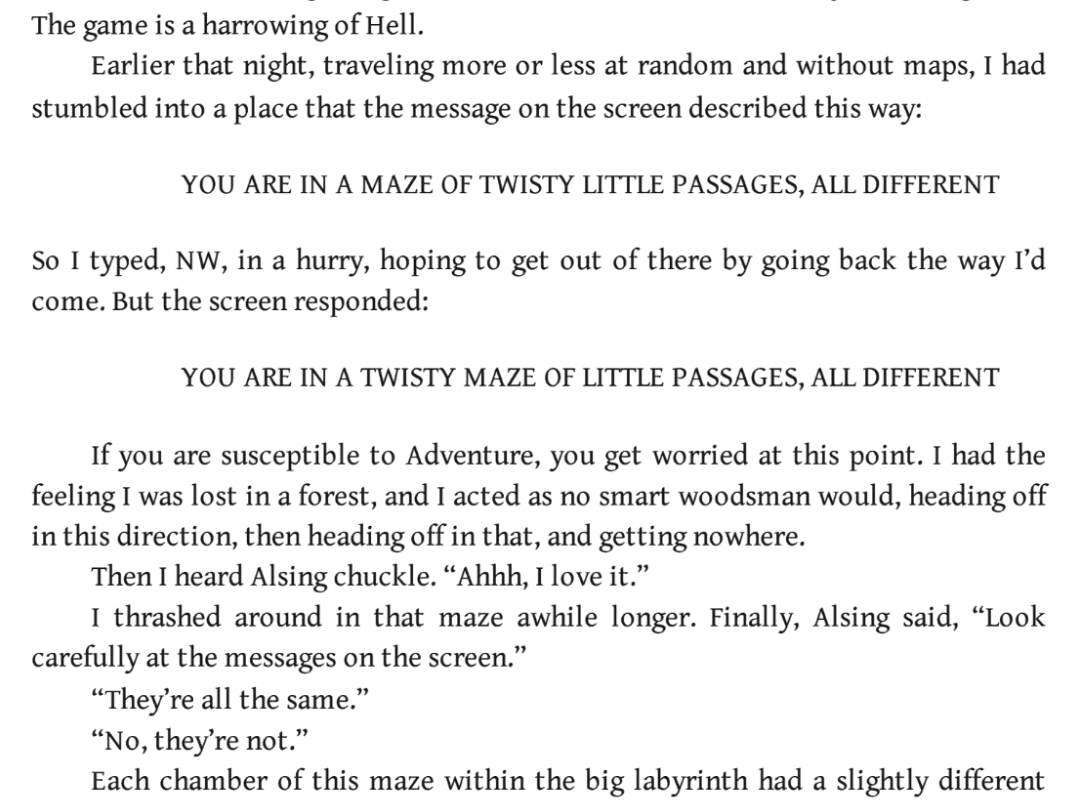
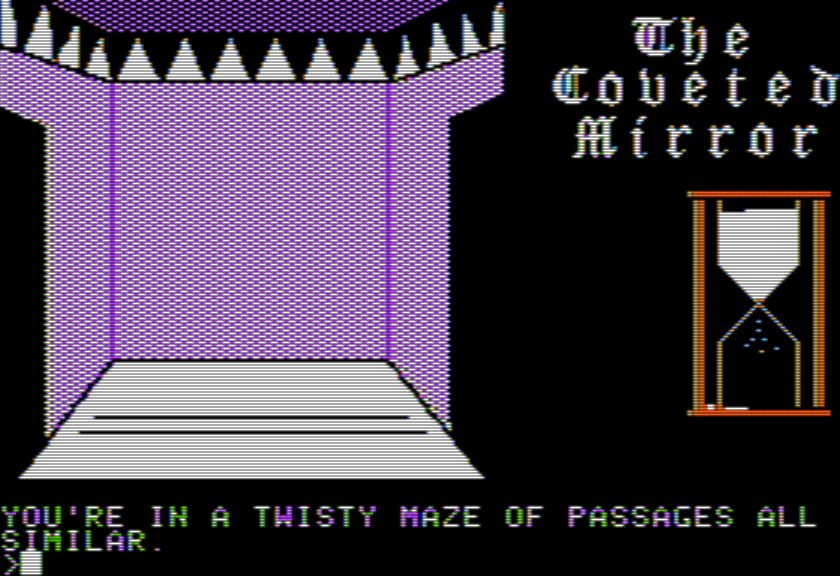
Tracy Kidder discovers the twisty maze of little passages, all different.
Finally, let’s get into the game, shall we?
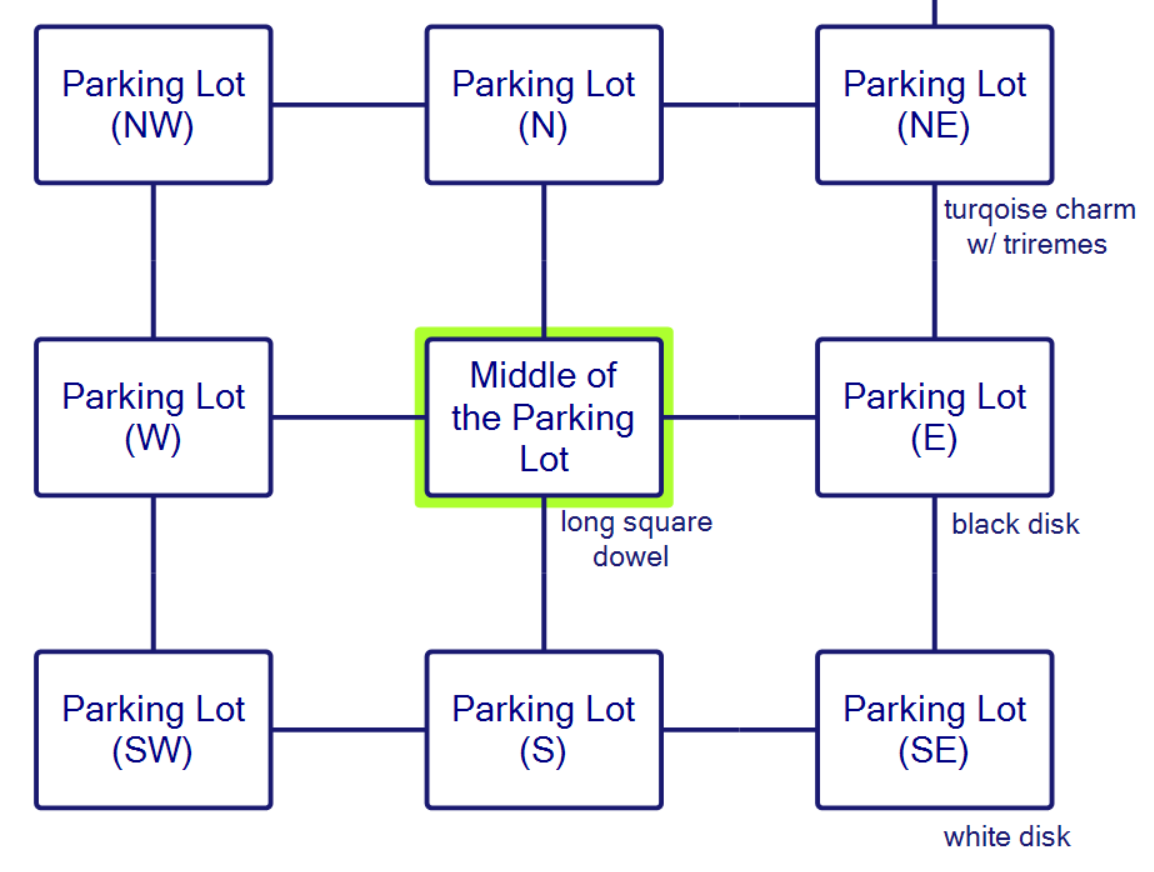
Middle of the parking lot
You are in the middle of a large parking lot that stretches off in all directions. In the distant north you can see a large mountain. To the northeast you can hear the sound of water.
At your feet lies a long square dowel.
This follows the Crowther/Woods tradition of not being clear about the goal until you look at the help info, but even then the game starts with its cards close. The HELP command asks you to type THISSALA for a description of the game.
The fundamental difference between THISSALA and other games is that the goal in THISSALA is not just to get all the treasure, but to accomplish a substantial feat, that is, to save the world from the forces of evil, and restore the power of good. Hidden somewhere in the land is a parchment describing the tale of THAMOS and MAKASSAR. This scroll holds the initial clues to what must be done.
(The scroll, fortunately, is easy to find, although I’ll save it for the end of this post.)
The help also specifies some statistics, more than other text adventures from this time: POWER (strength), COOR (agility), MAGIC (magic ability increased via specific books), WISDOM, KNOWLEDGE (percent of the game explored). WISDOM is explained with “who the hell knows?” so maybe it’s there for fun?
status
Current power level: 0
Current coordination level: 0
Current magic level: 0
Current wisdom level: 0
Current knowledge level: 0
It incidentally takes 8 rooms visited to increase the knowledge level by 1, so assuming it’s out of 100%, there are in reality “only” 800 rooms rather than 1000. That still puts the game as enormous. (Ferret beats that by about double, but keep in mind Ferret took six months to beat.)
You can incidentally mop up the 8 rooms fairly quickly by just walking around the parking lot you start the game in.
The room descriptions are not elaborate but the game already has thrown four items out, two which seem to be a complex mechanism.
First is the long square dowel. That’s all the game says. (There’s no “examine” feature, like the Cambridge mainframe games; the “on the ground” descriptions of objects try to be elaborate enough to cover.)
Go northeast and you’ll find a beautiful turquoise charm with the outline of a triremes on it. The game does not understand “wear” or “use” although you can wave it (to no apparent effect).
Parking lot (NE)
You are at the northeast corner of the parking lot. To the east there is a tall fence. To the north is a dirt trail.
Near the fence, is a beautiful turquoise charm with the outline of a triremes on it
(I assume the authors meant like the boat, but “a” triremes? Is that just a typo?)
To the east and southeast of the center are a black disk and a white disk. Both have instructions.
Magic stepping disk. To use, place on ground, and step on.
Warnings:
Disks must be used in pairs. You had better know where the other disk is
Disks will have to recharge at various times, not always dependent on usage
Disks require, and drain, magic power
I did some serious fussing but I was unable to work out the parser command to use the disks.
step on black disk
I don’t understand the word ‘step’
stand on black disk
I don’t understand the word ‘stand’
step on
I don’t understand the word ‘step’
step
I don’t understand the word ‘step’
get on black disk
Don’t be silly
stand on black disk
I don’t understand the word ‘stand’
I have yet to do my verb list test; probably next time. One last item of note before leaving the lot is there is the occasional random message, like
A thunder of rhinoceroses pounds by and miraculously, neither you nor anything around you is damaged
or
A murder of crows fly overhead, appearing from the north and vanishing to the south
I don’t know if these are meant just for color, or meaningful. If you don’t pause the game the backscroll can get filled with this kind of nonsense:
Excuse me … but are you still playing?
Hello … hello … is anyone still there?
Excuse me … but are you still playing?
Psst … hey you …
(Hence the Game Pauser. Although if someone knows a clever way to make Powershell just go idle when it isn’t in focus, that would also work.)
Heading north from the only exit away from the lot (north from the NE corner), there is a $10 bill along with a warning.
Dirt trail
You are on a dirt trail that runs north and south. There is a small
sign on the western side of the path
Lying in the path is a $10 bill
read sign
WARNING
DENSE FOREST TO THE WEST
DO NOT STROLL FROM PATH
IN THAT DIRECTION
Heading west leads into what seems to be a relatively standard Adventure clone (the kind with passages all different, too boot) but I haven’t had the energy yet to tackle it. If you wander long enough you’ll get help.
n
You are hopelessly lost in the woods
w
You are lost hopelessly in the woods
w
You are hopelessly lost in the woods
s
You are lost hopelessly in the woods
s
The game and ground keeper appears in front of you and says “Whats a matter … are we a little lost” and then muttering something about damn tourists, he leads you back to the junction in the paths
The aforementioned junction is just north of the dirt road.
Junction in the paths
There is one dirt path leading north, one leading south and a stone walk leading to the east. There is an old sign stuck in the ground on the eastern side of the path.
read sign
HISTORIC HOUSE —>
The historic house in question is the one from Zork.
Most of the map is removed, though, indicating a long-decayed piece of the past.
West of house
You are in an open field west of a big white house with a boarded front door.
n
North of house
You are facing the north side of a white house. There is no door here, and all the windows are barred.
e
Behind house
You are behind the white house. In one corner of the house there is an empty window with no glass in it.
w
Kitchen
You are in the kitchen of the white house. A table seems to have been used recently for the preparation of food. A passage leads to the west and a dark, boarded staircase can be seen leading upward.
To the east is a small empty window with no glass.
On the table is a can opener
w
Living room
You are in the living room. There is a doorway to the east, and a large wooden door to the west, which appears to be nailed shut.
Lying on the floor of the living room is a sheet of parchment
In the very center of the room is an oriental rug.
You can try moving the rug and opening the trapdoor, but you find if you try to go down that there is now a 30-foot drop instead (the game doesn’t kill you! it just warns you of the decay). The whole purpose of the section is to dispense the can opener and the parchment. The parchment gives the actual true plot of the game. It’s rather long but I’m still reproducing the whole thing, because there might be subtle hints.
Oh yee that find me … lend me your thoughts for an instant. Ensconce your eyes on this document, for you maybe the last to do so. Read and imbibe and if you be coureageous follow what follows, my tale and time are short, so I must write quickly.
Many years ago, a colony of explorers settled this region. They grew quickly in number and strength till they were larger and stronger than any people around. They were ruled by a kakistocracy for almost 100 years, during which time they expanded their geographical boundries by war and conquest. Eventually one leader emerged, his name was Makassar he was the most evil – and he continued and expanded the kakistocracy’s policy of conquest and terror. And that continued for thirty years.
At that point, a new leader replaced the just dead Makassar. His name was Magog, and he developed his abuse of humanity by turning on the weaker of his own people. He kidnapped children for his slaves and stole wealth for his pleasure. It was that same year that born to two mountain dwellers was Thamos, who could trace his lineage back to Thamos of Egypt, son of Tuktanfontmarranthon.
And after 20 years of Magog, Thamos came down from the mountain on the back of a great turtle, passed through the woods and accross the Dipestia and entered into Makassara. And he carried a carved oak flute. The good people, the abused, and beaten, joined behind Thamos, while the evil followers of Magog threw rocks and insults. The evil outnumbered the good, and the good were beaten and slain.
Seeing this, Thamos used his one magic power, and passed his hands in front of the people, and the world stopped. Thamos turned to his followers and spoke:
We shall sleep for many a year … and wait the music of the flute.
Thus spoke Thamos. Then he turned to the evils and said:
You shall remain awake … and continue your ways … but never again bear offspring.
Thus spoke Thamos. Then he turned to me and said:
Scribe … record accurately … cache well your parchment … for in your writings be our destiny … speak of the sleep … but more strongly of the flute for it is our future.
Thus spoke Thamos. He then raised his flute in his hand, then lowering his hands the flute remained suspended in the air. And Thamos said:
Go
The flute ascended and disappeared over the trees and into the mountains. And Thamos said to me:
Now hide your document … and return … you have but minutes before you sleep.
Thus spoke Thamos. And I followed.
Our goal seems to be to defeat a great evil by finding a flute that was used to put the people of Thamos to sleep. Thamos of Egypt is incidentally a reference to an obscure Mozart piece. The king is fictional.
The name-clash could be coincidence, but I don’t think so, since we’re on a quest for a magic flute, and (in contrast to Thamos, King of Egypt) The Magic Flute is one of the most famous of Mozart’s pieces.
I have at least a month blacked out for playing this game, it may go for two or longer depending on how much works and how much is broken. As I’ve only played the introduction for now, please keep speculations to this portion of the game; however, you can generally consider this a many-person game like Ferret where everyone can contribute as much as they are able.
This is a temporary post for anyone attending my talk on the 1st year of Japanese adventure games. This links to my discussion of each one I have been able to write about in depth.
For those not attending, there will be a YouTube upload eventually! (Although for my regular readers, there won’t be anything new! But maybe you’d like to hear me talk anyway.)
To continue directly with the most immediately clear solve: the way the barrel works is as a teleporter. It’s not a new location at all, but rather is the dark place between the dungeon and the magician’s room. You can go east or west to get out; the reference to finding a nearby fire to light the candlestick is to the fire in the magician’s room I had already used before. The barrel is a 100% optional shortcut.
Speaking of optional, while struggling with a lack of vase I found one more optional puzzle, back at Lady Vainly.
The main thing to note here on the game is there are two kinds of interaction
1. using TALK and getting some sort of comment or hint
2. randomly using GET on some item that the character possess, and rather than them getting angry at you they just tell you what they want in exchange
I had already discovered the GET earlier with the cookie at the baker (if you just TALK, it says nothing about the idea of trading chocolate moose for cookies) but it still wasn’t in my normal grab of tricks to simply swipe stuff in front of a character and see their reaction. With Lady Vainly you can try to GET the picture she is standing next to.
This is a BEAR. It strikes me as the sort of thing you’d find in a more generalized children’s game (not an adventure) but that seems to be the philosophical approach to the design in general (which is fascinating, and I’ll get more into that element after finishing the game).
She will give you the picture after you name BEAR, and she notes it is already signed. This picture is highly valued by the guard; I had plenty of items to give out (trying to be very efficient on my journeys) but I used this on my last pass before making it to the Peak of Shards.
Past that, I decided the chocolate moose would only be solved once I came across the right item, and I finished trying to give the COAT to every single character in the game (all who have unique messages to that in particular!) The fortune teller gave a message that hinted you needed the coat for yourself, not for a trade.
That meant I was left with the pesky vase. I had earlier thought it might be hiding in the “treasure room” in the maze, but was not having any luck.
I tried referring to every item in the picture, being very unclear as to what nouns even to use; for example, trying to open a BAG (noun doesn’t exist) or move what appeared to be a TAPESTRY (noun doesn’t exist) or a CURTAIN at the back (noun does exist, but the game just says to try walking that way). I was thorough enough that I discarded this for a while and tried USE COLOR in every single room in the game, looking for an invisible vase appearing. No luck.
It was time to whip out the big guns.
This is a page from Kim Schuette’s Book of Adventure Games, the most popular book of hints from the 80s (including maps of every single area in Time Zone, for instance). I checked the back hints for the vase that holds shadows, and was mystified to see a mention of the vase in a cupboard. The only cupboard I remembered was in the magician’s room, but trying OPEN CUPBOARD and GET VASE led me to finding no vase. Hmm.
That thing I thought was a tapestry in the treasure room was actually a cupboard.
Even after the fact, that doesn’t look like a cupboard to me. What’s with that black portion on the bottom?
The funny side effect of all this is you can find the vase almost right away in the game; for such a player, the mystifying part might be its use, but I had already staked out where to find the shadow of a child.
I found this deeply unsettling.
Returning the shadow to the witch…
…I now had USE INVISIBILITY and USE VISIBILITY as spells. Finally I could wander the castle! It turns out the trapdoor-navigation lets you visit most of the rooms; only a handful were inaccessible. The first is past a guard stationed by the kitchen, which goes to a church. Since I heard the hint already about the location of the shard, I automatically got it added to my screen just for entering the room.
To the far east is another previously-unseen room, the King’s Royal Chambers.
Going south from here leads to a place the jester hangs out, but also a moose on the wall.
The moose is what the baker wants, but the cookie just serves as another bribe for the guard, so I ended up not using it.
The Royal Chambers have a locked door to the north and trying to unlock the door indicates Voar locked the door and swallowed the key, so I admit I spent a little time trying to trick him into eating a cookie while invisible and causing him to throw up the key somehow. Except: I still had the lockpick! (The game isn’t into object re-use otherwise, so it took me more time than it normally might have to come to this realization.)
Having applied it on every single other room, knowing to USE COLOR to the painting was immediate.
That’s all the shards in the castle! Following my guess earlier, I then went to the tavern to see if Brother Jon was there to teach sign language. (There’s a hint from the bard about getting wine after you’re prepared, although I only realized the connection after the fact.)
Having entering the tavern be a softlock prior to this point (since you get everything stolen, including required items) is astonishingly rude even for a game not targeted at children.
TALK now enters a mini-game. It’s just Simon but with hand motions. Q/A/Z for high/medium/low on the left hand, O/K/M for high/medium/low on the right hand, copy what the Father is doing enough times and you win.
Solved the first time, but I honestly preferred an easy mini-game to the nonsense I had to deal with while fishing.
Now, with ring in hand, you can go over to the forest and TALK to the old man when he shows up.
This allows you to get to the endgame section, which is mostly linear.
Once past the mist there’s a bridge (I was worried there was a puzzle here where you can fall, but it’s just meant to look epic) and then one side route where you can meet someone fishing at a stream and get a hint.
This is a random encounter like the others, so there may be nobody here. The map is designed so you can accidentally loop back here; I met the person here on the second-loop round.
The mountain then gets cold as you travel upward, and there’s a “tight squeeze” where you can only carry one item. This is meant to make you actively think about the coat as being useful (that is, the puzzle otherwise would likely be solved by most players “passively”; by actively making them choose the coat, the puzzle isn’t just solving itself).
Above is a trap: trying to take the mirror shard now leads to a wailing alarm and you get captured. You need to WAIT for the right shard to appear in order to complete the picture. This entire setup does not make sense to me in a plot-coherence sense (why, if Voar was able to secure the mirror with fake mirrors, does he even have the real one show up at all?) but the entire game has played it loose with plot beats so I just rolled with it.
Or at least I tried to, but as mistertaster had been warning me in the comments, the shards don’t actually fit together correctly. I admit I went a bit meta; there’s that picture from the later printing…
Via the Museum of Computer Adventure Game History.
…and one of the shards from that picture shows up if you wait long enough.
While I wasn’t clear before without playing the game, all the references to non-violence in the historical background hinted to me this was aimed as a “children’s game”. I now think this is the case and it isn’t a bad thing. It led to:
strong emphasis on visuals that looked like they were supposed to, with many animations
emphasis on interacting directly with the visual environment (not that words are bad, but the game took a genuinely original approach that went past anything Sierra On-Line had done yet)
many straightforward puzzles throughout where you either told directly what is needed as long as you ask correctly (a crystal ball for the fortune-teller, grain for the inn-keeper) or at least the connection is not hard to make (fish for a cat)
more feedback on giving items than is standard for a game of this era, so there’s some engagement even when the player is doing the “wrong thing”
Essentially, the authors leaned more to the easy side of things; while there were some hard and even obnoxious puzzles (the vase being the most extreme example) it was framed by enough simplicity I didn’t feel like I was being crushed. There was enough environmental atmosphere (and optional encounters) that it was genuinely enjoyable to just bop around the map looking for something new. Despite it not being in the character-in-an-environment format Sierra On-Line would start following after King’s Quest (evolving into the “point-and-click” adventure), it followed a similar sensibility (and was even willing to show the main character during the mini-games).
Mind you, not everything went well. I understand why the authors put a limit on the number of times Voar could catch you (otherwise all the work putting bribes for the guards lacks in importance) but in the end it’s like Hezarin trying too hard to keep a player from guessing at a puzzle solution and breaking the game; there isn’t enough benefit to punishing the few people that will go 25+ loops, so all it really does is create anxiety for players.
(Long term time limits are, in general, a horrid design choice. Fallout originally had a time limit for finding a water chip at the start and then ripped it out. I’ve been tempted to play Xtal Soft’s breakout CRPG, Mugen no Shinzou, but the game gives a turn limit of 30,000 meaning you might be 80 hours into the game and have to restart because you weren’t efficient enough. Something like Ancient of Domains of Mystery works better because “corruption” increases over time, but it can be managed rather than forcing a hard stop to the game.)
Some historical points to tie up before closing things off:
I had promised to bring back Michael Kosaka. Specifically, he is mentioned in the manual for doing the art for the joust.
This would normally just be side trivia, but it’s more interesting than normal because his later career (as I already indicated) generally emphasized sports games, including Budokan: The Martial Spirit from 1989 (for Electronic Arts) which has combat with some aspects of the jousting in it.
Only a few years later he was positioned as Commissioner of the EASN.
You can thus draw a direct (if faint) line between The Coveted Mirror and the modern Electronic Arts sports empire.
Also, both Eagle Berns and Holly Thomason kept up a relationship with Penguin. Holly did the graphics for the Macintosh version of Transylvania; Berns worked on COMPREHEND (Penguin’s later “general” system for adventure games) as well as the Mac version of The Graphics Magician.
While it’s a little harder to find than her Penguin Software work, Ms. Thomason made another original game: In Search of the Secret Stone (Creative Publications, 1986). It is an “educational” game quite directly this time meant to teach mathematics, but it is also quite clearly an adventure game with graphics in the same style as The Coveted Mirror.
Finally, it’s worth at least looking at the screens for the Japanese translation of the game. Starcraft did the translation (just like with the Sierra On-Line games, such as the Time Zone game where they re-drew every single screen). What I find fascinating here is they tried to do heavy localization, changing the setting to Japan and radically modifying the graphics. Two screenshots of the PC-98 version via Mobygames:
According to Rob in the comments, it changes gameplay aspects as well, like removing the mini-games, removing the 25-capture limit, and making the vase visible in the treasury. The pickpocketing is both more forgiving and meaner at the same time: it doesn’t happen instantly when you enter the tavern, but if you wait long enough you’ll get pickpocketed without any kind of warning.
FM-7 box cover from Mobygames.
Coming up: An absolutely enormous game that was lost until quite recently.
Progress, but not quite as much as I’d like. Still, I think I’m one or two posts away from the end.
My main target for today.
The most immediate thing I solved — roughly five minutes after making my last post — came from one last re-read of the fairy looking for their glasses.
I realized that it might not be a tiara or hat on the fairy’s head (as my brain was originally interpreting), but rather the glasses themselves (especially since the game already had the “hidden in sight” puzzle with the lockpick). It took a little fussing to actually work out what to do, though, since you can’t just GET them (the game does politely say you’re on the right track). HELP gives the majority of the verbs that are available, though.
GET, PUT, MOVE, OPEN, CLOSE, USE, OFFER, READ, TALK, GO, WAIT, CLIMB, LOOK, INV, OR A DIRECTION
(Not all of them – you can LIGHT CANDLESTICK back at the magician’s room.) I was trying to do POINT and SHOW and so forth but consulting the list the only thing that seemed like it might work was MOVE.
It’s wildly unusual at this point in gaming history to have a puzzle like this; most of our graphics up to 1982 have been too squiggly (even some of the games with very good art, like Lucifer’s Realm, did not have their art done in 1982; it was added later). Even then it took some squinting and a leap of faith because of the pixel size but at least it gets very directly mentioned in the text.
Unfortunately, the effect here has not led me to solving any new puzzles. This gives access to USE COLOR (which incidentally took some noodling to figure out — even with a mostly-complete verb list it’s not always easy to work out how to communicate things, and it’s still not clear what action the player is doing to cast the spell). This causes the screen to change color briefly before returning to normal, but I have tested it in over half of the rooms in the game with no effect. There is no textual message given, and I wonder if it’s meant to find something hidden.
That is, in this moment of color inversion, you might see something secret.
Before leaving the fairy, I should mention I was misinterpreting another part of the image. There’s a door in the back but I thought it was simply the way we entered in on (the room only vaguely looks like the bottom of a well, so I thought there was some extra step being implicitly taken by going down, and you can easily go back up again). However, you can OPEN DOOR and find yourself on the other side of the hill. So that issue is resolved.
New route marked in blue.
Nearby all that is the inn, and I misinterpreted yet another image.
I thought that was a door behind the bull, and it represented the way back into the inn. It does not: it’s a passage to the outside, through the back of the Inn, leading to a brand-new area. Mind you, not one that I have gotten too far into yet, but some screenshots to explain:
Putting together the clues from before, I need the ring and the sign language to communicate with the man in the Forest, who will then take me through the Fog here to the fifth and final mirror shard. So it likely should be saved for later.
Speaking of saving things for later, my suspicion on the tavern where supposedly we can learn sign language (but our stuff gets stolen instead)…
…is that this gets saved for last. That is, I need all four other mirror shards, and something will happen in the tavern which will allow a scene to go forward. I suspect this because the hint talks about Brother Jon only showing up “rarely”.
With that set aside, one last piece of progress is I took every single available item over to be appraised and found that the ones that work as bribes are not obvious treasures. Specifically, of the items I have…
AX, ROPE, BONES, CANDLESTICK, JUG, BROOM, LOCKPICK, COAT, SHOVEL, RING
…the AX, JUG and BROOM are all valued as bribes. I’m particularly surprised about the broom, since it was just taken from a room in the castle; the AX seems like a utility item, but now almost certainly not. Unless I’m far off base, anything that counts as a bribe does not otherwise get used as an item for puzzle-solving. This means the rope, bones, and coat are the only items left where I’m completely unsure as to where they go (I haven’t applied the ring yet, but the game hints amply where it will show up later).
I decided next to do a big push on the tower; while the person inside laughs if you TALK, the face also “beckons” you if you do LOOK. I decided this had to be the missing witch. Given you can see the tower from the outside, I wondered if you could enter from the outside, given there were two holes in the bushes just outside the tower.
Further experimentation (especially considering the verb CLIMB on the help-list) led me to realize that climb was being recognized in that room, I just needed extra conditions, or more specifically a ladder. (The noun LADDER is recognized.) We’ve already seen a ladder, though!
It is not obvious in the slightest from the picture that you can just rip the ladder right off the well — I would think it was mounted — but you can just take it, and then PUT it at the castle.
This doesn’t quite let you go high enough, but I also had a rope I hadn’t used yet, so:
Finally the witch!
The witch requests bones and the shadow of a child. The bones were easy (I was already holding them freshly dug from the graveyard) but I still don’t have the shadow. The vase that holds shadows was hinted at by the fortune-teller, but I still don’t know where to find it; I do know if you are at the hovel which has a child in the picture, you can try to GET SHADOW and it says you don’t have the right container for it.
One last bit of progress, kind of: on the south side of the town there is a barrel in the picture (not mentioned in the room description, just shown in the picture). I found I could MOVE BARREL and get the top off, and even GO BARREL afterwards.
The problem is that the barrel is dark. LIGHT CANDLESTICK (like I did at the magician) says something about lighting it at the nearest fire, so I went and tried to light it at the alchemist, and the baker, and the glassblower, and the blacksmith, and in all cases it said it didn’t understand the command LIGHT CANDLESTICK. I could go all the way to the magician and light the candlestick but it apparently is unlit by the time you walk over to the barrel. So I’m not clear what to do here.
Just for an open-problem update:
a.) finding the vase that holds shadows
b.) figuring out the barrel
c.) chocolate moose ingredient for the bakery to get the cookie
d.) figuring out where to use the color spell (this may only apply at the endgame)
This is a much shorter list than before which is why (despite me still only being a two pieces of the mirror) I suspect I’m winding closer to the end, at least closer to the point where I’ll be able to enter the endgame.
Before getting into the puzzle solving, let’s tour the last part of the map, where “there’s less hustle & bustle”.
This is just past the main town, to the south. Just west of the room above are the stockade (with the scene I discussed last time) and the jousting.
Just like with town, the various rooms have random encounters. It isn’t nearly as bad as it could be, and I’m guessing they’re programmed in a way that forces a rotation rather than hoping the random number generator doesn’t make it so you might have to test each location 10 times. In the location just past town, you might see nobody, or you might meet a Bolshevik.
TALK here gives SOFT–AND CARRY A BIG STICK. Some of the characters give random hints (like talking to random town members in a JRPG) although it is also possible to try to GIVE items, so I don’t know if any of them represent puzzles. This isn’t the only encounter you can have here!
I met her on my fourth-pass through, rather than having to go back and forth ten times. I’ve most recently written about the perils of character appearance RNG with Ringen.
TALK gives a more active clue, about an NPC I had gotten lucky with and met on my first visit to the room in question.
Let’s just hop all the way over there — it’s on the far east, marked Near Forest of No Return on my map.
This man’s appearance is less frequent than other characters, which I suspect is why the hint is there. He’s also hinted at by the bard, he mentions MUNIJSTAN & HIS SILENT FRIEND and how you need to WAIT WITH THE RING AT THE DARK FOREST’S END.
Trying to TALK gets the response HE GESTURES IN SIGNS YOU DON’T UNDERSTAND; we’ve also had the sign language reference given by Alice at the hovel, but I don’t know how to learn the sign language yet. My suspicion, based on Alice’s hint about sign language at the tavern, is that someone hanging out in the tavern (where the pickpocketing happens) knows, but that’s one avenue I’m still dead-ended at (talking isn’t useful, nor waiting around, nor coming back and forth a bunch of times).
Let’s zip back to Outside Town and take a path by a graveyard next.
The graveyard sometimes has a ghost. The ghost makes a reference to digging.
Last time I had found a solving path (release person in stockade helps get the candlestick, candlestick gets bellows from the alchemist, bellows go to the blacksmith who gives you a shovel) that gets a shovel, so I tried it out and got some bones. Unfortunately, I don’t know what to do with the bones yet. (Giving them to the dog, the dog says — yes, it talks — that it prefers steak.)
Heading north, there’s another multi-character room, a crossroads. Encounters include a talking horse that lets you know again about the ring-forest connection.
If you try to ride the horse, the game lets you know it is a FREE SPIRIT.
There’s also someone who gives out elixirs for health that can sometimes appear and I think he may be there purely for color.
This shows the result of me trying to GET ELIXIR.
With that done, let’s swerve east which turns out to go into a house, the residence of Lady Vainly. (Some games, architecturally, will always put “boundary” rooms to set up transitions between outdoors and indoors; here this game is being a little more freeform.)
The dialogue above is the result of using TALK, and it is meant to hint that if you go east…
…you can GET GRAIN. Nobody says a peep about stealing or the like, the game just says OK and it lands in your inventory. We’ll be using the grain somewhere else shortly. First, a visit to a fairy.
Heading north from the grain is a well, with a bird in a nest. Again, I think the nest may be just “for color” — I’m still unclear how much content in this game is meant for pure atmosphere — and going down leads to a fairy.
The fairy asks you to find her glasses. I’m not sure where to even begin to look so this is one of those puzzles that will eventually solve itself.
Swerving back to the intersection with the talking horse, and going north, there’s a door in a hillside (locked) adjacent to a jug (which I have yet to use anywhere, and trying to take it to the tavern just gets it stolen). Going north from here is where the fishing is, which I will talk about (along with the jousting) in more detail later.
Neither mini-game is a proper “room”; the game just prompts if you want to start the game when you go a particular direction.
Finally there’s an inn. There’s a hint elsewhere (given by a woman randomly in the town) that the innkeeper likes to receive grain.
I guess he’s so keen on grain he gets kicked out if tries to go for Lady Vainly’s fields so can’t just walk over and grab it himself.
The reason he wants the grain is to feed his beloved bull; you can enter the door and see the bull assuming you’ve handed over the grain. There’s a rope in the room you can then take.
I originally thought that was a whip.
I did finish the mini-games but with a lot of save-state abuse. Starting with the joust, you have a series of clashes where you control your lance with A and Z (high/low) your shield with semicolon and period (high/low) and press SPACE to charge.
We’re controlling the person on the right.
There are two issues, one likely with the emulator. The first is that the game simply moves too fast at default settings, and I had to change the computer to be half speed. (Nothing else in the game, including the fishing, has this issue.) The other issue is that I don’t understand when you win or lose. The scene above looks to me like the right-side lance hit the opposing knight and the shield is placed correctly to block, but the scene shows a LOSS. I never could figure out a pattern and just kept reloading a save state and hitting buttons randomly until I won a match. Four wins means you are through and done with the game.
I assume the ATHLETIC PROWESS works to defeat another puzzle I haven’t seen yet.
The fishing is at least comprehensible, although still finicky enough that I resorted to save states again.
A and Z move the hook up and down, and the fish swim left to right, and you try to hit SPACE when the hook and fish match places. Your goal is to catch 14 fish before running out of time; time is not “real time” in a normal sense, but rather, the hourglass counts down by 1 if either a fish is caught or a fish is missed. You’ll notice I was cutting things tight above (goal of 14, 17 hourglass ticks) but I already knew from previous tests I was going to do save state abuse, and I was trying to fit both the jousting and fishing in one trip (without using up a bribe in order to increase time).
(Speaking of bribes: the only treasure I’ve found is still that necklace from the start. Given how long certain sequences take, I’m paranoid if I use the bribe early, I might get some later section that I won’t have the time to do on one jaunt before getting yanked back to the dungeon with the mirror shards.)
The main issue is the hitbox on correct presses of SPACE; there were many times it looked like a fish was properly being caught but it got away. I think there’s a slight offset (the fish maybe should optimally be a little below the hook?) but I never could figure out a pattern that worked consistently, so save state abuse ahoy.
After winning at fishing, the game informs you that you’ve obtained enough patience / quietude in order to stealthily read the Abbott’s book without getting caught. It’s nice when a puzzle solve is so direct! The book also quite directly tells you that one of the pieces of the Coveted Mirror is in the church at the castle.
This is definitely a case where you need to see the information before the mirror gets registered (so it isn’t like we did the mini-game for nothing). I know this because there’s a similar situation involving another mirror piece that I did find, which you’ve been seeing on some of the screenshots, one in the shape of a rectangle. To find it, bring the horseshoe to the jester (who wanted luck) and he’ll give a poem explaining there’s a mirror shard right in the dungeon at the start.
Once you know that, going back to the Dungeon is enough to trigger the mirror piece showing in “inventory”. (You can’t even refer to it in the room! It just has the picture appear.)
I unfortunately have yet to make it to the castle’s chapel so I can’t get the third piece marked down yet.
I managed to eke out one more puzzle solve, by taking the fish from the kitchen (only available via trapdoor, and you have to get caught right after, but you can retrieve the fish from the treasure room in the maze). I took the fish over to the sewing shop. I knew the woman there wanted a fish because I tried GET COAT and she’d indicated she would trade.
Some characters will say what they want if you just TALK, some will only say what they want if you try to take a particular item. The baker, for instance, doesn’t let you know about the chocolate moose ingredient until you’ve tried to GET COOKIE.
I do not know where the coat goes. I can’t USE COAT so I assume I give it to a person. There’s no obvious candidates. At least, there are custom messages when you give it to the wrong person, which is a very nice touch that makes the whole situation less frustrating.
It’d be hilarious if we then need to make a fake designer label, but this isn’t that kind of game.
To recap my issues, some which carry over from last time:
a.) two locked doors, one in the tower at the castle and one outside town at the hill
b.) I still need invisibility
c.) the people at the tavern (and the cryptic mention of sign language); relatedly, learning sign language for understanding the man at the forest
d.) the astrologer who pines after the fortune teller
e.) the “moose” ingredient
f.) the glasses for the fairy
g.) does Lady Vainly need anything or was that whole scene just for the grain?
h.) what to do with: bones, ax, coat, broom, and rope.
The game is keen on USE X so I may just need to start grinding (check every room for use of bones, ax, coat, broom, and rope).
I’ve got most of the map laid out, and things are open enough that I’m not really “stuck” but I wanted to report in anyway.
Story from the later version of The Coveted Mirror, via the Museum of Computer Adventure Game History.
To clear one thing up right away, regarding the mirror pieces: you don’t pick up the ones you find. You instead just see them and remember their shape, and trying to pick one up mentions a “protection spell” (I’ve only found one of them so far, but it clearly is consistent across the game). This at least partly explains the setup: Voar doesn’t need to be near the mirror shards to use them, isn’t worried about sabotage, and probably doesn’t even know seeing what they look like would be necessary information to find the fifth missing shard (given he hasn’t been able to locate it).
I also think the original wizard is still alive, despite the original manual indicating he wasn’t. There’s also reference to a Queen so maybe that’s who Voar pushed out?
No invisibility spell yet. That would be lovely to find.
The player starts “locked” in the first floor of the castle in the Dungeon (not really that well locked), can travel to a second floor, can leave to go into a town, and a little past. There is a timer on each trip out of the starting room. After the timer runs out, you get teleported back to the start, and lose any items you are carrying to a holding room on the second floor.
You can bribe the guard that checks the room for extra time. This required first having the bribe — there’s a necklace you can find early that works — and then typing WAIT while hanging in the Dungeon. Then you hand the item over and the guard gives you extra time.
I’m honestly not fully sure on the formula here, but I think the more valuable an object you give, the more extra time you have. It may be possible to not bother at all with this mechanic but since getting deep into (and past) the town does take a decent chunk of clock, it may instead be impossible to win without resorting to at least a little bribery.
Red spaces are spots you get caught. Yellow spaces are places you land from trapdoors (more on that shortly).
I incidentally say (GUARD) for all the red rooms but some of them are courtiers or other hangers-on of the evil Voar as opposed to proper guards. Any run-in will send you to Voar then back to the Dungeon (and one of your 25 times you can get into trouble gets used up).
From the Dungeon you can just move a bed to sneak your way out (through a dark room that I later managed to light up). Going south leads to a staircase, going up then leads to a mysterious locked door (and that necklace that helps with bribery).
One element to highlight (as touched upon in my last post) is that text is extraordinarily sparse and sometimes doesn’t try to describe the room at all (as in the above scene). The game is dependent on you looking at the picture and figuring out not just what to interact with but what nouns to use. Here “door” and “necklace” aren’t that hard to come up with, but later there are multiple items in a scene where I had to guess if the game would let me pick up something in particular.
I incidentally have no idea yet how to unlock the door. You can ignore it for now and go south or east, which leads to a maze which takes up the second floor of the castle.
The “twisty maze” aspect isn’t done in a classical Crowther/Woods sense, but rather in having trap doors which will shoot you back to the first floor.
These trap doors correspond exactly with the yellow rooms from the earlier map. This can be helpful as a way of jumping past the rooms you can get caught in. Before trying that, I should also point out:
a.) Going E-S-E-E-N-N-W-W from the necklace drops you in Voar’s treasure room; if you get scooped up back to the Dungeon while holding items, this is where they go. Unfortunately, that’s a lot of steps to start a run, so that already runs a fair amount of the hourglass out; I think the game intends you to time things out, storing items safely so you don’t have to deal with this.
You can hit ENTER on its own like a Sierra game to switch to text mode; if there’s items here they’ll be listed before the short description.
b.) One of the pieces of the Coveted Mirror is in the maze.
This is the first mention of the Peak of Shards. Metacommentary is an odd place to be introducing lore.
Dropping into trapdoors, you can make it into a kitchen…
Despite lots of visuals going on, the only thing I could find to do was GET FISH.
…and also a Great Hall.
This seems like a good moment to remind you that many of the scenes are animated; in this case the dog’s tail moves. I haven’t been able to interact with it but I assume some kind of food or bone would be appreciated.
The Great Hall is connected up with Voar’s throne room if you feel like getting yourself caught directly, and two rooms which have a random chance of encounters. This mechanic shows up much more in the town, but I’ll mention now there are a fair number of rooms where you may or may not meet a character.
South of the dog is the jester.
TALK gets this response. I think I know what the jester wants, just I haven’t managed the logistics yet of shuttling the item over here. It wasn’t clear to me right away that this was even an item request, I thought for a while maybe OFFER HELP or the like would work, but conversation seems limited to TALK in each location it can happen.
East of the dog is a bard (which, again, shows up at random — the hall may be empty).
Doing TALK here gets the response:
SO MUNJISTAN & HIS SILENT FRIEND FARED LONG AGO TO THE MOUNTAIN BEND. IF YE ASPIRE TO ASCEND, WAIT WITH THE RING AT THE DARK FOREST’S END.
I don’t think any further puzzle is here (although if a music sheet shows up it would be worth taking to the bard). North is where Voar is hanging, and to the east is a room with nice art and not much description.
Just a general fact about the keep, rather than trying to describe the room (and making clear the broom is takeable).
Time for an escape! Fortunately back at the staircase you can just go south, and there’s a window you can open.
The random mention of the Queen. I hope I’ve made clear why the confusing lore like this can be frustrating in an adventure game; is there a Queen that’s alive we are trying to find? If so, that means some artifact that seems like it belongs to the Queen might be an aid in finding her. Maybe she’s in the tower past the locked door?
To the east of the “main entrance” you pass by is a “good place to hide loot”; I haven’t experimented with if there really is a problem dropping objects in random places and you have to be strategic to avoid things being yoinked.
You see this as walking away from the castle and towards the town.
Here’s my map of the town:
There’s a lot of content, and I’ll mostly take it north to south. At the far north there is a tree where going UP lets you climb and find an AX.
It’s not clear these are climbable trees. Fortunately I was obsessively trying N/S/E/W/U/D in every room.
If you try to take the AXE the game suggests you use AX instead. I find it fascinating when the game clearly understands your meaning but tries to force your typing in a particular way instead rather than just recognizing the alternate spelling method.
The next east-west row has a tavern on the far west, where you get something stolen when you enter. I haven’t noodled here at all nor worked out if the game is softlocked once an item is stolen.
There’s a gate where “Starina” (optional encounter) tells you IN THEE LIES THE HOPE OF ALL STARBURY. GREAT HOPE MAKES THEE GREAT! and I’m again wondering what the biographical context of our main character is, and if it matters for any puzzles.
Past Starina to the east is an astrologer, who is pining after a fortune-teller, and the fortune-teller right next to him.
We’ll be back here later with the crystal ball she wants.
Going back to Starina and heading south, there’s a blacksmith (who needs something to help with his fire) and a hovel.
South even further is a “town square” with multiple possible encounters, including “Granny Garbled-Marbles” who lets you know a candlestick of hers was stolen by an Abbott.
To the east is a church, with Brother James (and the aforementioned candlestick) and the Abbott’s room.
If you try to read the book, the Abbott appears and throws you out.
To the west is a glassblower place, where you can find a crystal ball. This is the ball you need to take to the fortune teller (mind you, the fortune teller seemed to indicate she had lost her ball and you’re finding it … this seems like you’re getting a new ball?) When trying to GET BALL the glass-blower first quizzes you on what a picture is, showing it piece by piece; you need type MERMAID and you can go ahead.
Just to jump ahead a bit, if you take the crystal ball back to the fortune-teller, you get told about a magical vase:
Was the scene necessary to win, or will you find the vase anyway even if you don’t hear about it first?
Resuming our north-south walk, on one side is an alchemist.
He needs the candlestick. I’ll do that whole sequence in a moment.
Across from the alchemist is a bakery, where the person inside needs an ingredient for chocolate “moose”.
Reaching the outskirts of town, there’s a path passing by a pig, chicken, and goose (at various moments, their appearance is random); there’s also a horseshoe lying around which I believe is the lucky item the jester wants.
Further on is a shop where you can “appraise” items. It will determine which items are considered valuable as bribes (this is quite directly given in the text — something is listed as valuable or not “TO GUARDS”).
Also, there’s someone sewing with a cat.
There’s still more map south past the town, but I’m just going to highlight a couple things. First of all, you can find a joust minigame. You are informed you need to win four times in a row. You can move a shield and a lance independently, and it is possible to win, lose, or tie at any clash. I don’t know what you get if you win.
(The game also keeps track of your hourglass time and you will get booted back to the Dungeon once time is up.)
Similarly, you can also find a fishing minigame nearby. Again, I’m not sure what the reward is, although I found this easier than the jousting. Again, hourglass time will pass as you fish, so it is possible to lose by getting booted back to the Dungeon.
This and the other minigame show our avatar!
Finally, there’s a stockade just outside of town. If you talk with the criminal within, they let you know they have a lockpick out next to the tavern. You’ve actually seen the lockpick!
That little dot and line in the bottom right is the lockpick! (This, plus the minigames, plus the emphasis on parsing the world visually rather than reading text, plus the people appearing at random, make me think of later Sierra games.) You can just GET LOCKPICK, even if you hadn’t heard about it previously from the criminal.
With the man free, head over to the church, and he’ll cause the Father to chase him so you can grab the candlestick. You can then take the candlestick over to the alchemist who will take some of the metal for alchemy (not the whole thing) and he’ll give you his bellows. You can then take the bellows over to the blacksmith who will trade you his shovel for the bellows. I have yet to be able to dig anything up with the shovel.
That’s mostly it for this update, but one more thing: I was captured with all the aforementioned items, retrieved them, dropped down the trapdoor to the magician room, and then lit the candle using the fire at the flask. I could then open the cupboard and go in where it was dark, finding an item.
Just to recap the obstacles remaining, I need to deal with
a.) the jester (just need to get the horseshoe over, most likely)
b.) the locked door
c.) the various people in the halls (likely need the invisibility spell, likely meaning I need to find a witch)
d.) the people at the tavern (and the cryptic mention of sign language)
e.) the astrologer who pines after the fortune teller
This might just be for color, but maybe you give a flower or something along those lines.
f.) the Abbott and the book
g.) the “moose” ingredient
h.) something at the sewing shop (nothing seems to be requested?)
i.) winning the joust
j.) winning the fishing
k.) some exploration past the town which I’ll save for a different post
l.) probably at least one thing I’m missing because of the random appearance of characters and also the fact exits aren’t mentioned, so I have to test N/S/E/W/U/D in every room and I likely missed one by accident
I haven’t had a game split in this many directions in a while. The time-limit part is interesting in keeping each expedition “directed” (for example, jousting and fishing take enough time that they likely each need their own individual journey, without any extra stops). I certainly don’t need any hints or suggestions yet, so please save those for if I later get stuck.