As a child I was obsessed with making stuff, it started with cardboard boxes and moved on to wood by the age of 5. By 10 I was constantly visiting rubbish dumps to find broken electrical stuff I could use to build what ever my imagination could imagine. Space ships, cars, satellite dishes to search for aliens – Of course all of this failed.
— Martin Webb, writing in a 2020 forum post
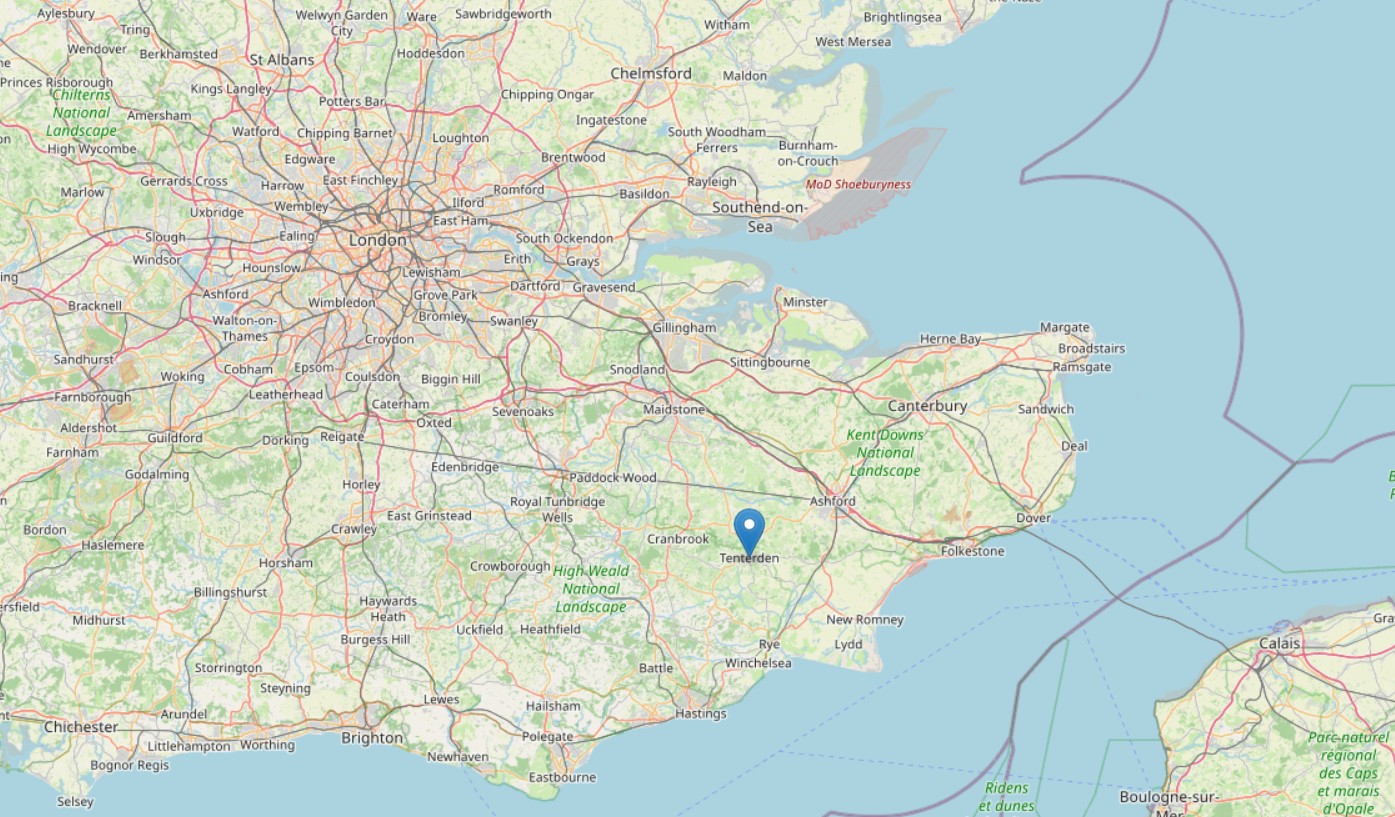
Tenterden, in Kent.
For all the games we’ve seen so far by teenagers, even when commercialization has happened, parents have either been standing by the sidelines or supportive. Software Innovations, founded by four 16-year olds, included “$100 investment donations from parents”. Greg Hassett, who wrote his work between the ages of 12 and 14, had his initial publisher contact (Mad Hatter Software) through the Boston Computer Society (founder, 13-year-old Johnathan Rotenberg). Alex Kreis’s parents sold their family upright piano to get him a computer and his initial publishing was through direct personal contact with the editor of CLOAD. We have a picture of Tim Gilberts (of later Quill fame) selling software with his parents and by his account it was a happy time.
This is in contrast to, say, child movie stars; Shirley Temple famously earned over $3 million during her film career but only had $44,000 in her trust fund, and horror stories about mental pressures abound. I would theorize that computers (and the idea of making a career selling software) were so new that parents didn’t understand enough to try intervening; the parents that did understand tended to be of the “engineering” slant so they were more interested in the technology than exploiting it for money.
Martin Webb is an exception to this; he was the programmer/artist behind Intrigue Software starting in 1983 (at age 13), and his father Dennis was the company manager. They started with producing games for the TI-99 computer.
It was a good money spinner. I had become pretty proficient at rolling out TI-99 games and that was good for business and keeping dad happy. When I made a game the orders followed.
When the TI-99 started to slack:
Dad kept dragging me to the bank telling the bank manager I was a whiz-kid, and the bank manager increased the overdraft. It was that easy. Dad would just tell them I was making a new game, roll off some sales figures and the money was given.
This seems to be a case where the parent was driving the production, rather than the teenager. Speaking of 1987 (the same year the teenaged prodigy produced the US Gold port of Outrun for C64, cover above):
Up until now dad came up with the game ideas. I would sit in my bedroom while my dad was in the spare room running the business, and of course trying to keep a 17-year-old on track to get the games finished. I’m a total perfectionist so I can’t imagine how hard that must have been. That said, teenagers and parents are not a good brew and we had a fair few problems, usually resulting in me running off into the Kent countryside and my dad driving around looking for me. I’m smiling now but back then it was really bad. The arguments started off verbally and soon turned to marginal fights and later got worse.
The family finances behind the scenes were be part of the issue; in other accounts of teenagers publishing the families seem to be relatively well-off (or even outright rich in the case of The Desecration) whereas Martin talks about money as an active motivator:
For some reason seeing the coloured tape cover of SANTA and the GOBLINS brings back the most Nostalgia – I think that time was very difficult at home when I made this game and as a child (14 or 15?) I guess i had dreams of making $$$ and solving family money issues.
The text adventures from Intrigue were
▸ Alpine Quest (1983?)
▸ Adventuremania (today’s game, 1983)
▸ Santa and the Goblins (also 1983)
▸ Mania (1984, and sequel to Adventuremania)
Alpine Quest is mentioned here by “Firefly” but not in a 1985 catalog so I’m unclear what’s going on:
The parser was a strange one; you couldn’t just type EAT FOOD … it wasn’t even a two-word parser, you had to type EATFOO so three letters of first word, no spaces, and three letters of last word …. I now realize why i couldn’t get off the first part of Alpine Quest because that would have been the same.
Maybe it was non-graphical, and consequently the Webbs wanted to prune it from the catalog? A different forum thread mentions going to someone’s basement to buy the game so maybe it had esoteric distribution. It isn’t mentioned on any of the usual archive sites, including the TI-99 Italian User Club which has a thorough collection of materials on Adventuremania.
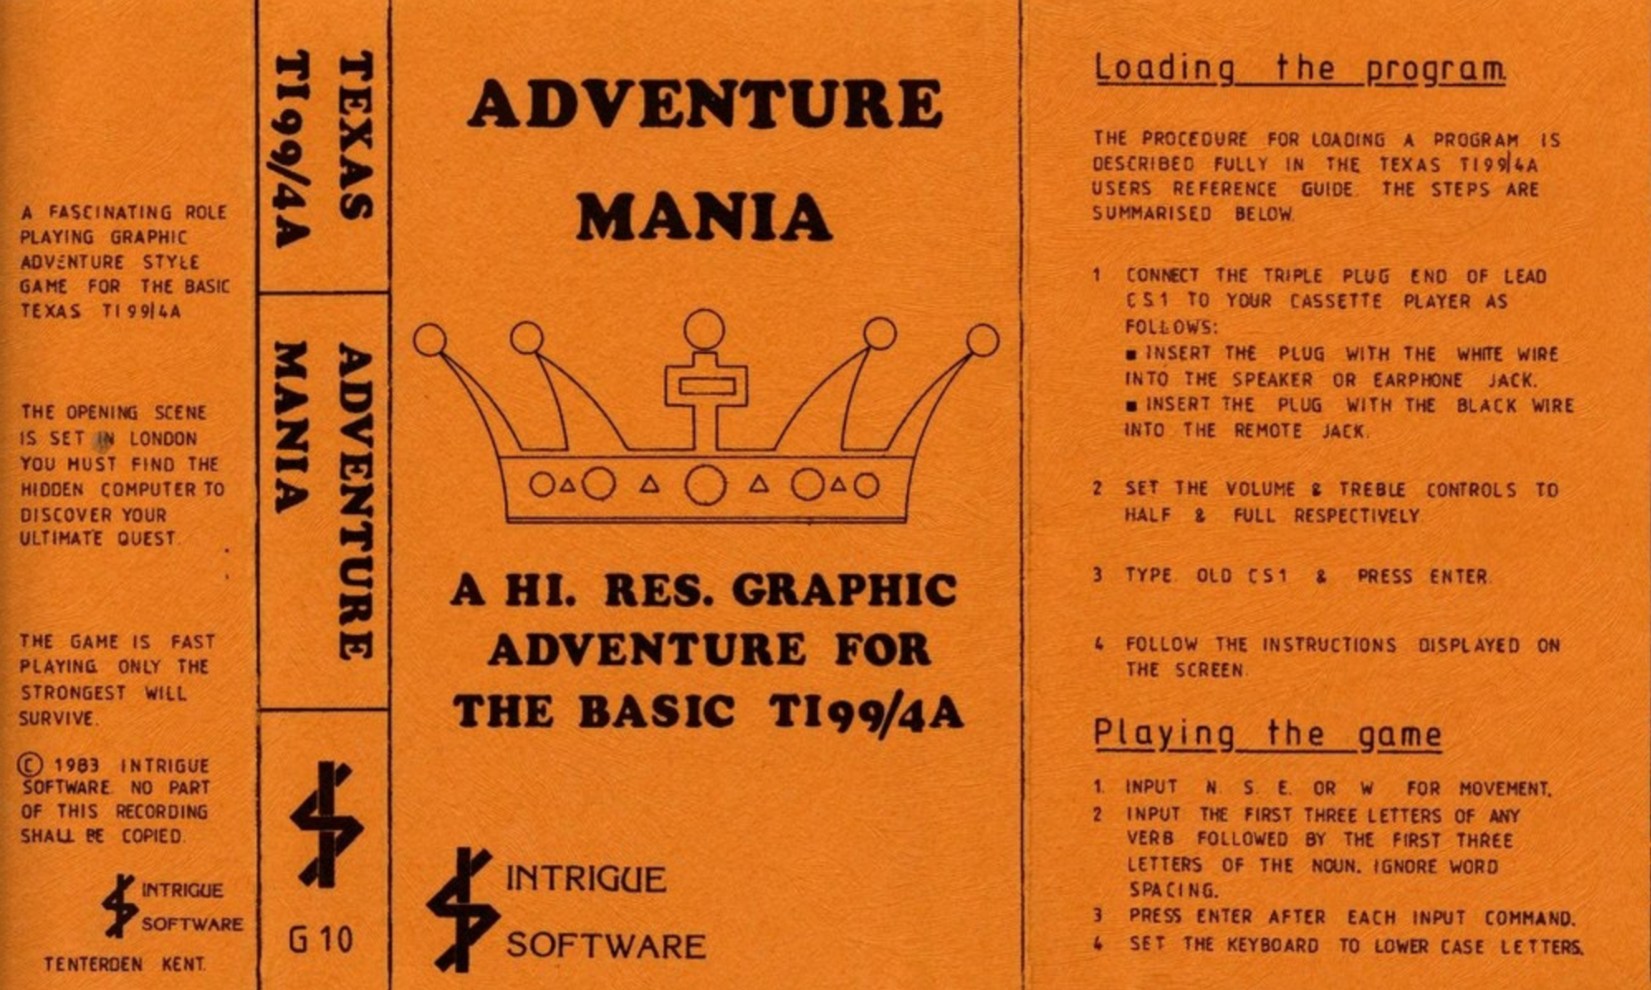
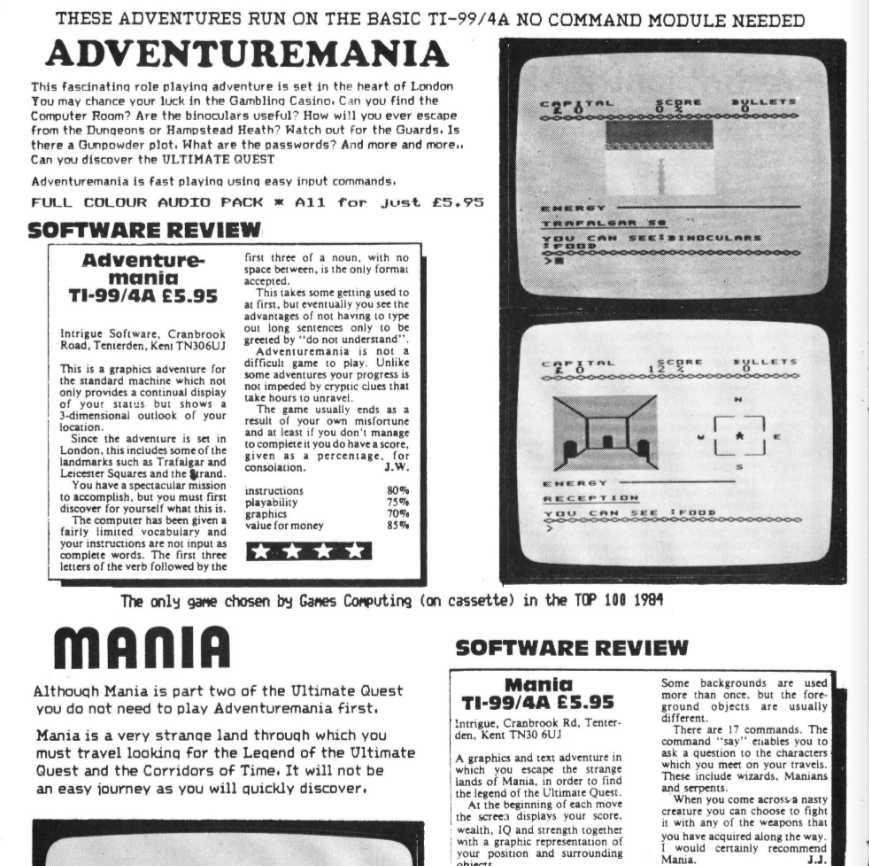
As the quote from the forum implies, this has a deeply odd parser. You’re essentially typing clumps of six letters, like TAKREV for TAKE REVOLVER. What I believe is the first printing (see above) doesn’t give much help in understanding this; fortunately, the game went through multiple printings, so we have more details. Specifically, we get a full verb and noun list:
verbs: tak(e), use, loo(k), res(t), ope(n), eat, bri(be), say
nouns: bin(oculars), bla(ck key), mem(bership card), pet(rol), mat(ches), lad(der), com(puter), rev(olver), bul(lets), mon(ey), foo(d), tap (water), tic(artridge)
“Say” gets its own special syntax examples; the game gives passwords and this is the specific case where you type more than six letters:
saynelson
saymaster key
sayqueens key
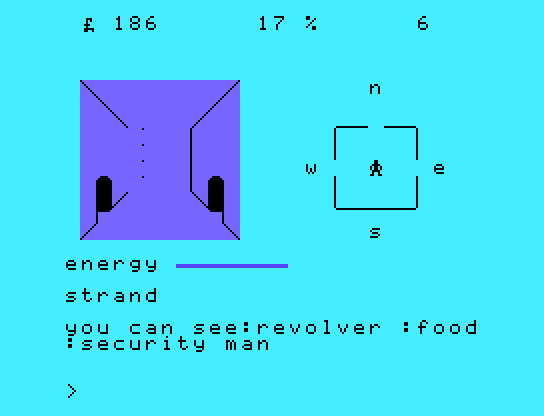
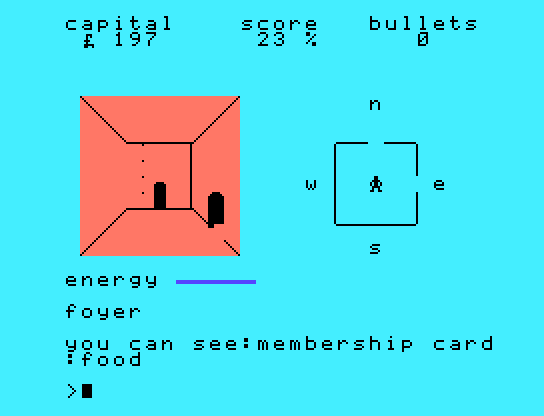
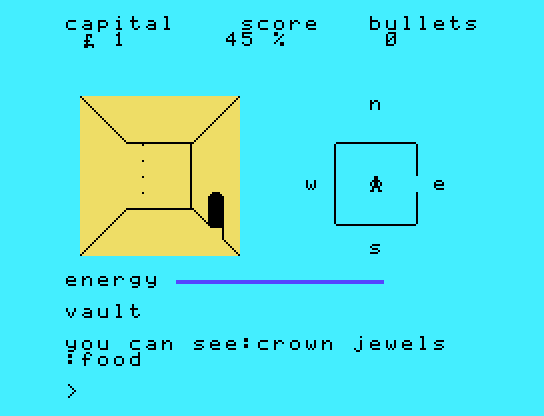
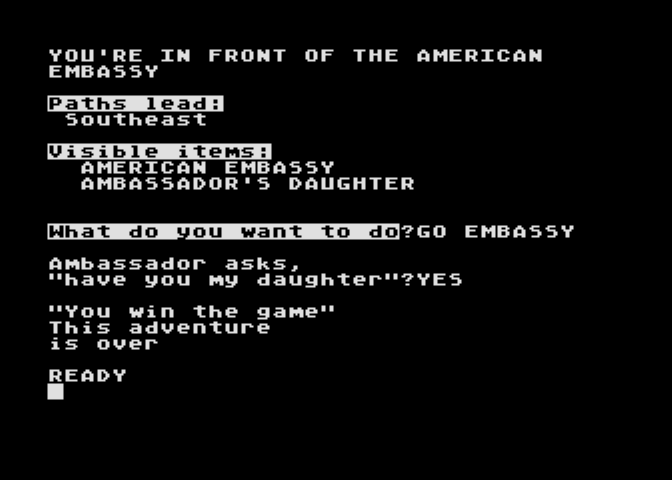
The initial goal is to FIND THE HIDDEN COMPUTER TO DISCOVER YOUR ULTIMATE QUEST although I’ll spoil right now the actual final goal is to steal the Crown Jewels of London.
The game has a bit more of a “strategic” layer than is usual, tracking “energy”, “money”, and “bullets”, and having “food” distributed across the map you can eat (and can’t take, I mean, “tak”). You start at Trafalgar Square, with a TI-99 graphical rendering of Nelson’s Column.
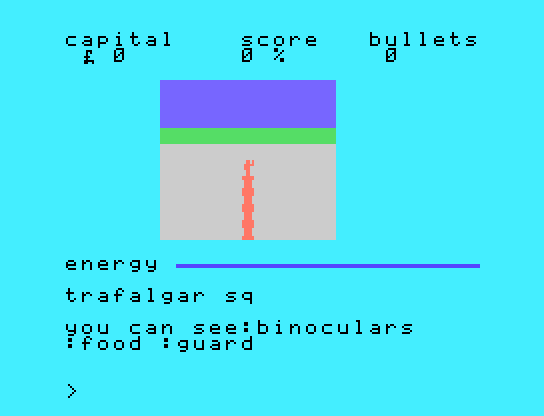
You would think using the binoculars here (“takbin”, “usebin”) would show something useful due to the Column, but the game just says “everything looks bigger” which is the default message for using the binoculars anywhere. The instructions include a hint that the binoculars will show one of the passwords somewhere but I never did see it.
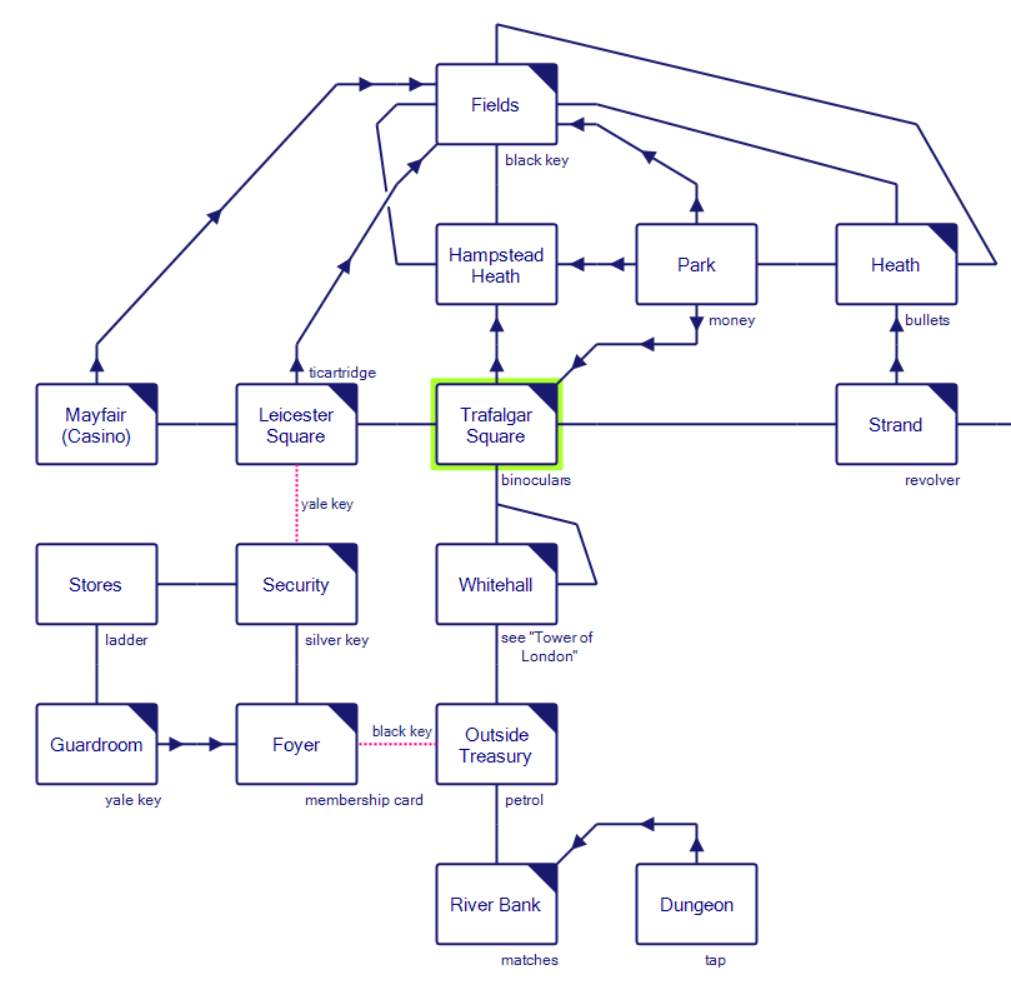
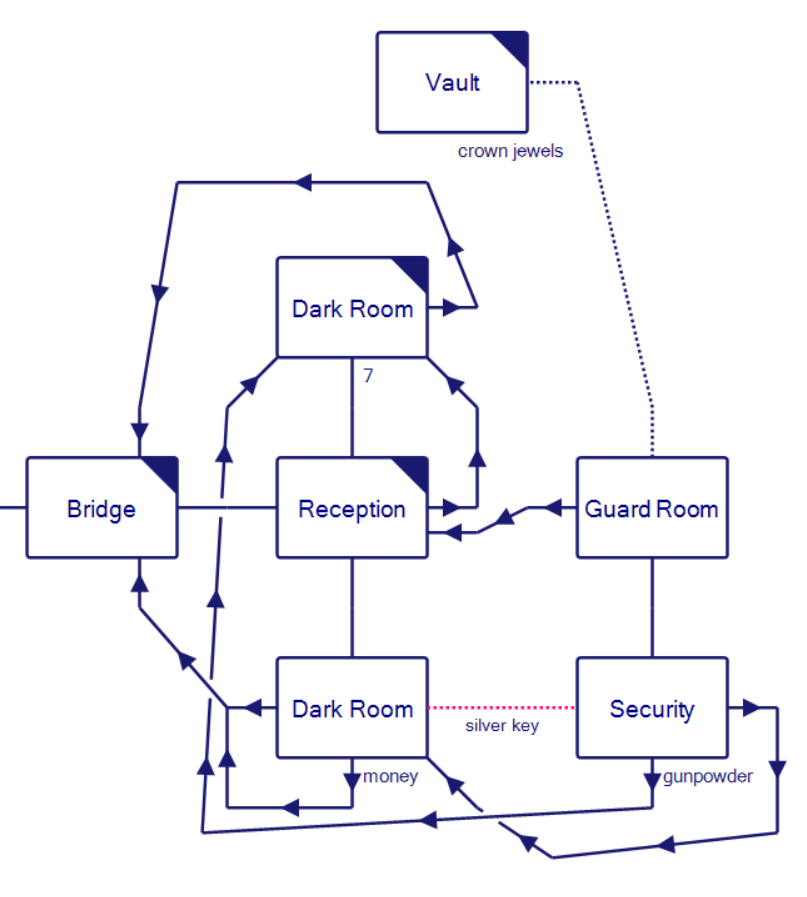
The corner markings are all rooms that have food in them; remember you can’t take the food. Your energy bar goes down each step you take, and the main obstacle to the game (other than getting thrown in the dungeon, which I’ll talk about in a moment) is just running out of energy. It feels a little bit like strategic Pac-Man, and when I eventually worked out my route I was using I had particular foods to eat in mind in order to keep energy reasonably high.
Often a room will have a “guard” or “security man”; there seems to be no difference between the two. For a while I thought the “revolver” plus “bullets” might do something but as far as I can tell the revolver is yet another gun-as-red-herring. There’s no command for shooting it and “use” on it isn’t understood.
You can just try to walk on by when you see a guard; a fair amount of the time (maybe 80%) they’ll do nothing. The other 20% of the time they’ll toss you in the dungeon.
You keep all bullets etc. when this happens; thankfully the game doesn’t scatter your objects across the map.
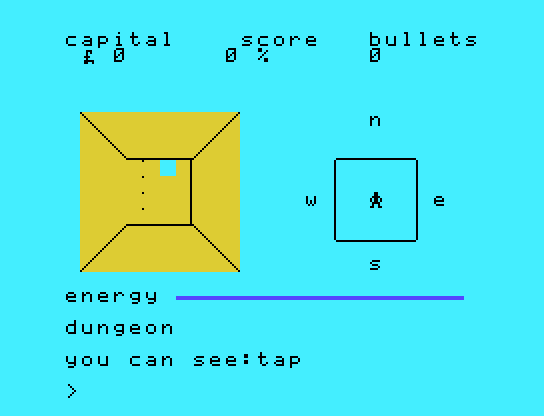
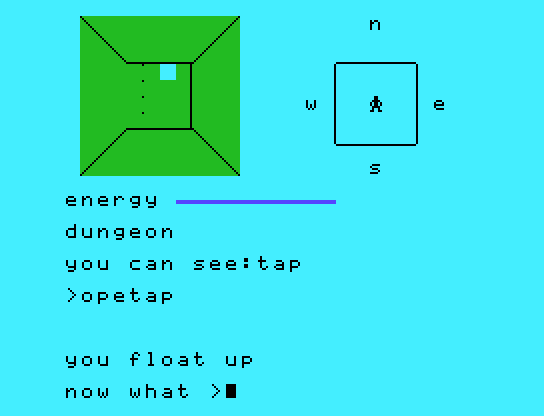
After some fiddling I chanced upon OPEn TAP as starting to fill the room with water; it then asks what you want to do next, and if you type the wrong thing you drown. You’re just supposed to type “n” as in “go north”, but the game doesn’t make it clear that north represents a way out!
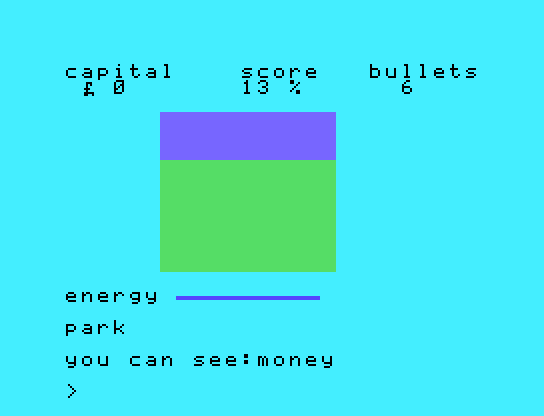
This means, theoretically, you can ignore all the guards, but I did still find it annoying to leave them un-dealt with; fortunately there’s another option: bribery. Two spots on the map have money you can pick up, and if you “brigua” or “briman”, you are prompted to ask for how much you want to bribe for.

Checking source code (before winning, although only this element in particular), I found that the chance of success is based on the fraction of your wallet you’ve given out. So if you have only 1 pound, bribing 1 pound has a 100% chance of success. If you have 100 pounds, bribing for 80 will have an 80% chance of success. There likely is some interesting mathematical strategy to optimize this, but I found just going for 90%+ each time (and grabbing the money in the second spot it shows up in) was enough to get through the game.

The TI cartridge goes in a computer which tells you your mission, but I never saw the computer. (Still won the game, though.)
To summarize, the strategy elements are:
a.) an energy bar that goes down, and you have to eat food to replenish it; you cannot pick up the food, you can only eat the food as it lies in particular location, like you were Pac-Man eating power pellets
b.) guards that are randomly in particular spots, and will sometimes toss you in the dungeon when you leave
c.) the guards can be bribed; the revolver makes it look like they can be shot as well, but that seems to be a red herring
Ignoring various items that seem to be red herrings (like the petrol, which only serves to explode if you light some matches in an adjacent room), the goal is to first nab a black key out in the fields, then take it back to the “treasure” and unlock it.
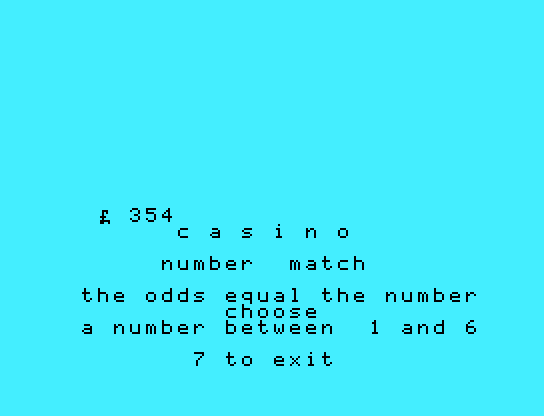
The membership card is technically not a red herring, but it just lets you enter a casino if you “usemem” at Mayfair. The casino game has you pick a random number from 1 to 6 and if you get it right you get your stake back. It’s not worth it.
You can ignore the membership card and the ladder in the treasury (no idea what the ladder does); what you need are the silver key and the yale key. The yale key can be used to get back outside (incidentally, the guards don’t toss you in the dungeon if you exit a room with a key), so you don’t have to bother with a bribe in such cases.
You can then make a beeline for a bridge to the east.
This is the Tower of London. A reception room is at the center.
There may or may not be a guard. The food here was one of the ones I would always eat.
To the north there’s a “dark room” where if you use matches (without holding the petrol) you see a message about the password MASTER KEY, which I never used anywhere. There’s also an object which is just the digit 7.
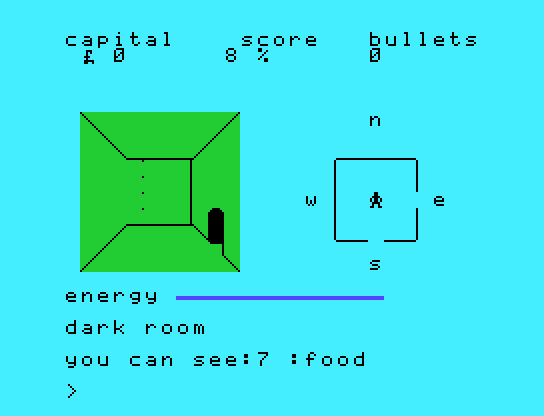
I don’t know what this is all about. I assume a typo in the BASIC?
To the south there’s a locked door where you need to use the silver key (which is why we needed the treasury run), then some guard rooms followed by another locked door. None of the keys work.
I went to the three words in the instructions, even though I only saw MASTER KEY. QUEENS KEY suddenly warped me to the jewels:
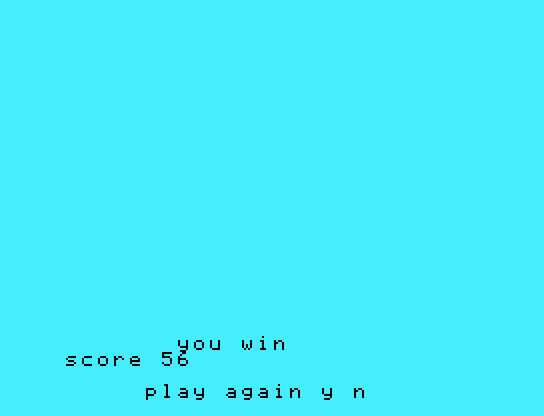
Take the crown jewels, and you get a “you win” screen.
I admit I was not bowled over enough by the game’s quality to want to work out where the other two words were, or where the computer was hiding. I did check through the source code and it didn’t seem like I was missing anything; my assumption is MASTERKEY gets used somewhere to find the computer…
1153 PRINT TAB(8);”congratulations”: : : :
1156 PRINT: : : :”your mission is to steal thecrown jewels.”
1159 PRINT “on nelsons column is the keyto the vault.”
1162 PRINT “go sightseeing in whitehall.”
…and related to Nelson’s Column is the QUEENS KEY password, except all three passwords were in the instructions (on the back of the green one I showed earlier) so there isn’t really a need? If someone wants to noodle around in the comments they’re welcome to, but I can say I feel sufficiently wrapped up.
I do think the strategy elements ended up being more interesting than I expected once I understood what the rules were; I first thought guards were blocking particular passages before I realized they were acting truly at random. Certainly knowing the bribery was relative to how much the player had at that particular moment was useful.
That’s part of the reason the casino is rubbish and you shouldn’t bother. Also the odds are rubbish and there’s no way to savescum (there’s no saved game feature).
The food-lying-around may have broken verisimilitude hard but at least the logic to planning a route (while simultaneously being unclear what actions are needed to beat the game) made gameplay sense. At least I’m not horrified at the thought of eventually going back to the sequel (Mania, in 1983).
From the 1985 Intrigue Software catalog.
Thanks to gschmidl for helping me past some technical issues; if you want to play the game, I’ve dropped a package here that has it configured.
I’ve finished the game; this is continued from my previous post.
Portion of the ad from Softside’s January 1983 issue announcing that Adventures of the Month are now being moved to the disk/cassette version of the magazine.
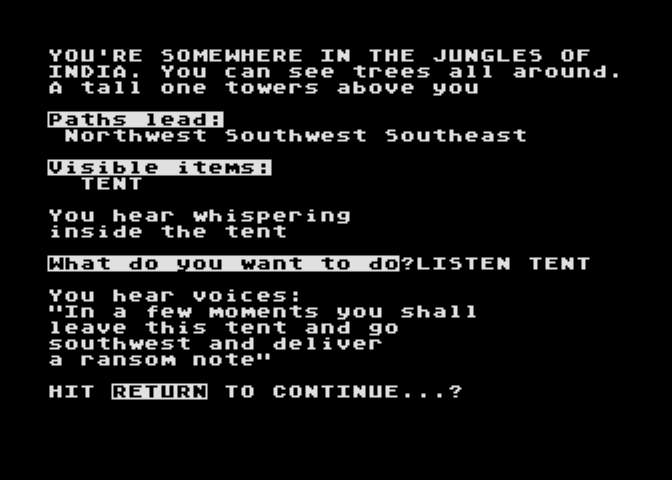
Just to get it out of the way first, we’ve got headhunters again, something I’ve written about before. Since this is set in India and vaguely Indiana Jones-shaped I checked in case it was making a reference, but Temple of Doom came out in 1984. Perhaps Indiana Jones was making a reference to it, or at least stereotypes like it; the movie has an infamous “monkey brains” banquet, and as Roshan Seth (who plays one of the villains, Chattar Lal) explained to Empire magazine:
The banquet scene was a joke that went wrong. I got a great deal of flak for it because people kept saying, “How does an intelligent man like you agree to be in a film which shows Indians dining on beetles and eels?” Steven intended it as a joke, the joke being that Indians were so fucking smart that they knew all Westerners think that Indians eat cockroaches, so they served them what they expected. The joke was too subtle for that film.
The original script had a line from Indy that Hindus wouldn’t touch meat and this prompts an additional line about being suspicious of who the hosts are; it never made it to the film.
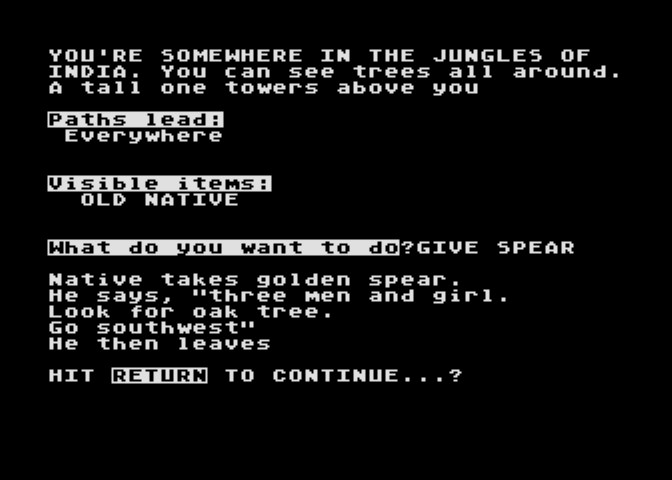
Moving forward, I was stuck last time on a bear, or at least a bear was stuck on what I thought was likely an oar, but the bear was sleeping and wouldn’t move. What I had neglected to do is LOOK TREE.

(Nevermind climbing the tree doesn’t mention the nest, even though you’d think it would.) Throwing the apple at the nest resolves the bear issue. You can throw the knife instead but it loses whatever item you throw (and you can go back and get another apple; you’ll need it in just a moment).
THROW APPLE
At what?
(Example: AT NATIVE)
AT NEST
Hornets emerge from nest
and bear runs for his life
far off into the jungle
With that resolved, it was time to take care of the canoe. The stalling for time with the bear puzzle led me (via a comment of Voltgloss) to realize I could CUT ROPE twice and take the rope with me that was holding the canoe; it gets used multiple times later. I then hopped in the canoe, applying the previously-found PADDLE verb.
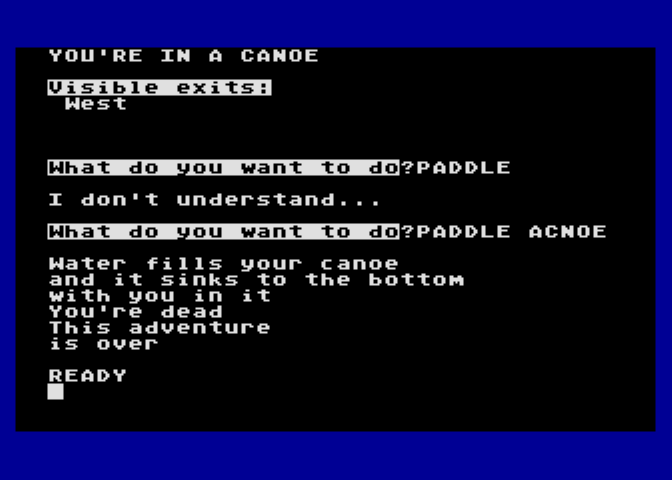
I find it interesting it doesn’t understand PADDLE, but does understand PADDLE ACNOE with my typo there.
You can LOOK CANOE to see the previously-unmentioned hole filling with water. You need to PLUG HOLE; the only item that works is the apple. Which is kind of absurd but at least the game has it come out mid-paddle.
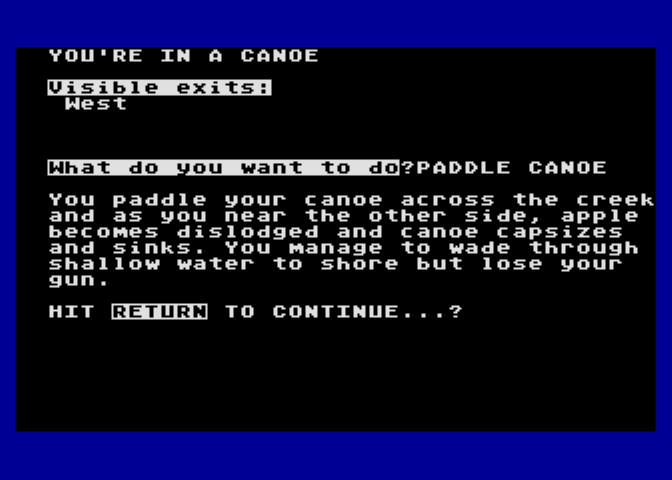
The lost gun (and fact it gets you just killed earlier) puts this as yet another data point in my list of games where weapons are red herrings>. The knife doesn’t get used for violence, either.
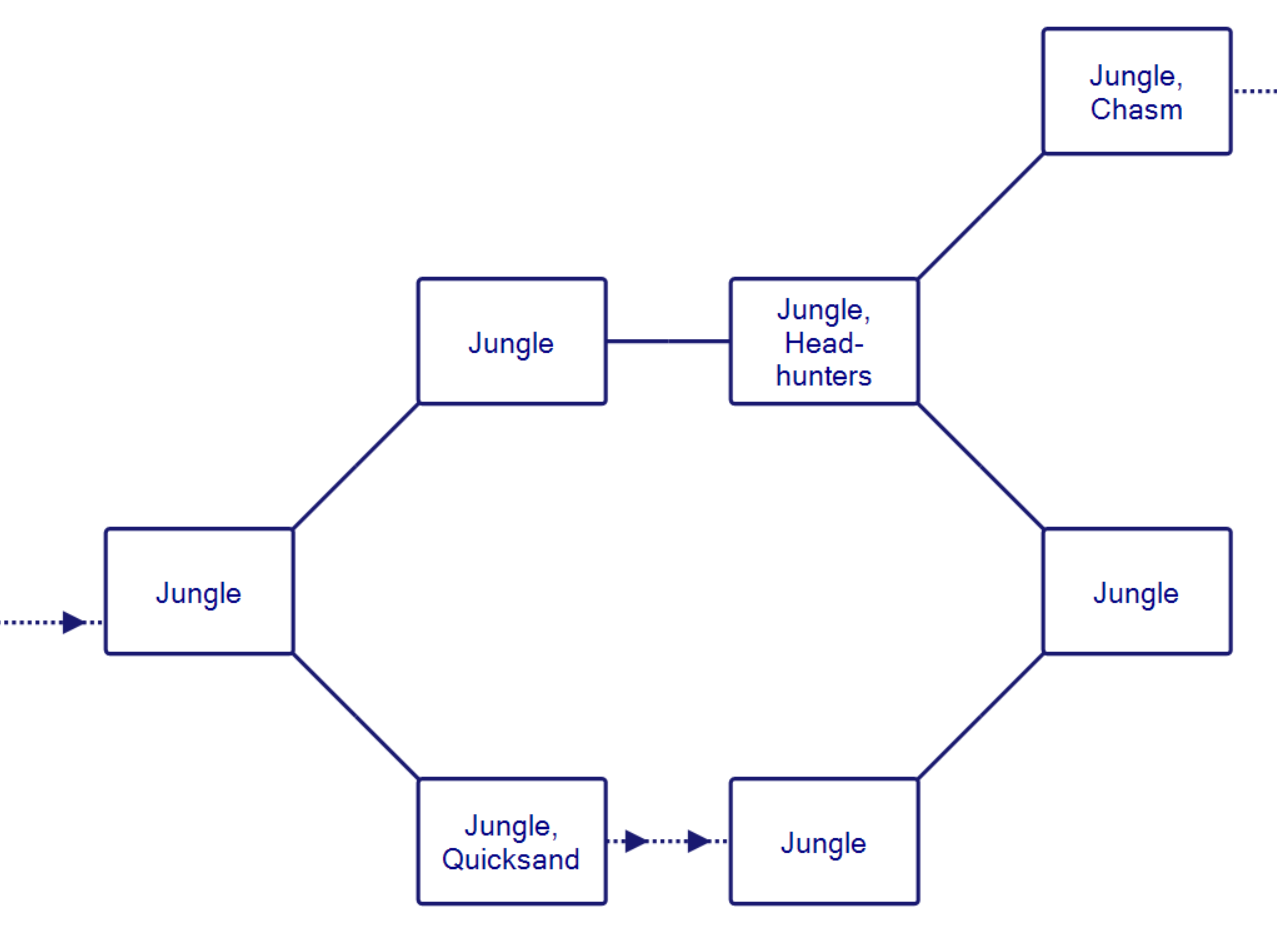
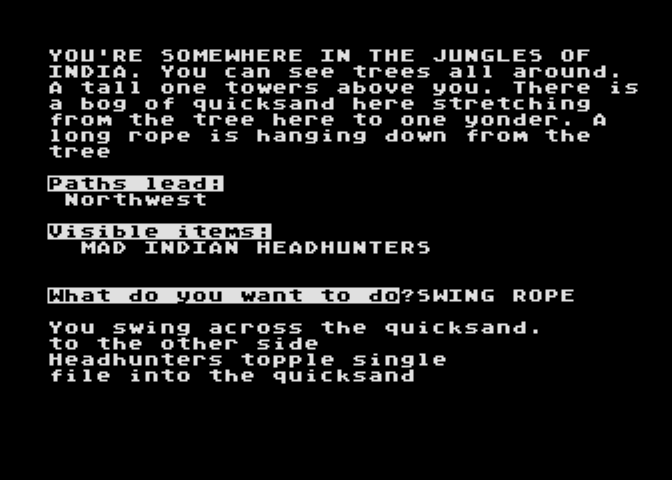
More jungle! This time it’s a small set piece, where to the southeast there’s some quicksand; you can CLIMB TREE (every single jungle room has a “tree room”, I’m leaving them off) and find there’s a sturdy branch. Assuming you remember to take it off the canoe, you can tie the rope to the branch, then go down and SWING ROPE across the quicksand.
To the northeast are some headhunters; if you try to pass by to the northeast, one will throw a spear (if you don’t, they’ll leave you alone, which suggests a structural-solving puzzle solution you’ll see shortly).

With the spear thrown the headhunters will go in hot pursuit and follow you around. If you haven’t guessed yet, the right action is to circle back to the quicksand, and swing over using the already-prepared rope.
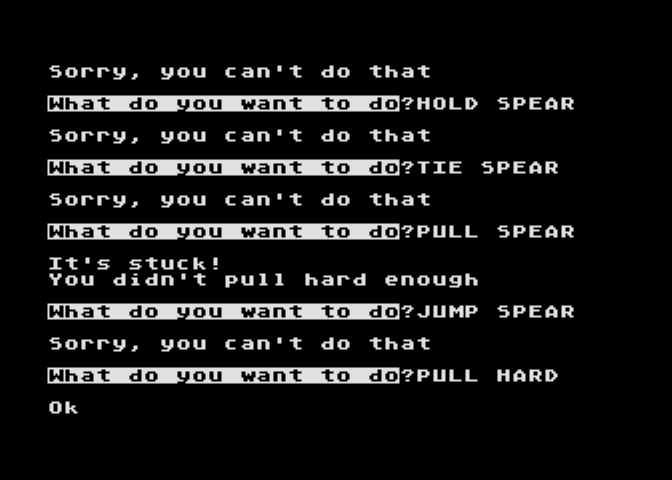
You then can retrieve the spear, except the game insists on having some kind of obstacle.
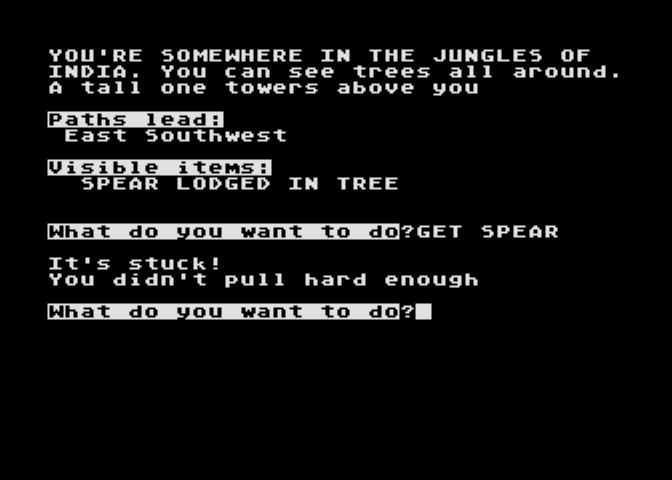
After much gnashing of teeth with PULL SPEAR and JUMP SPEAR I finally came across PULL HARD; applying a verb modifier is extraordinarily rare and downright abuse of the system (given the author-player contract generally has established it as a verb-noun form at nearly all other times, even disallowing PADDLE by just itself earlier).
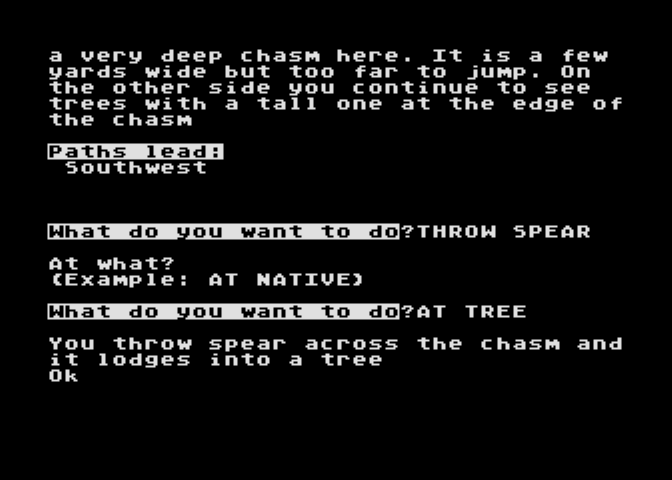
Past the headhunter section is a chasm; you need to tie the rope to the spear, then tie the rope to a tree on the side you’re on, then throw the spear before finally climbing the rope across the chasm. Strangely, it works intuitively well; ropes are infamous for having implementation issues, but it helps the rope refuses to let you do anything other than the right actions for solving the puzzle.
You can retrieve the spear (although you need to cut the rope to do so). It gets used one more time on the section right after: another maze.
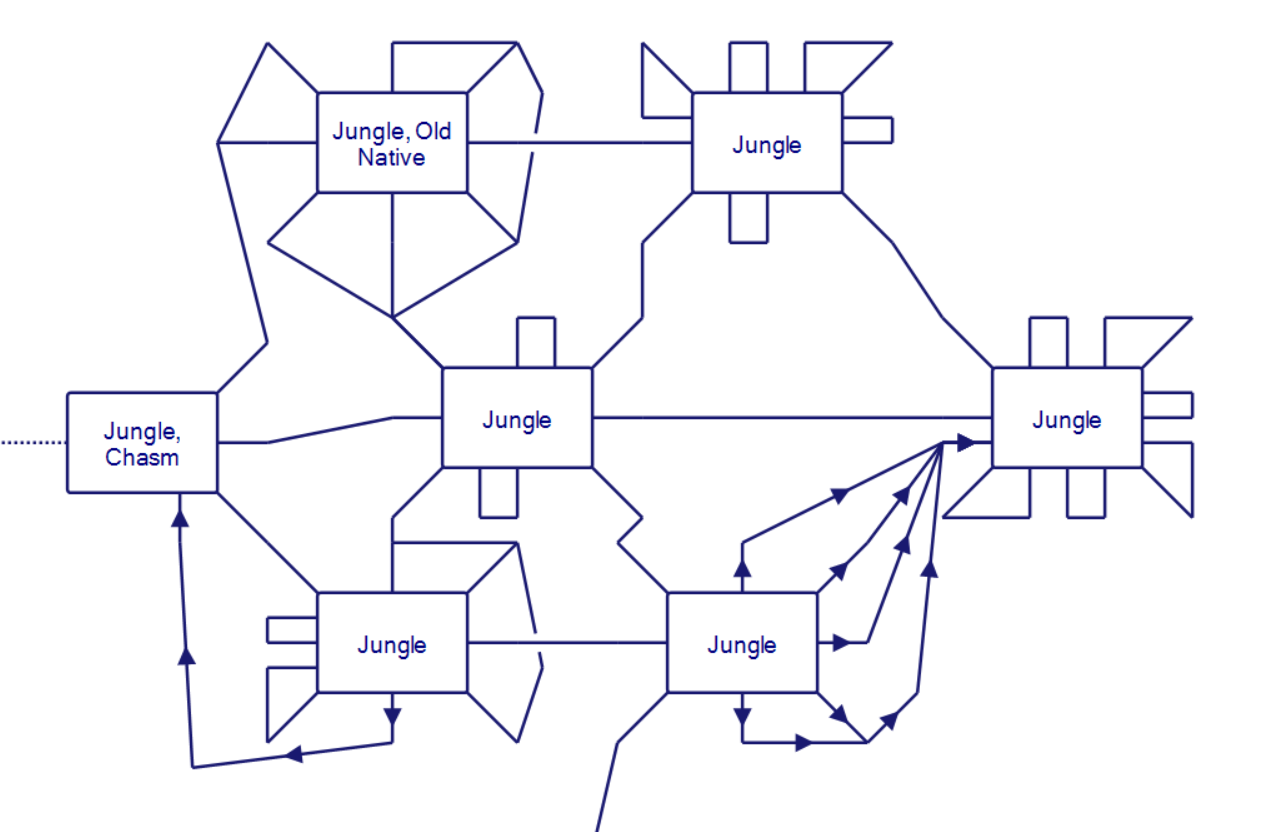
I get what the author was after; he wanted the jungle to feel tangled but didn’t want a full Crowther/Woods style tangled mess, but this still was a tangled mess to map out. Kirsch really wanted you to not bother mapping at all, because he added in a native who wants something valuable. You can hand over the spear, getting directions out of this area in the process:
I had my map already complete before I got this hint.
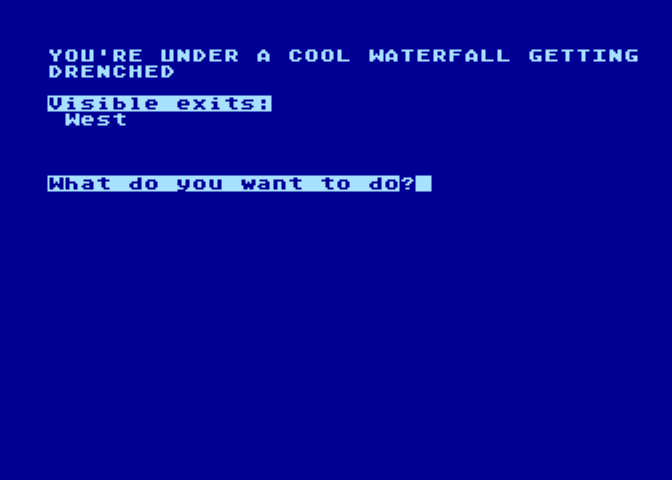
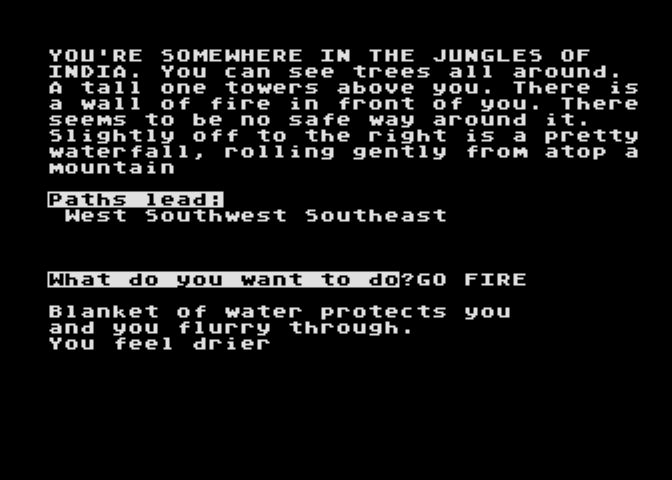
The southwest exit hinted at leads to another small area with a waterfall and wall of fire close to each other. You can GO WATERFALL first to get wet, then go back and go through the fire, where being wet is enough protection to pass through.
This leads to a northeast path with another LONG ROPE (always fun when you lose an item, only to find another version of the same item later; of course in code, it really is literally the same item). You can CUT ROPE to make two short pieces of rope, which will sort-of become important in a moment.
The “sort-of” is because you next come across a tent (see above) with the kidnapped daughter inside. Climb a tree and wait and eventually you’ll see a bandit come out; JUMP BANDIT to do a knockout. (As far as I can tell, this also works the same if you just go southwest for a while, wait, and come back to the tent.) You can then try to subdue the bandit via TIE BANDIT, and things go wrong.
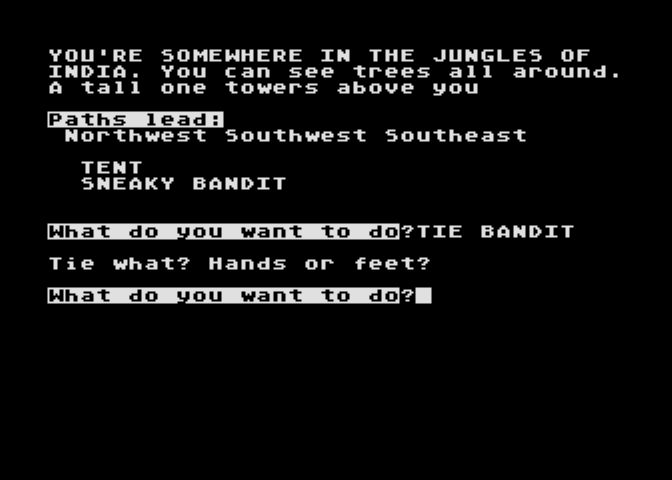
Dale Dobson couldn’t get the tying to work. He didn’t discover what I found, which is you can TIE HANDS AND FEET as one command (no longer even being a two-word parser) but even though the game seems to understand that it still breaks and the bandit kills you (“You didn’t tie me good enough”).
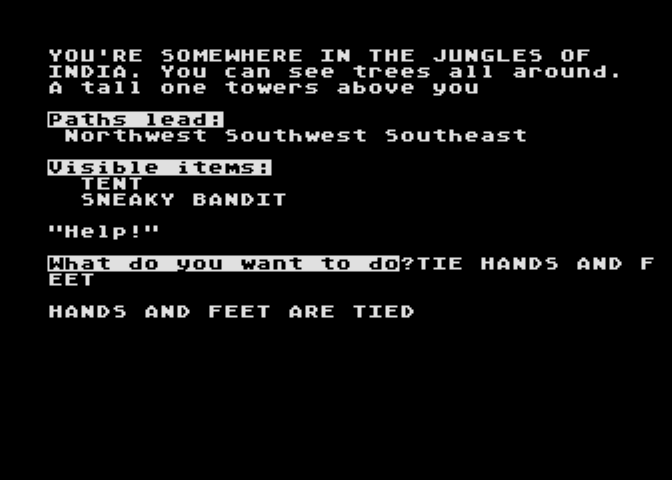
Dobson studied the source code and found the relevant line never gets called, so he (and I) continued playing via the command NT=3 followed by GOTO 300 (this changes a variable disabling the bandit, and then resumes the game).
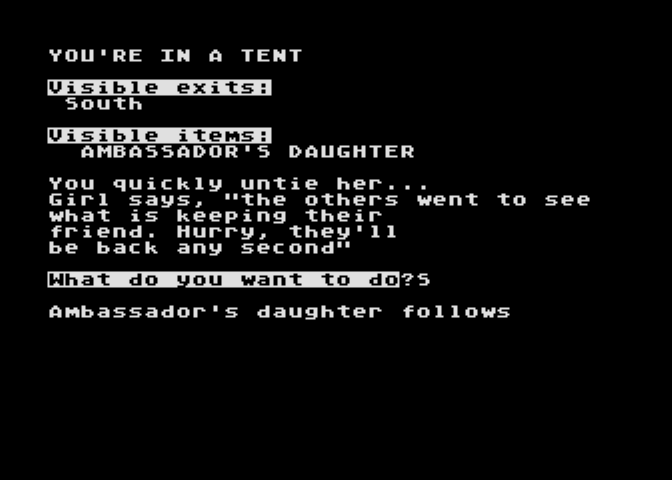
After all that nonsense was through, I was able to enter the tent and untie the daughter, who now follows the protagonist for the rest of the game.
The first obstacle is the two bandits that had left the tent earlier start chasing; you can fortunately get past a bridge where cutting the ropes seals off your escape.
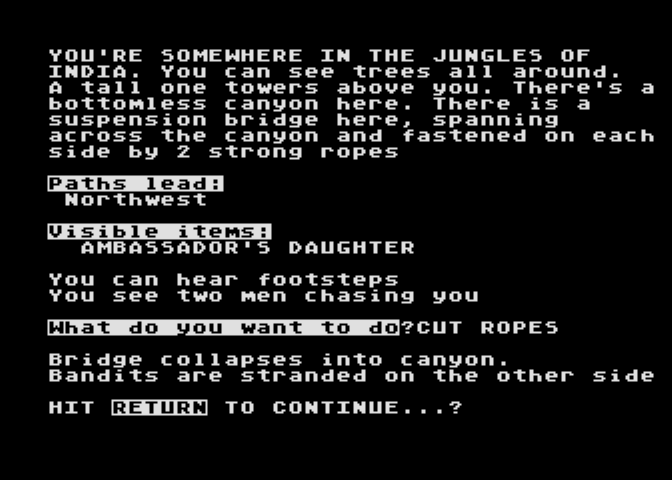
This is the other reason I checked the year Temple of Doom came out, although the bridge-cutting scene in the movie was much more dramatic.
Unfortunately, you’re not done with natives yet. A bit more jungle in and you’re blocked by MAD NATIVES; there’s a skunk nearby, but the way to handle it is via the command HOLD NOSE (not even pretending the parser is reasonable any more).
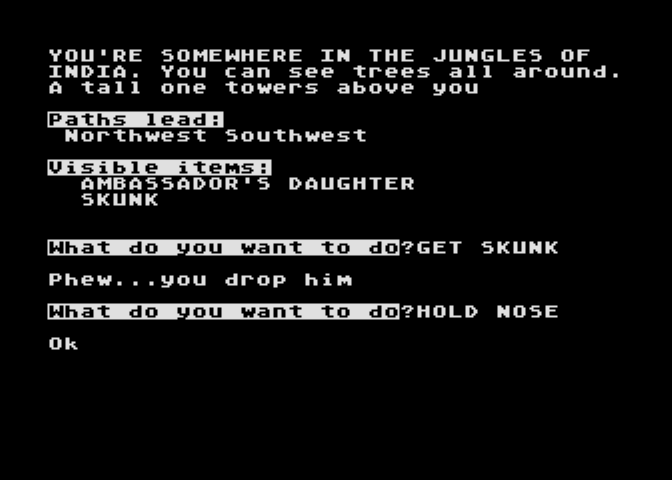
I think this is the first Kirsch game where you need to refer to a body part?
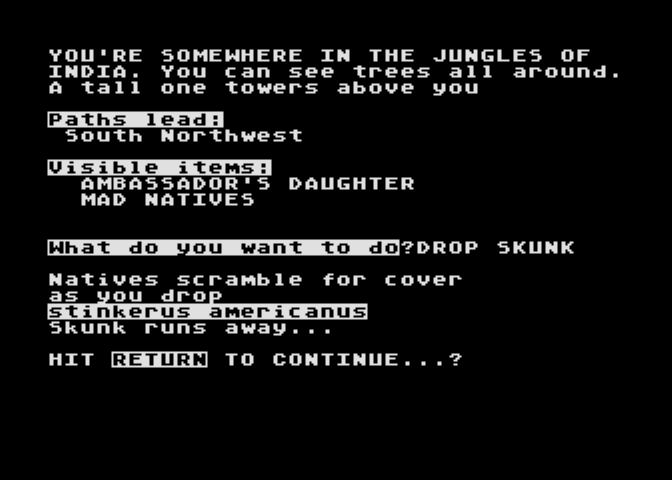
The actual scientific name is “Mephitis mephitis” although I like the “Stinkerus americanus” joke.
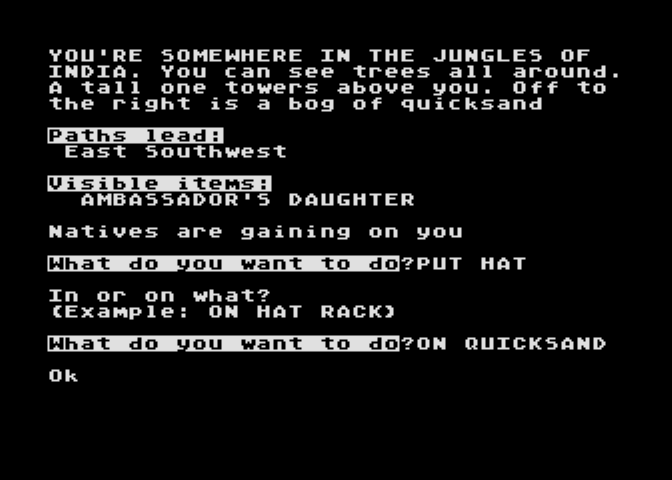
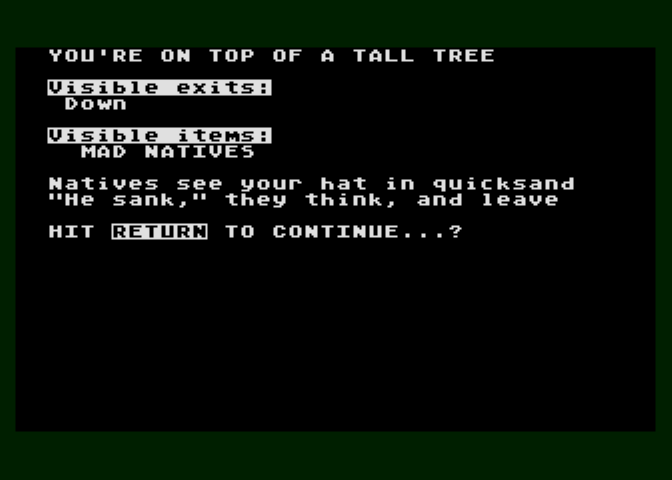
This lets you get by but then the natives go in pursuit. If you just try to outrace then they’ll catch you, and there’s no obvious obstacle like a bridge to stop them.
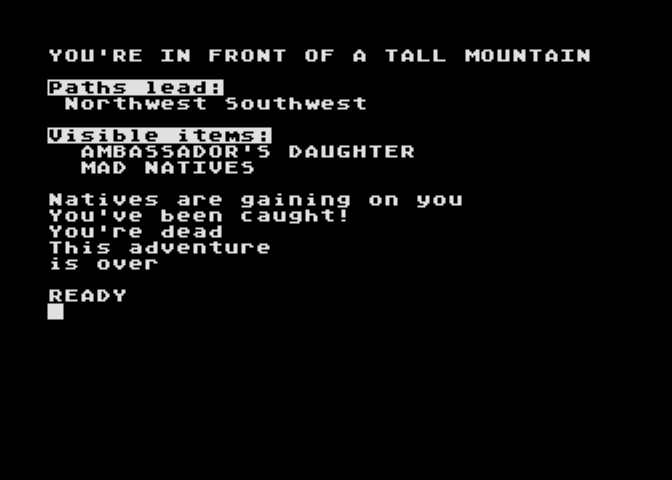
You do pass by some quicksand (not blocking the path) and this ended up being the most clever puzzle of the game (or at least it would be if there wasn’t parser struggle in getting the command to work). You need to put your hat on the quicksand so the natives think you fell in.
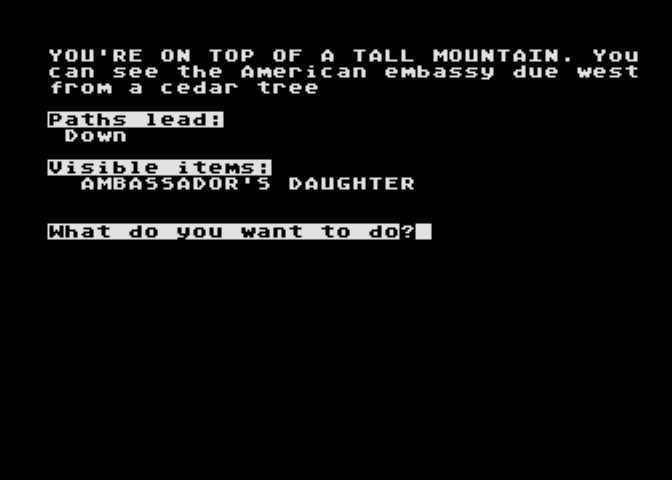
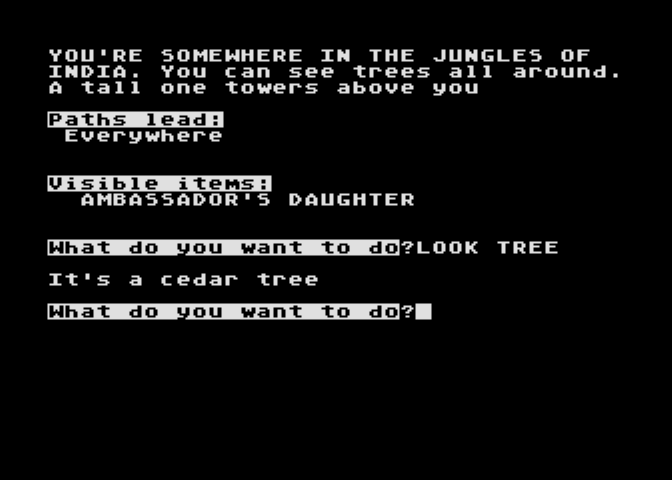
Then it’s a clear shot to the ending except for another maze. There’s a mountain you can climb where you will see the embassy is “west” of a cedar tree so the idea is to wander until you find cedar (LOOK TREE everywhere, that is), then keep going west. I already caught on earlier so I did not map the maze this time.
And that’s a wrap! Kirsch is still going full steam in terms of imagining scenes and then trying his best to enact them in the parser; they don’t always survive contact with the implementation which results in things like PULL HARD and whatever mess was happening with the rope and the bandit. I do think the presence of mazes weakened this considerably over his prior games with the same general weaknesses; while he twice gave hints for getting out and clearly did the layout thinking it was more of a “tangled map” than a maze, in practice I still had to deal with the same annoyances as most maps from this era have.
We’ve still got enough Kirsch games to go I don’t want do tier-list them out, but as a general observation, it doesn’t seem like he’s had an “experience arc” like you might hope; there isn’t continual improvement, just the same template being repeated in multiple ways where sometimes it sticks and sometimes it misses. I think the best Kirsch games so far have been
Kidnapped: early game, with building floors being a clever way to set out a series of mini-adventure games
Jack the Ripper: an extended preparation puzzle, including a very clever part with the killer’s knife
Around the World in Eighty Days: the source material is more or less just like a Kirsch game, so this meshes reasonably well
Dateline Titanic: recontextualizing the treasure hunt as rescuing passengers
Arrow One: conceptual sci-fi with a better setting than usual for Kirsch and a clever language puzzle
As far as Kirsch’s own favorite, I’m going to guess he liked Jack the Ripper, because he produced two sequels (which we’ll see in 1983 and 1984, respectively).
I do think his rapid pace may be part of the issue on the lesser games — certainly at least the bugs and lack of polish show — but I’m not sure if just going bi-monthly would fix the issue; I don’t know if introspection would help. At the very least, there’s now a gap until the next Kirsch game. It doesn’t show up until March! That’s because February has an RPG instead, by a totally different author.
Both The CRPG Addict and El Explorador de RPG have played it, if you want to see what it’s like.
Coming up, we’re going to stick with random 1983 games, and I’m making my next pick truly at random (I’m not using the next item on my list, I’m using random.org and having it choose a number) so who knows what will happen?
It’s been a while since we’ve played Peter Kirsch, despite this being his 16th game for this blog. (Most recently: The Dalton Gang, Alaskan Adventure, The Curse of the Pharoah). This is the 20th and last game for the SoftSide Adventure of the Month (he didn’t write all of them, but he edited all of them and wrote the majority). He kept going after this with the SoftSide Adventure Series (10 more games!); it was published on their “SoftSide Selections” which has more than just adventure games. The reason for the transition seems to be the desire to put everything on the “disk version” (DV) or “cassette version” (CV) of the magazine, which SoftSide was starting to push out more by this point.
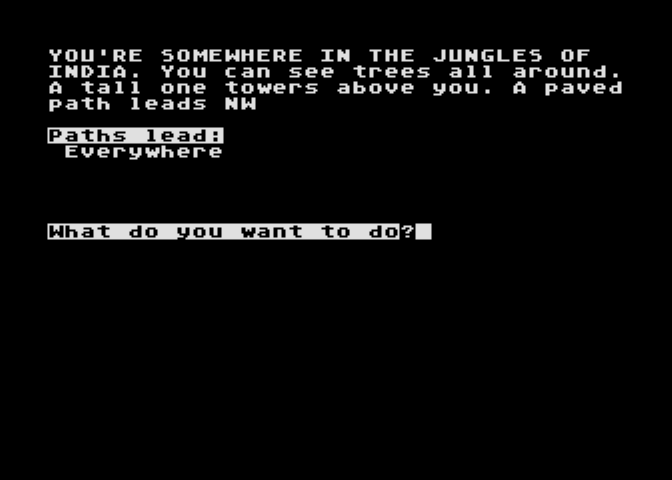
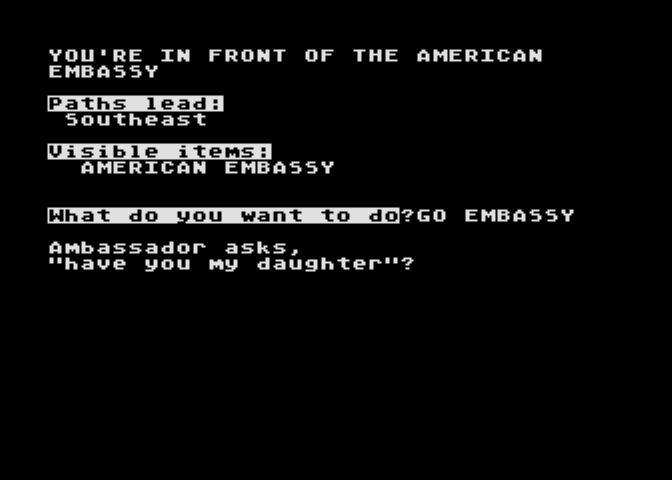
As mentioned in my earlier Kirsch posts, the benefit of cranking out so many games has been getting to explore every genre rapid-fire, including some where Kirsch is one of the earliest examples (like the track-the-killer game Jack the Ripper, which has two sequels in the forthcoming Adventure Series). Here the game is something in the Indiana Jones mold, kind of. We’re supposed to rescue the American ambassador’s daughter, who has been kidnapped and is somewhere in the jungles of India.
As usual, the SoftSide series has Apple, TRS-80, and Atari versions; I do not have a download of the TRS-80 version. I went with the Atari despite being warned ahead of time of an issue which requires modifying a variable mid-game (found by Dobson in his playthrough); I will do the same thing myself when I get to that section.
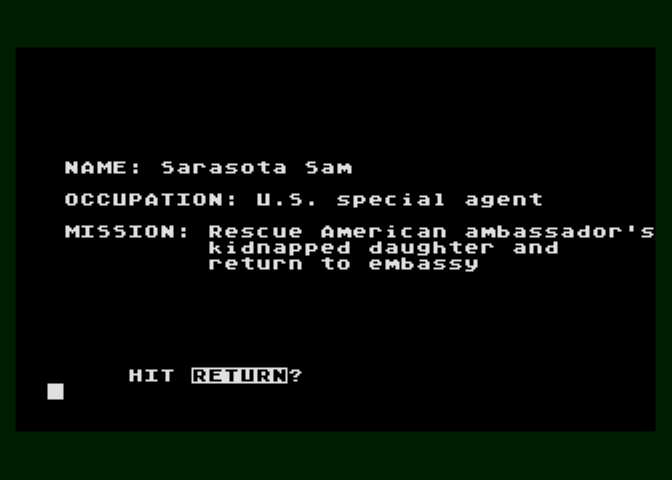
Dobson points out that “Sam” could be male or female, so I decided to imagine the main character as a woman. I’m reading a book by Sam Hawke (City of Lies) so it works for me.
As far as why I’m going with Atari instead of Apple: in a practical sense, I find it easier to read text when there’s lowercase characters, I haven’t brought out Atari to this blog in a while, and just in general amongst retro-sites I get the sense that Atari users were much keener on the games than people on other platforms. I assume people on Apple were busy playing Sierra games. (Also, the Apple version might have the bug that the Atari version does, and the same fix may not work!)
I decided to make a verb list right away this time; Kirsch games can be finicky and sparse with their verb choices.
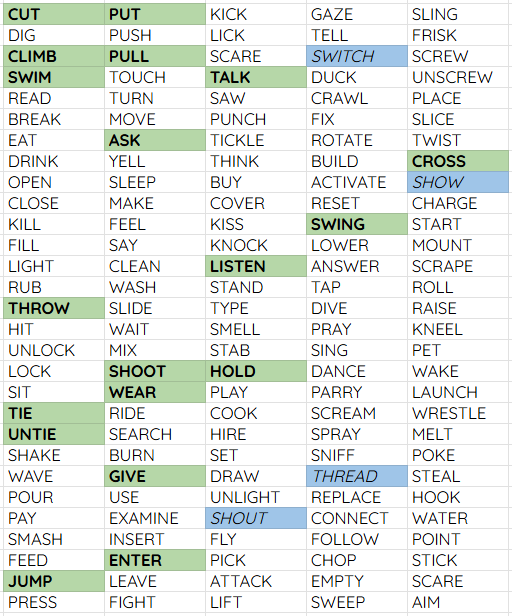
Three-letter parser, so typing SHOUT is really just SHOOT. I additionally want to emphasize this is not comprehensive on every possible verb; there’s one verb early not on my list (fortunately easy to work out).
There’s another reason I kicked off with a verb list: the game starts you in a maze. Just stalling a little bit before starting to map made me feel better.
There’s a brief scene if you go northwest, but it seems to be just marking the endpoint of the game.
Maybe you could give some supplies? All the game starts you with is a hat and a gun.
The aforementioned gun and hat then need (ingloriously) to be used as room markers for mapping the jungle. You can climb trees but they don’t always have something to see (this seems to be vaguely buggy, I’ll explain in a moment.
YOU’RE ON TOP OF A TALL TREE
Visible exits:
Down
It doesn’t look like a maze when properly laid out, but I still had to map it out like one (and the general logic to shape didn’t form until about halfway through). At least this isn’t the sort of maze with lots of “arrow jumps”; most rooms are connected to “adjacent” geographic space rather than flying around like a pinball.
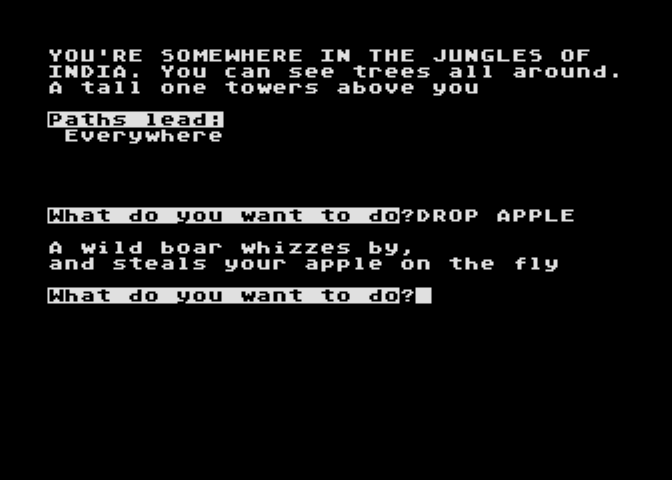
Kirsch at least emphasizes the maze in one respect by having apples up one of the trees, but having the apples be stolen when you drop them. They can’t be used as “breadcrumbs” for mapping.
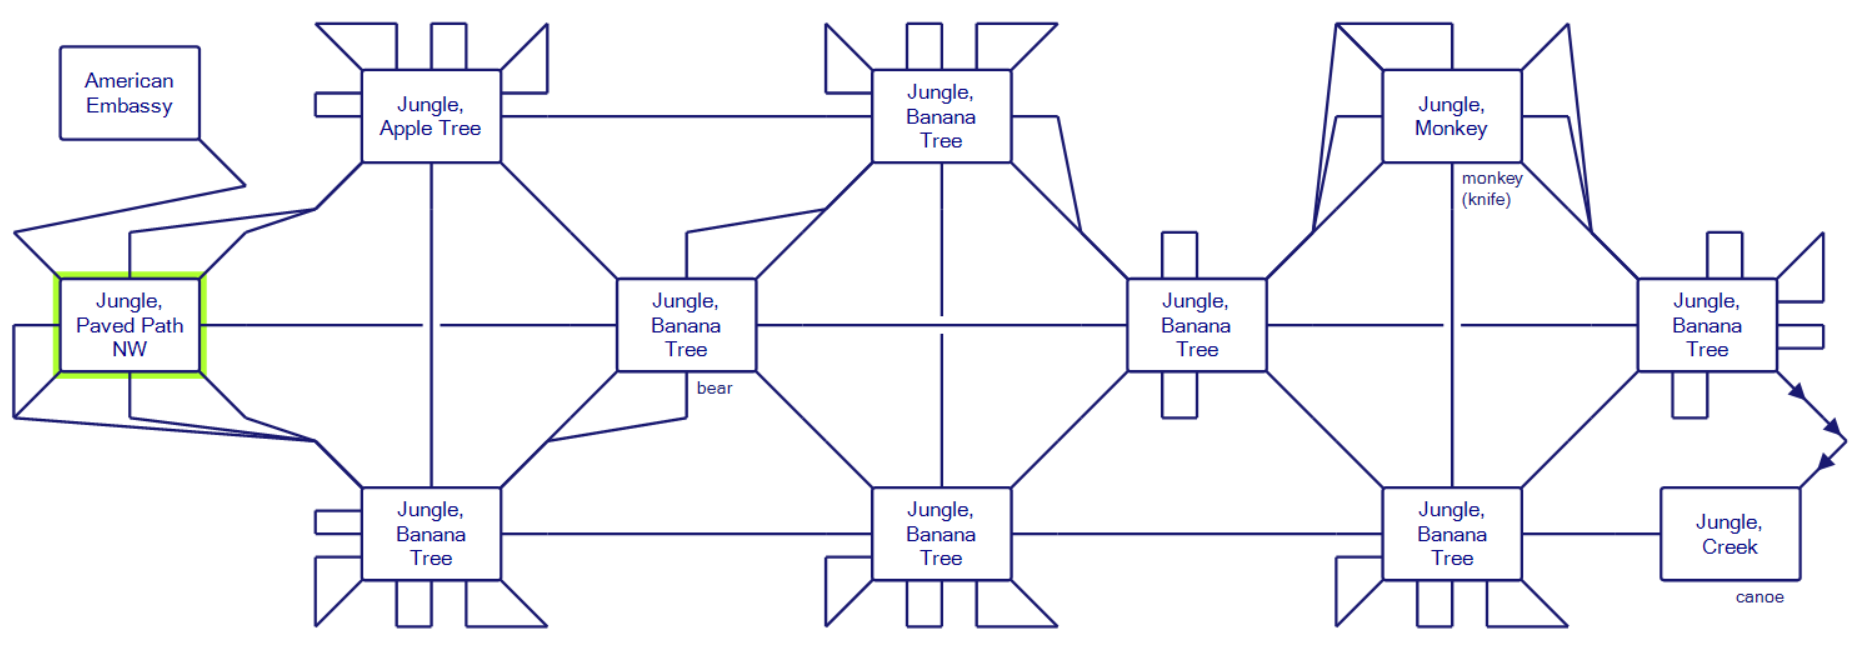
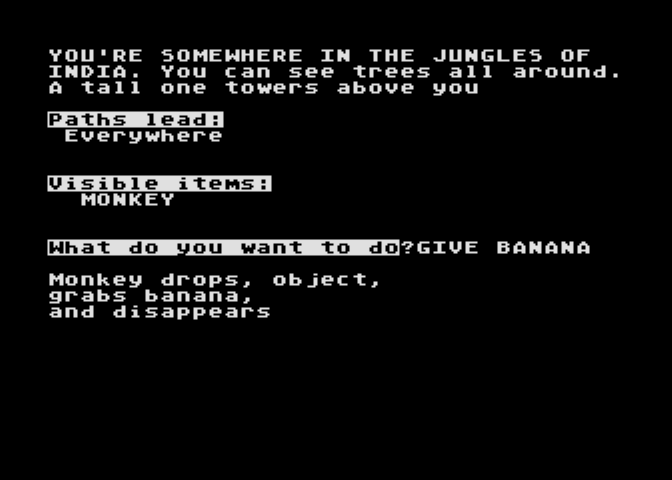
Most of the trees have bananas … sort of. It seems to be buggy; I think the author’s intent was to have jungle trees either be apples (in one case) or bananas (in all other cases) but every once in a while my game would have the bananas just not show up, even if shortly after on a second trip they did. Fortunately, there’s no need to get too fussy about it; all you need is to give a banana to a monkey in the jungle, who will leave behind a knife.
You can take the knife over to a canoe and cut a rope tying it to a tree; while I can then GO CANOE I unfortunately can’t get it to move!
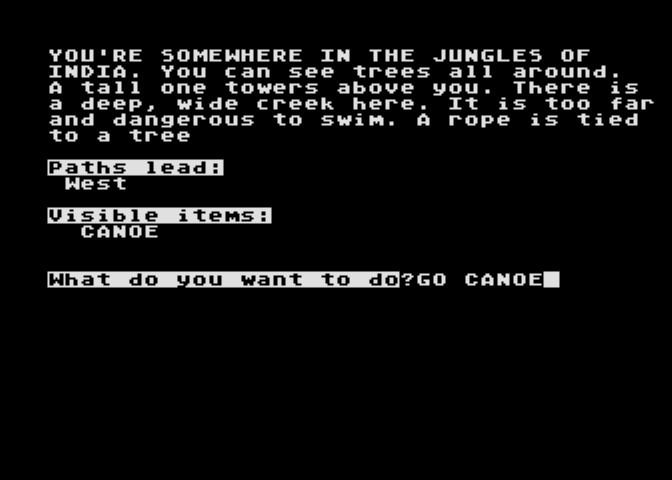
This is where the unusual verb shows up: PADDLE is understood.

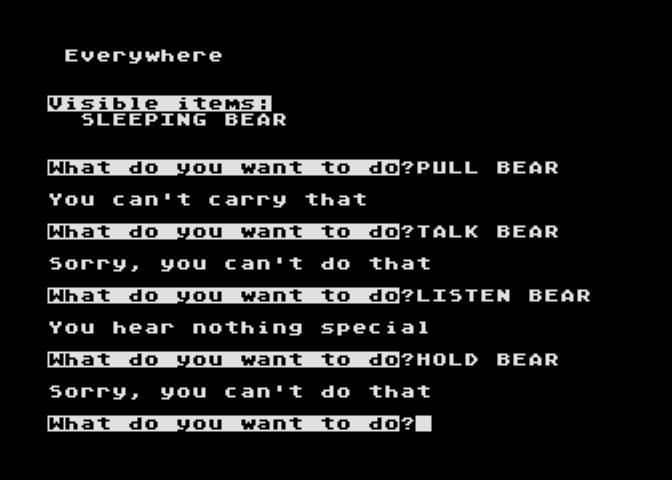
Hence, I am fairly certain I am in need of some sort of oar, but there’s only one other place that the oar can be: a sleeping bear in a different part of the jungle.
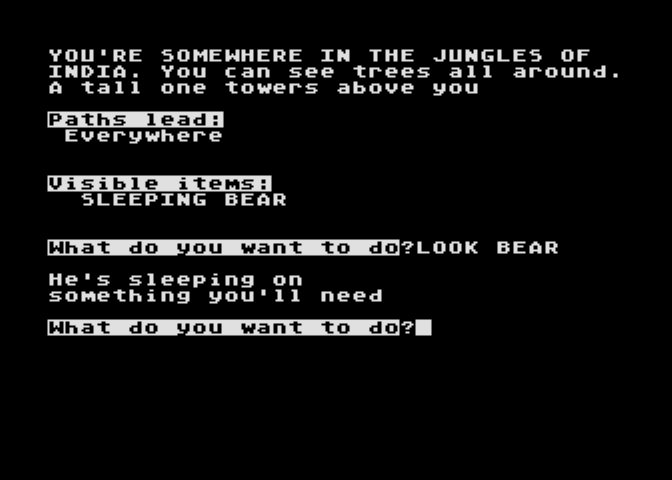
I thought about using the gun to scare or even just shoot the bear (…although in the latter case the bear would still be sleeping on the object…) but unfortunately this attracts the attention of “natives” who come and kill you (this is true if you SHOOT GUN anywhere, even not in the context of being at the bear).
I could of course check the very walkthrough I linked earlier but I’m going to be stubborn a bit longer. It’s faintly possible I’m wrong about the oar and it’s instead a get-a-boat-to-move puzzle, where there is almost no consistency between games on what commands to use. I’ll still take suggestions (from people who didn’t look at hints) but please no help right now otherwise.
It was remembered as a “joke” computer, with its 22 by 23 character screen and 3.5Kb of RAM. Revisionists forgot that at the time there was nothing else, and that within the confines of that 3.5Kb of RAM (sometimes more) we made magic happen.
Brendan Jones (quoted above) we’ve seen before with three VIC-20 games from 1982, the most memorable being Fatman: Crime and Vice which invokes gritty American ultracrime stories despite being written by a teen-aged Australian. He was friends with Nigel Dunk (mentioned here and here) and Nigel used Brendan’s Adventure Compiler to write three games of his own: Deathship, Werewolf, and Crown Castle. The third game (described as “coming soon” in a text file from many years ago) seems to have never been dumped and since we’re talking about private games here, likely was genuinely lost, but we can still play the first two.
I do want to emphasize the “private games” part; despite the moniker of the project being All the Adventures, we can’t take it literally. Not only is there lost commercial work, but there’s also the vast supply of games that were written on personal computers for fun and only played by family/friends. We’re reliant on the few people who uploaded their games to the Internet many years later and maybe a random disk or two surviving to get a window into what things were like historically.
The private-game aspect is good to keep in mind here because both games are straightforward and short. That’s not necessarily a bad thing! Certainly for a modern player they’re used to “game poems” and the like which might last five minutes and most, but with a commercial product from this time it would be considered too insubstantial, and even as a type-in there would need to be special circumstances for an adventure to be so simple (although it did happen). In the context of VIC-20 games, there’s also the matter of low memory capacity to consider, although these games were written for the 16k expansion memory.

In Deathship, you “awake on a ship”, no exact context of what your function was (passenger? sailor?); everyone else is dead. (Not to be confused with the Ohio Scientific game by Aardvark with the horrible parser. This game’s parser isn’t great but the game is short and straightforward enough it doesn’t matter.)
You start in a cabin that “reeks of salt” with a watch and a cupboard. In the cupboard you can find a hammer if you LOOK (OPEN isn’t understood here) and if you LOOK at the watch (not READ) you are mysteriously told the number of turns until sunset. So mysterious, I wonder what kind of game this is?

The rest of the map is very small and not exactly reflecting a ship, but I’ll be forgiving. In the small span there’s some nice moments of atmosphere.


The atmosphere here would be better if you could do something with the locker, but you can’t LOOK or do anything else useful I could find.
Just laying about the map, in addition to the hammer/watch from the start area, and the warning note from a different cabin, you can find a lantern, some food, a key, some wood, some garlic, some spaghetti, and some pizza.
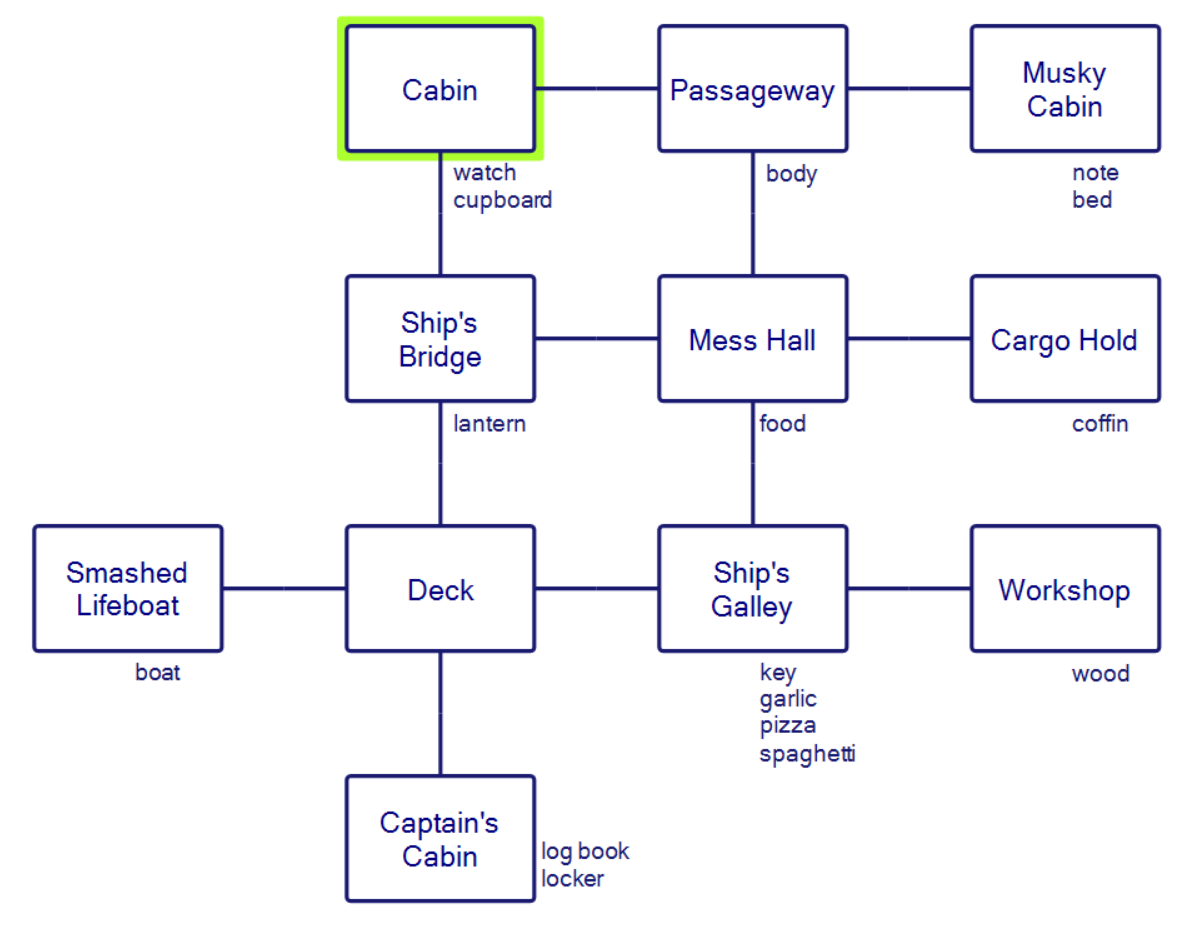
If it isn’t blatantly obvious yet, what we need are the hammer, wood, key, lantern. The garlic isn’t useful!

To the east there’s a room that’s dark and you’ll die if you aren’t carrying the lantern.

With the lantern, you’ll find a coffin. You need to open it and apply the wood/hammer promptly on the vampire sleeping inside.

You need to HAMMER WOOD.

Even with mapping things out and taking screenshots this was a five-minute game, but I’m not complaining; other than the parser struggle at the end it didn’t pad out its gameplay with tedious mazes or the like.
Next game! Rather than hunting down a vampire you are hunting down a werewolf.
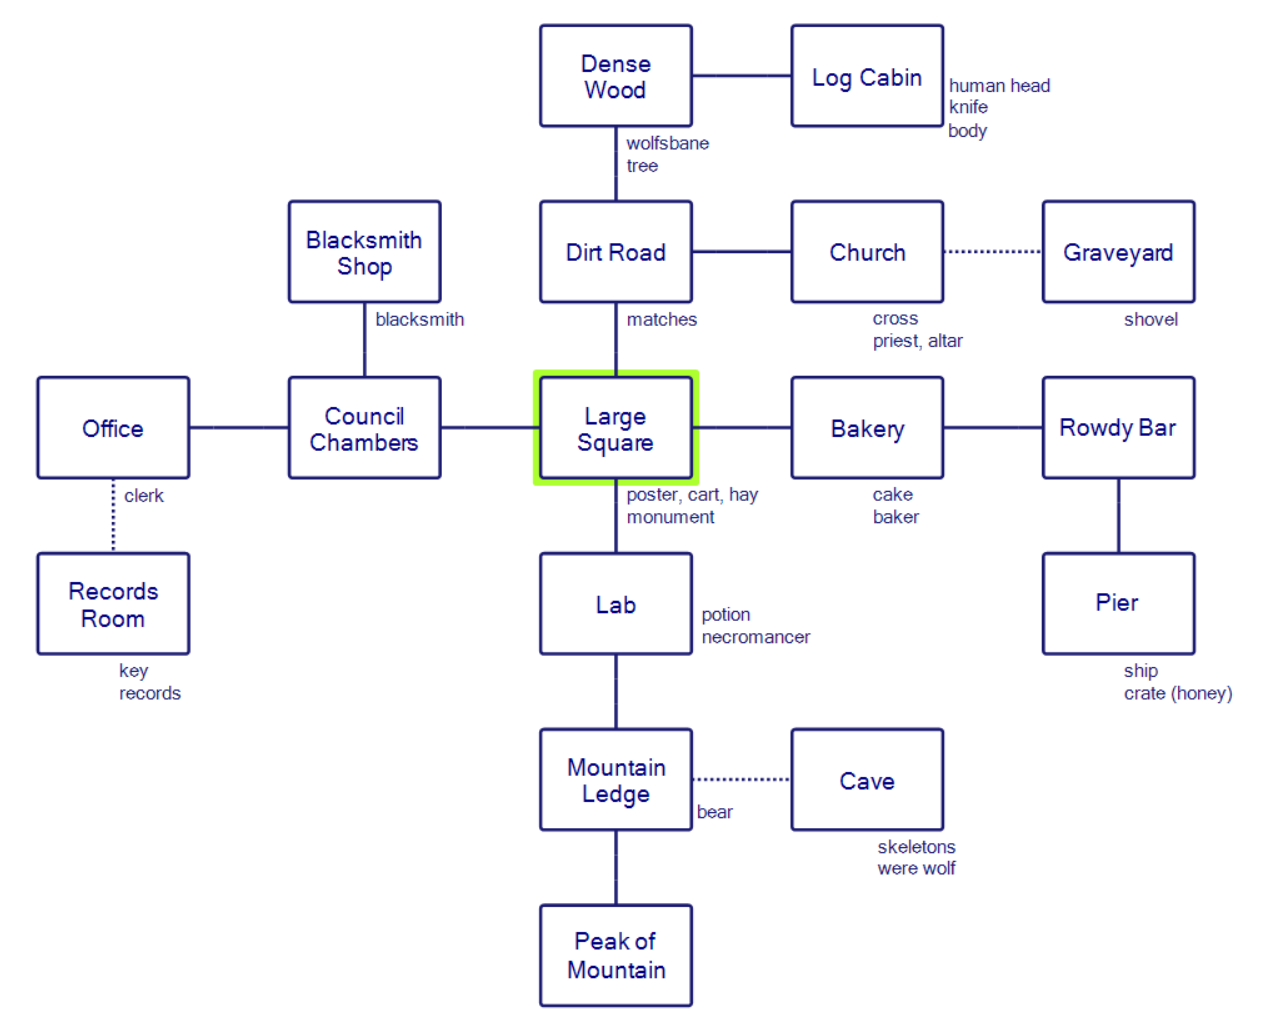
You start in a Large Square with a poster announcing a reward for killing a werewolf menacing the village, and a monument with a “gun” inside which is the “fabled gun Wolfsmane”.


Unlike Deathship there are characters to talk to. A blacksmith mentions they can do melting including “firearm accessories”…

…a clerk wants proof there is a werewolf before allowing access to the gun in the monument (via a key)…

…a baker can’t sleep (this scene is purely for “color”, you can take the cake but it does nothing)…

…a necromancer wants some wolfsbane to make a werewolf repellant (you can nab the potion right there)…

…and a priest announces (with slurring I assume meaning they’re drunk) that they’re not a nice person.

I’m unclear what the deal is with the priest. If you take the potion from the necromancer and drop it, the priest will eagerly drink it and then die, but past him is a shovel which does nothing (DIG is not understood, it is unnecessary for the game). What you do need is a CRUCIFIX you can see by LOOKing at the altar. The cross is made of gold, but the crucifix is made of silver, which is (using the “fan fiction shortcut”) the sort of thing you want vs. werewolves. Since you can take the cross/crucifix while the priest is alive without getting stopped there’s no reason to kill the priest, who is simply trying to stop you from entering the graveyard.

While I’m talking about it, let’s get that crucifix swiped from the altar melted down into a silver bullet, although we still need the gun:

To the far north (just past some matches which you can pick up) there is a “Dense Wood” with wolfsbane, but it is attached to a tree. To cut it you need a knife which is conveniently nearby. What is less convenient is if you try to take the knife and leave a werewolf will kill you.


I was very confused here because I thought this was a timed event. It is not. The idea here is if the body is left behind the werewolf will get you because … smell or something? I don’t know, but if you BURN BODY before leaving, you won’t get killed when leaving the cabin.

With the knife you can take the wolfsbane, leave it for the necromancer, and get the repellant. For the gun, at least in my version of the game, I was just able to OPEN MONUMENT and GET GUN with no fuss at all. I didn’t need to bother with the clerk. I assume this is buggy, and what you’re supposed to do is use the head from the house with the body (why the smell of the head didn’t matter if the smell of the body didn’t matter I don’t know).

This lets you go south into a records room and pick up a key. It will let you then UNLOCK MONUMENT but this isn’t required to OPEN MONUMENT.
With the repellant, gun, and bullet, you have almost everything ready; there’s a bear in front of the werewolf cave, but you can nab some honey from a dock and bribe the bear to go away.


Plot twist at the end, though!

The solution here was more difficult to wrangle than Deathship, especially the cryptic part about burning the body and the priest who can be killed with a random potion drop (but for no apparent reason). Comparing with Brendan Jones (using the same engine): his games were much more linear. Crime and Vice in particular was quite scene-oriented, and likely designed imagining what each scene would be like in order; both of Dunk’s games were non-linear and based around collecting resources for killing a supernatural creature (meaning there was more flexibility in the order). I don’t think either approach is “bad”, necessarily, but based on the weak parser, I think the open world worked better; despite it being sometimes arbitrary if you needed to “drop” something or “give” it, by not locking the actions in a particular order it was less painful to hit a spot of parser difficulty (even though I generally persisted each time until I made it through parser trouble, having the option to go elsewhere made the overall experience less grating). Jones still has two games left in 1983 we have to play, so I’ll return to that comparison when I get to those games.
One last thing to note is that, based on the CASA solution, the C64 version of the game is less buggy than the VIC-20 version I played. Unfortunately, the file has seemingly been purged at every C64 site I’ve visited; I played the VIC-20 version not because I wanted to but because I had to. (The VIC-20 version also has some unfortunate text vandalism.) A current link to the C64 version would be lovely if someone has one (it’s freeware, so there’s no reason the file should be secret, I think?)
(Continued from my previous posts on Catacombs, and in particular my last post which described how the 1981 PET version of the game was recently rescued.)
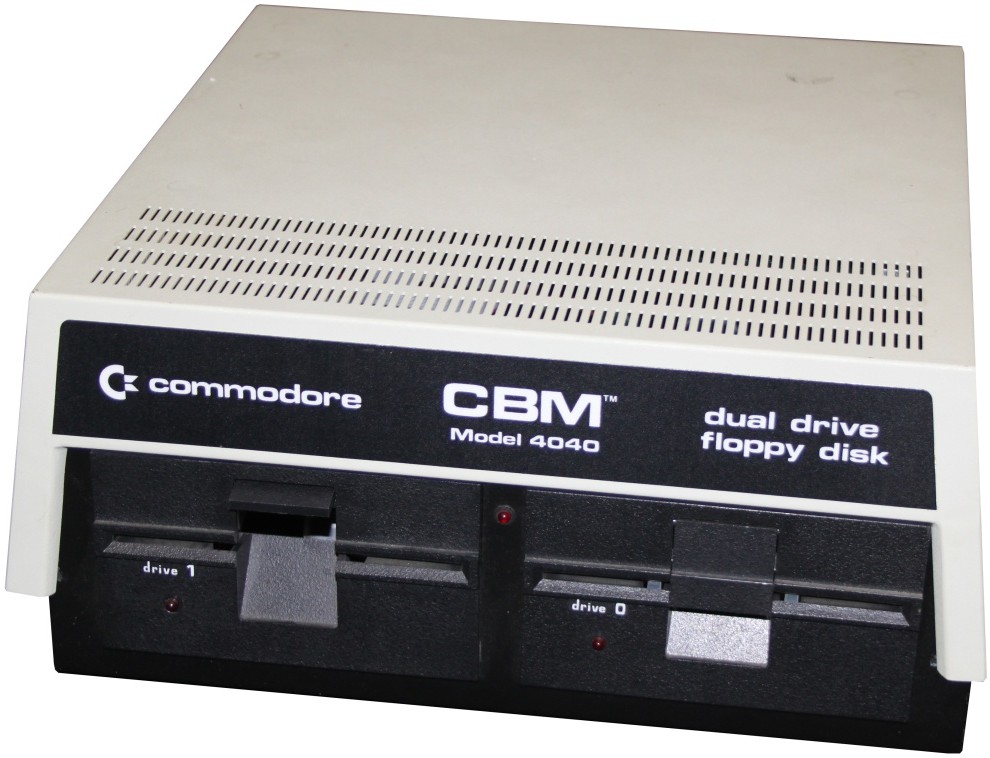
The disk copies we have are for the “4040” edition of the game. This is referring to a disk drive pair by Commodore; image via the Centre for Computing History. While the predecessors (2040 and 3040) were for the US and Europe respectively, this one seems to have gone international; it gets mentioned in an Italian book, for instance.
Catacombs was more frustrating to get to the finish than I expected because some aspects got changed, the fact I hadn’t put together a “full run” of the game before, and one extremely nasty bug. Regarding the second point on making a “full run”, there are some things that need to be done in a particular order, otherwise a softlock can happen. The easiest to point out is simply that you can’t drain the lake and enter Poseidon’s realm (an action that never even worked on the DOS version) until after you’ve swam over it to castle on the other side of the lake. In general, you have to look at the overall map and plan a general route before executing it. I have a meta-map below explaining the layout:
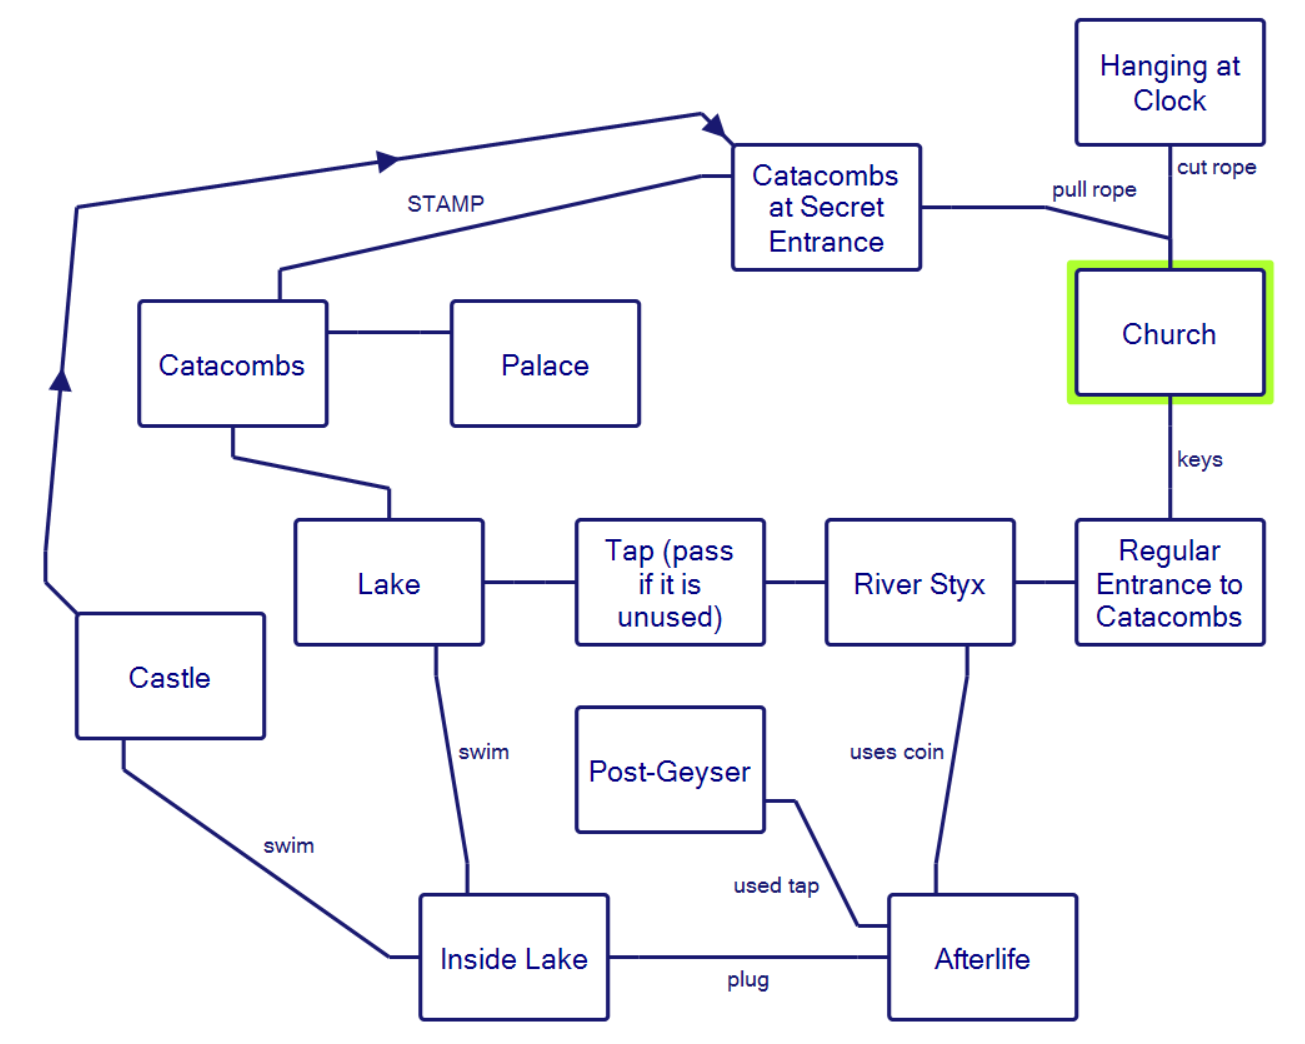
Points to note:
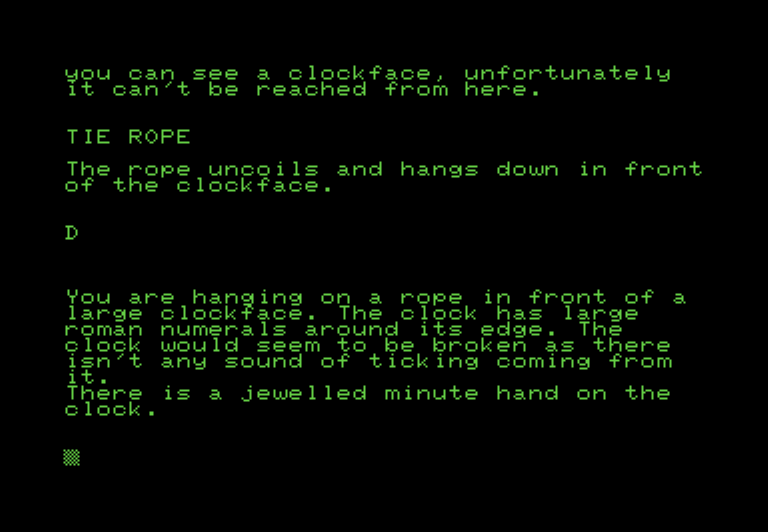
▸ The church is the starting point, and you can use keys to enter the catacombs directly or you can use a secret passage (pull a rope three times). You need to cut that same rope (with a sword you find early) to reach a jeweled clock hand on the top of the church which is one of the treasures, but that can be saved for the very end of the game.
▸ As I mentioned last time, you can cross the River Styx with a coin (as was required in the DOS version) but it counts as a treasure, so that particular route should be avoided.

The purring ball is a red herring.
▸ The other way to reach the Afterlife is via a lake, where you can drain it and enter via Poseidon’s domain, but there’s no way to refill the lake, so the castle you reach by swimming has to be done first.
▸ The afterlife also includes a spot where a geyser is blocking your way. There’s a “tap” in the living-world you can turn to stop it and get by, but by using the tap the place it is at gets blocked off. The secret entrance then becomes the only way to get into the catacombs.
▸ There’s an inventory limit of six. Usually this means a maximum of five held objects because the lamp is required for most of the game, so there’s at least some aspect of needing to sweep through for treasures first before starting to wreck things.
All this represents the “puzzle” that I missed solving by only worrying about getting individual treasures.
The bug I will get to in context, but let’s just say even though I was warned ahead of time and supposedly did everything “right” to avoid it, I was still struck by the bug and had to restart the game.

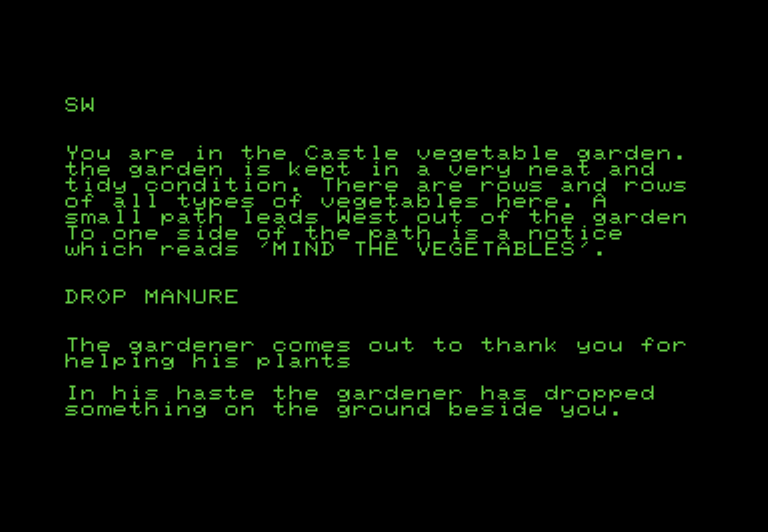
The Angel of Death appears quite frequently and does nothing (no manure drop like the DOS version, you just find it in the open). I did find out from Alastair that EXAMINE HOODED or EXAMINE HOODED FIGURE both work. EXAMINE FIGURE gets the response “I don’t understand that”. It generically applies to both misunderstood verbs and misunderstood nouns.
Based on the meta-ponderings, I planned an attack in this order:
a.) nab the keys and get the lamp/sword/coin and wand too (which is by the lake, does no magic, and is just a treasure)
b.) open the secret passage and nab treasures nearby, this includes a bottle for holy water
c.) fill the holy water, nab the cloak, and try killing Dracula with the holy water (in the DOS version killing the vampire was worthless, in this version of the game it gets you 27 points)
c.) with the cloak of invisibility-to-undead on, swim to the castle and take care of the actions there
d.) pull the plug and pass through the afterlife focused on getting into Heaven
e.) turn the tap, do a second pass through the afterlife with the geyser
f.) take care of the spider in the palace (with the flamethrower from the castle?) and any last treasures still lingering
g.) cut the rope and get the treasure from the clock as one final step
This went fine at least early on. When I tried killing Dracula I had a problem where I threw the bottle first before taking the cloak.
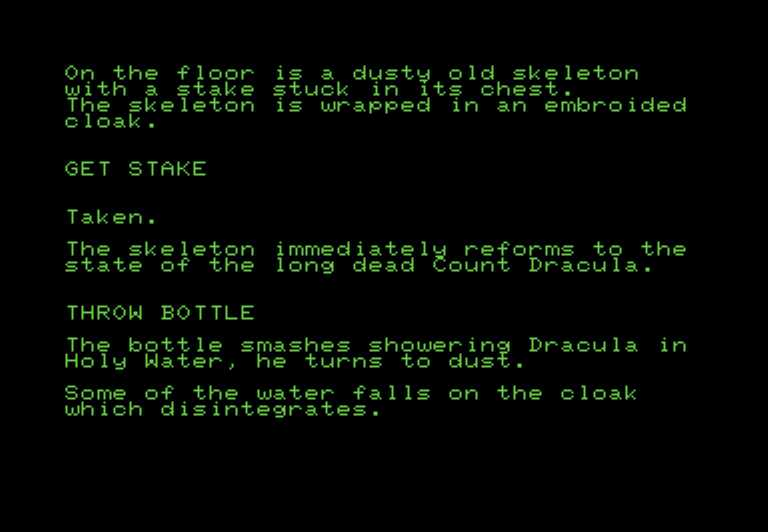
I had also been warned not to take the cloak but rather WEAR it directly off the floor, because it messes up the inventory otherwise.
From there it was time to visit the castle, which had a slightly different map layout than before. (For example, the flamethrower in Classic Quests is tossed in a cell to the side, whereas here it shows up in the torture chamber.)

The zombie stationed at the front, who was straight out buggy in the DOS version and could even cause the game to crash, will sometimes stop you from passing through at random, but you can just try again and you’ll get through.
There’s later a hint mentioned in the fireplace about killing undead with fire…
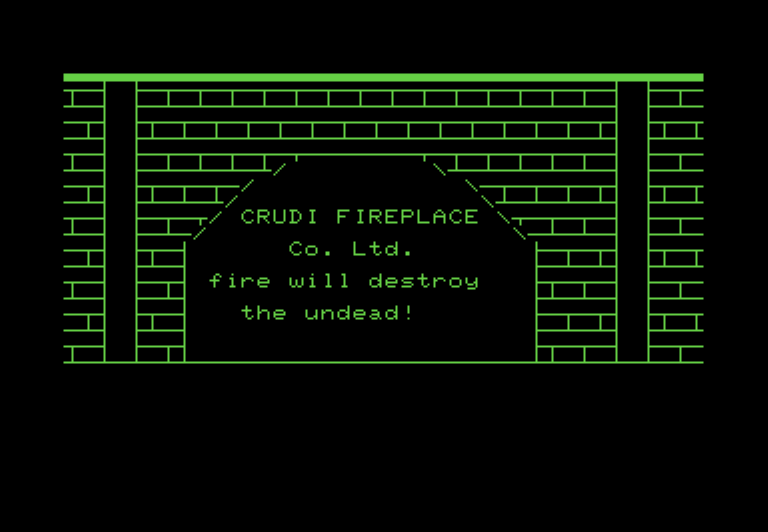
…and the flamethrower is still present, but I never got it to work.
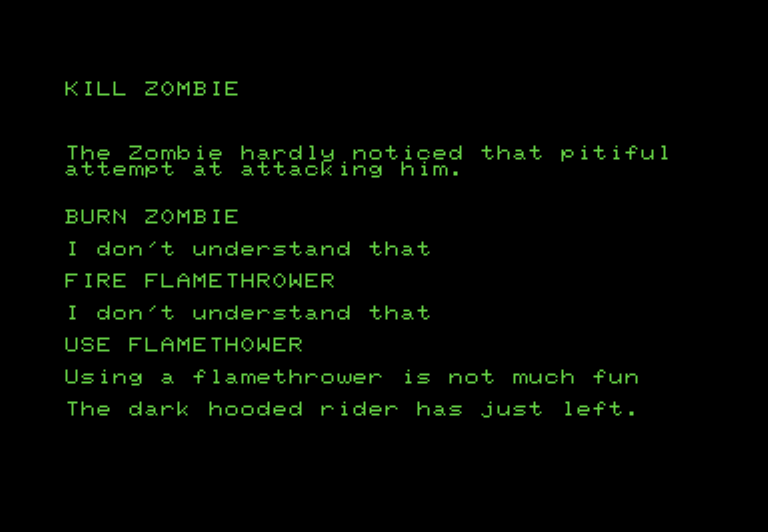
The game doesn’t even allow the command CLEAR FLAMETHROWER WITH PEN from the first game (it cuts off before it reaches that many characters) and just CLEAR FLAMETHROWER gets a “huh!” message which appears when the verb is applied to most nouns.
Fortunately, you can ignore the flamethrower entirely. You still need to plant manure to get a purple cube…
…and nab a purple sphere too (still mysterious to me what their deal is, only the sphere counts as a treasure), and you can escape via a teleport like last time.
Following my process, I needed to go yank the plug next, and this is where I ran into trouble. This is with just the book in my inventory (for getting past the Pearly Gates) and the lamp:

Alex reported having this bug too, but it was fixed by using WEAR CLOAK rather than taking it, and also dropping the cloak once it was done being used. I did both things and still had the bug. I knew I could get through because on another attempt (before working my sequence out) I could pull the plug properly, so I’m still not sure why it shows up or is missing. I ended up going nuclear and pulling out Alex’s walkthrough and following it step by step, with the hope that the reason for the bug wasn’t pure randonmness.
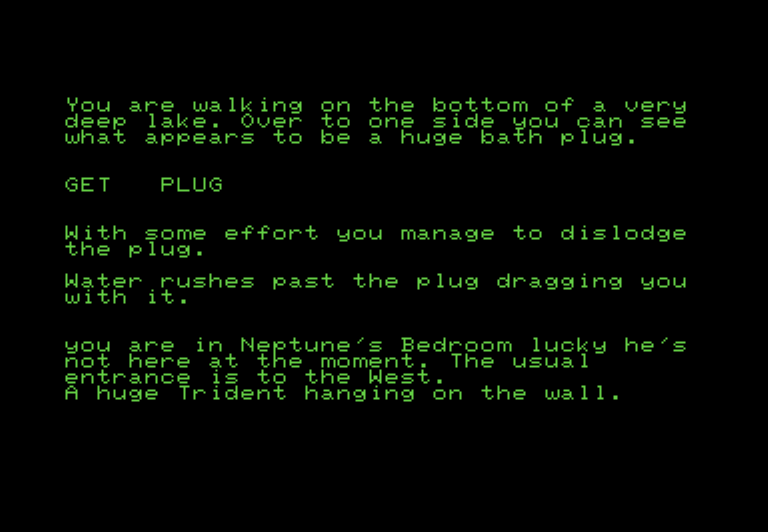
Phew. Fortunately everything else followed straightforwardly; I nabbed the trident (not reachable in the DOS version) and I was able to use the book to get by the Pearly Gates.
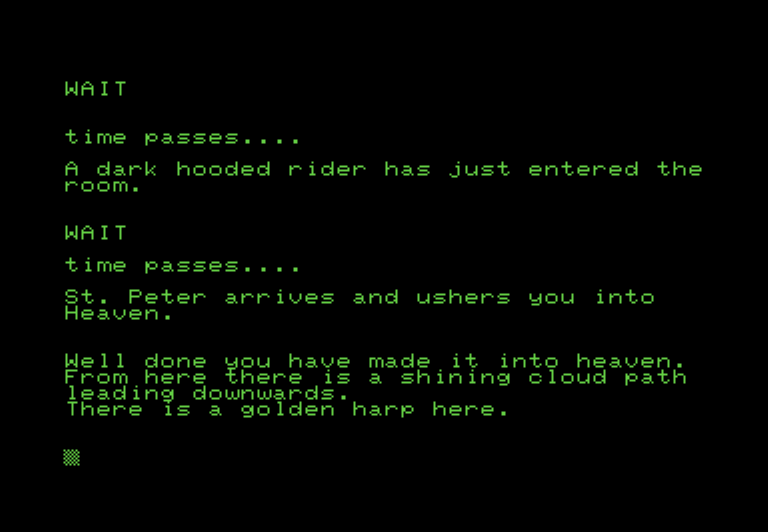
Death decides to take a visit to the Pearly Gates as well.
Then I did a second loop (you can go into the drained lake) where I first turned the tap, shutting off the geyser…

The Angel of Death is persistent. It’s mildly hilarious in a story-implication sense. Imagine a TV show where a person with a skull helmet randomly shows up each episode but everyone ignores them.
…used the scissors to cut the grass at the Elysium Fields (still the weirdest-to-find treasure of the game) and did the whole section going by the geyser (which was now turned off), retrieving a cup.
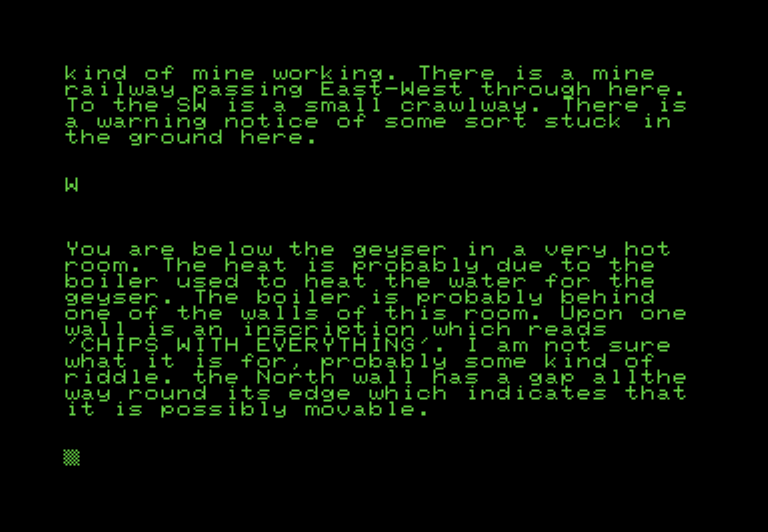
This is a riddle. You’re supposed to say SILICON. I don’t remember it being in the DOS version.
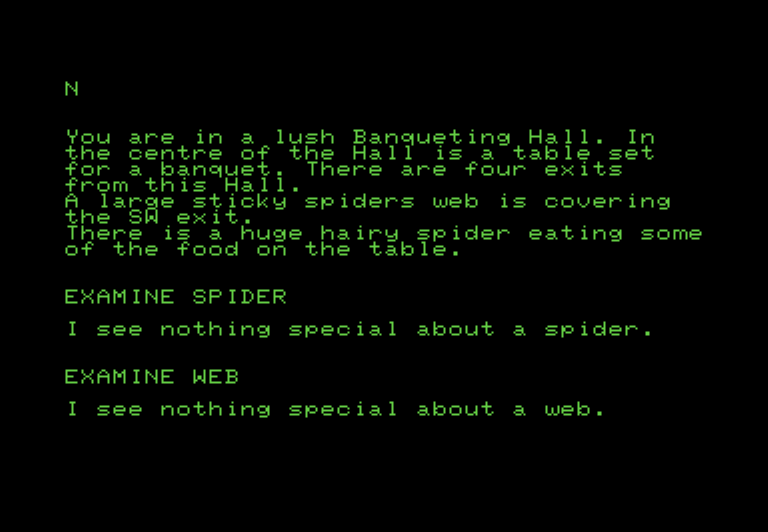
The only thing remaining was the spider at the palace, previously completely impassable. It turns out you can just “clear web” here, no flamethrower required.

The final step involves using the sword to cut the rope (which was previously needed for entry into the secret part of the catacombs) and nabbing the jeweled short hand from the clock.
What I found most curious about the experience was how many “loose ends” were there in the original game. For example, in the palace, in the DOS version there’s a crown you find in a laundry bag, but in the original, the crown is just sitting out in the open, but the laundry bag is still there.
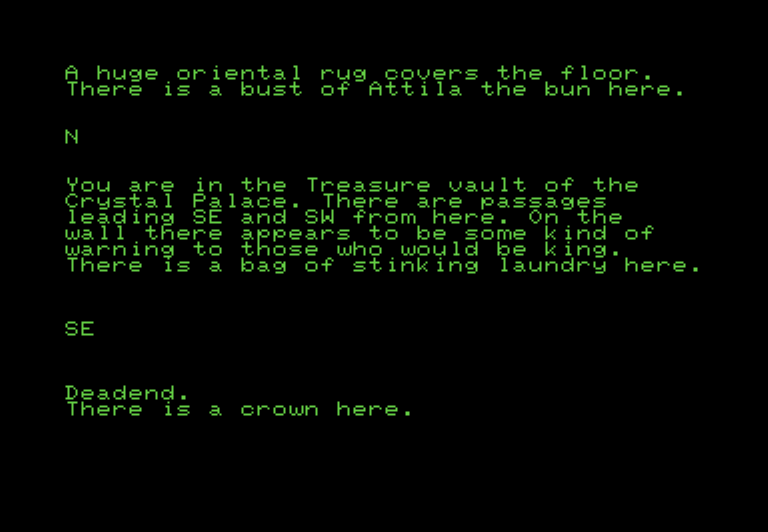
Why is the laundry bag there? It doesn’t add to atmosphere or even humor; it really seems like it was meant to hold the crown but Brian Cotton forgot to hook it up to the initial release; a bug that got fixed later, maybe? The hooded figure you just ignore was equally odd; did Cotton intend all along to have the manure appear because of the rider’s visit, but never got around to implementing it at first? Why make an entire ASCII art in the fireplace indicating you should kill undead with fire if you don’t need to bother with it?
These don’t feel like intentional red herrings but more like the author didn’t hook up everything he was planning. This suggests the DOS port is in some ways closer to the author’s intent, but of course that version is still broken (although at least, if someone ever gets hacking, they know what really is supposed to be happening).
The one thing that changed very little between versions was the general text in the rooms. None of the text was stored in memory, enabling Cotton to type more words than an in-memory game might allow. This has the downside that it runs very slow; I ended up playing most of the time at 3.5x PET speed. This would have been distressing to play otherwise; Cotton’s willingness to make the trade-off is what led to this very early British game (with long descriptions more like a proper late-80s game) existing in the first place.
Coming up: Some 1983 games. I’ve been doing a lot of pre-1983 mopping up lately, as so many things keep getting discovered; there’s a trilogy coming up (in perhaps a month?) in the same category.
(Continued from my previous posts on Catacombs, which you probably should read before this one if you want the full background.)
Last weekend, I received a message from Marcel Ingram Lansing that one of the most sought-after Commodore PET games had been rescued.
Specifically, Colin Haynes had copies of both Catacombs and Goblin Towers by Brian Cotton in Commodore PET disk format. They’re part of a series of five adventures from the author published by Supersoft starting in early 1981. Goblin Towers we already had in something close to the original form, but Catacombs we’ve only had as a broken DOS port from five years later which is impossible to beat.

Catacombs is one of the earliest commercial British text adventures, and given how many they eventually came out of the country, it’s not exaggerating to say a landmark has now been preserved.
LONG ASIDE: The first ad for Catacombs was from February 1981. Based on Gareth Pitchford’s research, we know of four (or maybe three) adventure games from earlier that were sold “commercially” (to at least some extent) of British origin.
1. Just one month earlier the magazine Computing Today had a classified ad for Dungeons of Death on the Commodore PET; the description makes it unclear if it’s an RPG, quasi-RPG, quasi-adventure, or adventure.
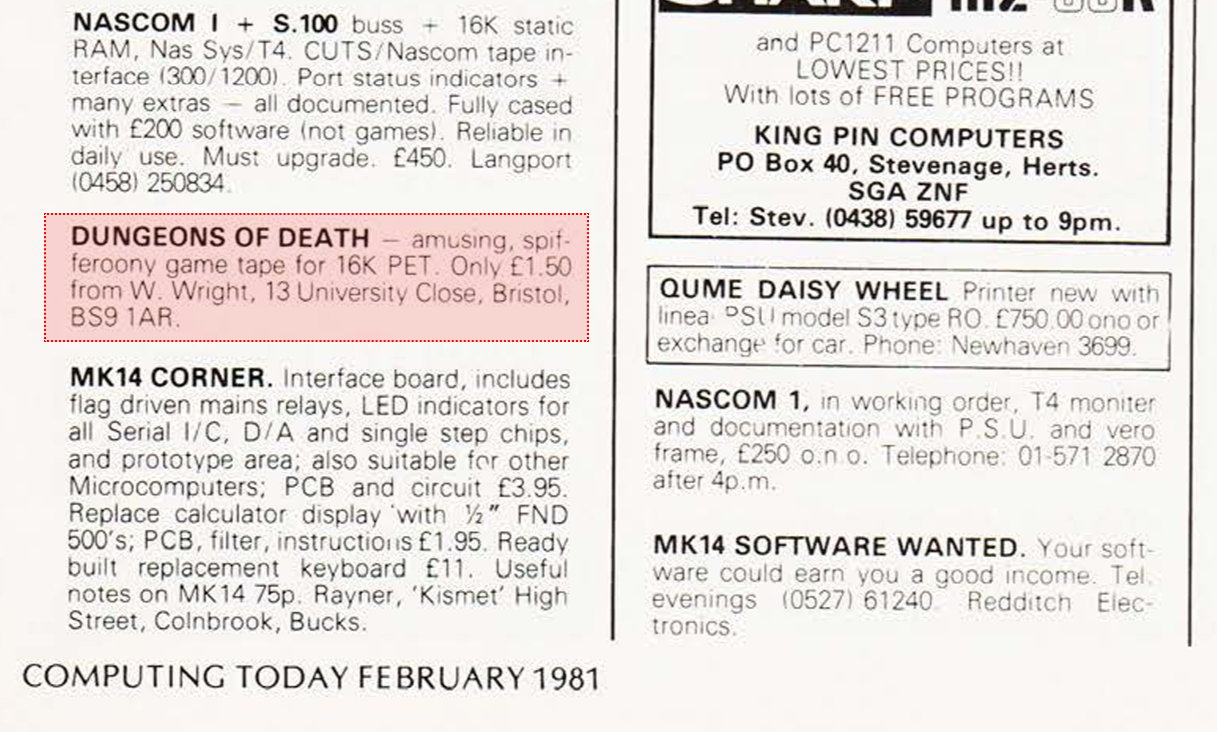
“Amusing, spifferoony game tape for 16K PET”. Source. Remember, for newsstand magazines the actual month is roughly one off from the one printed.
2. There’s an ad in Personal Computer World November 1980 for a mysterious game called Toxopholy by the equally mysterious Spider Software out of Croydon, Surrey. It was written for Apple II, which was not a common computer in England. (Not unknown either, to be clear!)
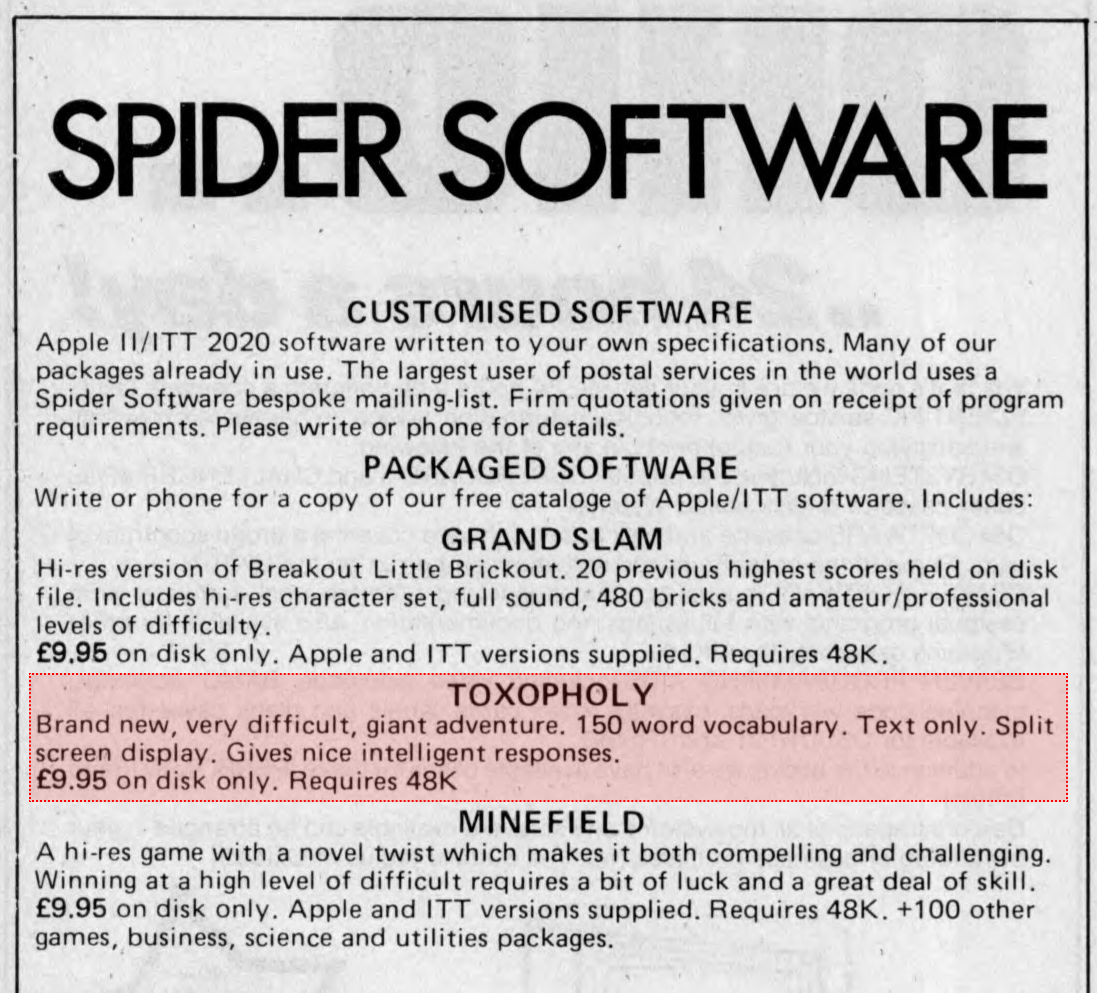
Given another ad from Spider Software elsewhere which includes games like Wizard and the Princess, they clearly were more of a “publisher” of Apple II software, although the Toxopholy ad is so early that game may still have originated with them.
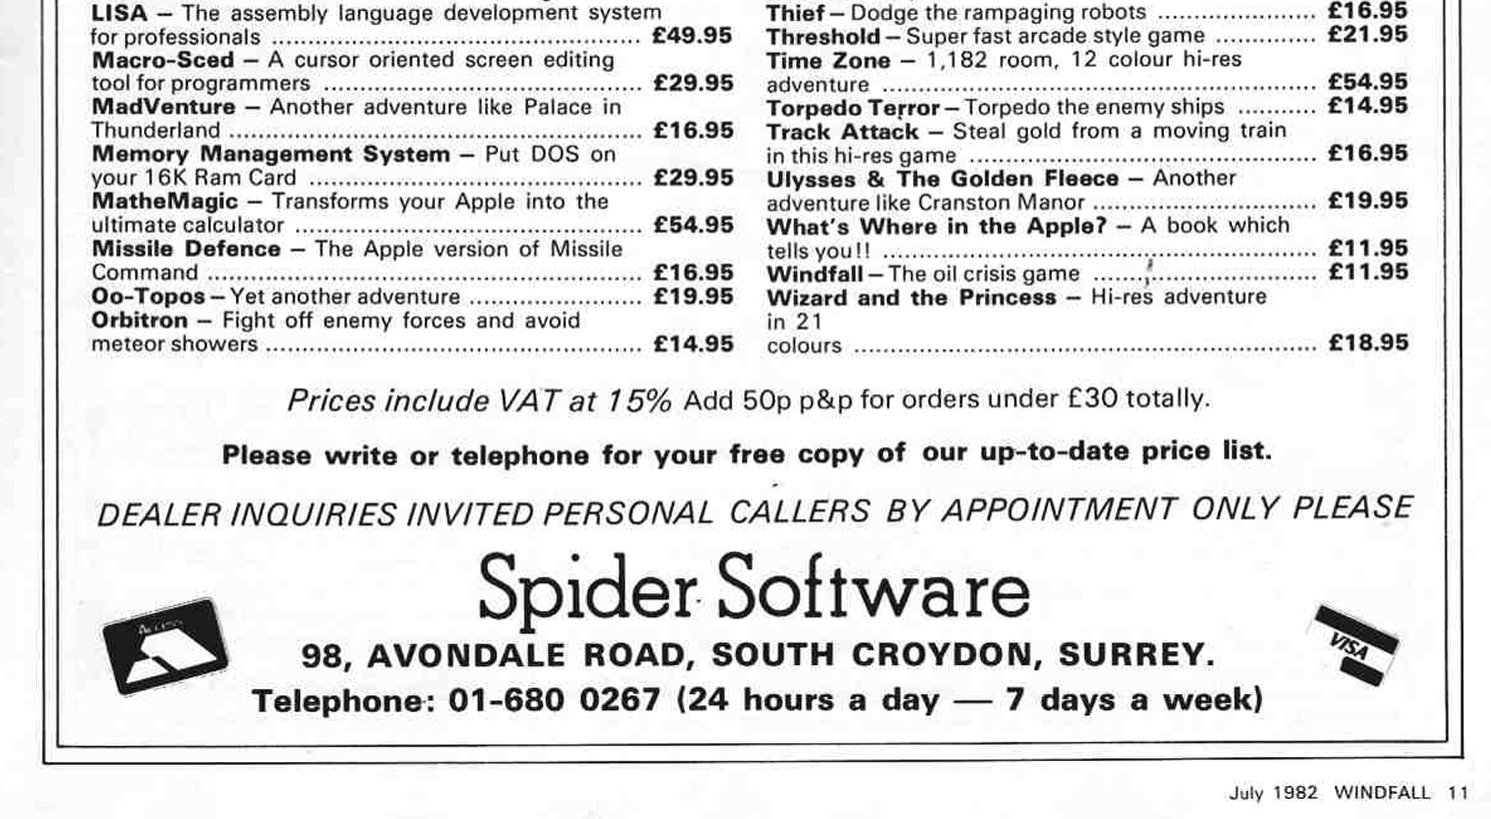
From Windfall July 1982, an Apple magazine from the UK. Notice that Toxopholy is no longer advertised.
3. We know more about Galactic Hitchhiker for the UK101 than the other games, because I’ve played it and written about it here already. It is remarkable for having the “computer avatar” have its own voice and attitude, and is story-driven in a way rare for 1980. It was first advertised a month before Toxopholy.
4. There was an early adventure game by none other than Games Workshop, the company most known for Warhammer 40K and with 2025 revenue of £565 million. The earliest ad anyone has been able to find for their adventure appeared in a July 1980 issue of Practical Computing (so out by June) which puts it as the earliest commercial release of an original text adventure from Britain we know of.
Our own version of this classic computer moderated fantasy adventure game in which you explore an underground dungeon populated by snakes, trolls and menacing little goblins which constantly bar your way. As you explore, you give the computer commands such as – get gold, open lock, drop bottle, kill goblin etc. – and tell it which way you proceed. The computer responds with your revised situation and awaits your further instructions.
White Dwarf Issue 22 (Dec. 1980/Jan. 1981) mentions Games Day ’80 with pictures; Adventure was being shown off on a Commodore PET.
None of this undercuts Catacombs in importance. None of the games just mentioned had wide distribution; Steve Jackson describes sales of the PET games as a “disaster” (the biggest seller, a Star Wars game, sold 60 copies), and Dungeons of Death appearing once in a classified means it might have sold in the single digits. While the Cotton games didn’t quite have the reach of, say, Planet of Death, they still had a second printing by Supersoft, and generally got into the UK gaming consciousness; the only places on the Internet you can find Toxopholy mentioned as even existing are my page and Gareth’s.
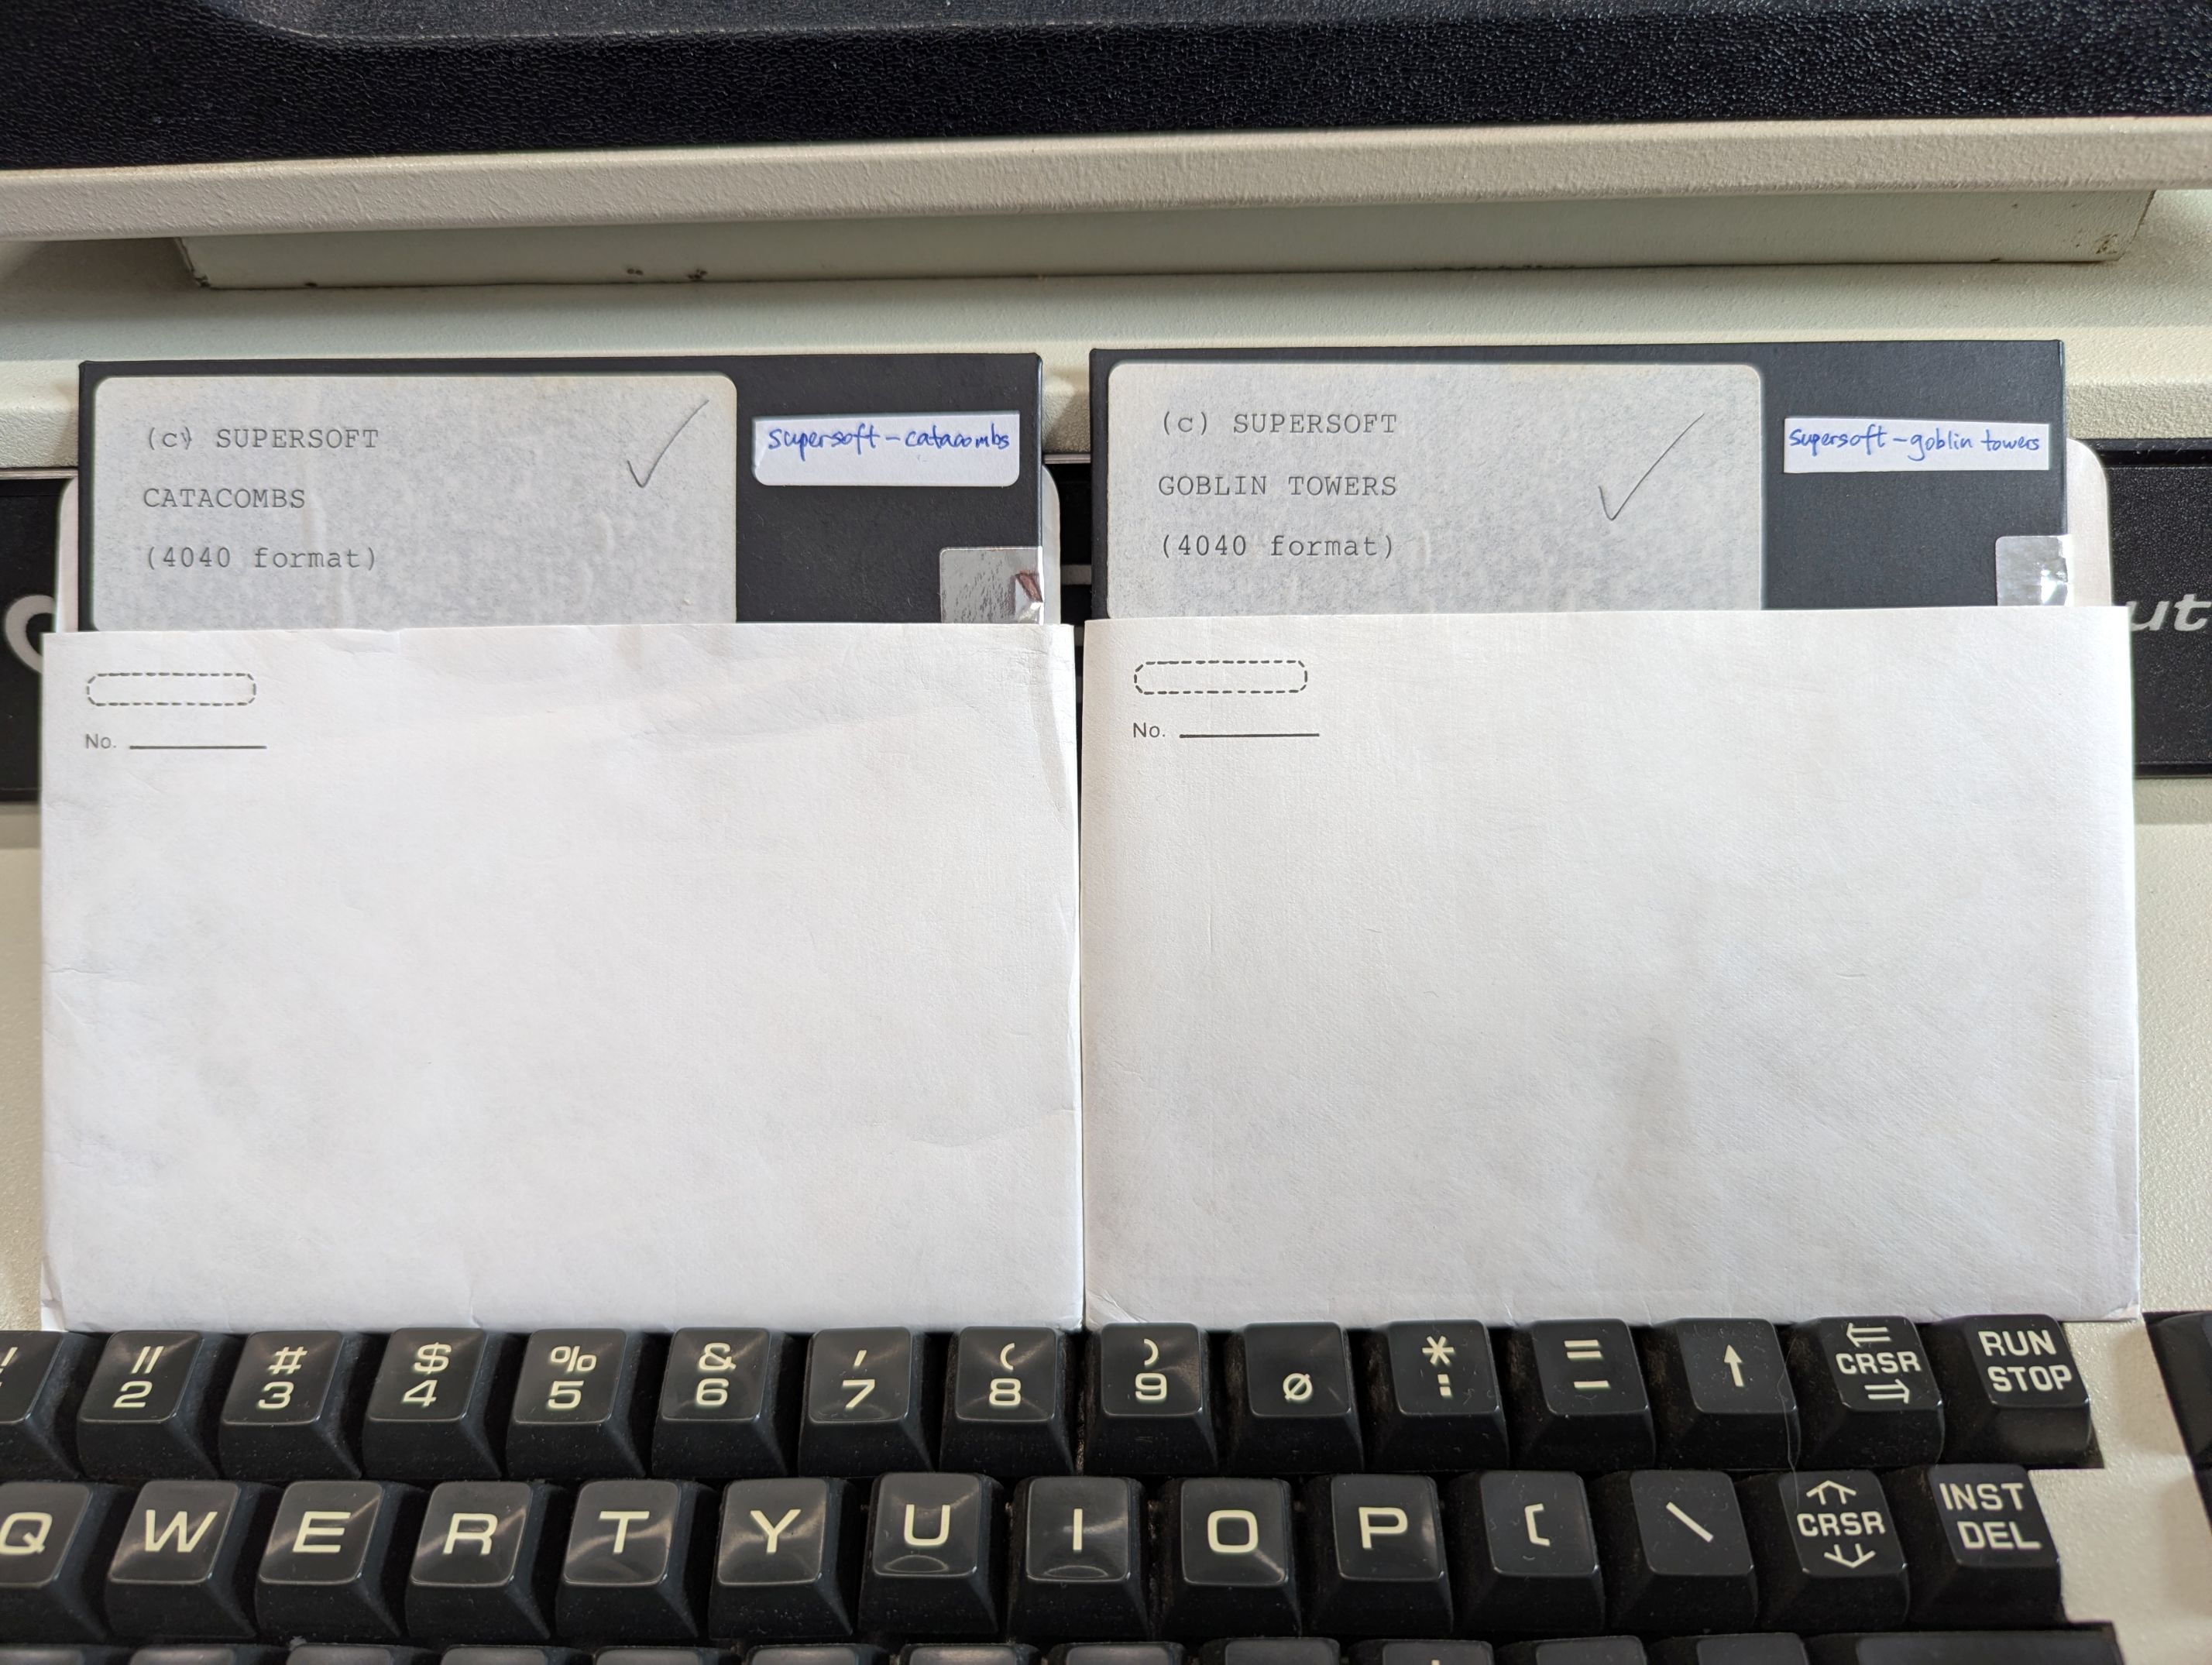
Returning back to the recent rescue: the disks for Goblin Tower were easy to copy, but Catacombs was a tricky case because the disk seemed to be corrupted. There’s a long account here (along with downloads!) of what happened, but to shorten the story, Brian Cotton used text files for each individual room, and wanted to make sure the player couldn’t read them.
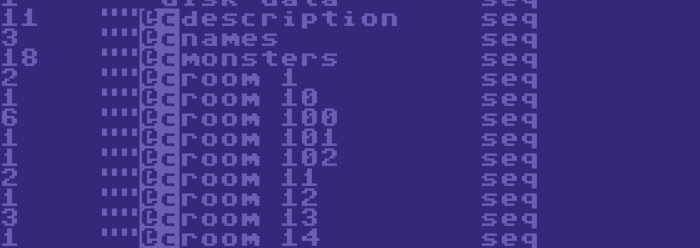
DirMaster is able to list the file correctly, but trying to take the directory on a real Commodore PET just produces corruption. What’s happening is the extra ” character followed by the @C which is sufficient to garble the text (when looked at with a PET) into junk. Furthermore, Cotton didn’t want people realizing the trick through the game’s BASIC source code. From Marcel’s video:

Look closely at line 2, which has a string of colons like this: “::::::::::::::::::::”. If run alone, that’s just a string of non-commands, but prior to that line there’s the SYS 15602 line. What that does is call a different spot in memory which overwrites the next line of BASIC source code while that code is running.
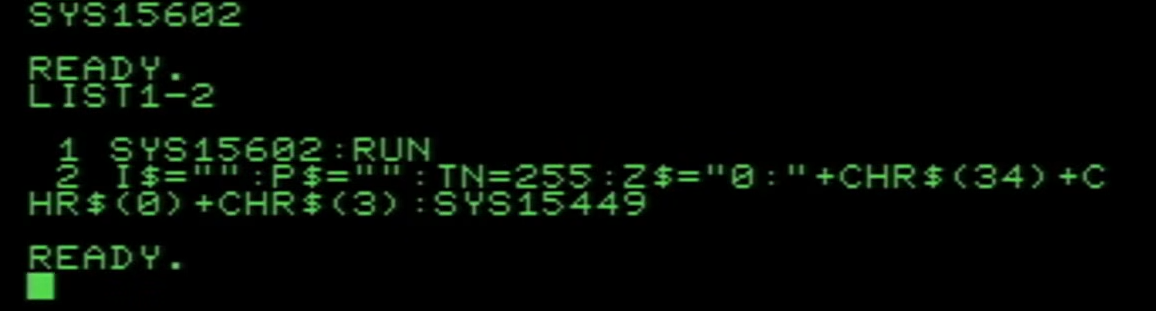
The spot filled with colons has been transformed into Z$=”0:”+CHR$(34)+CHR$(0)+CHR$(3). This provides a string that the game then uses to read the name of any text file representing a room, putting those characters at the start. Then, immediately after Z$ is assigned, the game covers its tracks by calling SYS15449, which rewrites the line of code that was just called back into a string of colons.
The web page includes the original version (which does run emulated) and also the “cracked” version with everything changed into plain-text. The issue for preservation is that it took a little more than a simple file-copy to preserve the disk (check the link for details). For us from here, though, we can focus on the game itself!
The game is genuinely close to its large Classic Quests iteration, although there’s one immediate change you can see from the start.
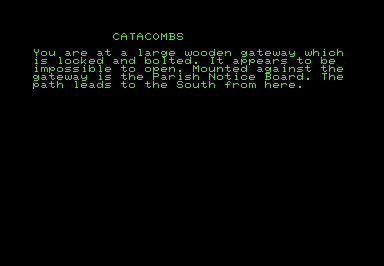
The result of READ BOARD.
The game has ASCII art! There’s files marked “pic1” through “pic11” (or to be more exact, funky characters followed by pic1 through pic11) and each one is an image that has a mere text description in the DOS version.
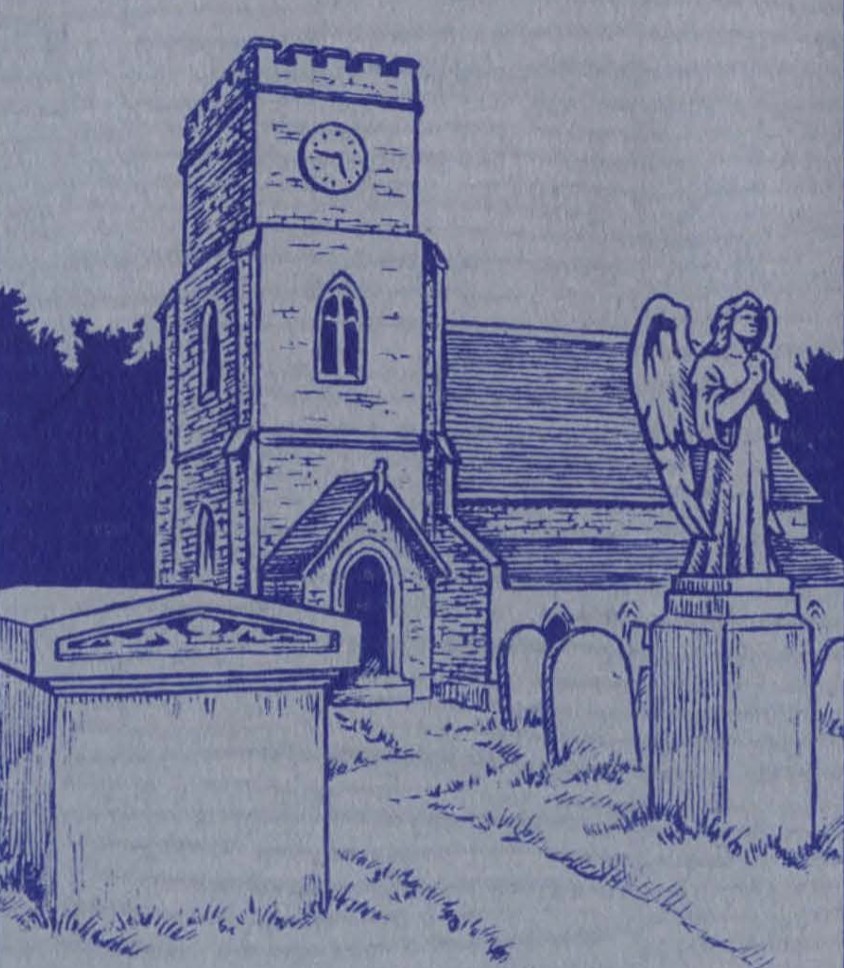
Your job is to explore the church that you start at and the catacombs beneath and retrieve all the treasures.
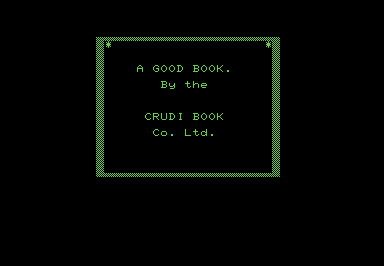
At least at the start, the game is very similar to the Classic Quests version, with room descriptions at least matching. However, inside the church, the book in the Classic Quests version uses text…
While the page is quite legible the content seems not to make much sense, however I can make out something about entering Heaven with the aid of certain holy writings.
…but uses ASCII art here. There’s no hint indicated like in the DOS version.
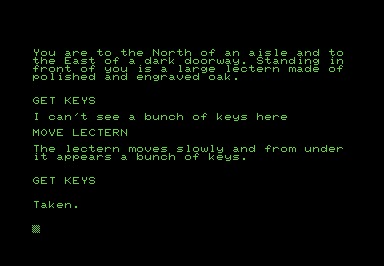
The map outside seems to be a slightly different maze than before (I probably will not map it out, but I’m always morbidly curious when a game undergoes slight changes). The keys are hidden under a lectern in the church just like before, and they unlock a tomb in the same way.

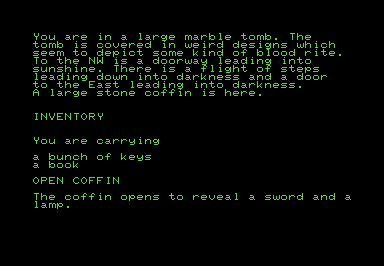
Inside is a coffin with a sword and lamp. The lamp lights with LIGHT LAMP but does not turn off with DOUSE LAMP (as the Classic Quests version) but rather OFF LAMP.
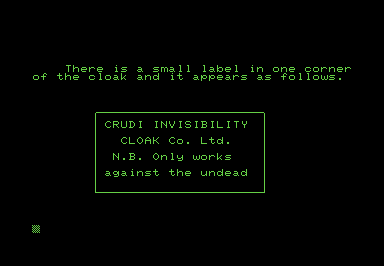
Just to the east is the vampire staked with the cloak, and the cloak has ASCII art. I haven’t tried messing with the vampire yet; in the current DOS version, you get a container for holy water from the church, then throw it at the vampire to kill it so you can safely take the stake, but the stake is used for absolutely nothing. It may not have the same behavior in the original!
Down is an OBOLUS coin as before, but again, some slight bit of art.

Just adjacent is the river with Chiron; I remember having to intentionally give a coin over in the DOS version (which is wrong to do! the coin is a treasure and you can cross the river a different way). Here, if you wait a turn at Styx, you will automatically cross.

One last difference I’ve noticed is that something that was previously broken definitely is here: the hooded rider. This was a rider that was supposed to appear randomly, but examining it would cause death.
You have looked upon the Dark Angel. This is the angel of death: to be more specific, your death. It has cost you your life to look upon it.
This game doesn’t let you examine! I’m not sure if I’m supposed to do something different here. It’s curious if it was added just for the DOS port.

Just as a reminder, other than this scene (which should result in some manure) I had a non-working flamethrower, no way of getting by a spider web (probably uses the flamethrower), a zombie and purple sphere with no clear use, and no way of pulling a “plug” in the water. On the last one, quoting Alex Dijkstra:
You need to remove this to get to Neptune’s bedroom and the Elysian field without paying Charon.
That is, previously the coin was getting used anyway because the alternate method wasn’t working! More investigation (and probably a finish) next time.
Back already! (Continued from my previous posts on Thissala.)
Well. Rob pointed out I still missed a chunk of content, but I still would have made it an addendum or a comment on my last post, except then I found a puzzle that both of us had missed, and here I am. Many of the lingering puzzles could be “this isn’t coded yet” territory, but the nature of the puzzle I found is such that it feels highly likely there’s a way through.
Let’s do that missing chunk first, and then the new puzzle. Last time I mentioned a section with a “dedication”.
Caldera (west)
You are in the great caldera of the minor mountain. There is a trail leading up the western slope of the caldera. Set in the ground is a 5 foot monument of marble in the shape of a man. From the sculpture eminates an outstandingly beautiful sound, unlike any other known to humans. The tone, pitch, and volume change constantly, but the rate of change appears to be dependant to your proximity to it. Engraved in the front of the sculpture is a dedication.
READ DEDICATION
It is with great sorrow, that here, at this location, on the twenty-fifth day of July, in the nineteenth hundred and eightieth year, we dedicate this sculpture in appreciation of a departed contributor to this endeavor. Swept away by the lure of self enrichment through further education with the eventual goal of making big bucks, he has left us.
We shall miss you Big Jim.
Though you are gone in being, the Thai will always remain
What I missed — because I interpreted the “trail” as the one I just entered in on — is that there is a new exit going up.
Acme of the minor mountain
You have reached the very top of the minor mountain. The visibility is very bad due to a dense cloud mass directly in front of you. The cloud obstructs your vision north, up and down.
There is a stake deeply imbedded in the ground here.
The stake is highly suggestive of typing a rope, and indeed TIE ROPE TO STAKE finally works! And then when I tried to climb the rope down it killed me and sent me down to Riverworld again. Sigh.
The game is fishing for you to DROP ROPE before going down (even though you’d be holding on to the rope to go down, right?) This allows going into a cloud section:
The white ramp
You are standing on a narrow white ramp joining the ledge on minor mountain and the clouds interior. The ramp is unlike anything you have ever seen. It is translucent and obviously very thin, but it can support your weight without the slightest sign of strain. Through the ramp you can see the ground many feet below.
N
A little gnome stops you on the bridge. After staring at you for a couple of seconds, he grows angry and curses you, waves his arms and suddenly there is a flash of bright light and when the smoke clears you find yourself in …
In the small room
You are in a small room with one window and a ventilation shaft in the opposite wall. The wall of the room are made from stone, and by looking through the window, it is obvious that you are somewhere in minor mountain, looking out on a field. The window has vertical bars obstructing passage, and the ventilation shaft has a crosswork grate covering it.
There is a small pile of bread pieces in the corner.
Thus begins a small escape section. Wait a beat (generally by trying to look at stuff and having nouns fail to get recognized) and a bird will appear at the window. Feed it the bread, and it will eat it, then fly off and bring you back a key.
There is a flurry of sound at the window. The multicolored bird has returned, but now he is aglow with light and the colors of his wings appears to change constantly. He lets out a noble cry and from his beak drops a brass key. The bird cries once more and disappears up towards the sun, circling higher and higher. He will be your friend and aide for evermore.
You can go up and unlock a grating, finding an exit out a ventilation shaft.
On the bed
You are standing on top of the small bed. Directly in front of you is a ventilation shaft embedded in the cold, gray stone wall.
Against the wall is a closed metal grating.
UNLOCK GRATING
There is a quiet click from within the lock on the grate as the brass key slowly turns
OPEN GRATING
The grating is now open.
ENTER GRATING
In the ventilation shaft
You are crawling through a well lit ventilation shift. The walls are made of aluminum. To the northeast there appears to be a junction in the shafts, while to the southwest you can see the end of the shaft, and a grey wall outside.
This is a small maze, and despite your items being zapped away by the gnome when you got imprisoned, leaving only the brass key, it still isn’t terribly hard to map.

Unfortunately, it also has the common attribute of some other portions of Thissala version 0.60 which it doesn’t seem to have any overall purpose. There are no treasures: you get captured, you get out. You can repeat trying to go up the white ramp but you just get caught again (and the bread/bird sequence appears again). Of the mainframe games I’ve seen with some in-progress aspects, the author usually nestles a treasure somewhere whenever they make a new area; that’s an easy way to make it “useful”! Maybe the working idea here was a little different because of the meta-plot, but there’s still clearly intended treasures to gather as well.
Just in case there was something useful from the brass key, I went around the map trying to stick it in various things, including the post box I spoke of ages ago. The box doesn’t even recognize being unlocked as something that makes sense, despite it being described as locked.
Inside the Old Post Office
You are standing inside of the old post office. Against one wall is a counter. This is was at one time a very busy post office (according to local lore) but now it is deserted. All of the postboxes have been destroyed except for one, which has a set of buttons on the front with a large brass faceplate around them, and a hinge on the left side.
The post office box is securly closed.
UNLOCK BOX WITH KEY
You cannot unlock the box.
By now I’d been obsessively trying to find recognized nouns, and I idly tried PUSH FACEPLATE, which resulted in “You cannot push it.” Not … “I don’t understand the word” … but … “cannot push”! Hmm! (Possibly you’ve hung out with me long enough you’re nodding along, but keep in mind how remarkable it is to realize a major clue from a slight change in parser message.)
READ FACEPLATE is the key.

!!! Due to the nature of already putting a “reset” button and a full ASCII screen, it seems highly unlikely the authors left this puzzle as a stub. It’s still possible whatever clue is meant to hint on a key combination was supposed to be placed and never was, but my intuition is telling me this puzzle can be solved.
PUSH “2”
Click.
PUSH “6”
Click.
PUSH “8”
Click.
PUSH “0”
Click.
PUSH “4”
Click.
PUSH “3”
Click.
Unfortunately this doesn’t seem to be the kind of code where there’s a sound when you’ve gotten the right number of key presses (even if they’re wrong) so I don’t know what length of sequence we’re looking for. Still, this is the closest this game has had to a Ferret-esque puzzle where people can chip in suggestions. For the record, I already tried 1979 (from the dime), the date from the memorial, and various ways of turning GLUCMAN LOCK COMPANY (and the special way it is written) into numbers. I will take suggestions in the comments.
In the meantime, my next post will be on a different game, even if somehow we progress here, and that progress leads to more progress; we’ll leave the action in the comments for now, but assuming we get somewhere, I will return to Thissala in a future post.
This is my last post on Thissala for now, although given the authors never finished it, and there seems to be content I haven’t been able to access, I can’t promise it is the last word. My previous posts on this game are needed for context.
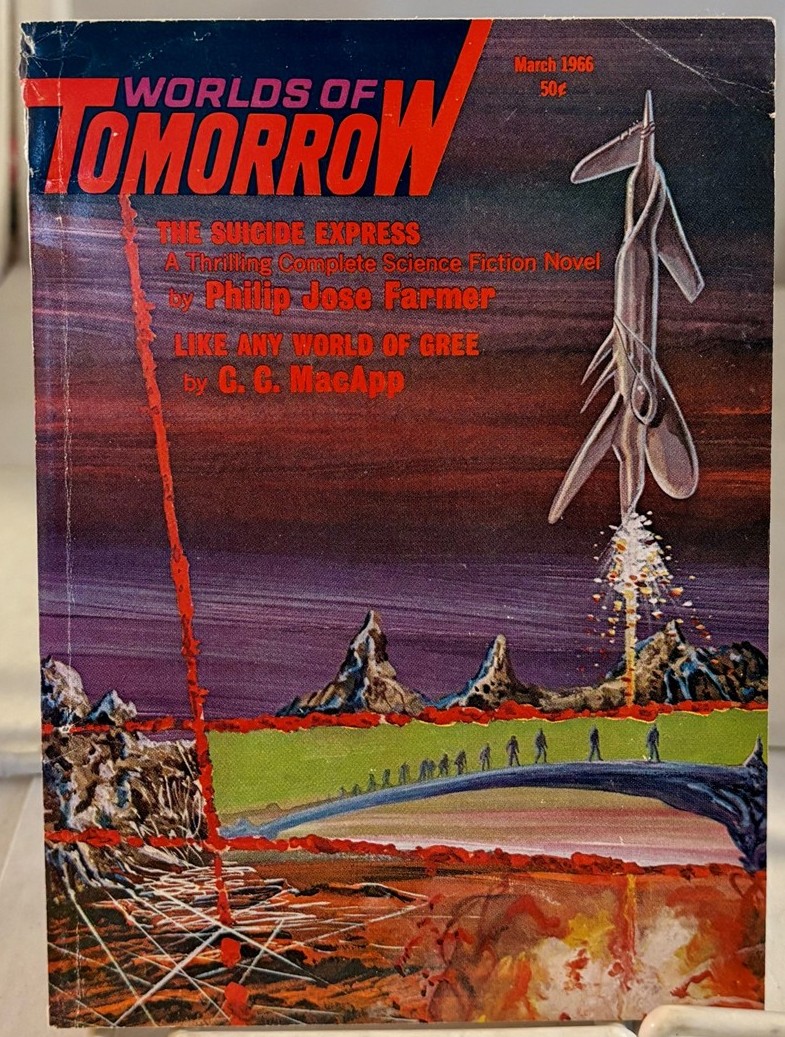
Via S. Howlett-West Books. Prior to officially being To Your Scattered Bodies Go, the first book of the Riverworld series was published as two novellas; this magazine has the second.
Let me first address something I mentioned in my post last time: what happens if you die repeatedly? In Riverworld the book, it causes the protagonist Richard Burton to be resurrected, but farther down the river; in a search for the source (like Burton searching for the source of the Nile) he kills himself repeatedly in order to take the “suicide express” down the river.
It doesn’t happen like that here.
KILL ME
As the darkness of death fades, and the light intensifies, you find yourself falling quickly at first then slower, then slower still until you find yourself looking down on a strange land. Below is a river, a long river, so long that even at this height the river stretches forever. About 1 mile from each bank of the river is a tall mountain range. You slow more until you are about 1 foot from the ground, and then you lite gently on the surface of an eerie world.
Western extreme of the bridge
There is a broken down wooden bridge here that crossed over to the other side of the river
KILL ME
As the darkness of death fades, and the light intensifies, you find yourself falling quickly at first then slower, then slower still until you find yourself looking down on a strange land. Below is a river, a long river, so long that even at this height the river stretches forever. About 1 mile from each bank of the river is a tall mountain range. You slow more until you are about 1 foot from the ground, and then you lite gently on the surface of an eerie world.
Thick mist
The ground, and the river, are almost undistiguishible here due to the dense fog that surrounds you. Upstream, you can barely make out what appears to be a bridge heading to the other side of the river.
You reappear at some random place on the west side of the river, and the three coins (dime, penny, quarter) re-materialize somewhere in Riverworld to be picked up. The only problem is the boat. If you’ve used the boat to the tower, and then escape, the boat stays at the tower! That means you are stuck in Riverworld and have to reload a save game. (I also, oddly, had one of the three coins not appear, which made me suspicious of a secret room, but it could easily be just a bug. You can re-suicide to get the coins to move elsewhere, though.)
The boat does have a delay when you push a button, so if you actually do feel the need to ride the suicide express, you just need to remember to press it after arriving at the tower.
Inside the little boat
You are standing inside the little boat that floats on the great lake at the end of the river. There are two buttons here, on marked “T” and the other “S”, although no explanations are given.
PUSH “S” BUTTON
Beep
DISEMBARK
After a momentary delay, the boat glides off quietly towards the shore
The Silver tower
You have reached the silver tower in the middle of the lake. You are standing on the lake level platform. The platform continues around the tower at this level in both the clockwise and counterclockwise direction. There is a second platform visible high above your head
I finally got by the pirate who was stabbing me, via that magic of the game being glitchy or at least confused. I reloaded a different save to go over to where the pirate/rat/spider were and for some reason one of the enemies (the spider) was missing. This was enough for me to win the battle.
ATTACK RAT WITH SCIMITAR
Your attack with the scimitar has been completely successful. The rat falls to the ground dead. As you look at the body, it disintegrates.
LOOK
In a notch in the wall
W
The Pirates Den
N, S, E, and W from the den lead back to the notch. I’m guessing the authors planned to mimic the pirate of Adventure but never finished adding the feature in, so the Den is just a description-less room.
Next up: two easter egg areas. First is from the lingering ghost of Adventure, which clearly held strong over these authors. You can use the magic word XYZZY…
XYZZY
You’re in Debris Room.
You are in a debris room filled with stuff washed in from the surface. A low wide passage with cobbles becomes plugged with mud and debris here, but an awkward canyon leads upward and west. A note on the wall says “magic word XYZZY”.
XYZZY
You’re inside building.
You are inside a building, a well house for a large spring.
…and using XYZZY a third time just sends you back to where you left from. This all raises a question: what is the earliest XYZZY easter egg? Is it this one? That is, not just a game that’s a derivative of Crowther/Woods, but one coded from scratch, that implements the word anyway. Acheton says
I’m afraid that magic word hasn’t got enough power to work in this universe.
and Zork has a voice that says “Fool”, but is there another one I’m missing from ’78-’79 that did more? I haven’t tested XYZZY everywhere.

From Dennis Donovan’s 1978 map of Crowther/Woods, via Facebook.
ASIDE: There was an odd period in the 1990s where XYZZY easter eggs were so prevalent a list was developed of every occurrence; you can find a modern compilation via David Welbourne. I remember when So Far (1996) first came out it seemed like a statement that XYZZY was not an understood word. (“That’s not a verb I recognise.”, with the British spelling, since Graham Nelson used that spelling.)
The other easter egg comes from an undescribed exit at the mountain right before the bridge. The text says “highest plateau” but the game didn’t really mean that. I will give the text in its entirety.
Highest plateau
You are on the highest plateau, which is considerably larger than the two lower ones. Directly below you you can see the Dipestia which flows from the NE to the SW where it curls around Major mountain, to south. Across, but higher up the northern face of other mountain, there is an observation booth with what appears to be a small gnome looking out at you using binoculars. Directly below the observation booth, at the level of the ledge you are on, is a wooden drawbridge. The drawbridge is in the closed position, forming a path accross to Major mountain
U
Top of the mountain
You have reached the top of the lesser mountain, on the eastern edge.
There is a trail here that heads due west.
W
Eastern edge of the caldera
You are standing looking down into a great caldera.
D
Caldera (east)
You are in the great caldera of the minor mountain. To the west you can hear a beautiful but faint sound – a sound unlike any instrument or animal ever heard.
W
Caldera (west)
You are in the great caldera of the minor mountain. There is a trail leading up the western slope of the caldera. Set in the ground is a 5 foot monument of marble in the shape of a man. From the sculpture eminates an outstandingly beautiful sound, unlike any other known to humans. The tone, pitch, and volume change constantly, but the rate of change appears to be dependant to your proximity to it. Engraved in the front of the sculpture is a dedication.
READ DEDICATION
It is with great sorrow, that here, at this location, on the twenty-fifth day of July, in the nineteenth hundred and eightieth year, we dedicate this sculpture in appreciation of a departed contributor to this endeavor. Swept away by the lure of self enrichment through further education with the eventual goal of making big bucks, he has left us.
We shall miss you Big Jim.
Though you are gone in being, the Thai will always remain
At least we have a date of one of the game sections! (25 July, 1980.) What I don’t know is which of the authors (David Auerbach, Paul Chiasson, and Peter Macaulay) this is referring to! Or if it even is one of those authors, and this is one of those things where someone who gives lots of suggestions is uncredited.
With all that wrapped up, there’s two puzzles lingering that Rob hinted at in the comments. One of them, I’ll admit, I still wasn’t able to solve with the ROT13 hint Rob gave; somehow there’s a parser command that puts the washer and the fuse together, and then it installs in the fuse box…? Given the result is a single treasure, and we still have the treasure destination, I’m fine leaving that puzzle be. (I’m guessing the answer will show up in the comments, so check there if you want to know. Look, I’m doing engagement!) The puzzle I did manage to solve involved the skittish hen.
FEED HEN WITH CORN
The hen does not trust you, and refuses the food.
Somehow way back in my early days of playing I tried just leaving the corn here but not coming back (because I forgot about it while mapping a billion rooms, maybe). If you leave the corn and do come back, you get a golden egg.
Inside the hen house
Sitting in the corner, eating some dried out corn, is a large hen.
Sitting on the shelf is a small nest
It contains:
@In the middle of the nest, where the hen used to sit, is a beautiful golden egg.
Huzzah, another piece of score that only registers when you are holding it, because we can’t get into the bank (where the treasure probably goes). With that, let’s summarize all the sticking points:
1. getting the teleporters to work
2. the bank
3. the mysterious box in the church which counts as a treasure but kills you
4. getting the treasures back past the bridge where the gnomes stop you (probably using 1)
5. the dowel/cylinder setup
6. the curtain with the hooks
7. the north exit mentioned in the Kitchen which isn’t there
That’s less than you might think! The desert had no real puzzles and I have found no use for the hammer or the key. Of the above issues, I’m pretty sure 7 is a dead end (unless there’s a wizard cheat code or someone can just hack a 32-bit Eclipse), but I still feel like the other six may plausibly have a real solve in game; just neither me nor Rob can find it. A thread for a future explorer to pull, perhaps? (Or at least someone who can figure out Data General binary files.)
You might be able to guess already I don’t recommend this game for the general public. I found the whole process of “digital archaeology” fascinating while contextualized in a historical sense — playing a game with no clear ending just like the players of the early ’80s on a mainframe did — and the prose was pleasant enough despite the typos, but it wasn’t enough of a reward for mapping and more mapping and more mapping. It’s like some musicians started with an ABACA formula but got stuck in B with a 2 hour guitar solo.
Coloured rock canyon
You are standing on a North-South track in the middle of a sandstone canyon. The rock walls on either side are veined and banded with varied hues of sandstone, mainly reddish shades which lie between roseate and ocherous, but with occasional streaks of bluish-gray and green, which seem to indicate the bedding-planes of an upper Triassic, or possibly lower Lias, series of sediments. The colours appear to be glowing in the strong sunlight. It is altogether a beautiful and somewhat awe-inspiring sight.
(Someone got to show off their geology skills, though!)
I don’t want to discourage people from trying too hard, because I really would like an answer to those questions! Maybe one of the unaccounted-for authors (David Auerbach, Paul Chiasson) is still alive and will Google themselves, and we’ll finally get the story on what happened.
Coming up: a recently rescued lost Commodore PET game.
(Continued from my previous posts.)
I’ve finally finished filling in the map of the desert, and found absolutely no items whatsoever. It’s all just rooms and more rooms. If there are any puzzles, they’re of the “hidden” variety. This presents an opportunity to do something I’ve done only marginally on this blog: analyze the prose.
Before I get that, let’s lay out the rest of the geography.
I mentioned a rusty key after a rock slide; heading farther northwest leads to a view by a cabin (the one with unimplemented rooms)…
Canyon edge overlooking cabin
You are on a northwest-southeast track which runs along the rim of a canyon. A small ruined cabin lies on the canyon floor far below to the west, and beyond it you can just see the entrance to a mine. The canyon walls are too steep to get down there.
…and is followed by a series of paths leading finally at the far north to a tower (which I gave the description of last time). I hadn’t mapped every nook and cranny here but I can now say they just go around in a circle.

The map has a strange mixture of realism and confusion. So many of our maps essentially have dropped the next place at random; however, the author who made this section clearly cared about how one aspect merged into another, and it all likely made sense in their head. In practice, having (for example) a north exit turn so going back requires going southeast and having some exits be only one-way (without absolutely clear reasoning given why) makes whatever reasoning the author had opaque to me.
Winding path in mountains
The small winding path where you now are is crossed by what could be various tracks in all sorts of directions, and winds so much that you are totally unsure of which direction it is heading. You have the impression that recognisable territory lies to the south of where you now are. The mountains all around are dry and bare.
N
Dry hillside
You are on an open dry hillside at a point where an East-west trail crosses a faint North-south path. The path to the north seems to head for a notch in the ridge of hills which lie across the horizon in that direction, and the Westward path goes into a dip in the hills which could be the beginning of a valley. The open bare rocky landscape surronding here is niether interesting nor attractive, though it is slightly impressive in a bleak sort of way.
N
Rock notch
You are on a path just beside the place where it runs through a notch in a rocky ridge of hills. The ridge runs more or less in an East-West direction,and the path on one side leads downhill to the South. On the other side it runs through the notch to the North and curves round and out of sight to follow the line of the ridge just below the crest on the northern face. You could also get over the rocks to the West (or amost any other direction) since the slope is not terribly steep.
I haven’t been fussing much about the typos; notice both “surronding” and “niether” at the dry hillside. I generally have given these a pass given the circumstances of the game either being a snapshot in progress or abandoned due to circumstance. (Just a reminder we knew nothing about Thissala prior to the Novas Are Forever dump appearing last year; for all we know there is some build from 1988 that completes the game, just like Ferret eventually came to an end.)
The other part I had left to fill in was the Opal Mine. (There’s a Goblin Mine mentioned which seems like it might have been intended as a separate place, but maybe the authors forgot about it? … or maybe there’s some ultra-obscure puzzle to get there.)
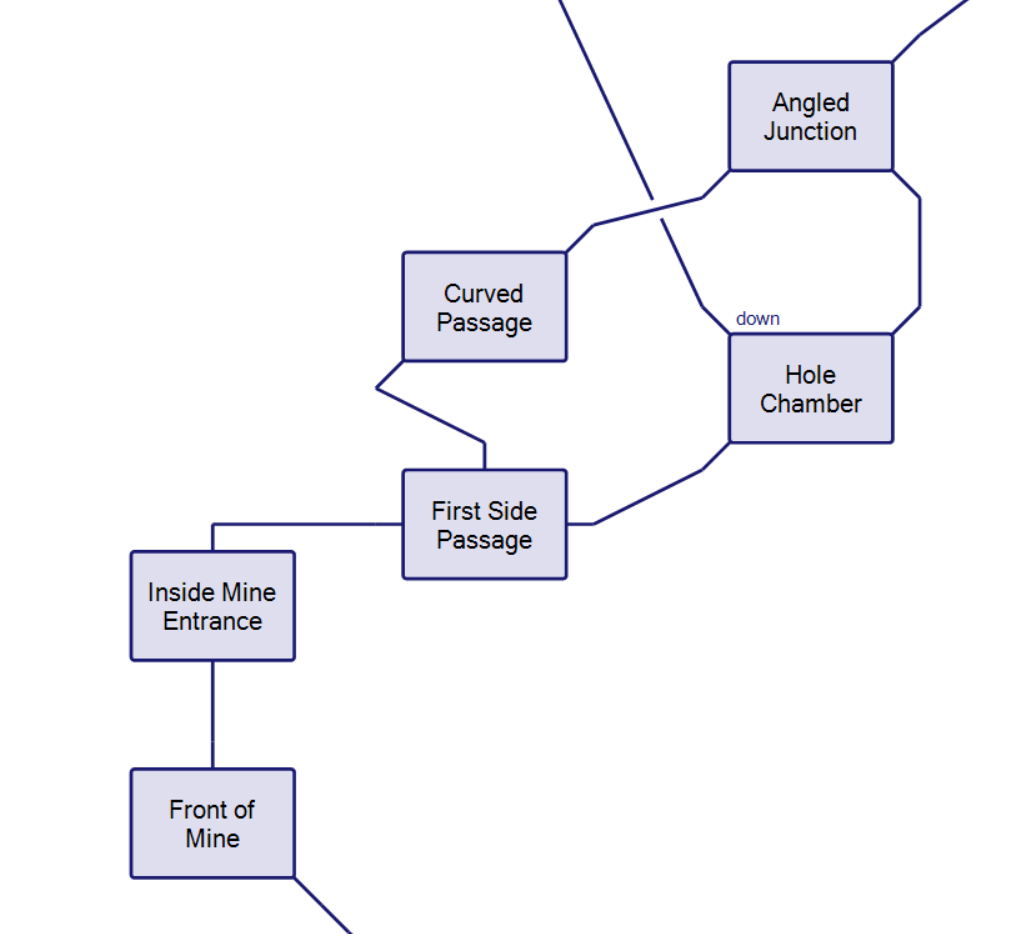
It started out seeming like it might be essentially linear.
Inside mine entrance
You are standing just inside the entrance to an opal mine. To the south the sunlight spills in through the doorway onto the rocky floor. The mine passage heads north from here and begins to twist about.
N
First side passage
The main gallery of the mine runs in an East-West direction here, and there is a small passage leading off the gallery to the north.
N
Curved Passage
You are in a narrow curving passage which runs Northeast-Southwest at this point. The passage appears to get broader to the Northeast.
NE
Angled junction
You have just come around a curve in the passage to this junction. From where you are standing a wide passage runs in a Northeast-Southwest direction, and a hewn rock passage enters this from the Southeast.
From there the map branched out a bit, enough that I would occasionally run into a room I’d seen and then have to shift my map around to make everything fit.
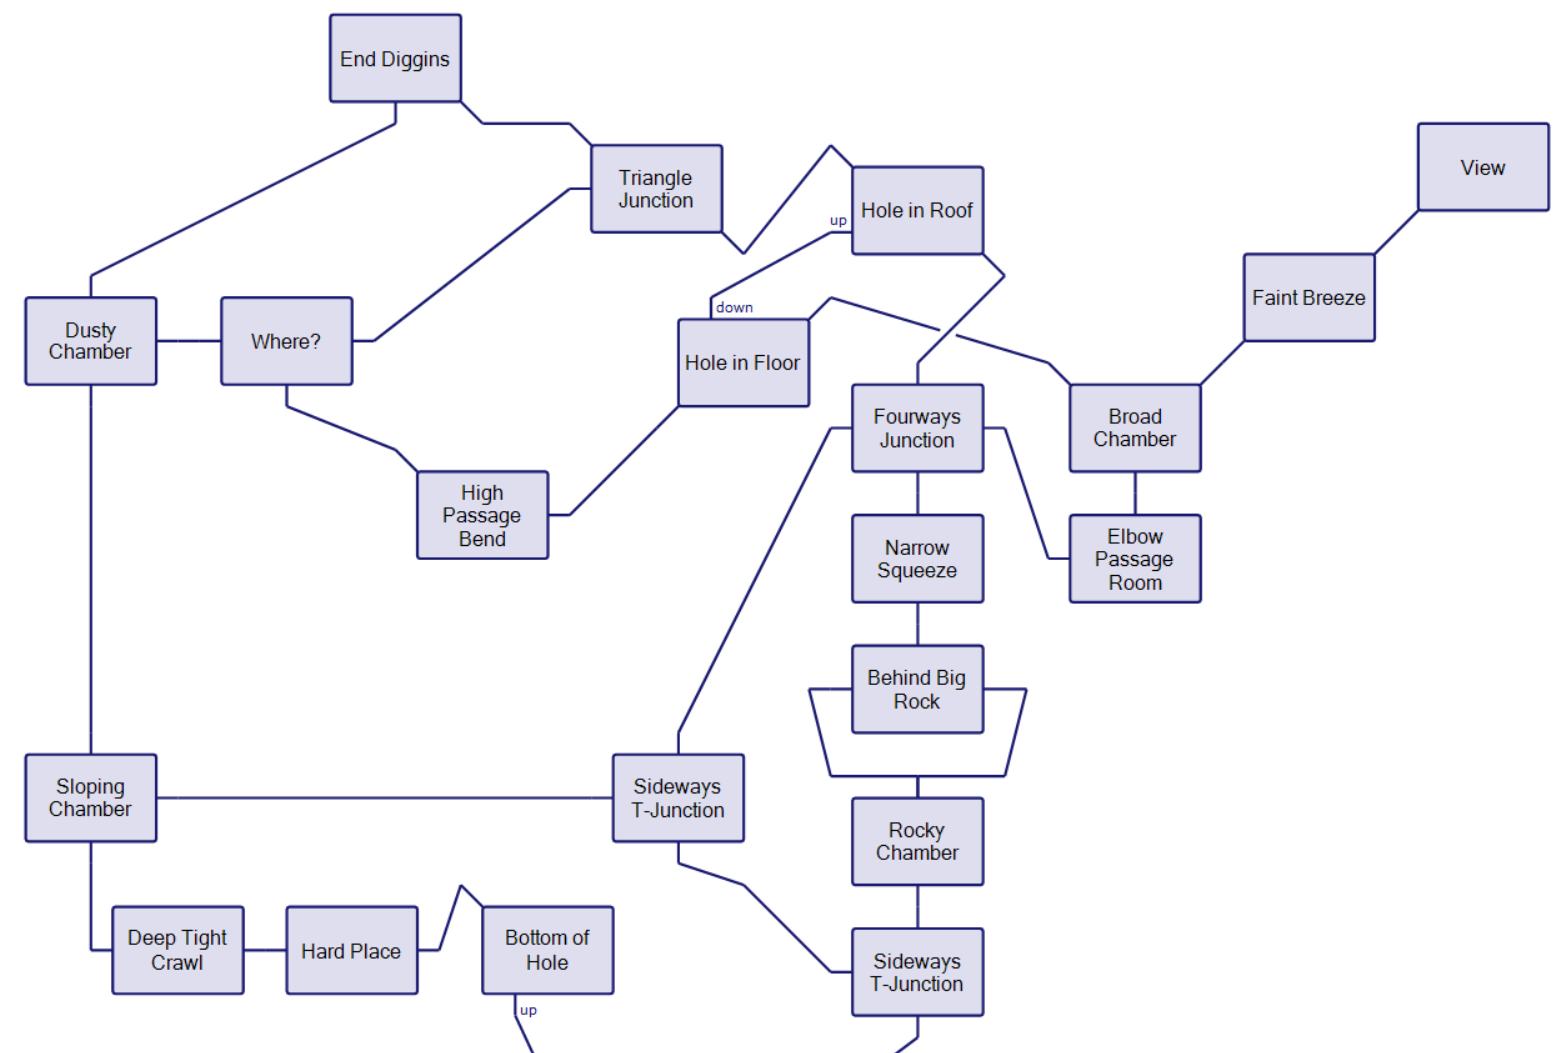
I still wouldn’t call my layout optimal, but again, there seems to be absolutely nothing here. For people without many virtual rooms to spelunk, just the sheer act of discovery I suppose might be interesting, but I really am not sure where the author of this section was going for.
Narrow Squeeze Passage
You are in a narrow North-South passage. The roof of the cave, which is quite high to the north, descends as the walls narrow, making the passageway to the south very tight.
N
Fourways junction
You have come to the middle of an arched and faintly reverberant cavern. Trails, which are faintly marked in the floor of the cave, lead North, South, East and West to passages dimly-glimpsed on each side.
N
Hole in roof
You are standing in a narrow twisty passage with walls of dryish dark coloured stone, which runs Southeast-Northwest at this point. There is a hole in the roof here.
There are only two rooms I found somewhat of interest (in a “maybe there’s a puzzle here” way), the first being a mysterious room marked with the word END DIGGINS. Maybe it signals a magic word, but more likely it signals the place the author ended (it’s essentially the farthest north you can get).
End diggins
You are in a very roughly excavated circular chamber with entrances only to the South and Southeast. Scratched in large rough letters against the north wall of the chamber are the words “END DIGGINS”. This would appear to be about as far as you can get.
Not too far away, going up a hole and heading northeast, there is a “View” which follows the same model of longer text than usual as other Views.
Faint Breeze Passage
Yoy are in a straight Northeast-southwest passage mined through some dry grayish rock. A faint breeze is blowing from the Northeastern end of the passage.
NE
View
You are standing where a hole emerges from a mine into the middle of a sheer cliff face. The rock is unscalable on all sides. From this vast height you can see over a vast and windy desert of golden sand, which ends in a mountain range far to the north of where you are standing. The mountains contain some of obviously volcanic origin, and just on the edge of the desert beside the mountains is an isolated and still active volcano, whose stark vertical sides of black basalt rise up from the harsh desert, and are topped by a craggy lava cone. Smoke or steam appears to be coming from several blow holes on the volcano, and from the caldera on its crest a plume of smoke and dust rises to a great height before being blown sideways in the wind. The hole in the rock leads off to the southwest and safety.
As I already mentioned, I don’t think lingering on the typos (“Yoy”) is worthwhile, but I think I can treat the View here as the author-intended prose. Is the prose effective?
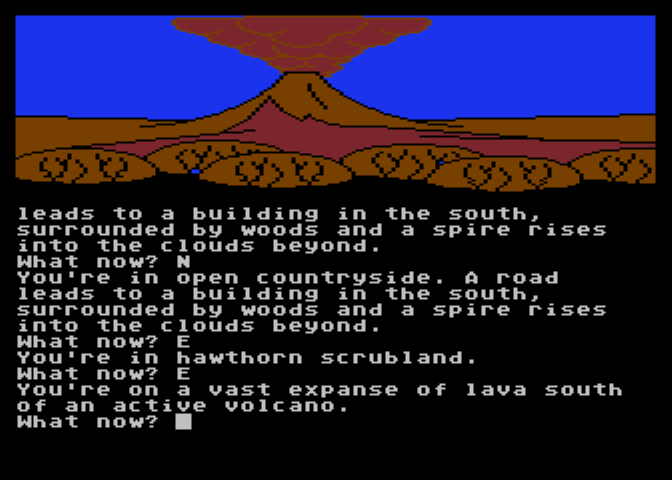
Colossal Adventure from Level 9 didn’t have the space to put a long prose chunk so didn’t copy the Volcano View composed by Woods and his friends, but they compensated with actual art of a Volcano outside.
You can look at both in a holistic sense and in a micro sense. In a holistic sense, it’s trying to emulate the Volcano View of Colossal Adventure, so let’s pull that text up alongside.
You are on the edge of a breath-taking view. Far below you is an active volcano, from which great gouts of molten lava come surging out, cascading back down into the depths. The glowing rock fills the farthest reaches of the cavern with a blood-red glare, giving everything an eerie, macabre appearance. The air is filled with flickering sparks of ash and a heavy smell of brimstone. The walls are hot to the touch, and the thundering of the volcano drowns out all other sounds. Embedded in the jagged roof far overhead are myriad twisted formations composed of pure white alabaster, which scatter the murky light into sinister apparitions upon the walls. To one side is a deep gorge, filled with a bizarre chaos of tortured rock which seems to have been crafted by the devil himself. An immense river of fire crashes out from the depths of the volcano, burns its way through the gorge, and plummets into a bottomless pit far off to your left. To the right, an immense geyser of blistering steam erupts continuously from a barren island in the center of a sulfurous lake, which bubbles ominously. The far right wall is aflame with an incandescence of its own, which lends an additional infernal splendor to the already hellish scene. A dark, foreboding passage exits to the south.
This maybe goes a bit too long (and was ALL CAPS in the original) but still has two advantages over the View in Thissala. One, the scene is vibrant in a way that allows picturesque words (“jagged”, “sinister”, “brimstone”, “gorge”) such that the prose level matches the melodramatic swarm of the vision. Second, the scene is totally isolated: there is nothing like it elsewhere. Hence, the length of prose lends a significance that the Thissala text lacks; even though there are absolute clichés in here, the fact this is the only place this happens in a work that can take 20+ hours to solve makes them more forgivable. You can think of it as the perspective of the avatar being overwhelmed and suddenly becoming loquacious; when I came across the scene for the first time (as a child!) I found this aspect to be moving.
In a micro sense, the Thissala prose is functional; despite this being in person something that would look at least semi-epic, it tries hard to describe what’s there in an almost scientific way.
Smoke or steam appears to be coming from several blow holes on the volcano, and from the caldera on its crest a plume of smoke and dust rises to a great height before being blown sideways in the wind.
This isn’t bad! But the language with “smoke or steam appears” is too hedging to be effective, and the idea of a giant plume going up and then sideways is conveyed but doesn’t have a sense of poetry. Let’s take, comparably, the first room of Beyond Zork, as written by Brian Moriarty:
The horizon is lost in the glare of morning upon the Great Sea. You shield your eyes to sweep the shore below, where a village lies nestled beside a quiet cove.
A stunted oak tree shades the inland road.
The prose here is similarly trying to depict what “your eyes” sees in a direct way, but makes it more dramatic: it establishes a “glare of morning” causing you to “shield your eyes” which segues into using your eyes to “sweep the shore below”. While it is never the absolute case that less text means more — Thoreau’s advice isn’t “simplify” but rather “simplify, simplify” — Moriarty manages to pack more into what’s going on via his choice of words. Both have the very similar technique of description-by-eye-movement (not conventional!) but Thissala needs a few more rounds of edits to hold the same amount of poetry.
Of course, those “few more rounds of edits” is the sticking point now — I really am out of places to explore, although Rob reports I’m missing something … somewhere. I think I’m done with Riverworld (see image on the top), although I haven’t tried dying multiple times yet to see if anything different happens on a return visit. I still haven’t resolved the fuse section, which I highly suspect is a matter of finding the right phrasing (in other words, not really a puzzle); I don’t foresee that opening up a large area. I am still suspicious of the curtain, but I haven’t had any luck getting it to move or do anything (Rob hasn’t had any luck either).
Library
This is the king’s library. Along each wall are shelves of books on all subjects, some old, and some new. Breaking the shelving on the east wall is a doorway, and on the north wall, a set of curtains.
Next to the curtains, on each side, are small hooks to hold the curtains
Sitting on one of the library shelves is a hardbound book
The book (Dream Park) I tried reading a bit of and I didn’t find any clues related to the game. Things do not go as badly as they do in Westworld; the environment is sort of a mega-LARP involving fancy holograms and the book plays more with combining the two layers of story than having one destroy the other; it doesn’t go apocalyptic. If the book indicates anything to me it might be there’s a “control room” somewhere that affects the world as a whole, but did the authors ever get around to implementing it?
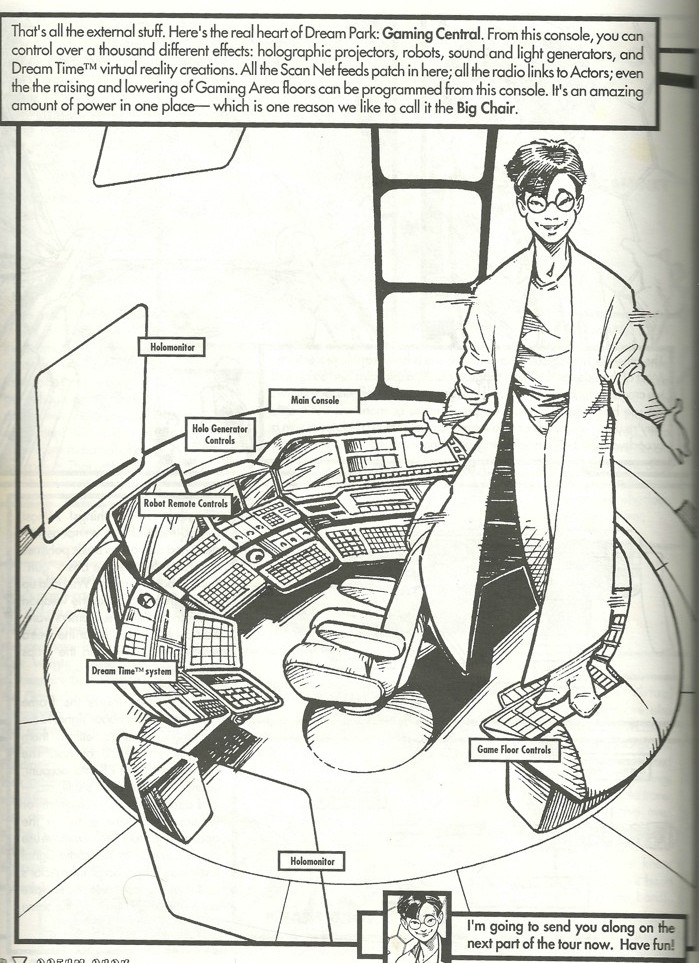
There was a Dream Park RPG from 1992. Since the characters are LARPing with holograms, it means they don’t really “die” when they die. Source.
I suspect, no matter what, I’m winding down on my entries. I’ll still do a big push on the remaining puzzles and locations but unless something major happens I’m likely going to finish by my next entry.
(Continued from my previous posts.)
One thing to keep in mind with mainframe adventure games is they were often experienced by players of that period in a state of “under construction”. This started directly with Crowther who left a literal “under construction” sign in the lower parts of his cave, where one of the exits simply crashes the game. This was kept to an extent by Woods (who left “under construction” in at Witt’s End) but Woods also had one release that included his own “under construction” sign, where the troll bridge would later be.

David Lebling’s map of the “250 point” variant of Adventure, at his GDC 2014 postmortem of Zork.
While the most recent version of a game (as complete as the authors have made it) is generally what modern players have, someone playing Acheton in 1978 (directly on campus at Cambridge) would not have the same gameplay as someone playing Acheton in 1981. It’s easy to forget we aren’t dealing with static works but moving targets, and David Lebling (see image above) only played a partial version of Crowther/Woods before starting on Zork.
This causes an extra issue: is what we are seeing not working because the author hasn’t implemented it yet, or is it a puzzle to be solved? In exploring the regions visitable by the train in Thissala (two very small, one very large) this question came up multiple times.

It’s not common to see literal Under Construction signs in games any more, although this area blocking off one direction of a street is from the 2026 demo for Nirvana Noir.
Before getting to that train, one issue that Rob mentioned in the comments (which I hadn’t even really dealt with yet due to a bug). Specifically, this has to do with the donation box at the church, which has a CHEVY key inside. As long as you don’t take the key, you are able to pick up the box.
Inside the old church
You are standing inside of an old village church. The interior of the church is lit from light filtering through the stained class windows high in the roof. Towards the front of the church you can see a small pulpet, behind which are rows of benches. Immediately in front of you is a small, brown, walnut table, that stands about 3 feet high.
On the table, is a beautiful veneer box, with a slot cut in the top.
SCORE
You currently have 0 out of 750 points, requiring 13 moves
You current classification is ABSOLUTE MORON.
GET BOX
Taken.
SCORE
You currently have 5 out of 750 points, requiring 15 moves
You current classification is ABECEDARIAN.
The change in points means it counts as a treasure (which goes… ???) Trying to make it out with the box results in death.
OUT
Old Church
NE
There is a loud crash of thunder, and as the sound reverberates through the lands, echoing off Minor and Major mountains, a deep dietal voice rumbles “THOU SHALL NOT STEAL”. There is a flash of lightening and as the bolt strikes you you find yourself still outside the old church …Unfortunately, you are now a pile of ashes, or to put it more simply … you are dead.
Notice there’s an extra turn here for you to do something (suggesting maybe there’s a puzzle-action here to survive) but is there really? Or is this an incomplete puzzle? Especially suggestive of the puzzle being unfinished is the fact that taking the CHEVY key out results in the player not being able to pick up the box (it is now described as fixed in place) which is clearly a bug, and putting the key back in doesn’t fix the problem.
Given there’s no clear place where treasures go I’m fine stalling on thinking about this anyway and moving on to the train station. I never was able to win the fight against the three enemies in the “niche” so I don’t know what clearing that space out does.
ATTACK PIRATE WITH SCIMITAR
Though you hit the pirate, it is still alive
The pirate, with an evil gleam in his eye, strikes and slashes, but you still live.
The giant rat circles … He bites you squarely … and you feel the life running out of you
The niche is not important for boarding the train; you can just wait at the regular station for long enough and it will show up. It seems to be on a two-hour cycle. When the game’s time is on 1:00 (or 3:00, 5:00, 7:00, etc.) the train visits the main station. At the half hour, it reaches “River’s End”, at the next hour it reaches “Dry Gulch”, and at the next half hour after that it reaches “Stark Beach” before returning back to the main train station.
WAIT
It is now 13:0
Now arriving on track number one, the VS+EL local train.
BOARD
Welcome aboard the VS+EL Railroad. Have a nice trip.
Main station (aboard the VS+EL)
This is the main station of the Very Short and Extremely Local railroad (the VS+EL RR). There is a small station house to the east of here.
WAIT
It is now 13:5
Main station (aboard the VS+EL)
This is the main station of the Very Short and Extremely Local railroad (the VS+EL RR). There is a small station house to the east of here.
WAIT
It is now 13:10
In the tunnel (aboard the VS+EL)
WAIT
It is now 13:15
Emerging from the tunnel (aboard the VS+EL)
You are emerging from a large tunnel dug in the base of Major Mountain. Behind you, you can see the entrance carved from the rock. In front of you is a large field.
For reasons that will become quickly clear, I’m getting River’s End (first stop) and Stark Beach (third stop) out of the way first before discussing Dry Gulch.
This map is the entirety of River’s End:

I wish I could say this area is clue-laden or at least filled with potential, but this really comes off as a stub that the authors intended to get back to.
Oceanside station
There is a small station platform here. To the distant south, you can see the ocean
Sitting at the station is the VS+EL local train
SW
Access trail
You have reached the access trail to Oceanside station. The station is on the branch line of the Very Short and Extremely local railroad
SW
Winding path
The path heads northeast/southwest
SW
Oceanside beach
You are standing on a small sandy beach along the shore. There is a trail heading northeast from here
Maybe there’s a boat or some other secret with the beach? DIG is a verb although the game very specifically asks you to have a shovel.
Stark Beach is similarly barren map-wise…
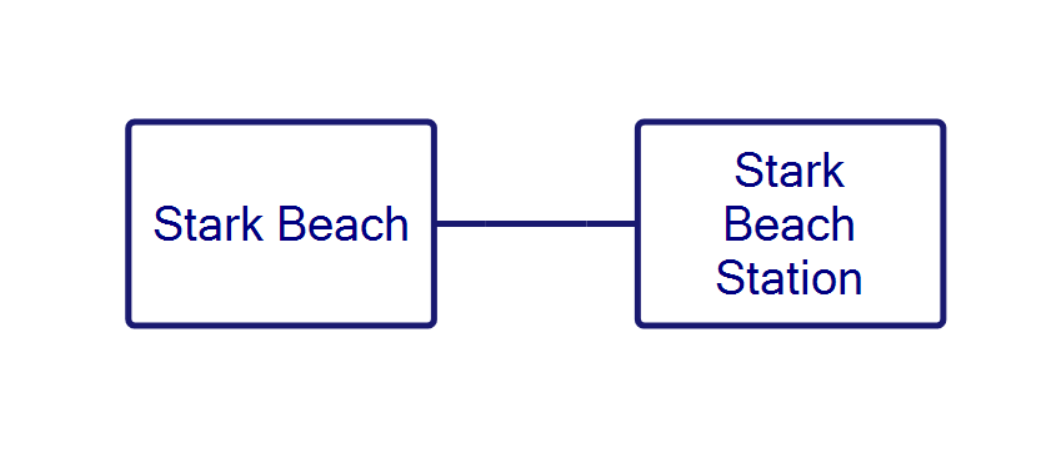
…although at least there’s more work put into the room description.
Stark Beach Station
Stark beach is known for it abundance of nude bathers and party people. To the west is a path that leads off to the beach.
Sitting at the station is the VS+EL local train
W
There is a rumbling sound and a distant whistle from a VS+EL RR train.
Stark Beach
Directly in of you, though seperated from you by a chain link fence, is a sandy white beach. Many beautiful women, and handsome men normally can be seen bathing in the nude, running around the beach, playing games of tag, and thoroughly enjoying themselves. There is a large bar at one end of the beach, where more naked men and women usually lounge and sipping tall cool drinks. At the other end of the beach there is a series of small tents where various men and women can go off to be alone. This is a way of life here at Stark Beach … when it is sunny … but it is overcast … threatening to rain … there is no one to be seen … and the fence is closed … too bad.
Lying in the sand here, is a beautiful silver bracelet, obviously dropped by a bather in a hurry to get to the fun.
I can’t tell if this is meant as a puzzle, a stub for further expansion (that never occurred), or a complete encounter. At least this location does dispense a treasure (the silver bracelet) although I have no way of getting it back out of the mountain past the gnomes. (You would think the teleporter from the parking lot at the start would do it, but I still have yet to get that working.)
In wild contrast stands the second slot in between the two beaches, Dry Gulch. In fact, while I would normally provide the full map, in the interests of actually getting a post out, I’m just providing part of it. There are parts that just keep going and lots of exits that lead to a boulder maze so testing every exit takes a while. Keeping in mind I’m not done interconnecting yet, here’s the general meta-map I have so far:
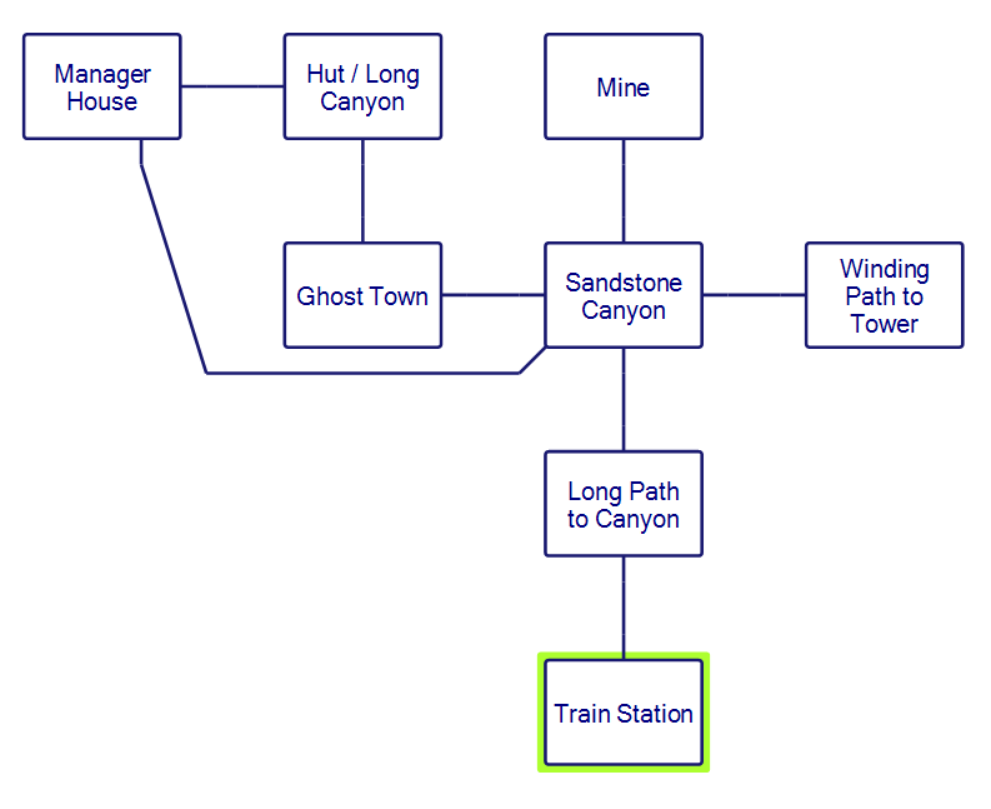
Leaving the train station just gives a straight shot to the north for a while:
Path in the middle of the Desert
You are standing on a north-south path in the middle of a bare and otherwise trackless desert. All around you are drab and dun-coloured sand dunes which stretch as far as the eye can see to the east and west. The sun is blazing down, and the air over the dunes shimmers with heat. A warm dry breeze is blowing, driving a layer of fine gritty sand and dust across the dunes and the path. There appears to be a range of mountains to the distant north, but it’s difficult to judge distances in the heat-haze; the image shimmers so much that it could be a mirage.
N
Path in the middle of the Desert
You are standing on a north-south path in the middle of a bare and otherwise trackless desert. All around you are drab and dun-coloured sand dunes which stretch as far as the eye can see to the east and west. The sun is blazing down, and the air over the dunes shimmers with heat. A warm dry breeze is blowing, driving a layer of fine gritty sand and dust across the dunes and the path. There is a range of mountains to the north, and it’s not too far away !
N
Entrance to sandstone Canyon
You are standing at the entrance of a large canyon cleft in the sandstone rocks of a mountain range. The walls of the canyon are steep and unclimable. The high and craggy mountains stretch away to the east and west of where you are standing. There seems to be a faint track leading along the foot of the mountains. A well beaten path stretches across the bleak desert to the south, and extends to the north through the centre of the canyon.
While the game has three authors, I suspect all of this section is by one author, and one who is keen on lovingly describing outdoor geology. Perhaps the thought process went: Crowther made a realistic cave, so let’s make a realistic desert.
Coloured rock canyon
You are standing on a North-South track in the middle of a sandstone canyon. The rock walls on either side are veined and banded with varied hues of sandstone, mainly reddish shades which lie between roseate and ocherous, but with occasional streaks of bluish-gray and green, which seem to indicate the bedding-planes of an upper Triassic, or possibly lower Lias, series of sediments. The colours appear to be glowing in the strong sunlight. It is altogether a beautiful and somewhat awe-inspiring sight.
A map of the central coloured rock canyon area:
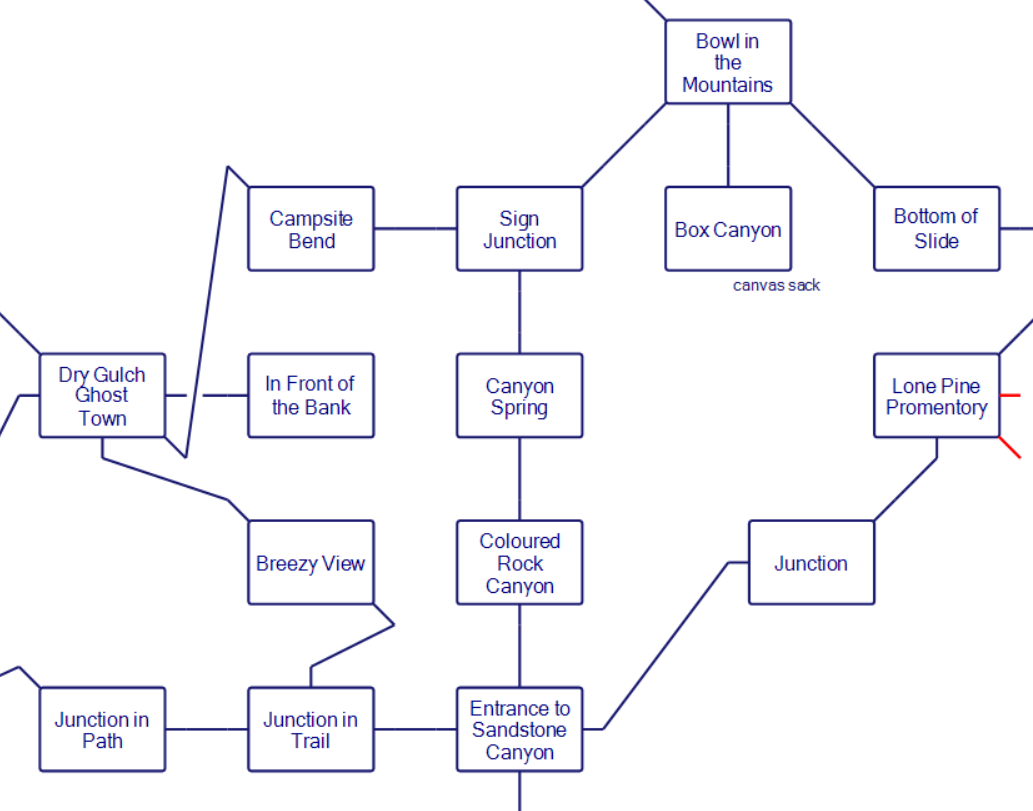
The two red-marked exits lead to a boulder maze which I’ll talk about later (other exits lead to the same). While there’s plenty of long descriptions there’s very little here to do, other than swipe a “canvas sack” which seems to serve like the sack from Zork (it increases your inventory capacity). I incidentally tried hiding the prayer box from God by using the sack and it didn’t work.
To the northwest is a ghost town with two buildings, a bank (which seems to be truly and completely shuttered) and a general store. The only reason for the general store to exist, despite it having a map which allows going in an alternate exit…
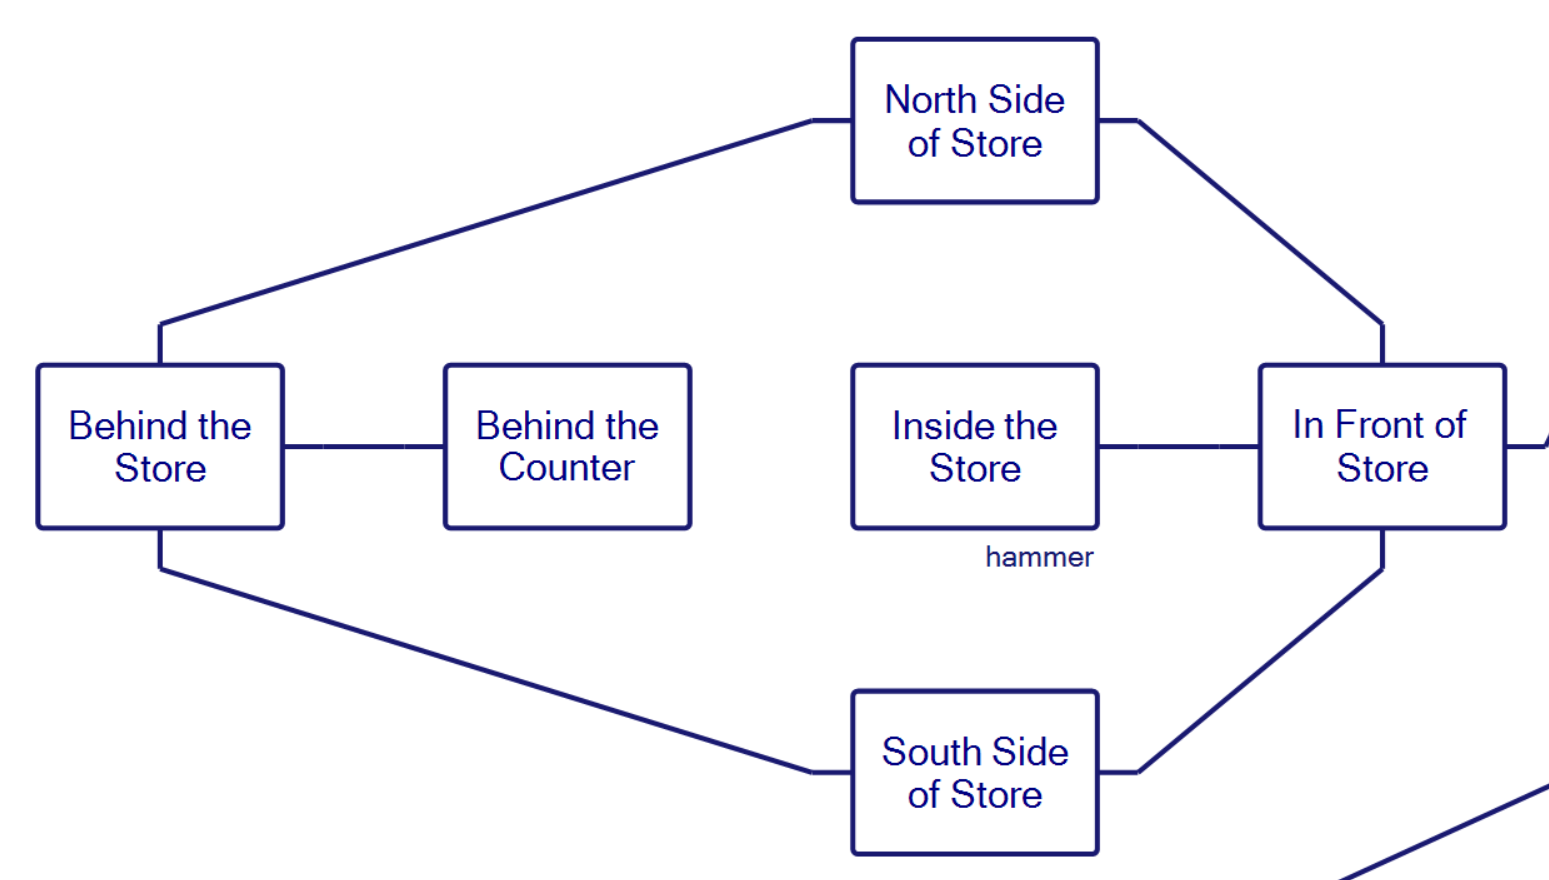
…seems to be to get a hammer by smashing a case.
In front of store
You are standing in front of the Drygulch Equipment & Clothing (DEC) store, a large building which is partly ruinous and which has obviously seen better days, but which is at least still standing. Behind the wooden boardwalk at the front of the store is an adobe brick facade which is sadly chipped and crumbling. There are two windows and a door in the front of the building.
IN
Inside the store
The inside of this abandoned drygoods store has the musty odour which a wood and abobe structure acquires with long neglect. A high old-fashioned service counter runs north-south across the width of the store, effectively barring entrance to the back from this side. There is sufficient light coming in from the grimy windows and open door in the eastern wall to see the rest of the room quite clearly. Though the frontage is a substantial adobe brick wall, the rest of the store is built from dry wooden planking.
Against one wall of the room is a large glass display case.
It contains:
a geological hammer
BREAK CASE
The glass of the display case shatters into millions of glass splinters that fall between the cracks of the floor
We’ve certainly had game maps before with lots of window dressing (like The Hermit’s Secret) but the long prose means the empty space here feels very different: like the author of this section was making a simulation with game elements as an afterthought (perhaps literally, in that they intended to add things on a later pass). If you bypass the ghost town on a canyon rim path (or go by a hut I’ll show in a moment) you reach a Manager’s House where the incomplete aspect really becomes obvious.
Front of Goblin Mine Manager’s house
You are on a trail which runs along the southern rim of an east-west
canyon. Dug into the dirt of the hill slope beside the trail is the
rather imposing entrance hole of the habitation of the Goblin who manages
the Goblin Mine.
IN
Entrance hall
There is a doorway to the north, and a plain walled hallway extends to
the south.
S
Hallway
The corridor -like hallway extends to the north and south. There is a
doorway on the east side.
E
Study
That’s a room with no description at all! A trophy room and a kitchen are similarly left with no description.

Some of the locations lead to a maze. It is a classical “drop the objects to map” style.
You are lost amongst the giant boulders on a mountain plateau.
W
You are lost amongst the giant boulders on a mountain plateau.
N
You are lost amongst the giant boulders on a mountain plateau.
I’m missing a few exits on my map (given here with the objects I dropped at various spots), but I can say there is nothing here to find.
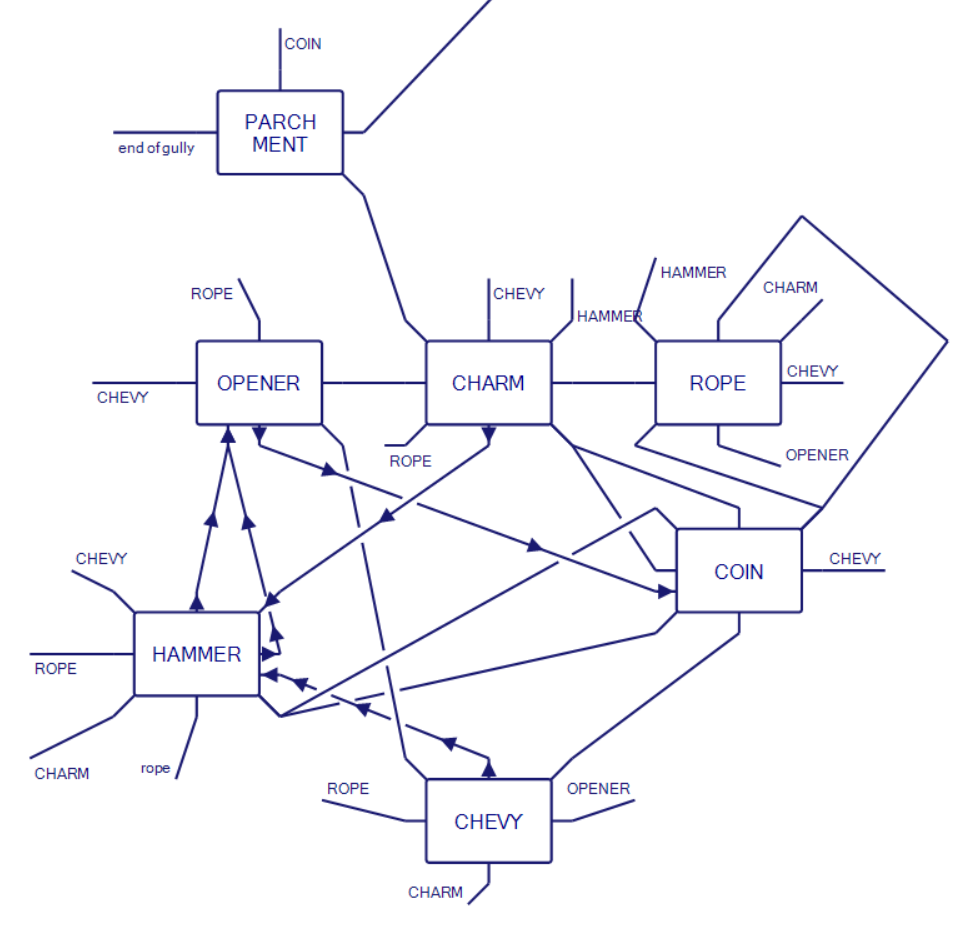
The sole purpose (other than making the map a pain overall) seems to be to lead to a “Windy view” where there is nothing of note other than scenery.
Windy view
You are standing on a small trail on the shoulder of a mountain. There is a magnificent view from here across a wild and windy mountain landscape composed of many colours of sandstone rocks. The mountains are cut into by a maze of twisting canyons. From where you stand you can go either north or east around the shoulder of the mountain. A very steep rockslide begins here and fans out south and west below you to the bottom of a distant canyon.
Look, I’m never thrilled when yet another maze-mapping happens in one of these games, but at least even a treasure at the end gives some tinge of reward. (Or earlier in this game, it was satisfying to find the mysterious cube at the center of a maze, which turned out to be the “respawn point” after dying.) When the map just exists for its own sake, I feel like I’m spinning my wheels.
I’m going to save the remainder of the desert when I get it finally final, but a few notes:
1. The east side of the central canyon leads to a “slide” which goes by a rusty key (haven’t found a use for yet, including taking back to the post box) and leads through many rooms up to a “tower”. The tower seems to serve no purpose beyond being scenery.
Where two paths meet before a ruined tower …..
High on a lost and rocky mountain ridge, open to the blue and windy sky, two paths from southeast and southwest meet before a roofless tower of broken stone dark built of massive granite blocks, alien to this land of honey coloured stone. The crumbling arch where once a door did swing lies open to the north of where you stand.
N
Inside roofless tower of broken stone ……
The walls rear high, but, shattered at the top, reveal the welcome light of open sky. Here below, surronded by these massive sombre walls, is dark and chill, except where one diffused beam of welcome light reveals the shadowed southern entrance arch.
It’s still possible some of these places will have purposes that eventually reveal themselves, but my game-sense is currently telling me no, there’s a tower here because the author thought it would make good scenery.
2. Near the Ghost Town, to the north, is a hut. Just like the Tower, no apparent purpose.
Hut
You are on an east-west portion of a winding trail which goes along the northern rimwall of a long brownish canyon. There is a small and somewhat delapidated hut beside the trail here.
IN
Hut
Diagonal beams of light from the harsh sun outside come through the cracks in the warped and twisted planks. This place appears to have been at one time the residence of a prospector or miner, now left to fall to ruin.
3. Near a Sweetwater Spring is the mine. I still have more to explore so I will report back later, but so far I haven’t found anything except more rooms.
Sweetwater spring
You are beside a small spring of clear water which bubbles up from the canyon floor. The canyon runs in a southeast-northwest direction. There are small trees growing all over the canyon floor on all sides except the west, where an extremely steep fan-shaped rockslide is piled up against the southwest wall of the canyon. The slide goes all the way up to the rim.
NW
In front of a mine
You are at the end of a canyon in front of a mine with a large iron door, and there is, chiseled into the stone, the legend
“PETEY COOPER’S OPAL MINE”
above the door. Up against the east wall of the canyon there seems to be the ruins of a building. There are piles of rubble and mining spoil all around. A fitful warm wind blows swirls of rock dust around your feet.
N
Inside mine entrance
You are standing just inside the entrance to an opal mine. To the south the sunlight spills in through the doorway onto the rocky floor. The mine passage heads north from here and begins to twist about.
Other than that, I’ve got all the same obstacles from before (skittish hen, post box, bank, curtain, power box, enemies in the niche) and I do suspect at least one of the items I’ve been nabbing in the desert will eventually help. However, I also suspect I’m running out of runway here, and the game is eventually going to reach a hard stop which may or may not be passable. For example, one room has a north exit mentioned in the room description that simply doesn’t work: does it lead to a single place or a full new area? Based on my calculation earlier with the exploration stat, there should be more rooms in the code out there, but that doesn’t mean I’ll be able to reach them.
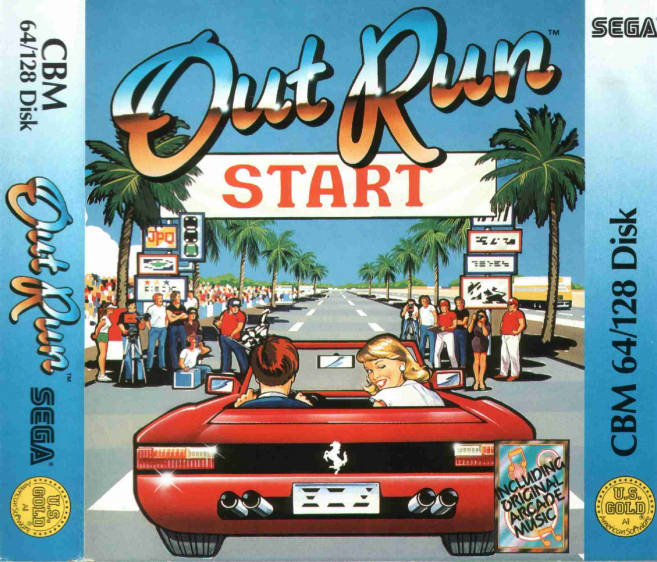
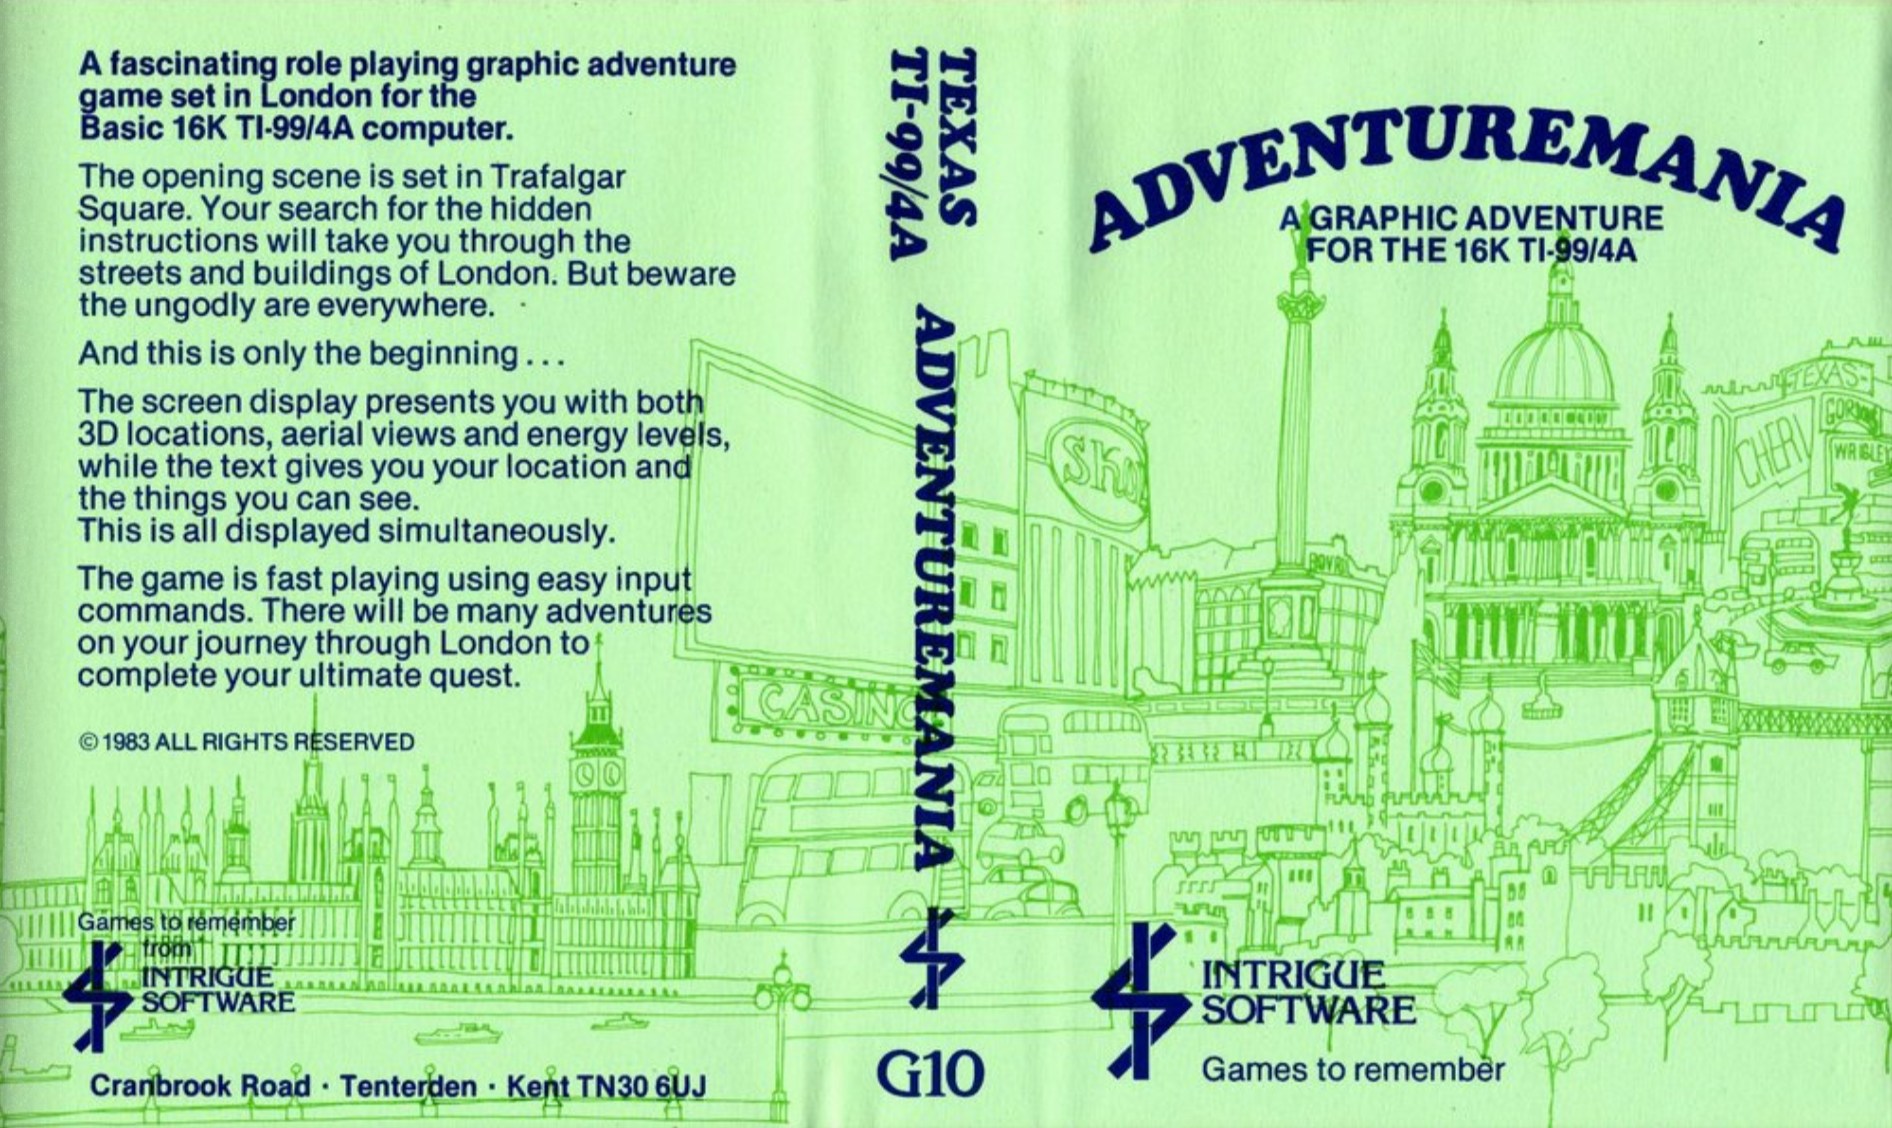
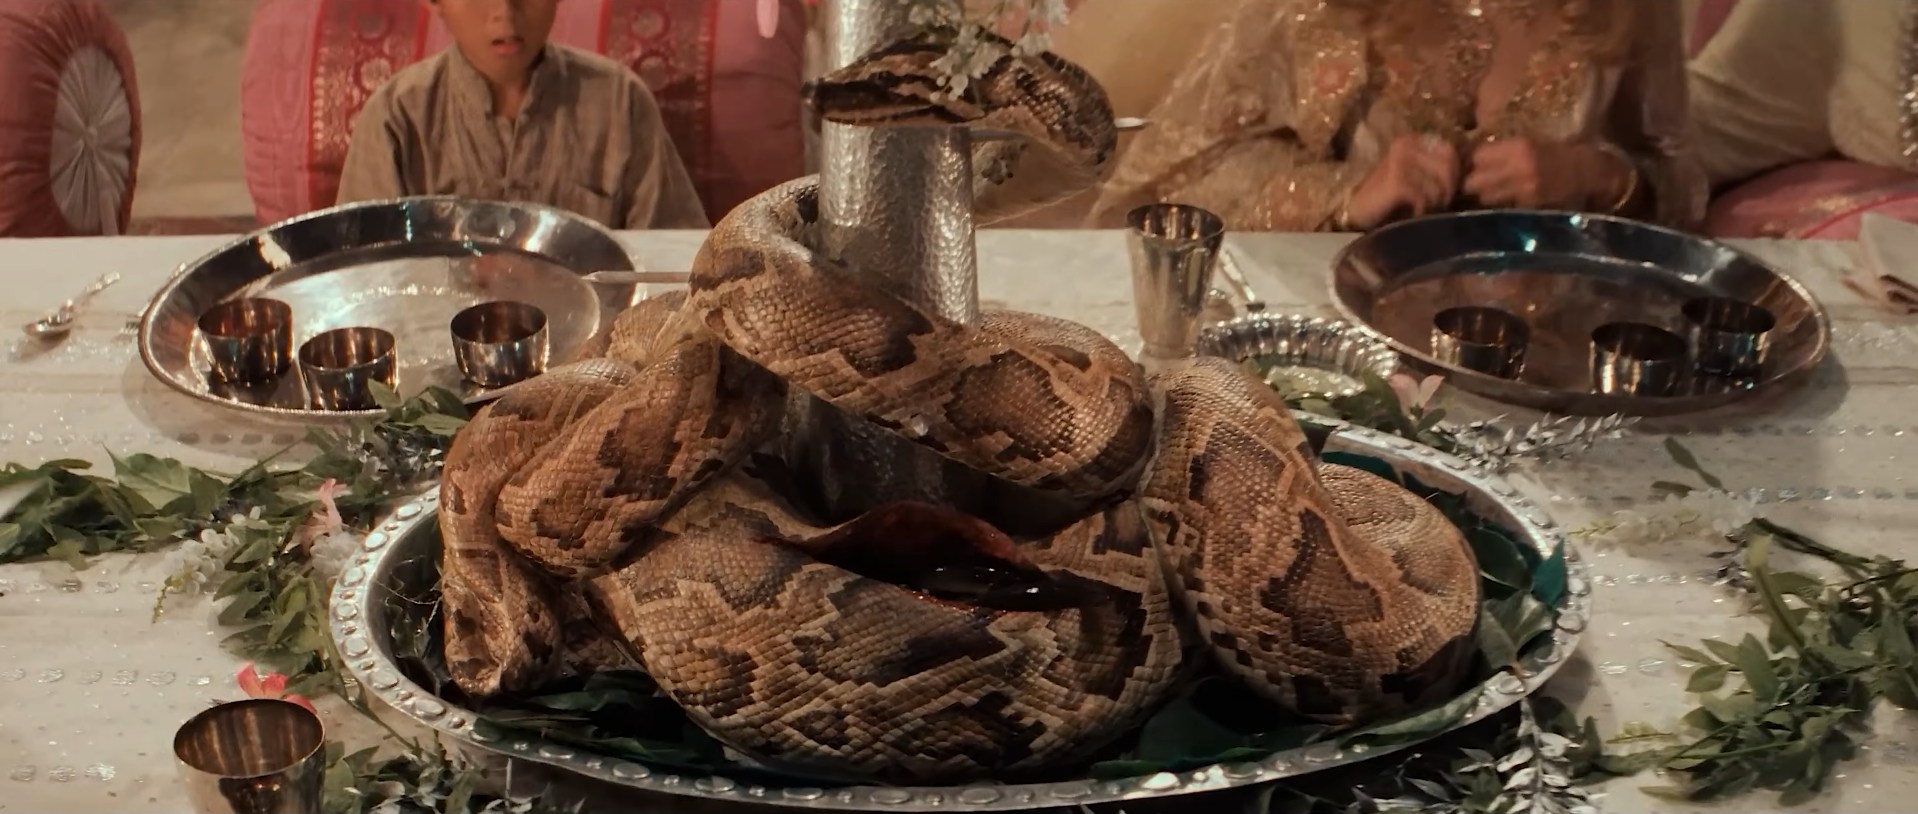
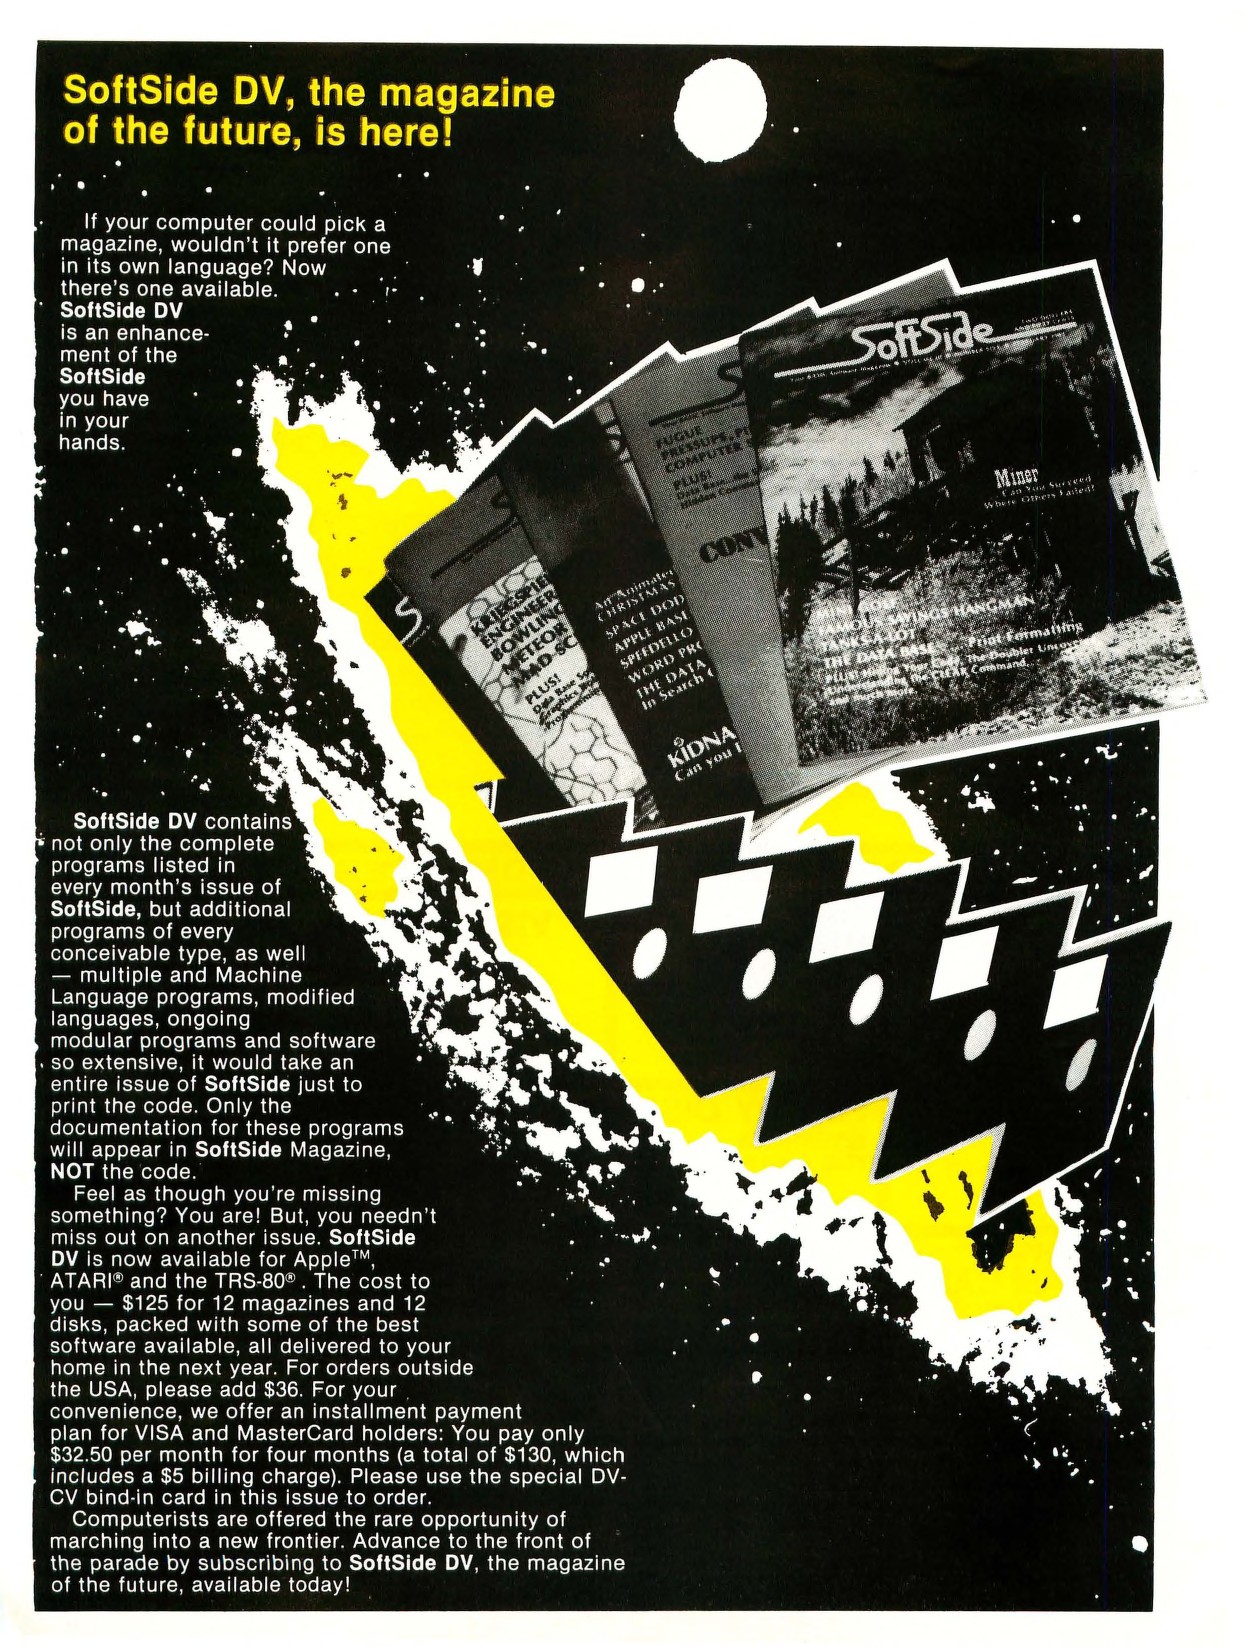
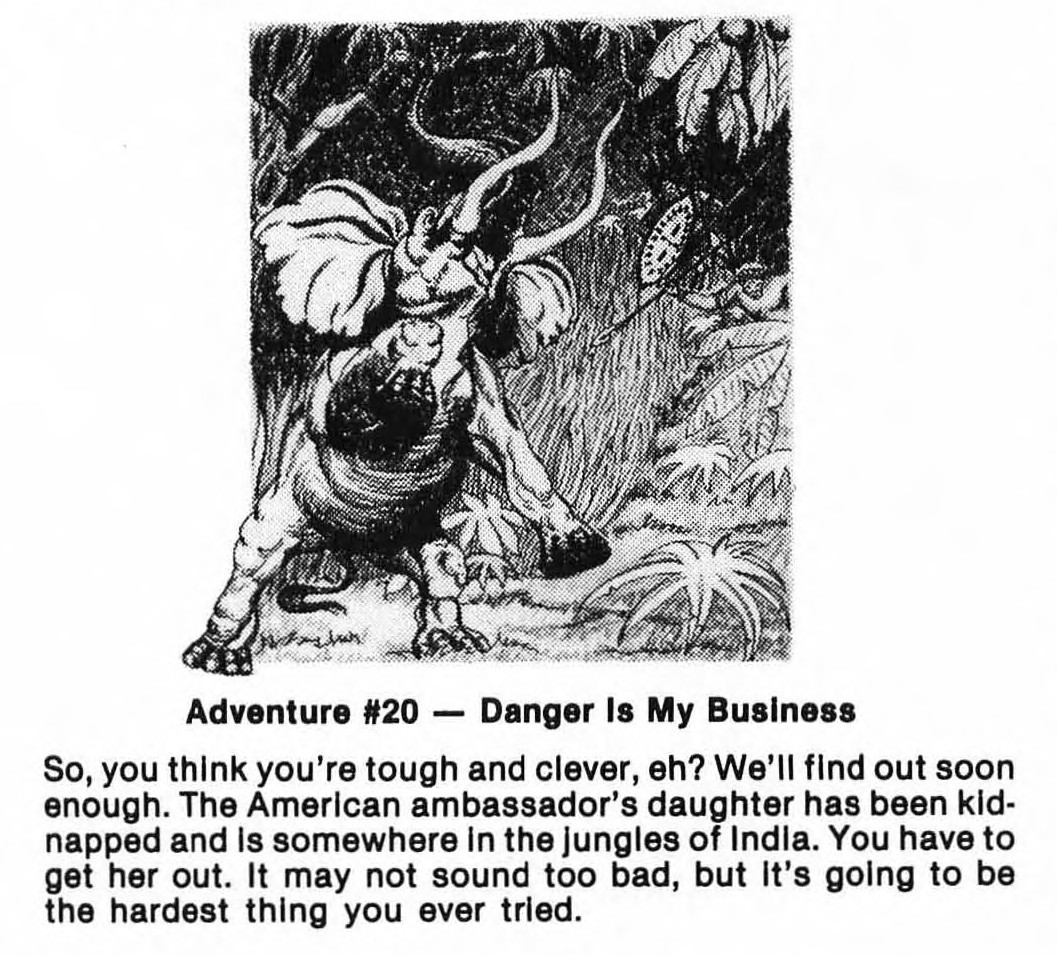
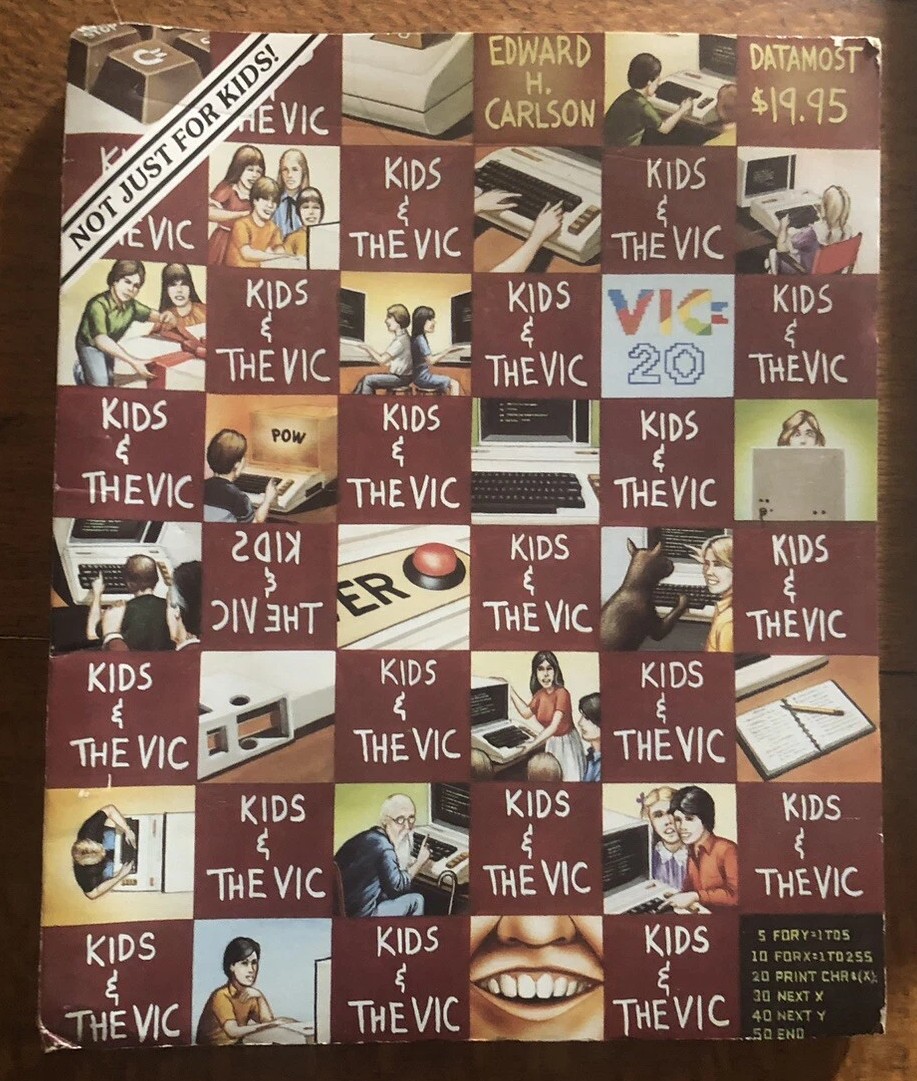


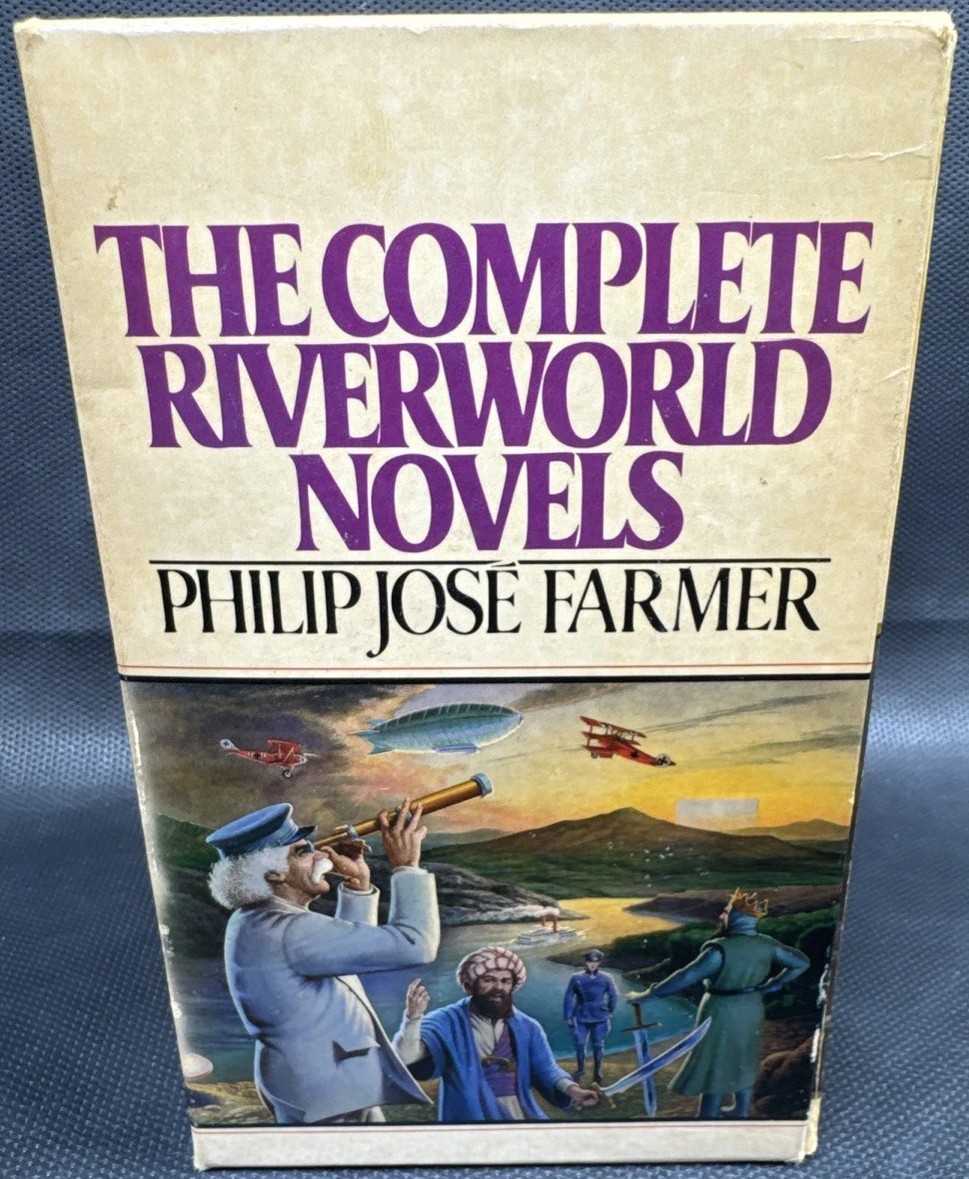
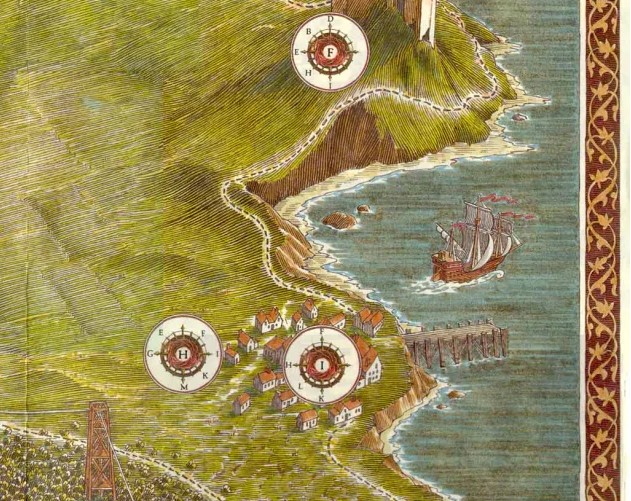

FrontCover.jpg)