Finis, 400 out of 400 points, cue fireworks. Spoiler warnings apply.
Before I discuss the game itself, I want to refer back to a point I made about Star Trek: 25th Anniversary.
You are given a score based on amount-you-followed-Federation-ideals when playing; ex: don’t randomly shoot aliens if you can help it. Sometimes there will be a dilemma where you *can* shoot past aliens to solve a particular puzzle. Maybe there’s another way? But if there is, you have to come up with a plan and enact it, there isn’t a morality button you can just press to do the right thing.
The idea hovers around my beef with modern “moral choice” games in that they lay out the options clearly on a platter, when in real life even working out what the options are is murky.
The finale of Zork II does something spectacular with moral choice.

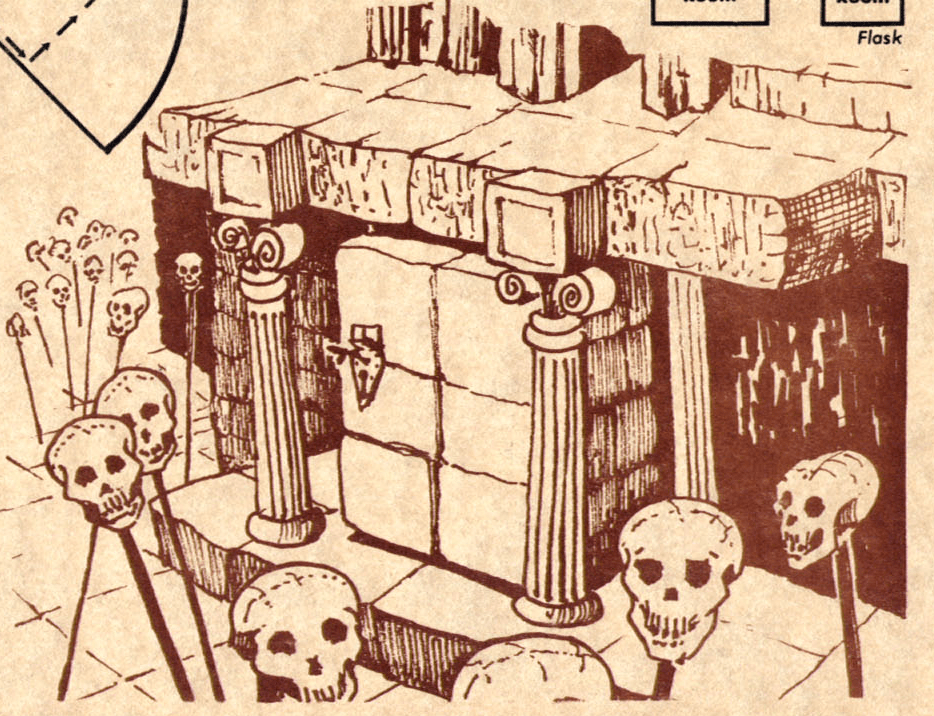
From the cover of Zork User Group map of Zork II. Via the Gallery of Undiscovered Entities.
Last I posted, I was stuck on a wall of ice and a dragon. The solution (which I did need to look up) was to combine the two. You can ATTACK DRAGON to annoy it and it will follow you, then ATTACK DRAGON again to keep it annoyed, until reaching:
Ice Room
This is a large hall of ancient lava, since worn smooth by the movement of a glacier. A large passage exits to the east and an upward lava tube is at the top of a jumble of fallen rocks.
A mass of ice fills the western half of the room.As the dragon enters, he sees his reflection on the icy surface of the glacier at its western end. He becomes enraged: There is another dragon here, behind that glass, he thinks! Dragons are smart, but sometimes naive, and this one has never seen ice before. He rears up to his full height to challenge this intruder into his territory. He roars a challenge! The intruder responds! The dragon takes a deep breath, and out of his mouth pours a massive gout of flame. It washes over the ice, which melts rapidly, sending out torrents of water and a huge cloud of steam! You manage to clamber up to a small shelf, but the dragon is terrified! A huge splash goes down his throat! There is a muffled explosion and the dragon, a puzzled expression on his face, dies. He is carried away by the water.
When the flood recedes you climb gingerly down. While no trace of the dragon can be found, the melting of the ice has revealed a passage leading west.
Your sword is no longer glowing.
I was foiled somewhat by visualization issues. I assumed that the dragon was very large, too large to really follow after the player. (Or at least, the locations along the way were too small to let a dragon through.) It did cross my mind that dragon + ice would be very interesting, so I’ll still call this a failure on my part rather than the game’s. Can’t win them all.
…
Continuing the theme of failure on my part, my eternal nemesis of missing an exit returns.

Argh! The south exit isn’t even hidden, it is right there in the room description. It’s a fun puzzle, at least.
Dingy Closet
This is a dingy closet adjacent to a larger room to the north. Chiselled into a wall are these words:Protected by
FROBOZZ
Magic Alarm Company
(Hello, footpad!)There doesn’t seem to be any footpad here, however.
There is a robot here.
There is a beautiful red crystal sphere here.>get sphere
As you reach for the sphere, a solid steel cage falls from the ceiling to entrap you. To make matters worse, poisonous gas starts coming into the room.Cage
You are trapped inside a solid steel cage.>robot, lift cage
The cage shakes and is hurled across the room. It’s hard to say, but the robot appears to be smiling.
I think there’s a potential parser meta-frustration in that it isn’t clear you can still communicate with the robot while in the cage. The general rule for CHARACTER, DO SUCH-AND-SUCH requires the player and character to be in the same room; the cage is technically “the same room” I suppose but that’s still a potential dodgy space. (The very first release of Zork II had even more parser trouble here; I played the last version, since the bugs in earlier versions are well-documented.)
…
Zooming back to the dragon, past where it originally lurked was a room with a princess.
Dragon’s Lair
You are in the dragon’s lair, where the rock walls are scarred by flame. A blackened doorway leads to the south.
A rotten old wooden chest is in one corner among the debris. A beautiful young woman, wearing a dirty and bedraggled gown, sits on a rock in the corner. Her hair is unkempt and she is oblivious to your presence, almost in a trance.
The princess walks all the way to the garden, befriends the unicorn, and rides off, leaving the key behind.
Shyly, a unicorn peeks out of the hedges. It notices the princess and seems captivated. It approaches her and bows its head as though curtseying to her. Around its neck is a red satin ribbon on which is strung a delicate gold key. The princess takes the ribbon and uses it to tie up her hair. She looks at you and then, smiling, hands you the key and a fresh rose which she plucks from the arbor. “You may have use of such a thing,” she says. “It is the least I can do for one who rescued me from a fate I dare not contemplate.” With that, she mounts the unicorn (side-saddle, of course) and rides off into the gloom.
Your sword is no longer glowing.
So that’s another puzzle solved without any extra effort on my part — the puzzle I was stuck on really was the hinge for quite a few things.
…
Past the ice wall is a volcano which I remember from Zork mainframe.
Volcano Bottom
You are at the bottom of a large dormant volcano. High above you light enters from the cone of the volcano. The only exit is to the north.
There is a large and extremely heavy wicker basket here. An enormous cloth bag is draped over the side and is firmly attached to the basket. A metal receptacle is fastened to the center of the basket. Dangling from the basket is a piece of braided wire.
Part of the way up the volcano is a box which requires explosives to open.
Dusty Room
You are in a dusty old room which is featureless, except for an exit on the north side.
Imbedded in the far wall is a rusty box. It appears to be somewhat damaged, since an oblong hole has been chipped out of the front of it.>examine hole
The oblong hole has been chipped out of the box, probably by someone wanting whatever is inside the box. The attempt was a pathetic failure, however.
Flying even higher leads to the most colorful death in the game.
The balloon floats majestically out of the volcano, revealing a breathtaking view of a wooded river valley surrounded by impassable mountains. In a clearing stands a white house. You drift into high winds, which carry you towards the snow-capped peaks. Oh, no! You crash into the jagged cliffs of the Flathead Mountains!
Honestly, even though I didn’t remember it from before, the volcano was straightforward and fun, which was a relief after banging my head on everything else.
…
Getting the key from the unicorn led me into the Wizard’s Lair, and the endgame.

From the Zork User Group map again. Unlike the later Invisiclues version, there are drawings of the characters, including the sea serpent shown that I will discuss shortly.
The centerpiece is a “wizard’s Workroom” with “three stands – ruby, sapphire, and diamond – which form a triangle.”
I realized immediately the spheres would be useful. I had a red sphere already (for the ruby stand) and a blue sphere (for the sapphire stand), but the third sphere was still elusive. I knew from seeing it on the other side that it was a “blurry” scene, and I also knew I had mostly exhausted the Zork II map otherwise, so it led me to zero in on an aquarium in the Wizard’s habitat.
Aquarium Room
Here a dark hallway turns a corner. To the south is a dark room, to the east is fitful light.
Filling the northern half of the room is a huge aquarium.
The aquarium contains:
A baby sea serpent
Breaking the aquarium revealed a “clear sphere”. The first time around I had to die in the process.
>break aquarium with sword
The elvish sword shatters the glass wall of the aquarium, spilling out an impressive amount of salt water and wet sand. It also spills out an extremely annoyed sea serpent who bites angrily at the elvish sword, and then at you. He is having difficulty breathing, and he seems to hold you responsible for his current problem. He manages to rend you limb from limb before he drowns in the air.
I guess you were too careless.
Upon resurrection I walked back to find the sphere, so I knew I was on the right track. (Technically I could have kept going and finished the game, just with a reduced score.) A reload and a little thought later led me to throwing the sword rather than swinging it.
>throw sword at aquarium
The elvish sword shatters the glass wall of the aquarium, spilling out an impressive amount of salt water and wet sand. It also spills out an extremely annoyed sea serpent who bites angrily at the elvish sword, and then at you. He is having difficulty breathing, and he seems to hold you responsible for his current problem. He tries to slither across the stone floor towards you. Fortunately, he expires mere inches away from biting off your foot. A clear crystal sphere sits amid the sand and broken glass on the bottom of the aquarium.
Poor baby sea serpent! But I had the third sphere.
As you place the clear crystal sphere in the diamond stand, a low humming noise begins, and you can feel the hairs on the back of your neck begin to stand up. The three spheres begin to vibrate, faster and faster, as the noise becomes higher and higher pitched. Three puffs of smoke, one red, one blue, one white, rise up from empty stands. The spheres are gone! But in the center of the triangle formed by the stands is now a black stand of obsidian in which rests a strange black sphere.
…
I was right that the demon from the afterlife was to come into play in the endgame. The black sphere I obtained from the previous scene went in a black circle nearby.
A cold wind blows outward from the sphere. The candles flicker, and a low moan, almost inaudible, is heard. It rises in volume and pitch until it becomes a high-pitched keening. A dim shape becomes visible in the air above the sphere. The shape resolves into a large and somewhat formidable looking demon. He looks around, tests the walls of the pentagram experimentally, then sees you! “Hmm, a new master…” he says under his breath. “Greetings, oh master! Wouldst desire a service, as our contract stateth? For some pittance of wealth, some trifle, I will gratify thy desires to the utmost limit of my powers, and they are not inconsiderable.” He makes a pass with his massive arms and the walls begin to shake a little. Another pass and the shaking stops. “A nice effect… I find it makes for a better relationship to give such a demonstration early on.” He grins vilely.
This is a lovely way to justify treasure-hunting — arguably the best I’ve seen. The demon demands treasures, and it happens to be all the treasures available in the world of Zork II. He helpfully tells you when you’re getting closer to the right number. Fortunately, I had already found all the treasure by this time, so I got to move on to being able to control the demon.
>give violin to demon
“This will do for my fee. ‘Tis a paltry hoard, but as you have done me a small service by loosing me from this wizard, it will suffice.”>demon, kill wizard
The demon grins hideously. “This has been my desire e’er since this charlatan bent me to his service. I perform this deed with pleasure!” The demon forms himself back into a cloud of greasy smoke. The cloud envelops the Wizard, who waves his wand fruitlessly, mumbling various phrases which begin with “F”. A horrible scream is heard, and the smoke begins to clear. Nothing remains of the Wizard but his wand.
The genie departs, his agreement fulfilled.
Satisfying! The wizard leaves behind his wand, which led me to resolve one of the last lingering puzzles.
>wave wand at menhir
The wand grows warm, the enormous menhir seems to glow dimly with magical essences, and you feel suffused with power.>say “float”
The wand glows very brightly for a moment.
The menhir floats majestically into the air, rising about ten feet. The passage beneath it beckons invitingly.
The “F” was a pretty good hint signal that I needed to wait until I could cast spells, so I didn’t waste much time at the menhir before this. Good job, Blank/Lebling. (This is somewhat canceled by the syntax being finicky — you have to put “float” in quotes.)
Behind the menhir was a dog collar, which I could take to the final stretch: nearby is the oddly-angled room maze I’ve already discussed in depth, and past that is a room with a Cerberus.
Cerberus Room
This is the entrance to a huge crypt or tomb. A marble stairway leads up from a gateway arch.
There is a vicious-looking dog guarding the entrance. It is more or less your usual dog, except that it has three heads and is the size of an elephant.
I had a slight hiccup here because I first typed GIVE COLLAR TO DOG
>give collar to dog
The huge dog snaps nastily at you.
and assumed that meant I couldn’t put it on him.
>put collar on dog
The creature whines happily, then the center head licks your face (which is roughly like experiencing a sandpaper washcloth). The other two heads look about, as though the monster felt a sudden need to find a pair of slippers somewhere. Its huge tail wags enthusiastically, knocking small rocks around and almost blowing you over from the breeze it creates.>pet dog
The dog is now insanely happy, slobbering all over the place and whining with uncontained doggish joy.
Confirmed: In Zork II you can pet the dog.
Past the Cerberus was a crypt and the final challenge.
Crypt
The room contains the earthly remains of the mighty Flatheads, twelve somewhat flat heads mounted securely on poles. While the room might be expected to contain funerary urns or other evidence of the ritual practices of the ancient Zorkers, it is empty of all such objects. There is writing carved on the crypt. The only apparent exit is to the north through the door to the anteroom. The door is open.>read crypt
“Here lie the Flatheads, whose heads were placed on poles by the Keeper of the Dungeon for amazing untastefulness.”
I have heard report if you let your lamp run out (and have enough points overall) the Wizard casts “Fluorescence” on you and causes you to permanently glow. That’s great for getting close to the end, but robs you of final victory, because here you need the lights off.
>turn off lamp
The lamp is now off.
It is dark, but on the south wall is a faint outline of a rectangle, as though light were shining around a doorway. You can also make out a faintly glowing letter in the center of this area. It might be an “F”.>open secret door
The secret door opens noiselessly.>light lamp
The lamp is now on.>s
Landing
Beyond the door is a roughly hewn staircase leading down into darkness. The landing on which you stand is covered with carefully drawn magical runes like those sketched upon the workbench of the Wizard of Frobozz. These have been overlaid with sweeping green lines of enormous power, which undulate back and forth across the landing. The wand begins to vibrate in harmony with the motion of the lines. You feel yourself compelled downward, and you yield, stepping onto the staircase. As you pass the green lines, they flare and disappear with a burst of light, and you tumble down the staircase!At the bottom, a vast red-lit hall stretches off into the distance. Sinister statues guard the entrance to a dimly visible room far ahead. With courage and cunning you have conquered the Wizard of Frobozz and become the master of his domain, but the final challenge awaits!
(The ultimate adventure concludes in “Zork III: The Dungeon Master”.)
Sweet, sweet, victory. But I wasn’t done yet.
…
I started this post off with the title The Death of a Wizard trying to parallel my Zork I finish with The Death of a Thief. As I got typing, I started to wonder: do you really need to kill the wizard? There isn’t much left in the game after he’s eliminated.
Yes, it is indeed possible to avoid killing the wizard; you can ask the demon to get his wand for you instead.
>demon, give wand to me
“I hear and obey!” says the demon. He stretches out an enormous hand towards the wand. The Wizard is unsure what to do, pointing it threateningly at the demon, then at you. “Fudge!” he cries, but aside from a strong odor of chocolate in the air, there is no effect. The demon plucks the wand out of his hand (it’s about toothpick-size to him) and gingerly lays it before you. He fades into the smoke, which disperses. The wizard runs from the room in terror.
(!!) The rest of the game proceeds as mentioned above. You are still told your courage and cunning helped you “conquer” the wizard but note that’s different than “killing” him.
This was a moral choice without even announcing a moral choice was happening. Again: when I first finished, I thought DEMON, KILL WIZARD was the only solution. All that really needed to happen is the removal of the wizard as a threat (the wand he uses).
This could have gone the other direction in terms of hidden choice. Both Jimmy Maher and Joe Pranevich asked for the wand on their playthroughs; it appears it never occurred to either one to just request that the demon kill the wizard.
What makes the ending even more fascinating is a third moral choice, but what turns out to be a wrong one. You can ask the demon to GET MENHIR, bypassing needing the wand to get the collar. This is enough to get you right to the end, where you fail in spectacular enough fashion I’ll quote the whole thing.
Landing
Beyond the door is a roughly hewn staircase leading down into darkness. The landing on which you stand is covered with carefully drawn magical runes like those sketched upon the workbench of the Wizard of Frobozz. These have been overlaid with sweeping green lines of enormous power, which undulate back and forth across the landing. The green curves begin to vibrate toward you, as if searching for something. One by one your possessions glow bright green. Finally, you are attacked by these magical wardens, and destroyed!**** You have died ****
Now, let’s take a look here… Well, you probably deserve another chance. I can’t quite fix you up completely, but you can’t have everything.
Room of Red Mist
You are inside a huge crystalline sphere filled with thin red mist. The mist becomes blue to the west.
You strain to look out through the mist…
You see only darkness.>w
Room of Blue Mist
You are inside a huge crystalline sphere filled with thin blue mist. The mist becomes white to the west.
You strain to look out through the mist…
You see only darkness.>w
Room of White Mist
You are inside a huge crystalline sphere filled with thin white mist. The mist becomes black to the west.
You strain to look out through the mist…
You see only darkness.>w
You follow a corridor of black mist into a black walled spherical room. The room is empty. A huge face looks down on you from outside and laughs sardonically. It doesn’t look like you’re getting out of this predicament!
Your score would be 360 (total of 400 points), in 516 moves.
This score gives you the rank of Master.
Killing the wizard works, disarming the wizard works, but the moral choice of ignoring the wizard means he gets you in the end (you need his wand to get by the magical traps).
Now, I fully acknowledge there’s a game design issue here when nobody notices the choices available even after the fact (this could be alleviated by some more specific ending text) but this is still far more advanced plotting than I would have expected in 1981.
Commodore C64 cover, via Mobygames.
How does this compare with Zork I? The first game had a much tighter geography with multiple methods from the underground back into the house, and I still found the thief superior to the wizard. I could believe Zork I’s sprawl was a real environment, whereas Zork II’s hub structure felt like a loosely connected set of mini-areas (even though there were some crossover elements, like the princess walking all the way to the garden). And while Zork I had some frustrations (like the egg) Zork II trumped them (including two puzzles that live in infamy today).
So if I was applying numerical ranking, sure, Zork I would score higher, but Zork II’s intent was rather different; being meant more as a blanket challenge for those sturdy enough to beat the first game, with less attention paid to geography but more coherence behind needing a treasure hunt. For what it tried to be, it succeeded, and is still worthy of the Infocom library.
…
I haven’t fully decided what I’m playing next, but sometime next week I will show off another discovery I’ve unearthed not chronicled on any gaming site: a missing branch in the chain of adventure game history.

If you didn’t test it already, I highly recommend trying a fourth “option” with the demon:
>DEMON, KILL CERBERUS
nice!
>demon, kill cerberus
“This may prove taxing, but we’ll see. Perhaps I’ll tame him for a pup instead.” The demon disappears for an instant, then reappears. He looks rather gnawed and scratched. He winces. “Too much for me. Puppy dog, indeed. You’re welcome to him. Never did like dogs anyway… Any other orders, oh beneficent one?”
There’s another command you can give the demon that presents a different result:
DEMON, GET THE WAND
>demon, get the wand
“This I do gladly, oh fool!” cackles the demon gleefully. He stretches out an enormous hand towards the wand and taking it like a toothpick (this is a large demon), points it at himself. “Free!” he commands, and the demon and his wand vanish forever.
Looks like you can also do
>demon, kill me
“Foolish mortal, if you insist…” The demon crushes you with one blow of his
enormous hand.
**** You have died ****
The “wish” structure is pretty fun gameplay-wise; even though you can’t *really* get anything you want it points in the direction of games like Aisle where you can try nearly anything.
For the curious, here’s the full list of commands the genie has responses for:
MOVE THE MENHIR
TAKE THE MENHIR
TAKE THE WAND
TAKE [any portable thing]
GIVE ME THE WAND
GIVE ME THE MENHIR
GIVE ME [any portable thing]
ATTACK CERBERUS
ATTACK THE WIZARD
ATTACK ME
FIND [anything]
EXAMINE [anything]
[anything else]
You’ve seen most of the interesting ones already (TAKE/GIVE ME portable things do exactly what you’d expect, FIND/EXAMINE he refuses for contractual reasons, anything else he says he’s not capable of), but it’s interesting to note how many different ways there are to get the menhir out of the way, probably added for different playtesters.
Where does this referring to the demon as a “genie” come from, anyway, since the game text says “demon”?
Good question! I’d guess it was originally a genie, only later changed to a demon, because all the internal references in the code are to a “genie” (which is why that word was on my mind when I posted this). The text still says “genie” a few times: “The genie departs, his agreement fulfilled.” “The genie grins demonically, but says nothing.” “The genie frowns briefly, then opens the box. He smiles horribly.”
In the search for this, I found one other thing he can do: BREAK THE CABINET. This accomplishes nothing useful (the case and all its contents are destroyed).
I don’t have the quote offhand, but after the wish happens the game mentions the “genie” disappearing so they’re being used as synonyms; they’re classifying genies as types of demons, I guess.