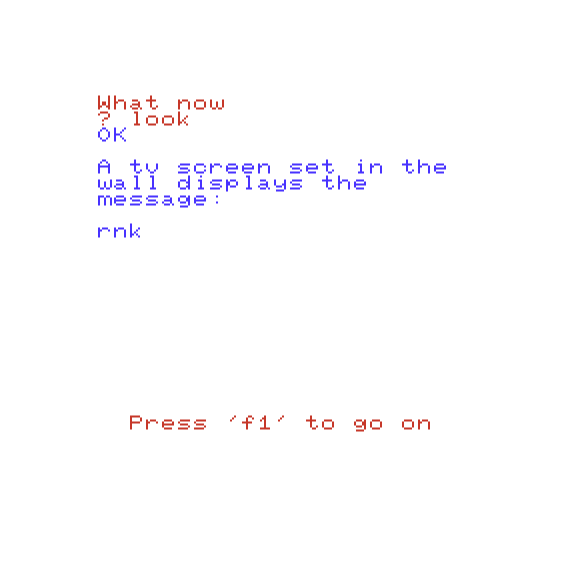
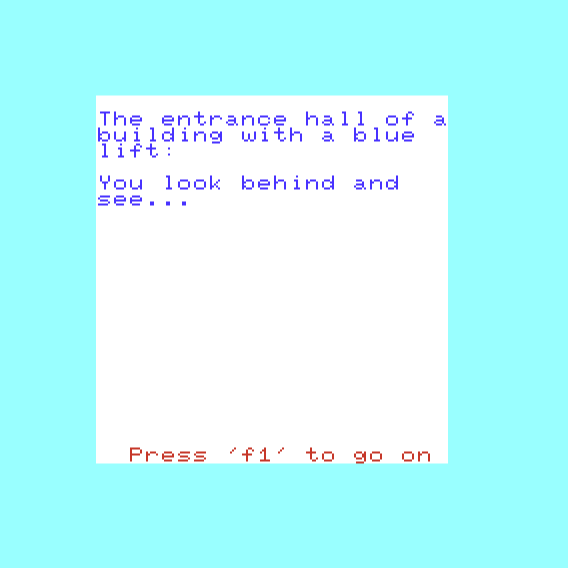
From last time: our protagonist had entered a room with a “blue lift” available and a postcard, mirror, and dead dog in the room. To see these things in the game you need to LOOK; typing LOOK then prompts (in some rooms) if you want to use a computer terminal. Using the terminal gives you what floor you’re on, although it can also cause a funky visual effect.
I also neglected to mention that for some reason we start with a screwdriver. (The only thing we could sneak past an initial screening? Always fun to go on secret missions equipped with almost nothing.)
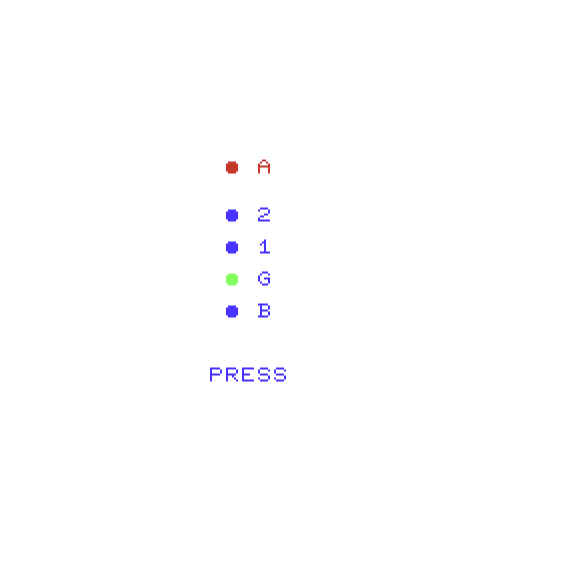
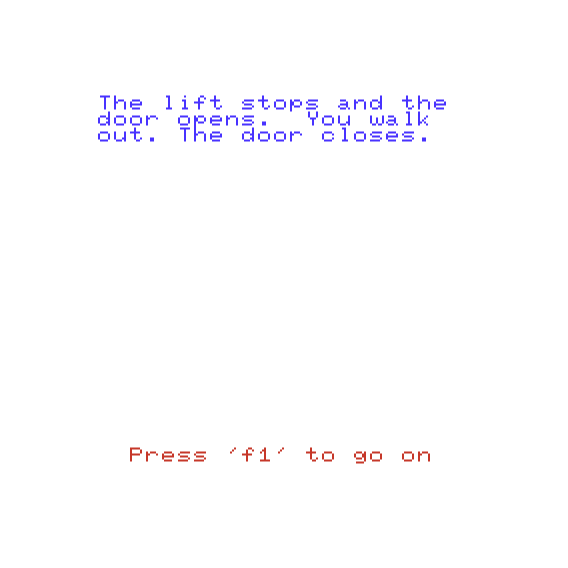
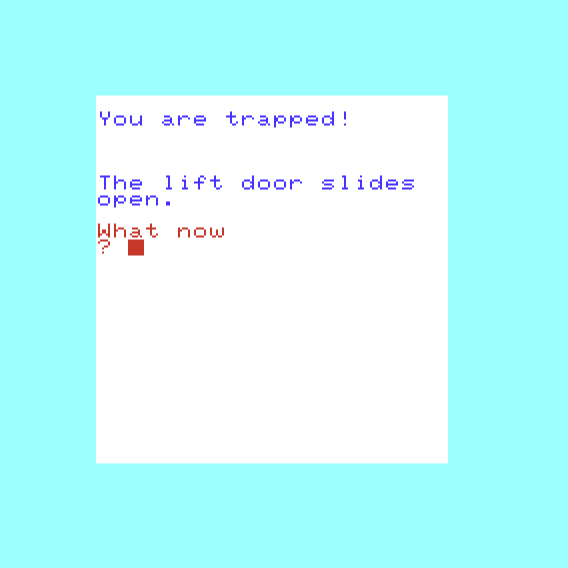
The mirror is useful on an early puzzle, as is the screwdriver; the dead dog isn’t useful at all. The postcard says LOAD to KILL. This will be very important later. The screen upon entering the lift:
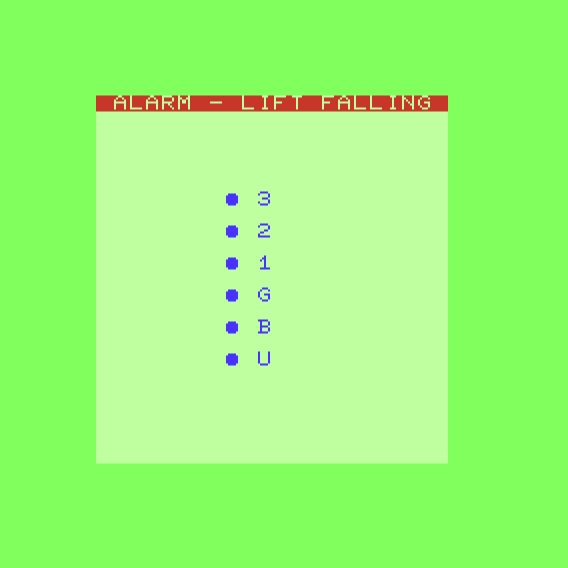
You just push the button B, G, 1, or 2 to operate it.
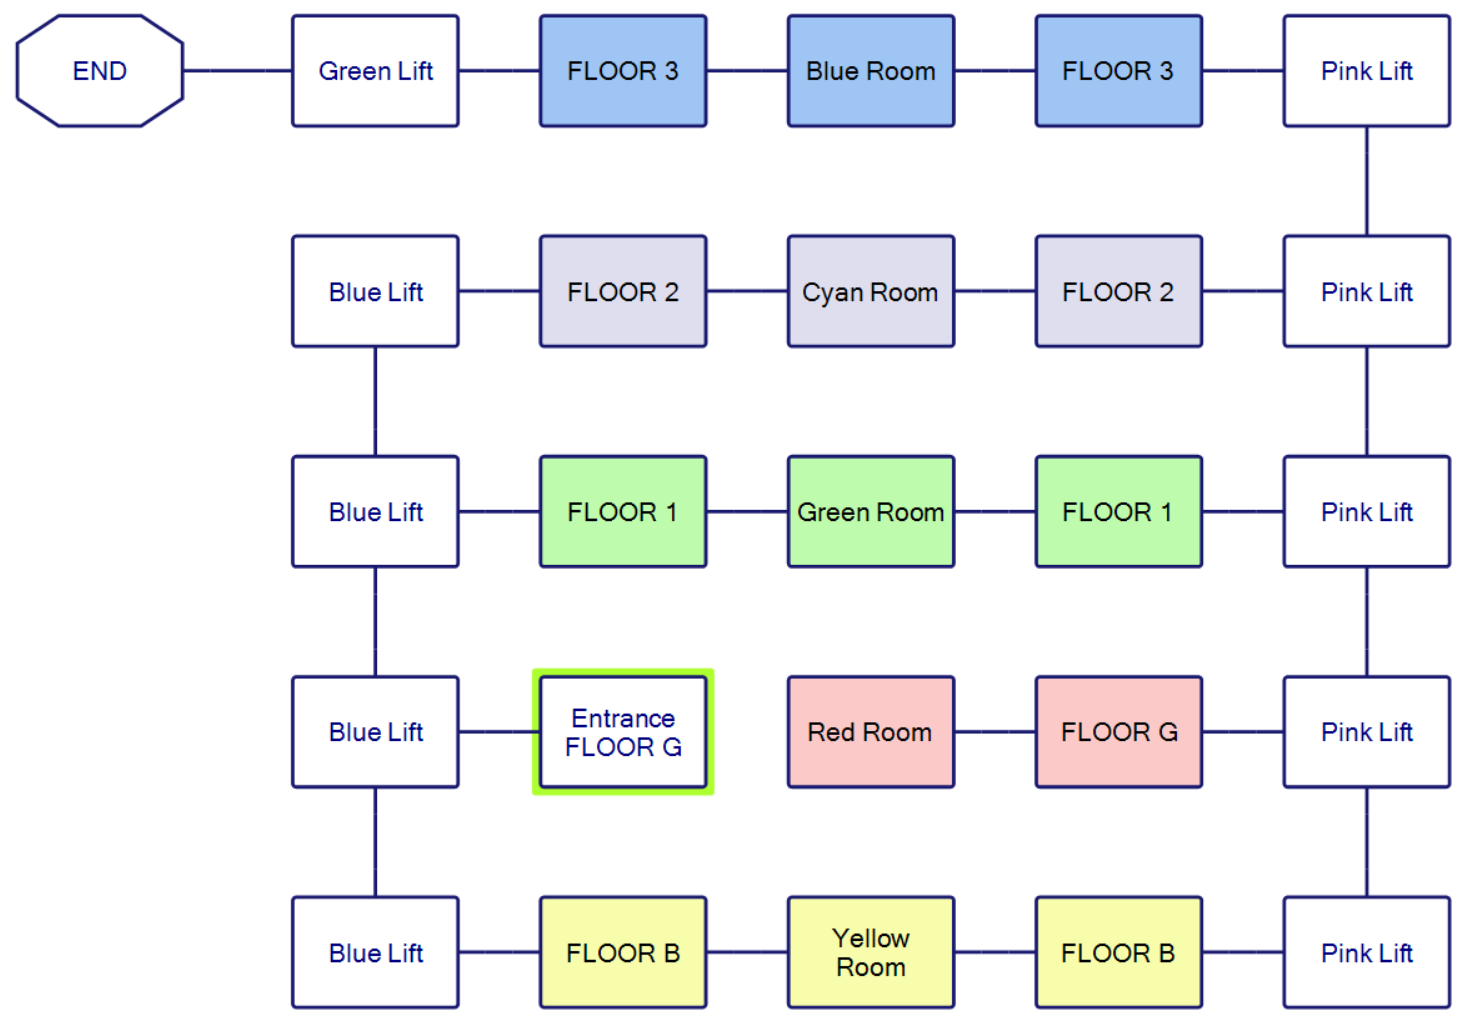
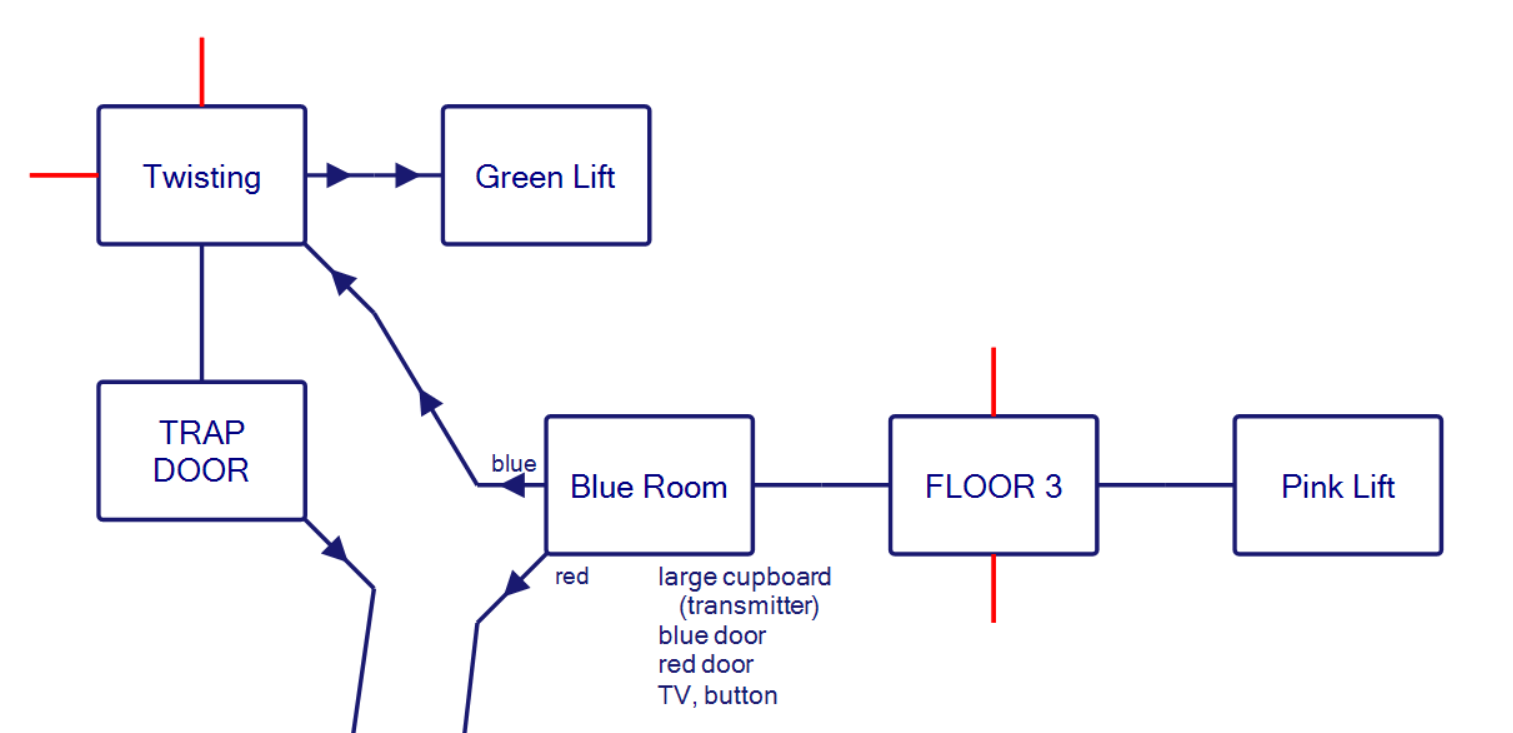
The complex is a tower with multiple lifts: a blue lift on the west side, a pink lift on the east side, and a green lift which will take the player to the end. A general map, although this is without the one-way arrows and other complications:
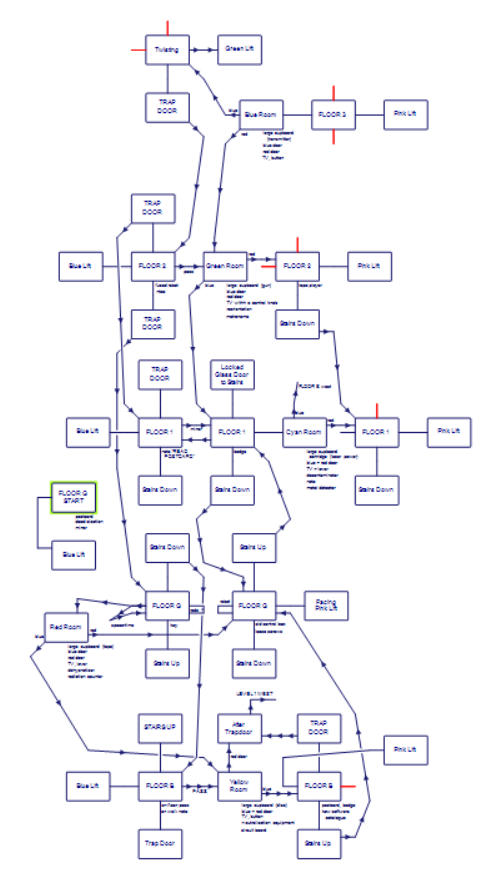
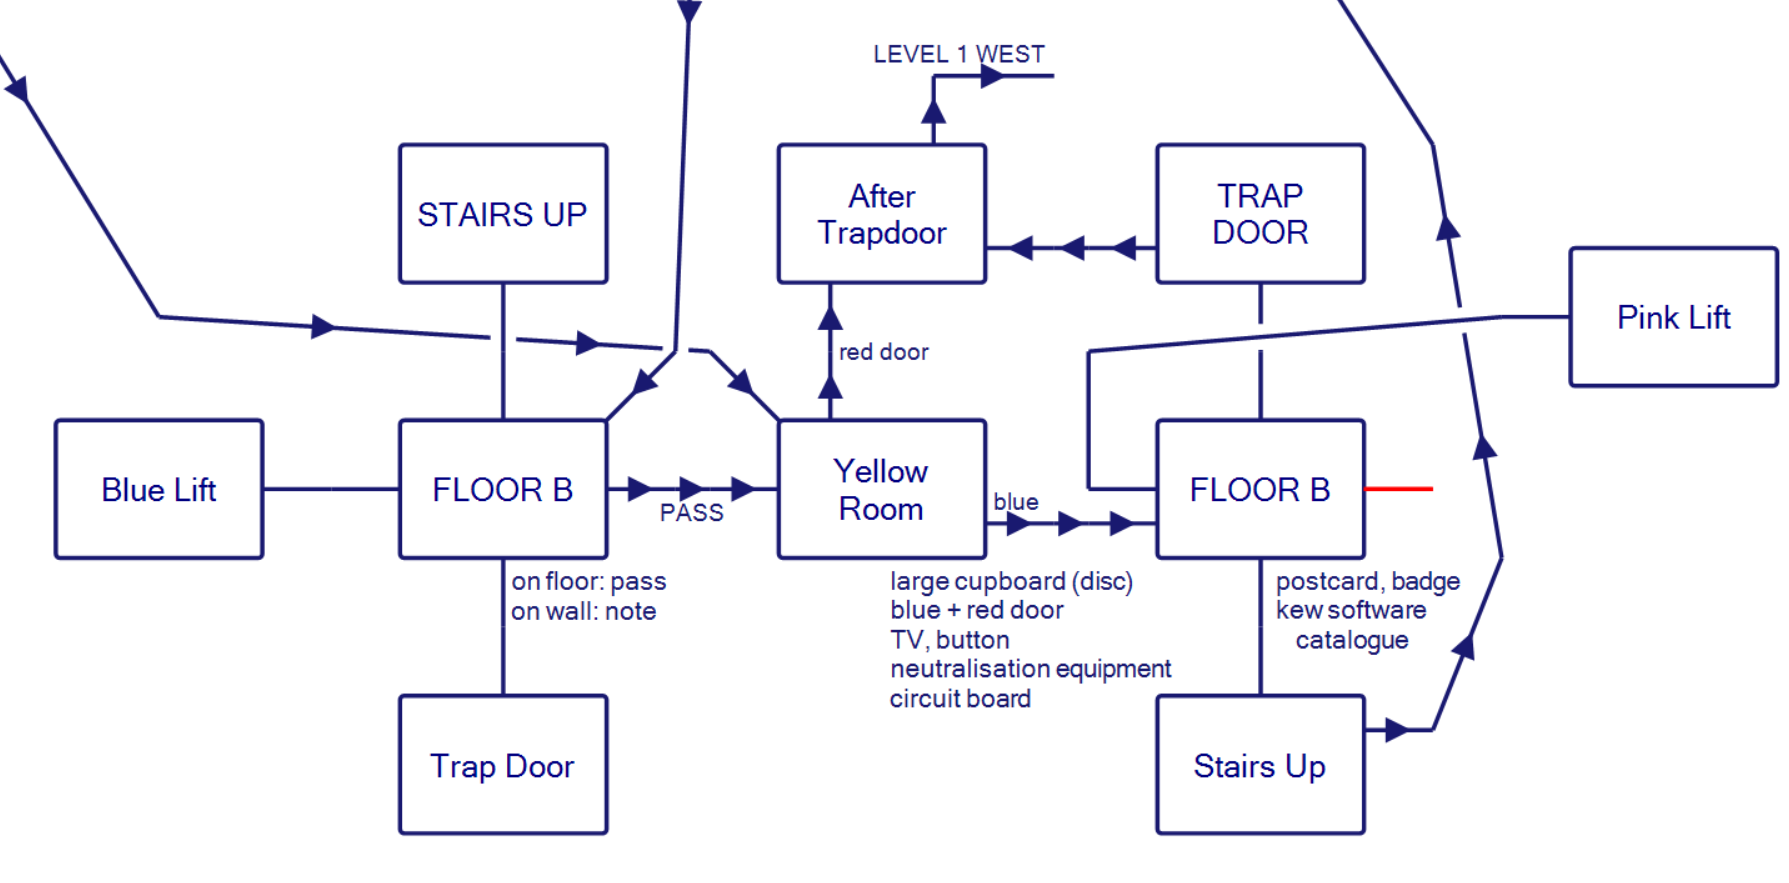
The problem is that the phrase “other complications” elides quite a lot. Here’s a zoomed out-view of the “real” map…
…but even on this one I’m missing some up/down connections. There are lots of “stairs” and “trap door” rooms which aren’t even really rooms proper even though they get displayed that way; when entering it you automatically go up or down a certain number of floors. I originally got very disoriented until I realized that the central “hall” of each floor is the only set of “real” rooms.
This looks off-center for good reason. I’ll get back to this later.
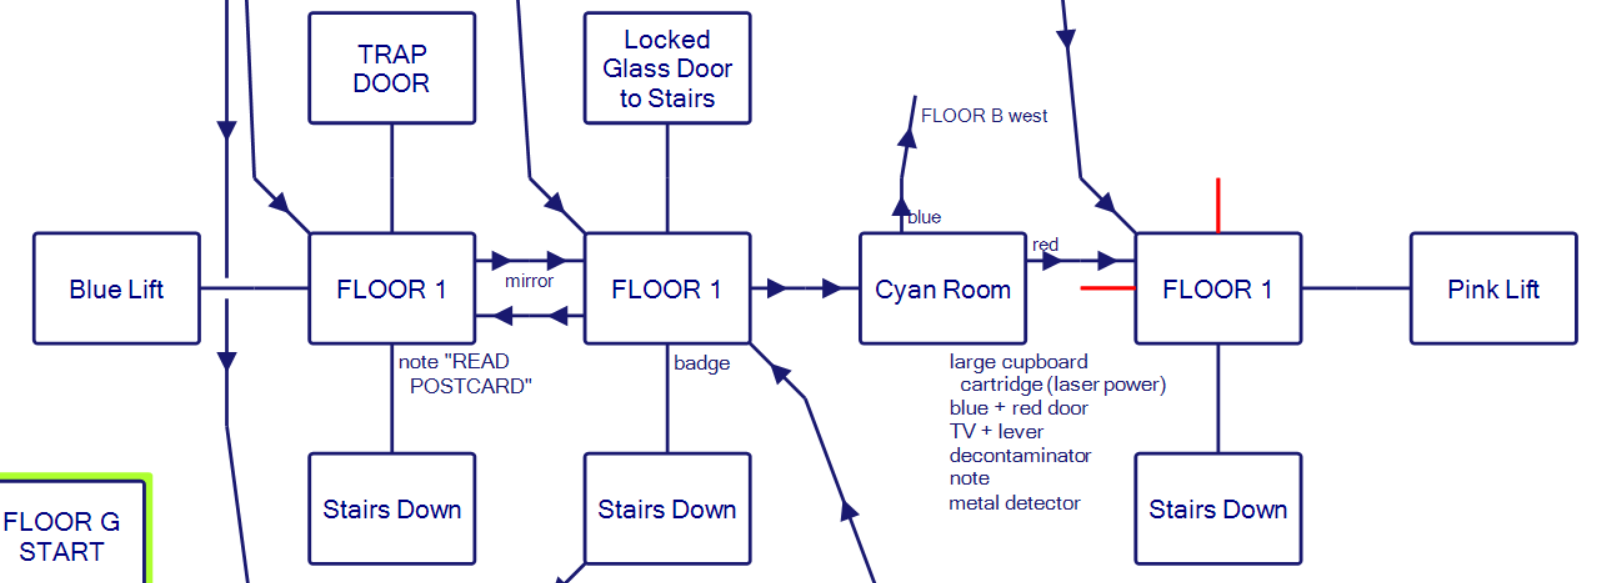
Here’s floor 1 (the floor above “ground”) to start with:
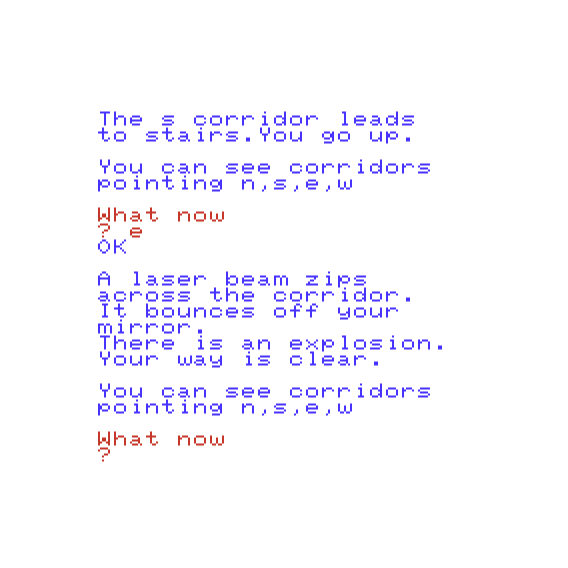
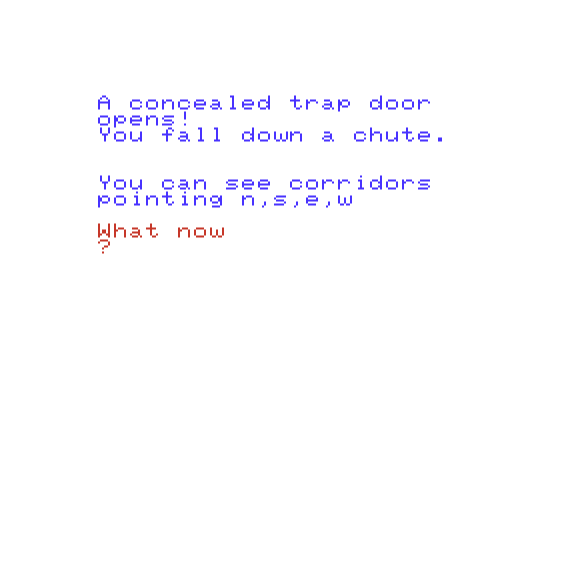
So on floor 1, you start in a regular corridor with the note READ POSTCARD and then going north falls down a trap door (which drops two levels) and going south leads to some stairs which get used automatically (dropping down one level). Try to go east and you are blocked by a laser beam unless you are carrying the mirror from the start.
Fortunately (although it wasn’t clear to me yet until finishing the game) you can drop the mirror here and not touch it again, and pick up the item found by using LOOK (a badge). Going south leads to “stairs down” and going north leads to “a locked glass door leading to stairs” (remember that for later, along with the LOAD to KILL postcard and the weird off-center screenshot from earlier).
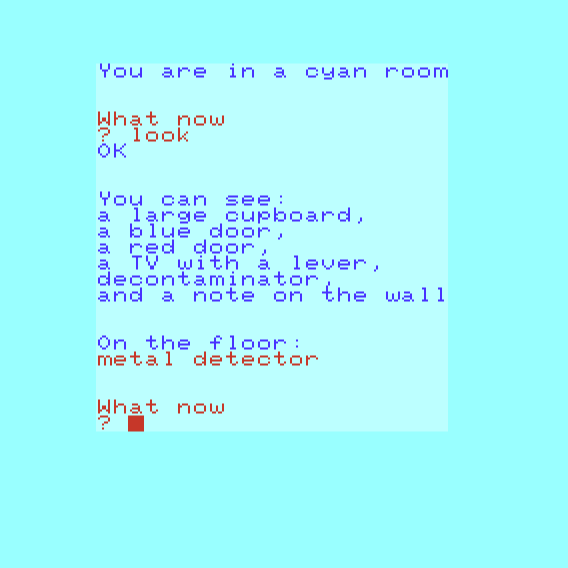
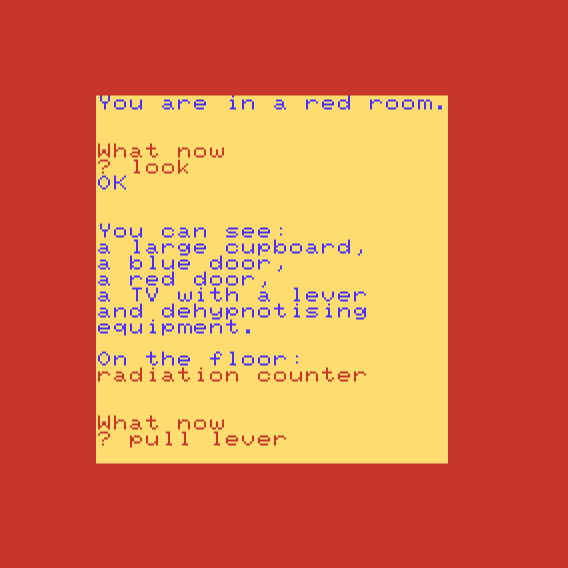
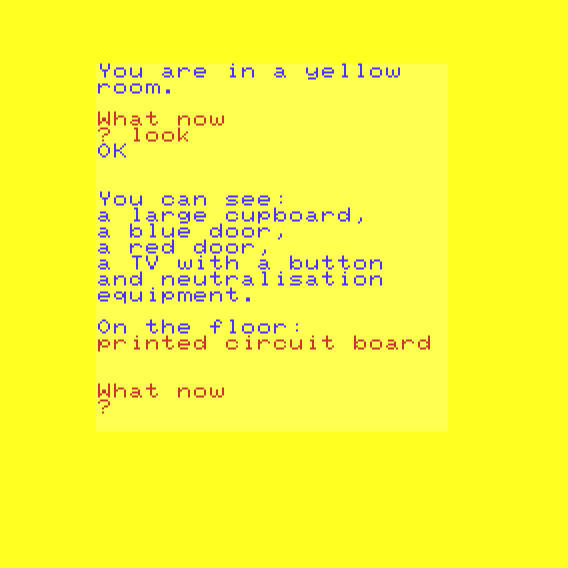
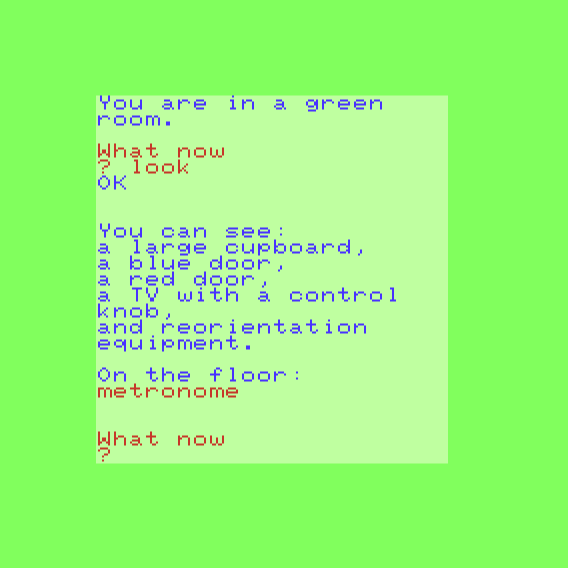
Going east again leads to the first of the “color rooms” of the game. They all are described in code the same way in order to save space, with slight variations.
Here’s the actual code in question. While there’s technically a parser and world model most aspects are being “faked” so to speak; a Scott Adams game would have each item implemented as an object in code whereas these are just text strings, with conditionals for customizing the various rooms.
5000 PRINT”you can see:”:print”a large cupboard, a blue door,”:print”a red door,”
5002 print”a tv with a “;
5004 ifq=1thenprint”button”:print”and neutralisation equipment.”:az$=”press”
5008 ifq=3thenprint”control knob,”:print”and reorientation equipment.”:az$=”turn ”
5010 ifq=4thenprint”button”:az$=”press”
5012 ifq=6thenprint”lever”:print”and dehypnotising equipment.”:az$=”pull ”
5013 ifq=2thenprint”lever,”:print”decontaminator,”:printa$(47):az$=”pull “
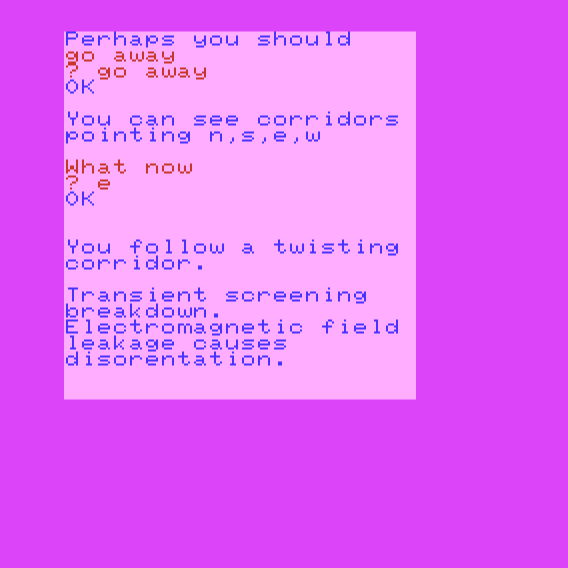
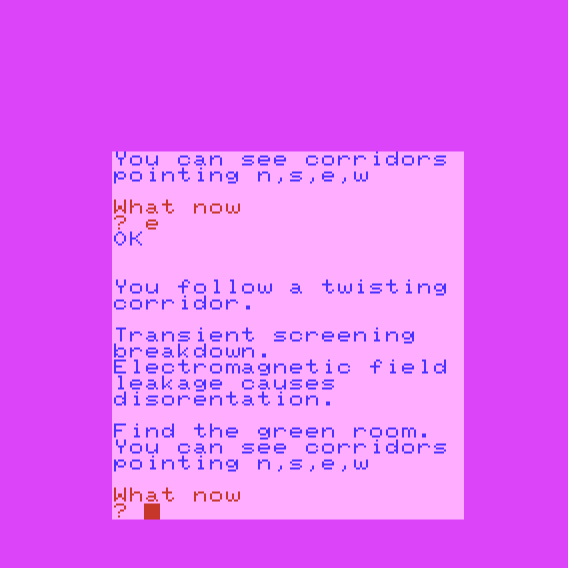
The room can have a “decontaminator” (this floor, floor 1), “neutralisation equipment” (basement), dehypnotiser (ground floor) or “reorientation equipment (floor 2). Each one clears up a general effect on the player. The TV effect with the strange text is undone via dehypnotiser. Some exits cause “disorientation”…
This is animated with the “text window” bouncing around the screen. I didn’t even know that was possible on the VIC-20.
…and that screen earlier that was off-center was a result of the orientation issue. It’s possible to keep playing (it just looks funny) but you do want the effect cleared up by the end of the game.
Going back to the big list of objects, there’s a TV with a gizmo you can push/pull/turn that will activate a puzzle. With the cyan room, “pull lever” will do the trick.
The game is prompting a button (1 through 6) as the answer. On the puzzle above, “1 over 8” is 9, and so 4 below that is 5, meaning the answer is 5. The puzzle gets selected randomly from a big list.
handy bunch: 5, because 5 fingers.
riap otherwise: the “otherwise” is indicating the “riap” gets flipped around to be “pair”, so the answer is 2.
square corners: 4. (They’re not all hard.)
roman start to vic: 5, because V is 5 in Roman numerals. This answer annoyed me the most as it could have been VI so I went with 6.
The randomization gives a true adventure-roguelike feel although if you play for long enough you start to see repeats.
Pushing the wrong button drops you down a trap door.
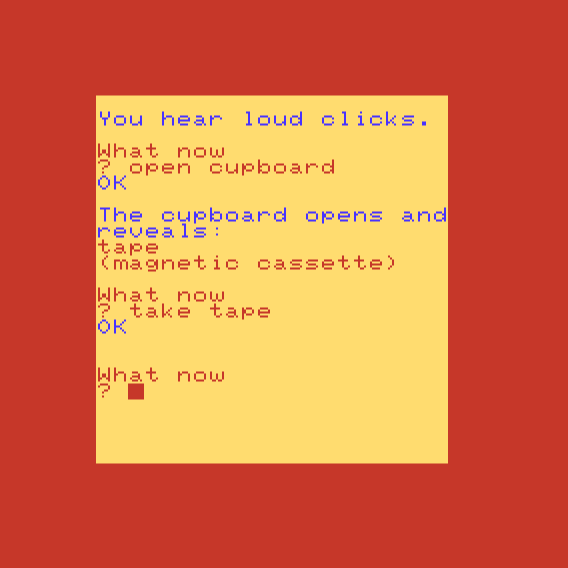
Pushing the right button causes “LOUD CLICKS” and the various doors to open. That is, the red door, blue door, and cupboard are now all accessible (they otherwise are shut tight). The red and blue doors simply lead to elsewhere (on floor 1, red goes to the far east of the floor next to the pink lift, and blue jumps down to the basement), and the cupboard has an item which may or may not be useful. The cyan room’s item (that is, the one on floor 1) is a laser power cartridge which is worth keeping. The cyan room incidentally also has an item on the floor (a metal detector) which you should completely ignore.
(Of course, I didn’t know when playing what I could ignore or not-ignore. This turned out to be particularly frustrating in that this game has a three item inventory limit. Even rooms have a three item limit, so if you try to drop something in a room that already has three items, you are not allowed to.)
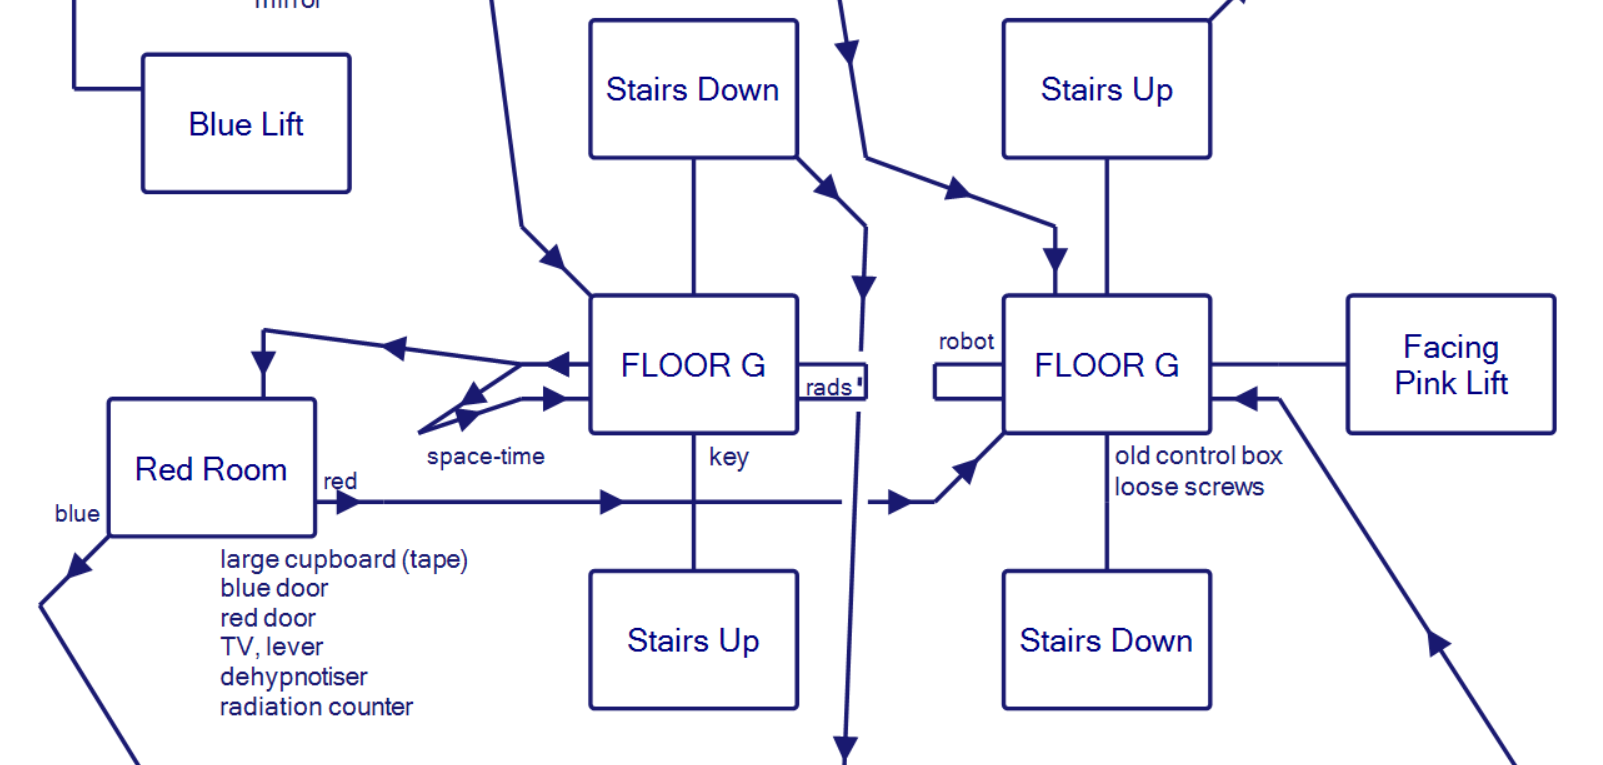
Continuing our tour, let’s step back to the corridor prior to entering the cyan room and go down some stairs to Floor G. The blue lift only connects to the starting room, so you have to enter via going up or down or the pink lift. What’s even messier is that the two corridor rooms don’t even connect to each other:
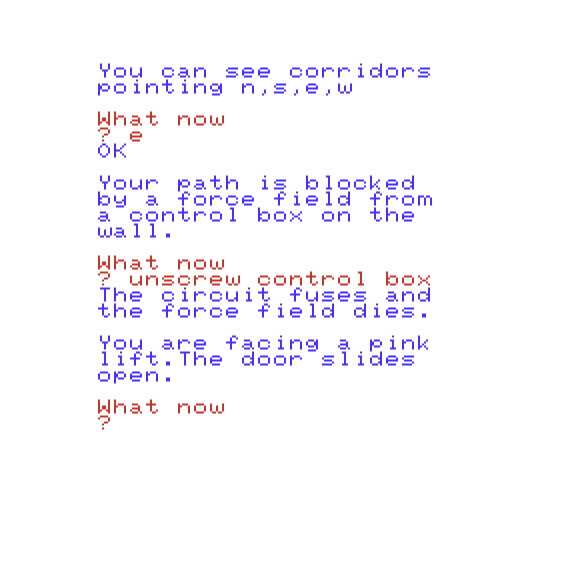
The east side (which you can reach going down stairs right where the mirror was used and we found the badge) has an “old control box” and some “screws”. If you try to go east you’ll get blocked by a force field. With the screwdriver from the start in hand you can UNSCREW BOX to get the forcefield down; the really wonky part is this doesn’t work until you’ve gotten stopped by the force field.
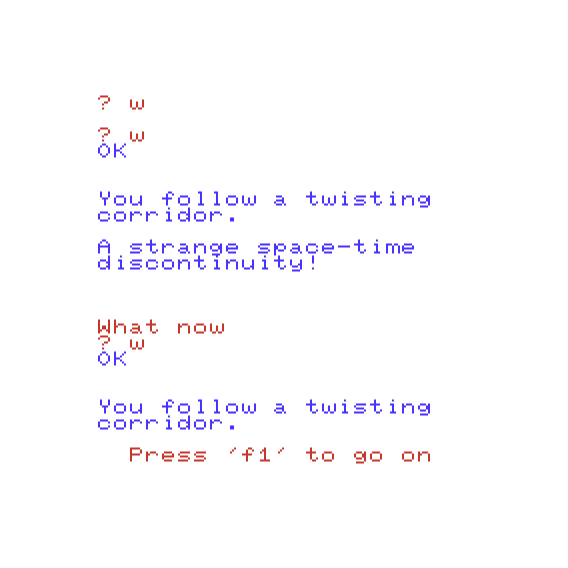
This takes you directly to the pink lift, which I’m still going to pass over in order to look at the west side of Floor G. North takes stairs down and south takes stairs up, like normal; to find the red room on this floor, you need to go west twice.
It took me a long time to find this in my playthrough, but I’m going to take care of it now.
The red room looks just like the cyan room, except it has a radiation counter instead of a metal detector (but similarly useless)…
…and solving the puzzle attached to the TV reveals a tape.
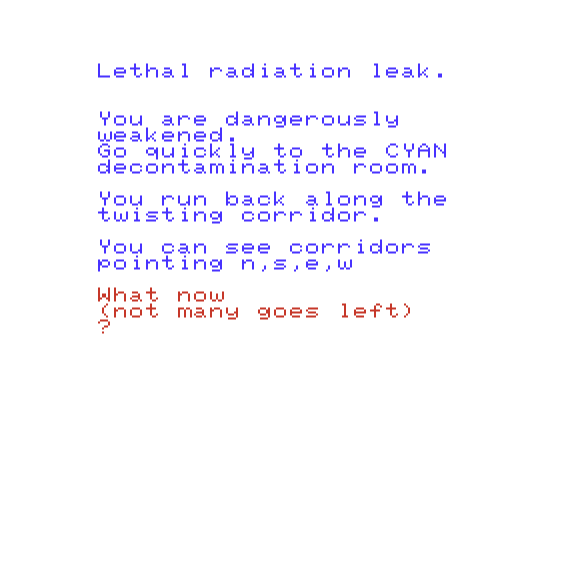
The radiation counter seems like it might be handy because going east (the last direction we haven’t tried) runs the player directly into some radiation. According to the source code, having the counter doesn’t matter.
From here you get a time limit and you have to pop back to the floor above to enter the cyan room.
One last thing about the west side of Floor G: there is a key on the floor. The key is toxic…
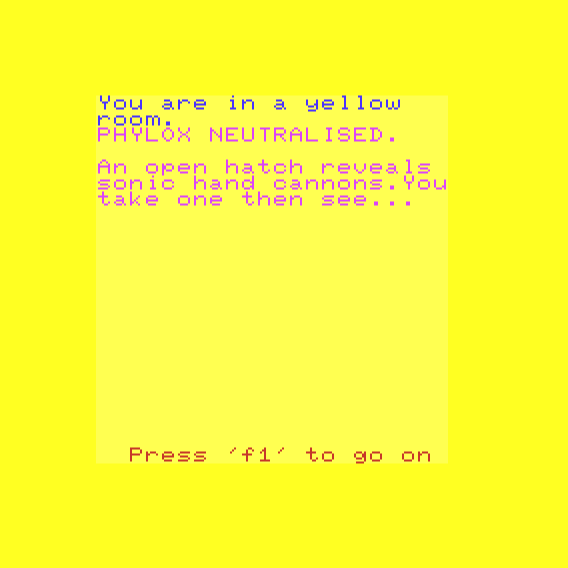
deadly phylox germs on the key! find yellow room entrance.
…and just like the radiation, a counter starts where you need to find a particular room, in this case the yellow room in the basement. So let’s head down there next:
The room includes a “pass” which is needed to unblock passage east. (It also gets used equivalently on Floor 2, so you can’t just assume an object can be discarded right after use.) There you can find a yellow room.
The “neutraliation” is for the disease, although I think now is a good moment spring another surprise the game can have at random.
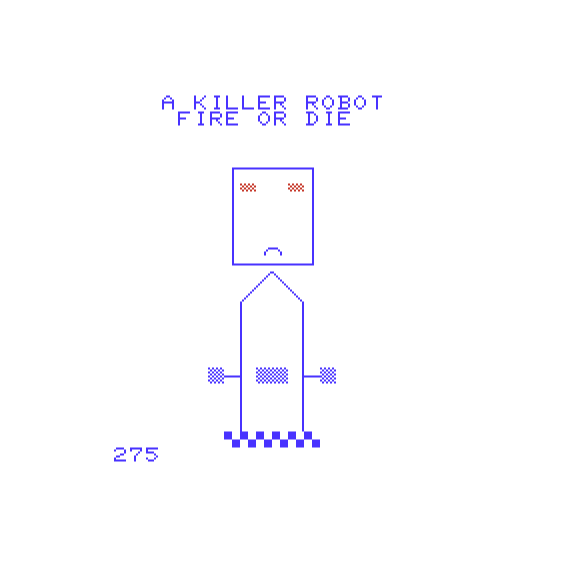
Sometimes, you get attacked by a robot when entering one of the color rooms. Notice you get dispensed a hand cannon at the start of the sequence.
I had immense trouble here; any keypress I did seemed to cause death. I tried typing LOAD. I tried making sure I had the charger pack (maybe that would help with the hand cannon). I tried going through every letter on my keyboard and reloading with a save game state. I started to suspect maybe I was hitting a bug. I was not, but it would not be until much later that I would resolve this issue; since it appears at random I was able to juggle just avoiding having them show altogether. This isn’t silly for this game — my winning run ended up skipping quite a lot — for example, that key I mentioned, which requires decontamination to survive even being picked up? I tried it on the glass locked door, no dice; I tried it on other exits which also mention a locked door, and nothing happened there either. You don’t need the key at all; it is a red herring. Hence, I figured perhaps the robot fights could be evaded in a similar way.
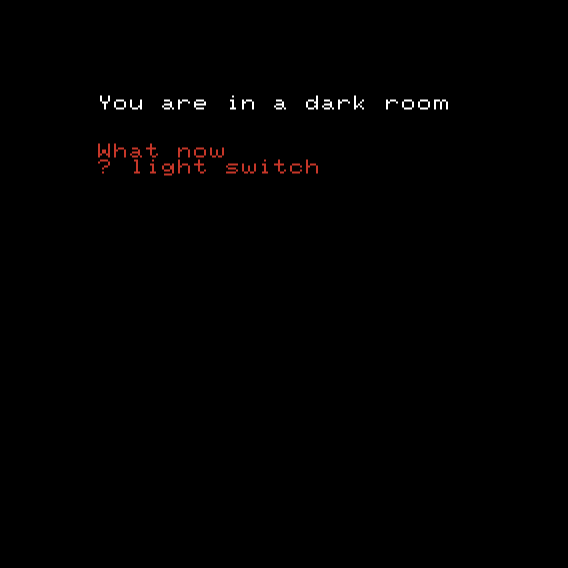
One other item of note is that the basement is essentially the bottom floor (there’s a special floor at the end of the game although it’s unclear if it’s “beneath” or “sideways”). This means if you go down farther, you will get dropped into a special area. For example, you might wander into a room with a trap door, or you might push the wrong button at the color room puzzle (trap door) or you might even spend too many turns in a room trying to figure out the syntax for something (trap door, just at random it seems after X turns).
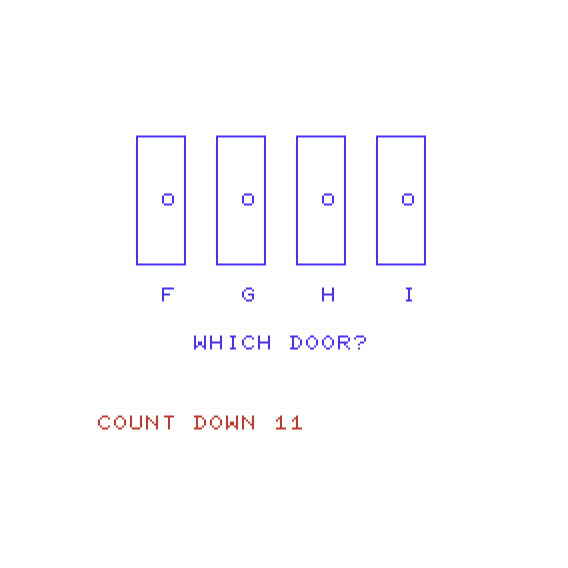
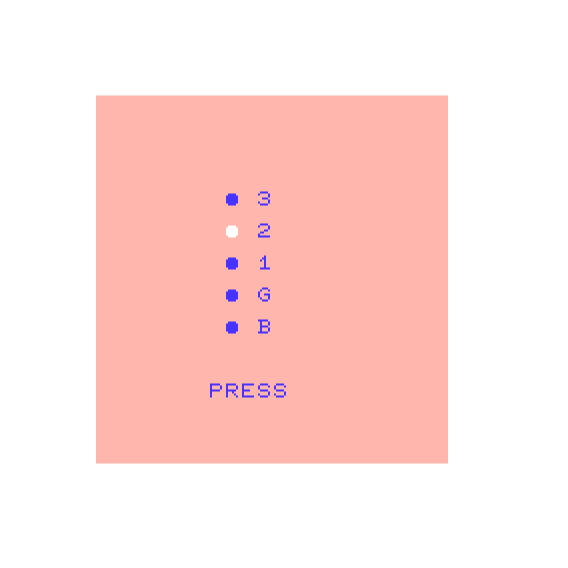
Here you need to (as shown) type LIGHT SWITCH to make any further progress. Then a TV shows a short sequence of letters, and four doors are revealed.
There are multiple variants, but the one here I was stuck on (even though I had the right answer, I couldn’t explain it). I checked on Bluesky, Mastodon, and Discord and got answers from all three (thanks to Tyler Bindon from Mastodon, Mike Piontek from Bluesky, and tjm from Discord); I think my problem was that the second screen is timed so I thought it would be something solvable quickly and also would generate a sequence that would keep going. This is not the case here.
ABCDEFGHIJKLMNOPQR
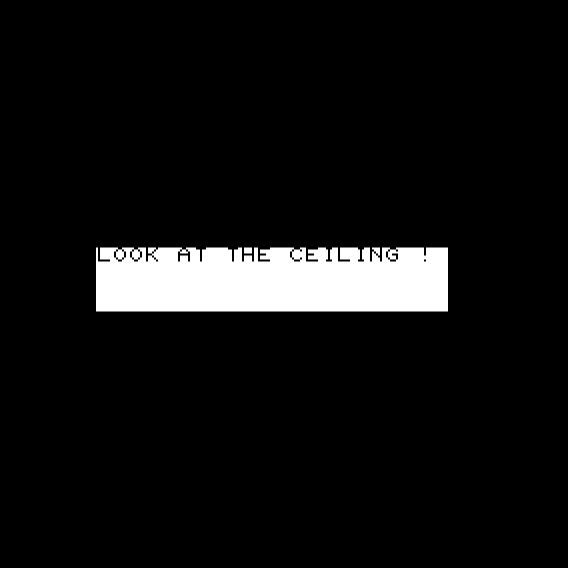
R (skip three letters) N (skip two letters) K (skip one letter) I. In case you get it wrong, you get a second puzzle, and if you get that one wrong, you get a “ceiling crush” effect and you die.
Animated!
All of that material is completely optional. In fact, other than the pass at the start, you don’t need to go into the basement at all. The yellow room has a circuit board on the floor and a disc in the cupboard, and both seem like they would be useful defeating a rogue computer, but they are absolute red herrings. (I do want to emphasize how much easier the game is with me telling you this kind of thing; imagine you’re juggling an item limit of 3 this whole time and trying to pick up things like the disc you are sure are useful, while simultaneously getting dropped into trap doors for arbitrary reasons and getting attacked by robots that you can’t defeat.)
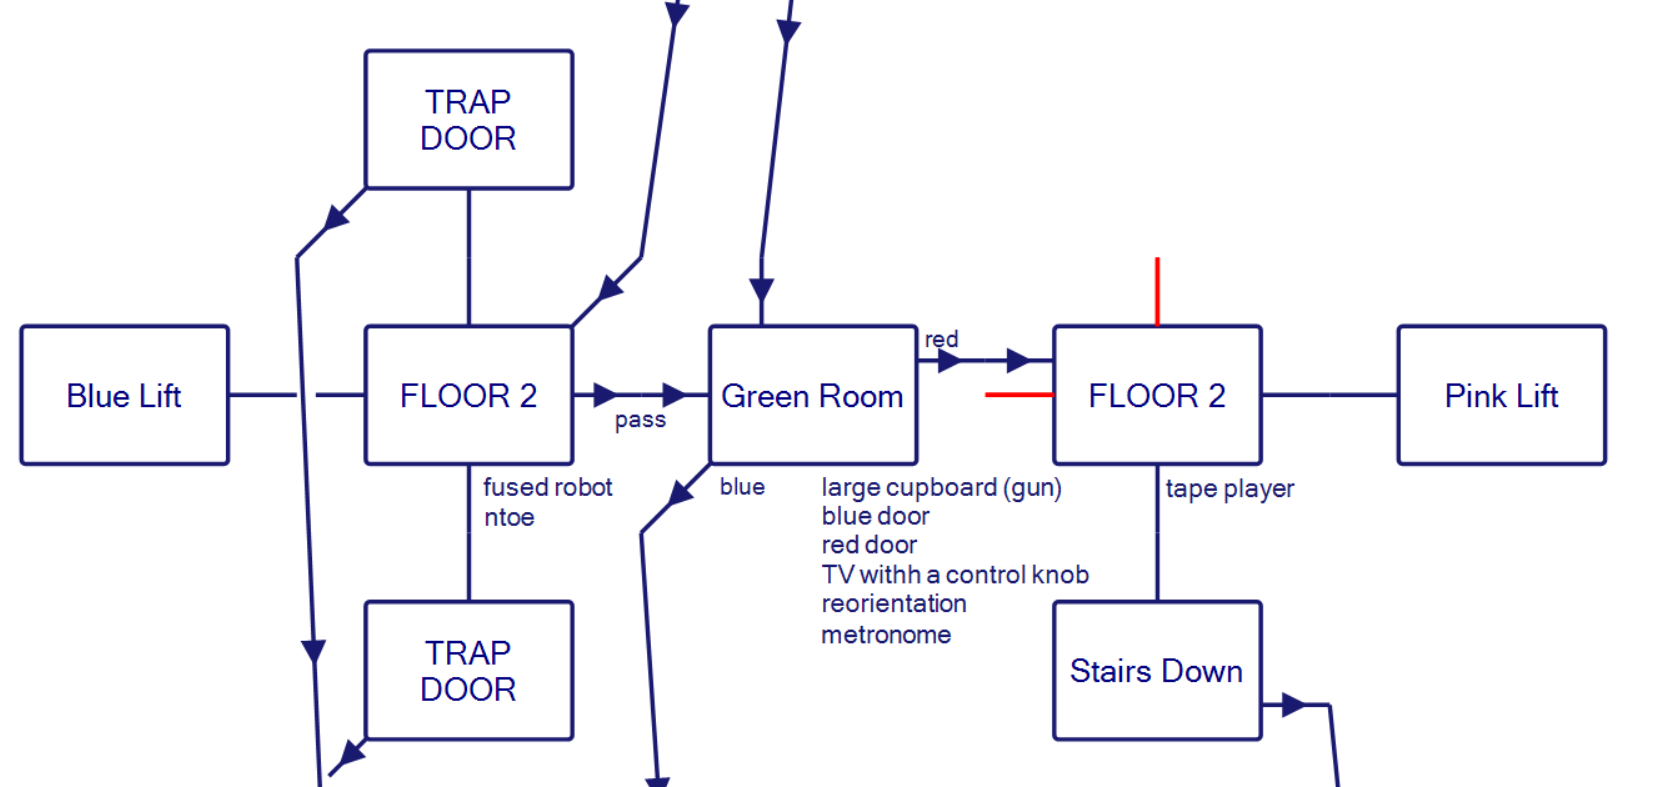
Time to hop up to Floor 2! At least this time there’s some reason to be up here.
I haven’t been talking about them, but the red exits are dead ends like “a locked door” or “a killer robot lurks”. In both cases you might think there’s some way to handle them (like that deadly key) but they really are just dead ends.
The pass from the basement opens the green room on Floor 2.
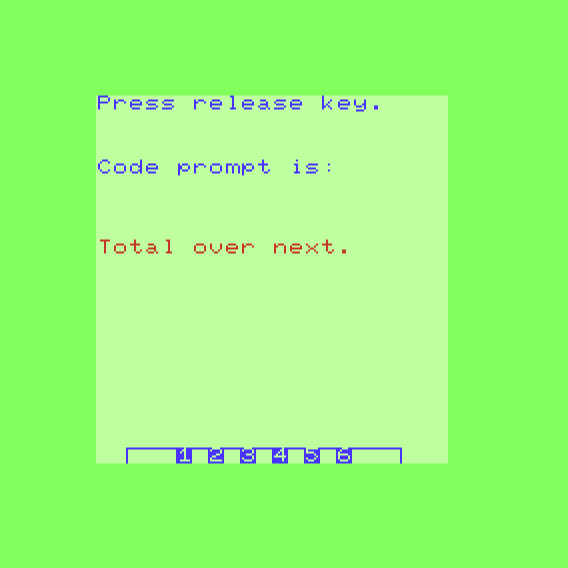
The metronome, of course, is useless, solving the puzzle opens the cupboard revealing a gun.
Sum 1+2+3+4+5+6 = 21 is the “total”, and the “next” after 6 is 7, and the “over” is division, so the puzzle is fishing for 21/7 = 3.
If you are holding the gun and the cartridge at the same time you can LOAD GUN to charge it. (The command here isn’t obvious hence I thought it is what the postcard was referring to.)
ok…gun loaded
Despite you having a gun already if you get into one of the robot scenes after there’s still the gun that gets dispensed (and still the issue where you need to hit the right keystroke).
Now it’s time for the last(-ish) floor, Floor 3. There is no button for it on the blue lift, so you have to ride the pink lift instead, and the lift won’t let you get to floor 3 unless you are carrying the badge.
The map here is a little more straightforward than the other levels. The red exits on the map below are locked doors. (Again, no luck with the key.)
The blue room straightforwardly has a “transmitter” in the cupboard and just as straightforwardly the transmitter is useless. (I carried it around with me most of the map assuming it would have some effect.) Past that, assuming you don’t get tripped up by the geography, you can walk around a corner to find a third lift, a green lift. Try to enter the lift and a robot attacks, and there is no weapon given to you beforehand. The reason you need a charged gun is for this encounter.
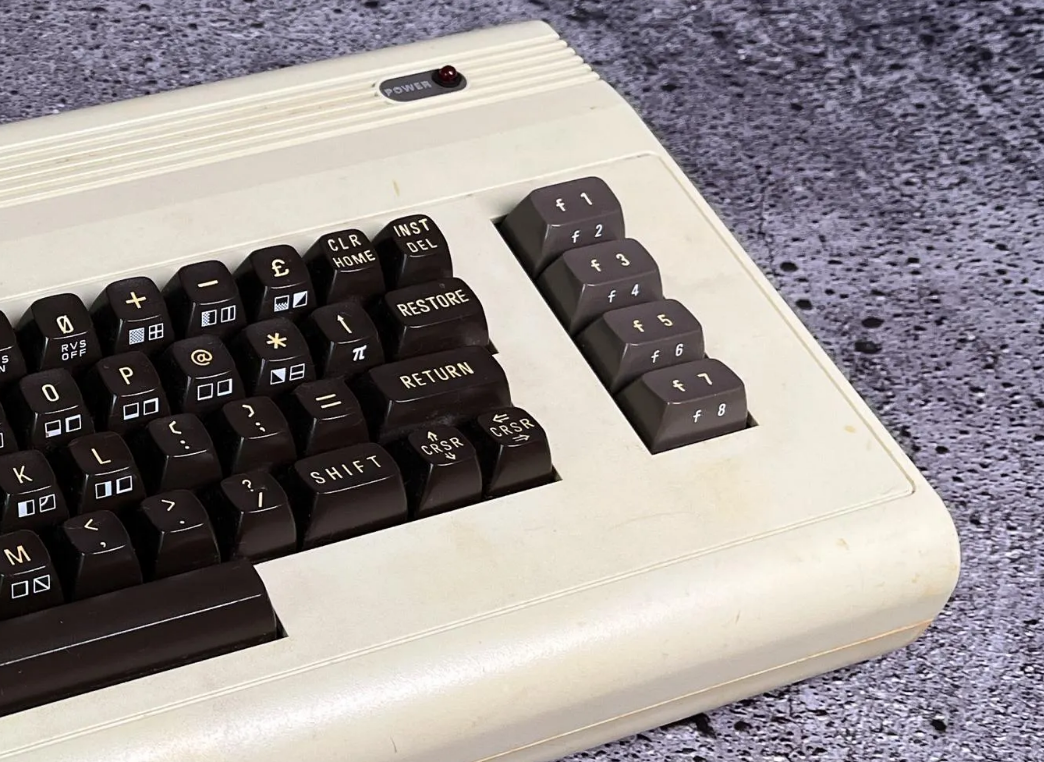
It took a giant and absurd leap of insight to get through here. It would not take as big a leap for someone playing on actual hardware. You see, the VIC-20 has four “function keys”:
The postcard was trying to hint that the way to kill the robots is to press the F7 key on the keyboard, which gives LOAD text in certain circumstances.
Pimania had a bit where you needed to hit the “pi” key on the ZX Spectrum keyboard but at least the button was marked that way! (And it was needed to start the game; it wasn’t in the middle of what seemed to be a different kind of puzzle.) From what I gather not everyone used or even understood the function key use. (The article I just linked includes the line “The four function keys on the right hand side of the VIC 20 are probably the most neglected part of the whole computer.”)
Past this, while in the green lift, no matter what button you push you plummet to the “U” floor.
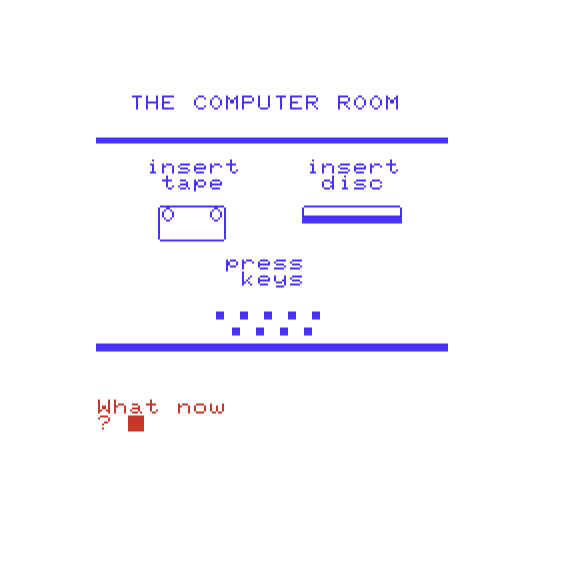
You do not want to use a disc. The way to win the game is INSERT TAPE.
Based on how hard I had to push to reach this screen, I was hoping for at least a laser show.
This is another case where I think a numerical rating would be deceptive; I’d probably rank it 1 out of 5 stars if I had to write a review on IFDB. However, I am in admiration of just how much complexity the author managed to stuff into so small a package, and just how far they were willing to go to toss in a little misdirection. The key in particular was what I call a second-level red herring, as in a red herring that keeps the joke going a bit longer (with the cure, plus what seem like potential uses which aren’t). Similarly, the fact LOAD GUN is required makes it seem like the postcard has been used already, even though it was hinting at an entirely different puzzle.
It is possible we may run into the author again. Sumlock did publish an adventure game of their own in 1984 called Salvage. It is for Commodore 64, but shares some resemblances to Secret Mission. In addition to the game having character art, you need to get the digits of a pass code (by collecting individual digits) in order to escape a shuttle.
The tape packaging of the original 1984 version actually comes with author names: A. Pomfret and T. Picking. I assume Pomfret is related to Mike and Tony of Sumlock (I would say maybe “A” is Tony but he was already at Ocean by then), but could Picking be the Kew Enterprises author? This will need further investigation when I reach that game in the future.
To be clear from the start, I am writing today about an extremely obscure VIC-20 game from 1983, but to do justice to the story, I need to start just a little farther back–
The University of Tübingen. Located in modern-day Germany, depicted here in the early 1600s.
While the German Johannes Kepler is now one of the most famous names in the history of astronomy, his work reached the scientific world in a slow burn. His first law of motion, describing the orbits of planets as ellipses (contra Copernicus and his “circles with epicycles”) was published in 1609 but not accepted until many years later.
Part of the issue was simply the quality of the astronomy data being collected. The obsessive work of Tycho Brahe (another one of the astronomy greats) was compiled by Kepler himself over a period of 22 years into the Tabulae Rudolphinae, a set of star charts and planetary tables with accuracy far superior to that which came before. Kepler was not a fan of the labor, writing in one letter:
Do not sentence me completely to the treadmill of mathematical calculations, and leave me time for philosophical speculations, which are my only delight.
His lack of enthusiasm for mathematical tedium was shared by another German polymath: Wilhelm Schickard. (By “polymath” I mean he was a Professor of Hebrew, Oriental Languages, Mathematics, Astronomy, and Geography.) Both Kepler and Schickard had affiliations with Tübingen University and were sometimes collaborators. We know from letters between the two that they had discussions on the labor-saving invention known as Napier’s bones (1617), rods intended to allow easier calculations; these rods, however, were still entirely manual work, needing to be placed against a frame.
Schickard got the idea: what if he could make a full “calculating machine” akin to Napier’s bones that would work automatically, like (literal) clockwork?
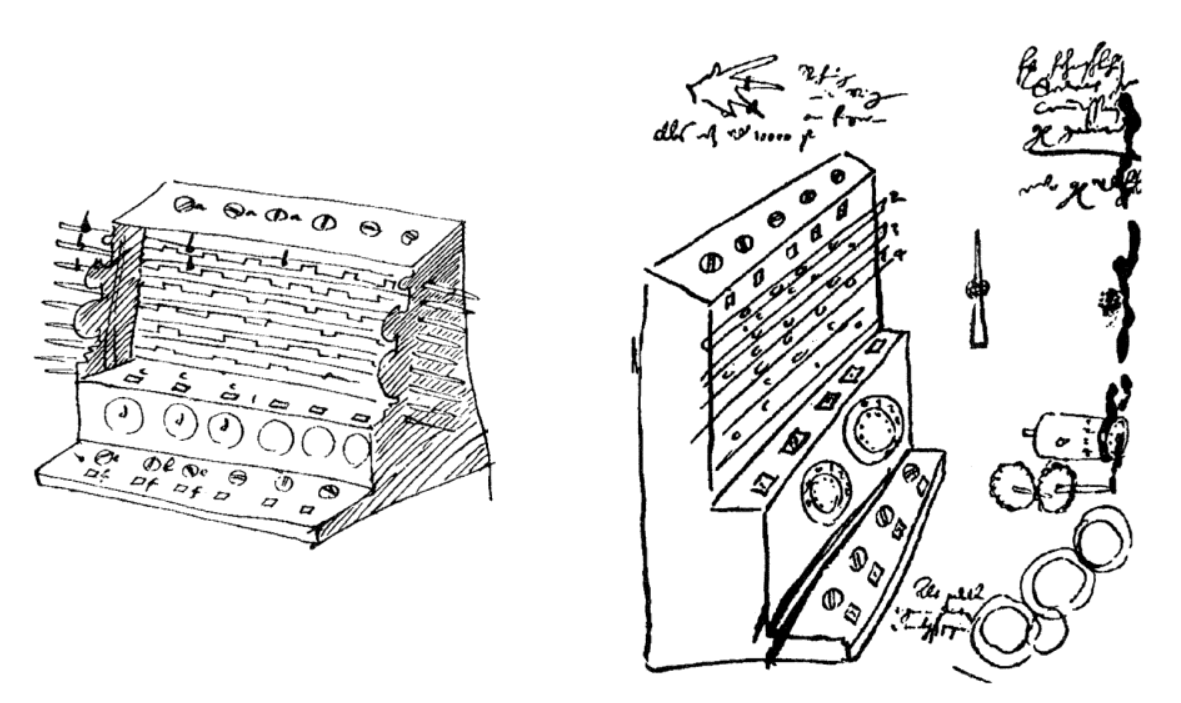
He got a device working and described it in some detail to Kepler in a letter, including a picture.
The device includes actual Napier bones in the mechanism, and uses an “accumulator wheel” that would cause a digit to go up by one. This involves a tooth of the wheel needing to move exactly 360 / 10 = 36 degrees and while it was unclear what exact method Schickard used, he likely had a spring set up to allow the internal gears to stop at specific points. It had the issue that an overflow (999999 + 1) could actually damage the gears.
Unfortunately, the picture in Kepler’s letter was not found until much later (it was on a separate paper being used as a bookmark) so despite Schickard being the first to create an automatic calculator he was not influential. Instead, the icon for kicking off automatic calculation was Blaise Pascal, yet another polymath, French rather than German. He obtained fame in mathematics, science, and religion (his biggest contribution in science being to prove that pressure changes with altitude, hence the unit of atmospheric measurement being a Pascal).
From a lithograph of Pascal after a painting by François Quesnel the younger.
Blaise was born in 1623, hence the story now is squarely in the Thirty Years’ War (1618-1648), which started to be the utter ruin of all of Europe. The Pascals (father: Etienne; mother: Antoinette) were a rich family that lived in the small town of Clermont. Etienne had the aristocratic job of “tax collector”. (Blaise did not mention his mother much as she died when he was three.) Etienne decided (with Blaise at age nine) that it was better to be closer to Paris where intellectual and political life was blazing. Etienne sold his tax post and invested in government bonds instead, which would normally give the Pascals a generous income while in Paris. However, the Thirty Years’ War lasted (squints) a long time, and the government cut back on their interest rates of those aforementioned bonds while spending vast amounts on war. Etienne made a protest as part of a group; displeased, the King’s Chief Minister (Cardinal Richelieu) ordered those protesting arrested. Etienne ended up fleeing Paris (back to Clermont) and leaving his governess in charge.
Richelieu on the Sea Wall of La Rochelle, painted in 1881 by Henri-Paul Motte. The Siege at La Rochelle (1627–1629) ended up being a major victory for the Royalists. It was one as well for the Cardinal, who was trying to centralize power to the King.
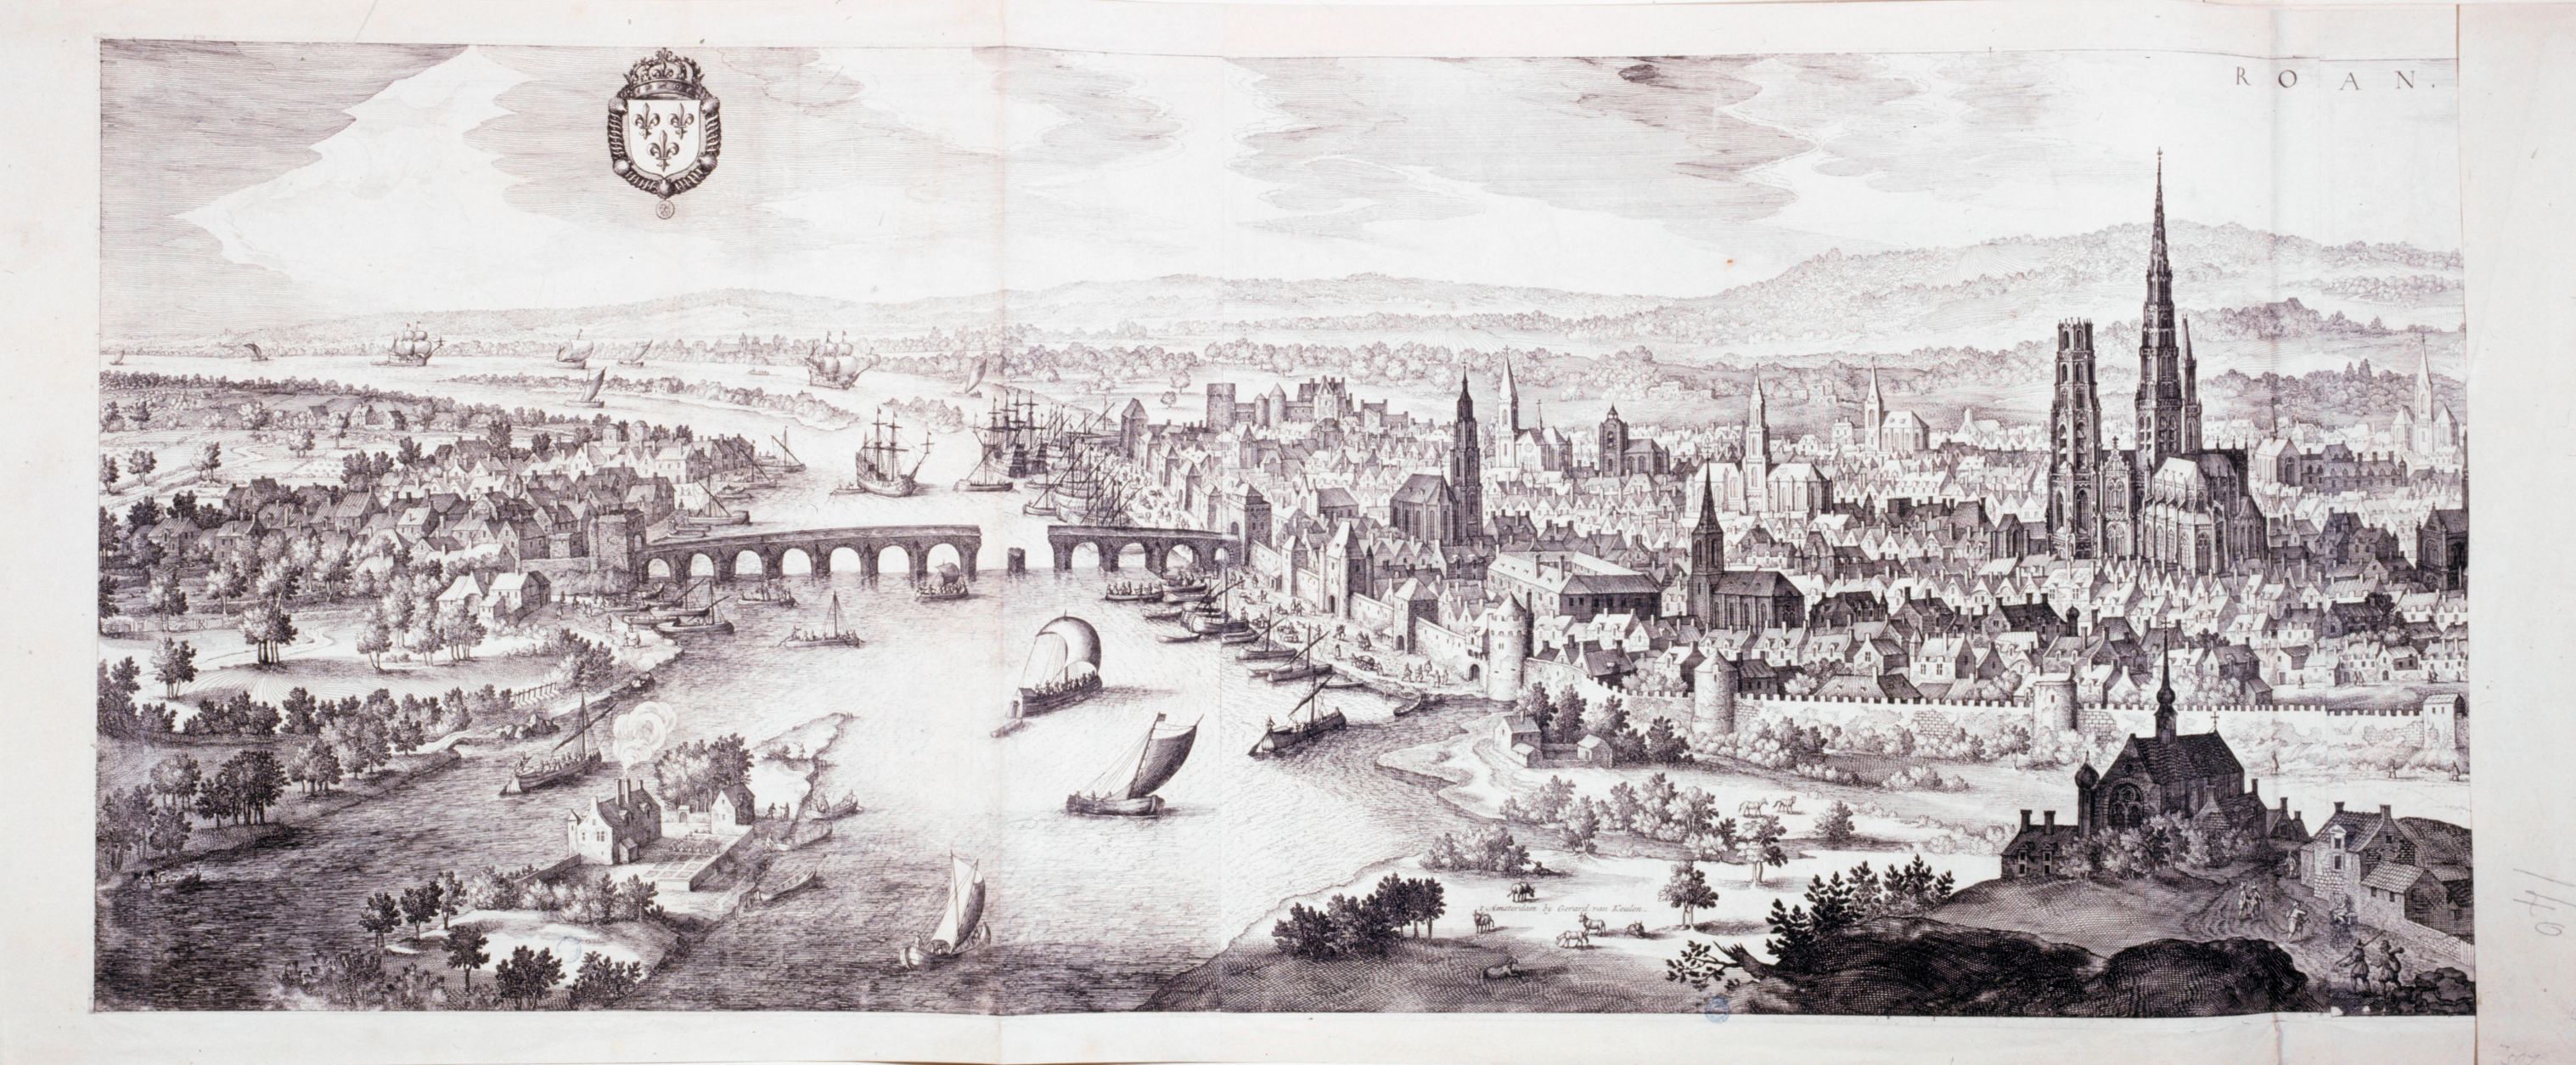
Events turned by a stroke of luck: the wife of Louis XIII, Anne of Austria, was finally pregnant. This, in best Louis XIII fashion, was cause for great celebration. One of the invitees was Jacqueline Pascal (aged twelve) who was known for acting and reciting poems. She made an appearance during the event and talked to the Cardinal while there, getting a promise of rehabilitation for her father rather than arrest. This ended with his father being given an appointment as tax collector of Rouen, capital of Normandy.
To be clear, this was only halfway-generous on Cardinal Richelieu’s part. Etienne still had angered the Cardinal. His place of appointment was not an easy place to collect taxes. Its location near the Channel (and former affiliation with the English king) made it a prime spot for English and Scottish Catholics and it had a general reputation for chaos.
The calculations for tax collection were onerous. Blaise was recruited to help, leading the polymath in 1642 to devise an instrument: the Pascaline. It resembles Schickard’s device in using gears although it is addition-only (Schickard’s could do subtraction). On the other hand, Pascal’s device allowed gears in increments other than 10, making it better suited for financial use (example: 12 deniers = 1 sous).
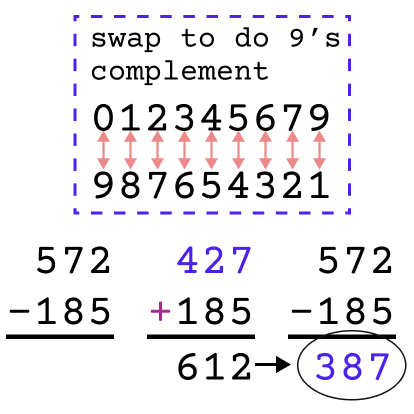
Since there was no built-in subtraction function, it was instead done with the 9’s complement method.
Because it is genuinely important for the story, a brief explanation how the 9’s complement method works. Suppose you want to do 68 − 34, but want to do it with addition rather than subtraction. Take the first number (68 in this case) and subtract it from 99; except, you don’t need to actually do the subtraction! All 0s will swap with 9s, all 1s will swap with 8s, all 2s will swap with 7s, etc. So 68 − 34 turns into 31 + 34. Do the resulting addition; with the example you get 65. Then take the end result and do the “subtract from 99” trick (or rather, digit swap) and you get 34, which is the correct result.
Another example. 572 swaps digits to be 427. Add and you get 612, then swap back and you get 387, which is the result of subtraction.
The length and difficulty of the ordinary methods led me to consider quicker and easier ways in order to relieve me of the complex calculations I had done for some years regarding positions you honored my father with in the service of His Majesty in Upper Normandy.
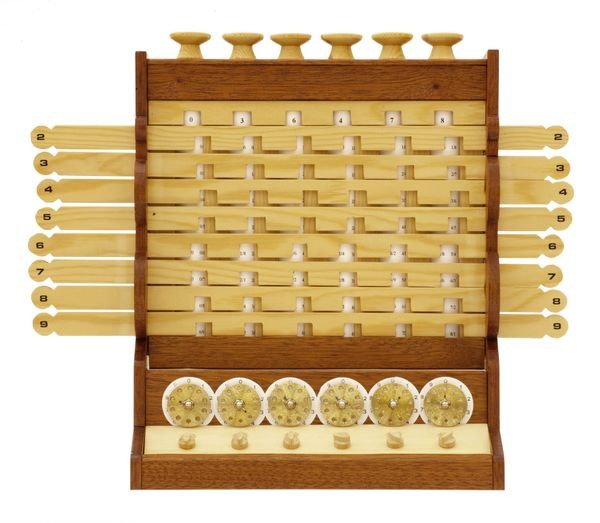
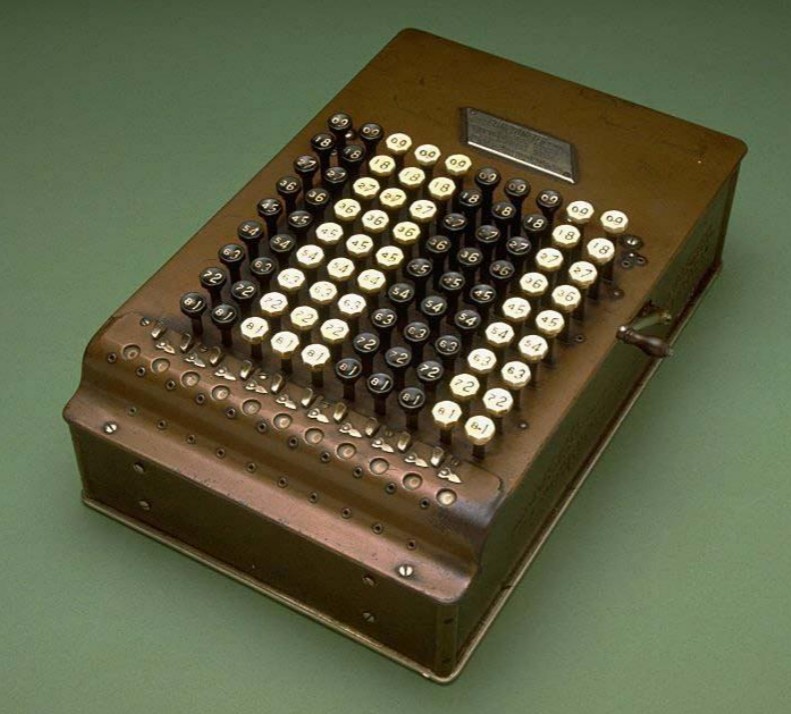
…and he made multiple Pascalines over his lifetime, some which still exist today, it was expensive and only available to the very rich. Still, this method led to a general approach to automatic calculating devices which lasted much longer than you might suspect. Lurking closer to our ultimate goal, in the 19th century, the comptometer was designed very much like Pascal’s mechanism but with straight rods rather than rotating dials. (The prototype used meat skewer rods in a macaroni box.) It even still used the 9’s complement method.
The buttons of the device have two numbers on them; the smaller numbers represent the 9’s complement, so a fluent operator can think in terms of swapping the 9’s complement quickly. What I mean by this is that it wasn’t as terrible a system as it might seem to modern eyes, and the device had a fantastic feature: you could press multiple buttons at the same time. That is, on a standard electronic calculator, you might need to press 4, 7, 3, and 2 in sequence to get the number 4732, but an operator of a comptometer doesn’t have to wait: they can press all four buttons simultaneously. Furthermore, the 9s complement system means that with number-buttons only a fast operator can rapidly move through additions and subtractions in mixed order without slowing down to specify what operation they’re doing.
All this is relevant to the company of Bell Punch Co., Limited, founded in 1878 in the UK, which obtained the patent rights to a ticket punch machine already in use in America. It was used for trains to — as the name implies — punch tickets; it was generally the case beforehand that people paid a flat fee for an “area” rather than their actual distance travelled. With the punch tickets, you can have an exact number of stops marked automatically.
In 1924 they expanded into dispensing movie tickets (by purchasing the company Automaticket); in 1929 they expanded again into race betting tickets. (In between these, they formed Control Systems, Limited as a consolidation company.) Bell Punch tried putting an adding mechanism to go along with one of the ticket mechanisms, and got the rights to an adding machine design (the Petometer, 1933) in the process. They soon began creating just the adding machines by themselves. The video below shows the “Plus Adder S” manufactured from 1936 to 1940 based on the Petometer model.
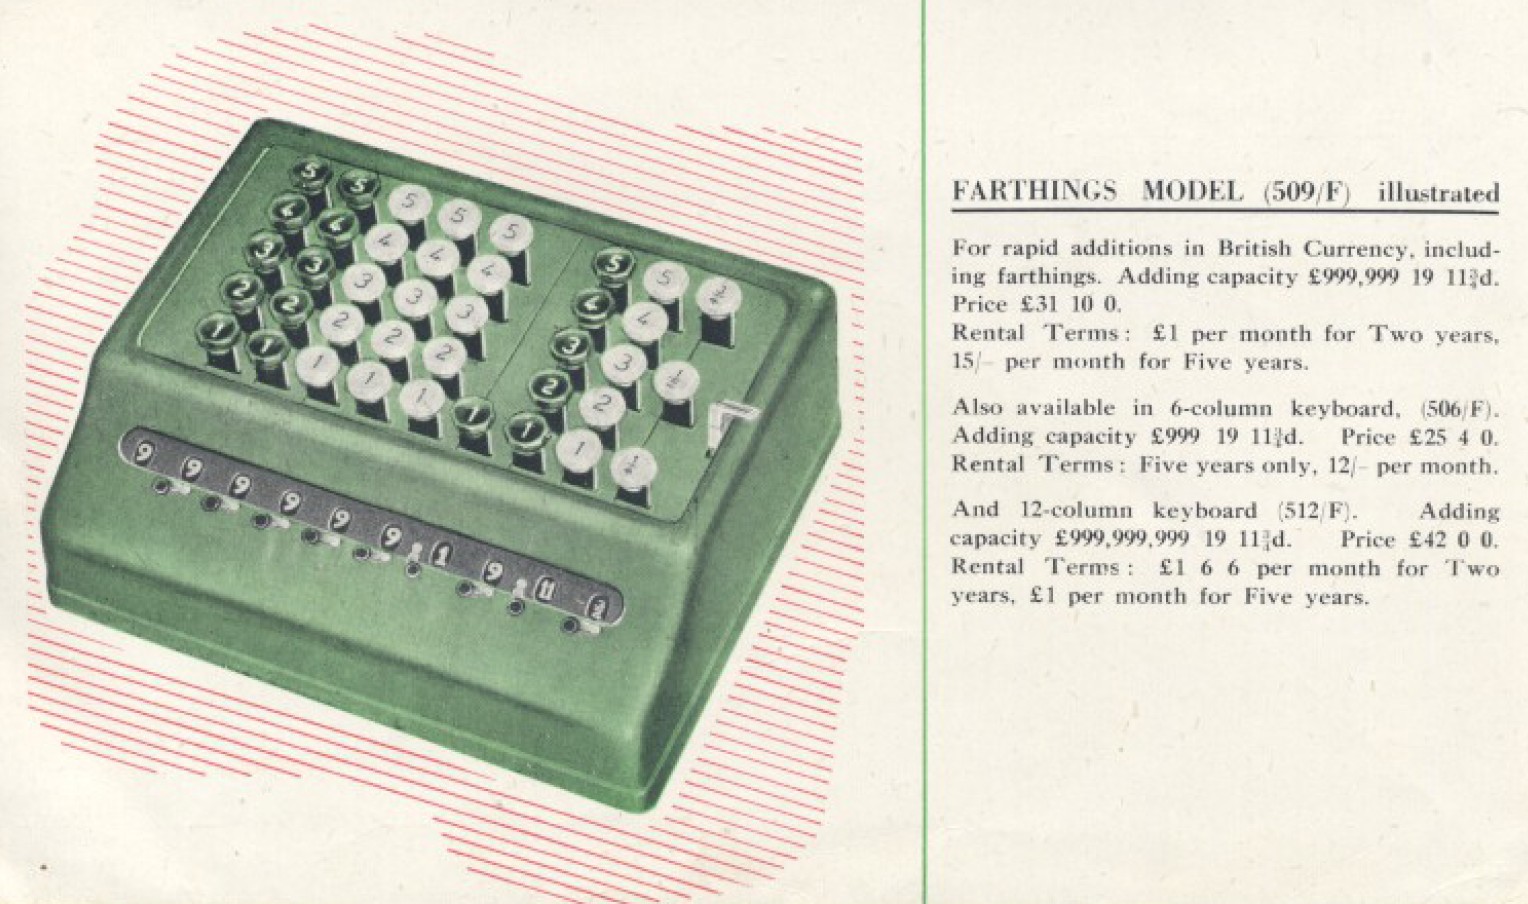
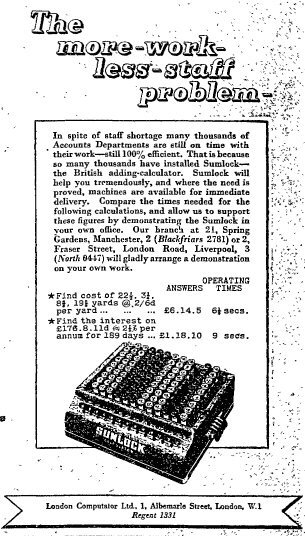
During WW2 they made a subsidiary brand, Sumlock, specifically for the manufacture of calculating machines. A 1943 ad highlighted the “more-work-less-staff-problem” being faced during the war. After the war they pushed even harder into the calculating space.
From a 1948 brochure.
They consequently were poised to hit a remarkable milestone of 20th century technology: they made the first fully electronic desktop calculator.
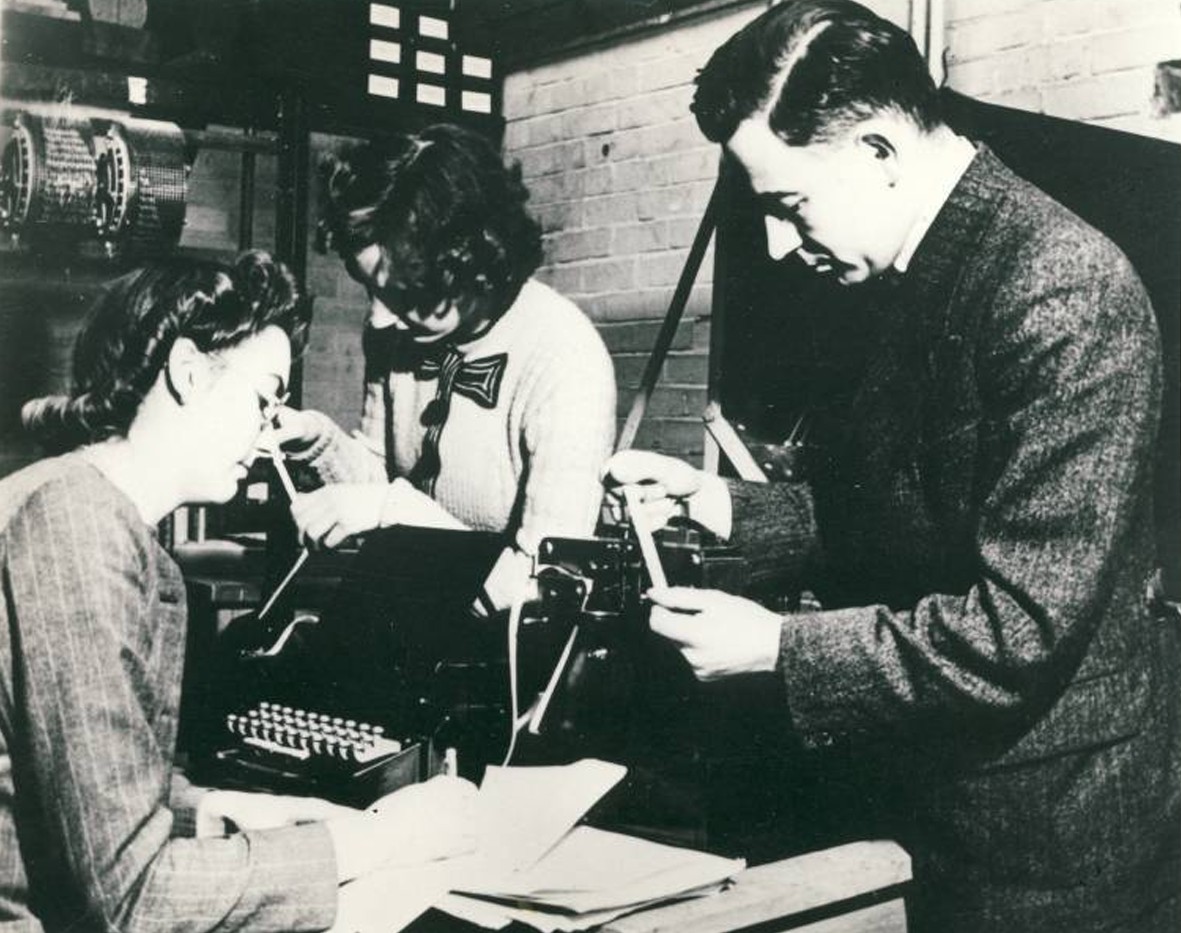
The genesis of Sumlock’s device (code-named ANITA) started at Birkbeck College in London, where Andrew Booth led one of the groups in the UK looking to build digital computers, and due to limited resources tried to think small, embarking work on an Automatic Relay Calculator (or ARC).
December 1946. Kathleen Britten, Xenia Sweeting, and Andrew Booth. Kathleen Britten was soon to be Kathleen Booth.
He visited the United States for six months, including two very important meetings. One was Warren Weaver of the Rockefeller Foundation. who was interested in funding a computer project as long as it led to research in “natural language translation”. (Odd for a calculating device, although Birkbeck College ended up becoming a center of automated language translation research.) Andrew also met with von Neumann at Princeton; the ARC was consequently redesigned with von Neumann architecture and Kathleen and Andrew wrote a paper about the possible methods of producing such a computer.
This design was picked up by Norbert Kitz who was a graduate student at the college in 1950.
I was collecting data on the older types of conventional calculators for an introduction to my dissertation on digital computers. While studying those old calculators in the Science Museum, the thought struck me that there was actually one more important page to be written in the book of their history. I had some knowledge of electronic digital computers and it seemed to me that it must be quite possible to use this knowledge for the construction of an electronic desk calculator.
He thought about such a device for some time but it wasn’t until 1956 that he met with directors at Control Systems; Sumlock was still busy at work making giant mechanical machines with 9’s complement markings on the buttons but they were keen on forming a new electronics department; by now Kitz had worked on the Automatic Computing Engine (originally Turing’s design) so had plenty of computer experience. Kitz not only was concerned with the fundamental mechanics of the arithmetic calculation, but he also needed to design the keyboard and the method of display (as prior to all-electronic calculators the displays were mechanical). As Kitz points out in an interview, “our greatest difficulty” was keeping the price down; they were aiming for the £350 to £400 range rather than the usual £50,000 for a computer.
Sumlock introduced their Mark 7 and Mark 8 fully electronic desktop calculators at the Hamburg Business Equipment Fair in 1961, and started selling in 1962, beating everyone else to market. (Sharp, for instance, had Atsushi Asada lead an R&D group in 1960 towards that goal, but they weren’t able to announce the fruit of their labors — the Compet CS-10A — until 1964.)
The follow-up Mark 9 from 1964. Notice how it still follows the form of the original Comptometer, which was itself based around the mechanics of the original Pascal device. Via the Centre for Computing History.
By 1970 (now owned by a new company called Lamson, with Kitz still in charge of calculators) they were at the peak of the UK market.
The company claims to have just under 50 percent of the U.K. market, a market that is expanding. Sales are mainly in the U.K. but outlets do exist overseas through distributors.
A March 1970 market report states they “doubled” their unit sales even with “pressure from competition supported by the full weight of the Japanese electronics industry”. However, Sumlock’s mainstay was the business industry and started selling calculators of other companies in order to fill niches.
Mostek introduced a “calculator on a chip” in 1971 and companies like Texas Instruments soon after introduced their own. (In the UK, that is — Texas Instruments had the first calculator chip to market worldwide, it was used in Japan.) Sumlock tried to jump into the fray getting a chip from Ferranti (which failed) but they ended up going with Rockwell in 1972. Quoting John Lloyd, Chief Engineer:
In 1972 Rockwell, the American defence company, approached us with an offer to put all our calculator circuitry on to one chip. Previously we had always bought from British suppliers because of the need to keep close technical back-up of these suppliers in a high-tech industry. It was a change of policy which was to prove fatal.
Development was started and the prototype of a pocket calculator was produced, the ANITA 800. I was then chief engineer of Sumlock Anita Electronics and Norman Kitz was technical director of the Bell Punch group. He came into my office looking very shaken and put the prototype pocket calculator on my desk and asked what I thought of its sales potential. I said that I thought that with good production engineering we could get the cost down to about £25 and sell a million on the home market and the sky’s the limit for export. ‘Yes I agree with that John’ he said, ‘I have just shown it to our M.D. and he can’t see a market for it’.
The prototype was fully engineered and could have been in production in weeks, but it lay in a drawer of Kitz’s desk for months.
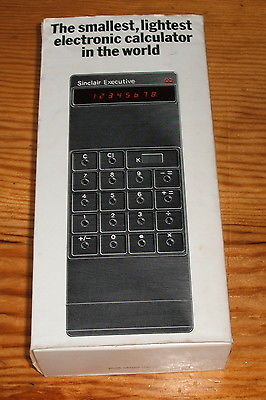
Then Clive Sinclair brought out his pocket calculator. The sales director rushed into Kitz’s office in a panic asking what could we do about it. Kitz opened his drawer and said ‘We can do this’.
Sinclair had beaten the company to market with their Sinclair Executive; as Lloyd claims, “our engineering vision was not matched by our management’s vision”. According to a report from The Times, in 1972 Sumlock went from £1.1m profit to £290,000 loss. Rockwell ended up buying Sumlock in 1973 (separating it from Bell Punch, who was still producing ticket devices, tax counters, and cash collectors); both Kitz and Lloyd stayed with the Bell Punch. Prices of calculators started to plummet as there was a race to the bottom; by 1976 Texas Instruments was able to sell a scientific calculator, the TI-30, for a mere £14.95.
Sumlock still had plenty of expertise and could have diversified into other office machine areas (like word processors) but not long after the sale, Rockwell got a NASA contract for the Space Shuttle and started to lose interest in their foreign investments. Everyone in the main company was “made redundant” by July of 1976 and the various branches worked out splitting off into their own franchises.
Branches tended to land on computer sales; the 1980 Commodore PET price list includes Sumlock Bondain (London), Sumlock Tabdown (Bristol) and Sumlock Electronic Services (Manchester). Even when selling calculators they diverged to other brands. Sumlock-Bondain, as reported by Practical Computing, originally kept selling Sumlock calculators but eventually went to Texas Instruments and Hewlett-Packard.
All this finally leads to the Manchester branch, run by Mike Pomfret. Rather than just being reduced from a mighty engineering company to a sales company, they decided to produce their own software line under the name Sumlock Microware. Mike’s son, Tony Pomfret, was working at the store when he got recruited by Ocean (located “just down the road” from Sumlock) and Tony even makes an appearance in the infamous Commercial Breaks documentary featuring Ocean succeeding and Imagine failing utterly, the latter frittering away money on a game called Bandersnatch.
Retro Gamer: In the programme, you are shown working on Hunchback II, and in one scene, the whole team is sitting around a table, discussing the game’s design. Is that actually how it worked?
Tony Pomfret: That was utter bollocks. It was all staged. I did that game on my own.
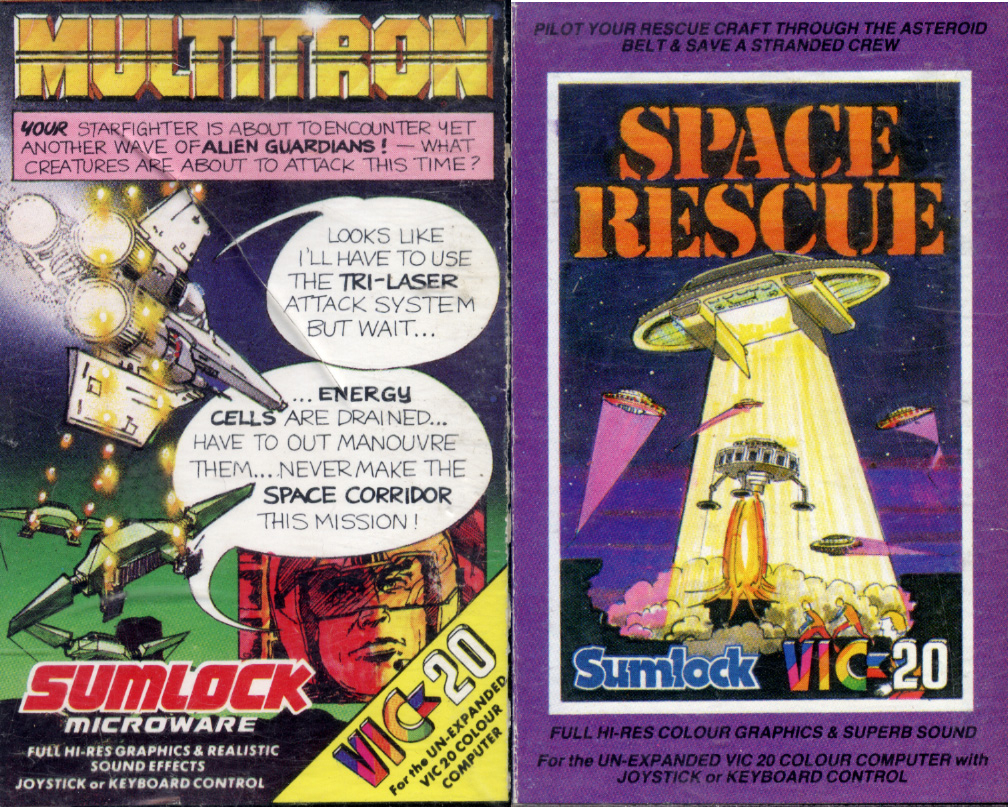
Imagine also crosses paths with Sumlock in 1983, as Sumlock’s products included a clone of Frogger called Jumpin’ Jack for VIC-20 (every British company had a Frogger clone, it seems) and a year later Imagine also accidentally hit a nameclash by calling their C64 version of the game Jumpin’ Jack. The two companies managed to work on a plan where neither name would be changed but when Sumlock released their C64 version of Frogger, they called it Leggit.
For today we’re concerned not about C64 games, but VIC-20 games.
Sumlock released a set of games they called a Puzzle Pack written by Kew Enterprises, like Rainbows (“complete the series by typing in the next three letters”), Knight’s Move (“fill all squares of the chess board starting at the marked corner using the knights’ move”), and Graphic Twister (“rearrange each bottom square to look like the top display”). Their ad copy gives a little clue who the proprietor of Kew Enterprises is.
A compendium of six intriguing puzzles, games and IQ tests for the unexpanded VIC20. Specially written by an expert in puzzles to be both entertaining and educational for all ages and abilities. Programs include: ORBITS, KNIGHTS MOVE, GRAPHIC TWISTER, RAINBOWS, SLIDE PUZZLES, DIGITS.
The “expert in puzzles” plus educational aspect make me think we’re dealing with yet another math schoolteacher turning to games, but that’s just a guess (the address of the company is residential).
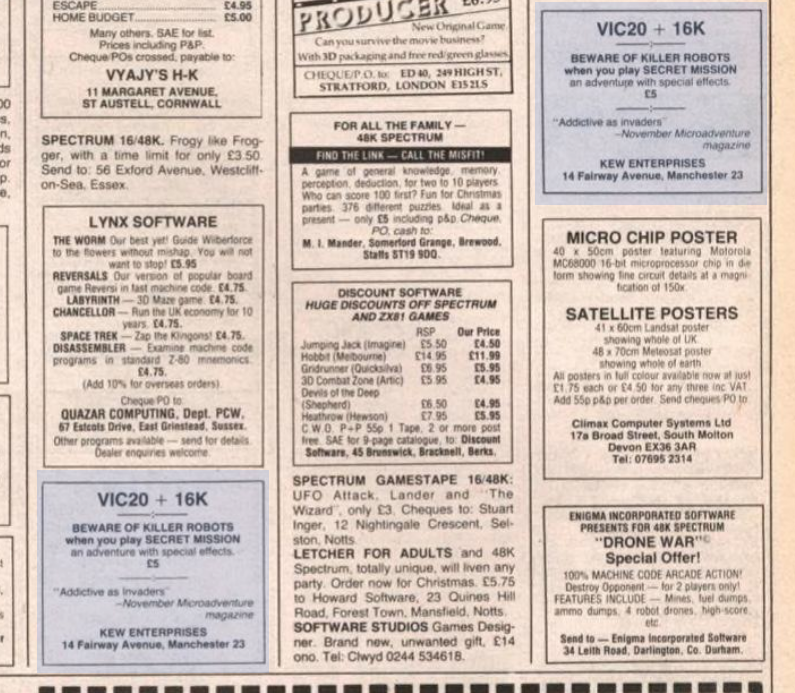
The Puzzle Pack games were eventually republished for MSX and Plus/4 under the name Can of Worms, with a few modifications, and Kew Enterprises still mentioned on the game’s screens. What’s puzzling is after this game was picked up Kew Enterprises started advertising their game Secret Mission on their own, using magazine classified ads.
I don’t think there was some kind of animosity, especially given the continuing use of the other product. It might simply be a matter of platform; Secret Mission was a VIC-20 game (for systems with a 16K expansion) and Sumlock started to focus on C64 games from this point, adopting the label LiveWire (but still “published by Sumlock”; they’re the same company).
From Everygamegoing.
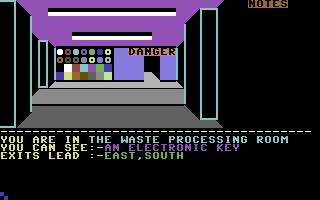
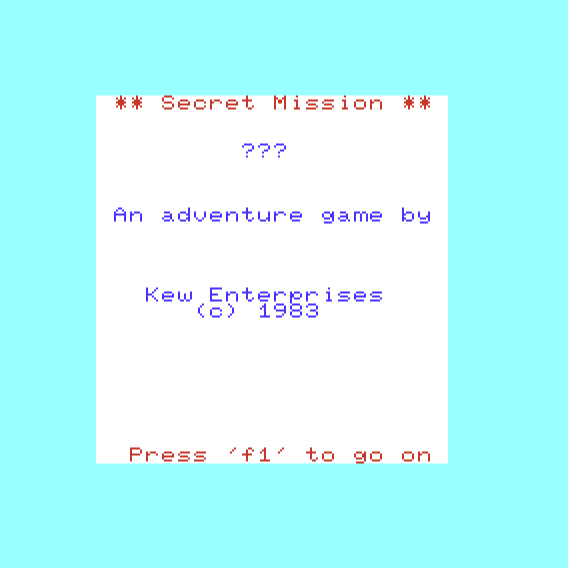
Our job is to infiltrate a building and disable a rogue computer.
This is animated.
You need to LOOK in every room in order to see items. Furthermore, for many rooms the game starts by prompting if you want to use a computer terminal while there; the terminal indicates which floor the player is on.
Sometimes the terminal produces an visual giving the side effect of the player being “hypnotically distressed”.
While I’ve finished the game, it is far more complicated than you’d expect from a VIC-20 game, so I’m saving the rest for a part 2 where I’ll do my playthrough. The game includes one of the most outrageous puzzles I’ve run across in an adventure game and it is overall convoluted enough (and obscure enough) it is possible the number of people in the past who finished are in the single digits.


