This case has more twists than a Martini drinkers’ convention. You’re Al Club, private eye, and you’ve got to grab a beautiful heiress from the gang that snatched her.
Hayden Publishing company was founded in the early 1950s (trademark registered 1954) as a technical publisher, generally associated with electronics and mathematics, although they branched into other subjects including language arts.
From The Mathematics Teacher, March 1965.
They were well positioned to enter computers as well, starting in the 60s. As far as games goes they re-published what is arguably the first “commercial” CRPG in the second edition of William Engel’s book Stimulating Simulations, which includes the CRPG Devil’s Dungeon. (The 1977 self-published 1st edition does not include it but a self-published 1978 booklet does, which was folded into Hayden’s first version in 1979.) They also published non-books around this time like Sargon II and Sargon III, two of the most important early chess programs. Relevant for our purposes today, in late 1982 they published two Apple II text adventures by Daniel Kitchen, Crystal Caves and Crime Stopper, the latter also giving story credit to Barry Marx.
Crystal Caves was written first (people of this era tended to copy the fantasy of Adventure before branching out), but they don’t form a series, I’m not being that picky about chronology as long as I’m playing within a year, and I’m still needing a break from Adventure Quest, so: hard-boiled crime it is.
Dan Kitchen, a New Jersey native, got his game-design start in handheld toys, making Bank Shot and Wildfire for Parker in 1979. He obtained an Apple II that year:
I was a big fan of Microsoft Adventure and all of Scott Adams’ games … I fell in love with text adventures instantly and knew I wanted to make my own.
With his brother Garry Kitchen he co-founded Imaginative Systems Software and got a contract with Hayden (also in New Jersey) for six games.
The idea for Crime Stopper came from one of my brother’s friends, Barry Marx, a writer and a brilliant chap. He suggested he write the story and I would make it interactive using my Crystal Caverns engine. And he’s responsible for the Sam Spade pun.
You start in your stereotypical office, with a telegram urgently summoning you:
Unfortunately, I haven’t gotten to the actual crime-solving part of the game. If you climb to the roof of the building your office is in you cand find a “hanky”…
…and if you go out into the street you can find an ice cream shop and a diner.
However, to get to the building mentioned in the telegram (2nd and 50th) we need to ride the subway, but the subway requires cash, and our protagonist has no cash.
I’ve very thoroughly examined every object described in every room, I’m still stuck with just the HANKY and the TELEGRAM. I tried GIVE HANKY in the ice cream parlor (…maybe they’d give me something I could get money out of?…) but the game responded I didn’t have any money, suggesting it thought I was trying to buy ice cream instead. To be fair trading a hanky for ice cream isn’t logical but when I’m stumped already I’m willing to try anything.
There’s hints out there — Crime Stopper is even a featured game in the Kim Schuette book I’ve re-visited in this blog many times — but I’d very much like to avoid spoiling the very first puzzle in the game, as that makes me much less likely to hold out for anything later which might involve solving an actual mystery.
The first programming contest was held at Texas A&M back in 1970 on a large mainframe using punchcards. Teams competed to finish problem tasks within a set time.
This eventually transformed into the The Association for Computing Machinery’s Scholastic Programming Contest, and even later the International Collegiate Programming Contest. Back before the contest was international, in 1988, there was a set of 8 problems that teams has 6 hours to complete, using Apple Macintosh computers. The contest had recently switched from allowing both Pascal and FORTRAN to just only having programs given in Pascal (this made it easier to give problems, as they were designed previously so that neither language would have an advantage). The winning team — for the second time, and they only started competing in 1986 — was Caltech.
We spent the remaining time fooling around, programming the computer to play musical scales.
Ron Goodman later went on to work for Creative Labs (most famously known for the Sound Blaster). In 1998, while working on some new mixer software as well as the Nomad (a predecessor to the iPod) he started to get major arm and wrist pain. He was diagnosed with De Quervain’s disease and tried to use a pre-existing software to help:
Eventually, intense pain prevented me from clicking the mouse. I found a free utility that would click for me, and I asked the author to make a few tweaks to make it more usable. He was “busy” and politely suggested I do it. Slowly, I did! My dev environment required that I come up with a name – I chose RSIGuard with far too little consideration. I thought I’d finish the program in a couple of months, never imagining I was starting a 20+year project.
Ron made a small webpage and received an order for “50 licenses” from Hewlett-Packard. He decided this was the time to leave Creative and start his own business; Mr. Goodman still works as the product manager for RSIGuard today.
You’ll notice all this, including the contest, is long after the year for today’s game (1982). Goodman was another one of the teen programming prodigies we’ve seen and was quite involved with computers all the way through the 80s; for example, in 1983 he wrote a technical article for Dr. Dobbs about the shift and rotation commands on the Z80 processor.
Goodman was 15 or 16 at the time he sent Building of Death for publication in the TRS-80 tapemag CLOAD.
CLOAD, October 1982. Technically speaking this is the month a disk started being available, so it was also a diskmag.
The copy provided by the CLOAD editor just states that
Just in time to miss Halloween – Building of Death. This is an adventure game with many ways to die.
and it isn’t more complicated than that: we’re in a building, we need to get out. The novel bit is that the Building of Death is a department store.
Now, just being written by a teenager doesn’t mean a game is bad; Frankenstein Adventure, published in CLOAD exactly a year before this game, is a good case in point — it genuinely is one of the best from 1981.
I regret to inform you, alas, that this game does not accomplish the same feat. It is quite dodgy.
Just to illustrate with one screen:
Yes, immediately after using the word PLAY to play a portable game from the toy department, we are informed trying that the game doesn’t understand the word PLAY. The cassette incidentally is “A cassette labeled ‘Adventure hints'” and if you go back to the TRS-80 at the start you can LOAD it or CLOAD it (I had to look this up) but this gets a checksum message I never was able to get by.
It doesn’t really matter though; I checked the source code and if you manage to get in farther the computer explodes and you die.
Just to give a general sense of geography, let me first give a zoom-out of the entire map…
…and a zoom-in on the starting area, which is the only part that feels like a normal department store.
Some observations:
1. The large grid makes me wonder if the author was riffing off of Conquest of Memory Alpha, like Danny Browne did. The layout and parsing in the actual source code are different enough that I don’t think so, but the author may still have played it, as there’s a similar notion of a “central area” that the player breaks into.
2. Rooms are incidentally specified by X and Y coordinate; here’s a line from the source code, where (7,0) is at a vending machine:
260 IFC$=”INS”ORC$=”PUT”IFB$”QUA”THENC$=”DRO”:GOTO230:ELSEIFX7ORY0THENPRINT”Where ???”:GOTO120:ELSEI(0)=512:PRINT”The machine rumbles for a second then stops.”:VM=1:GOTO120
3. The vending machine lets you use a quarter that starts in your player’s inventory to get food and some garlic. The food must be eaten to avoid starving (yawn) and the garlic fends off a vampire that randomly enters the store later and starts hunting you. Somehow you are supposed to WEAR the garlic, garlic breath like Adventure Quest doesn’t work:
A vampire attacks
But your garlic warded her off
4. Most of the inventory is stuffed in the upper right corner, where you get some no-slip boots, a flat handball, some dill pickles, some meat, and the aforementioned food and garlic. Only the meat, food, and garlic are useful. Throughout the map you can also find a chalkboard, a torn leash, a bottle of vitamins, and a comb; again, none are useful. Most of this map is a red herring.
5. The red-marked rooms all have lions which kill you. None are worth visiting, and one even specifies the lion has a key, but that’s just another red herring.
Most of the experience of the game — due to the giant grid — is walking through large, empty halls. Again, it invokes the Memory Alpha experience, and can also be compared a little to a CRPG like Wizardry.
Again useless. Leading up to here are simply “dimly lit hallways” and rooms with strong stenches.
Barring randomly being killed by lions (and also one bit where there’s a spider on a key, again a red herring, just don’t get the key) the central part is where the action really begins.
Starts from the lower right.
First, a dog you need to give meat to.
Then, a door you need to KNOCK to get by. (The portable game from earlier gave a hint about this.)
Then there’s some grease you need to JUMP over. There’s an explicit hint elsewhere about acting like a kangaroo, but I still wasted a fair amount of time trying to wear the no-slip boots which have no purpose at all (“I don’t think you want to put it on”).
Proceeding further I get exceedingly stuck on a door.
Here’s the relevant bit of code:
315 IFC$=”OPE”ANDB$=”DOO”THENIFX0ORY0THENPRINT”Oh! You are upsetting!!!”
The command OPEN DOOR only works at the “front door” to the building, in the far left corner at (0,0). Otherwise it gives the weird response shown. You can still open the door, but you need to TURN DOOR (??) or TURN KNOB.
Then you can straightforwardly find the front door key, although don’t leave just yet! There’s also a room with a “rusty pin” where if you take it summons an elevator and you are asked if you want to go in. Say Y and an animation starts.
On the top you can find a bulletproof vest.
Leaving teleports you out close to the exit, and with both front door key and bulletproof vest in hand you can leave safely.
The first part of this gets animated with a “screen shake” effect but I’m going to be polite and leave it off.
So yes, dodgy. At least memorable and slightly unique-feeling, with the vast majority of the content as a red herring; I did kind of like the fake keys as it wasn’t too hard to catch on to the fact they were unnecessary.
This game is otherwise noteworthy insofar as a tape (now diskmag) was willing to publish it as late as 1982; they clearly were still scrounging for material.
13000 I(1)=512:PRINT”You lost your sunglasses. It is much too bright to see. Your
eyes are burning up. You are blind.
Do you wish to continue this adventure as a blind person (Y/N)”
In some of the later printings of Level 9 games they included this paper you could send by physical mail for a clue. From the Museum for Computer Adventure Games.
I was very much on track to win already; the problem with this sort of game is you never quite know if you’re inches away or miles. All that is really needed to finish from where I ended is
1.) getting all four stones plus the talisman together at the end, which is more trouble than it sounds like
2.) also bringing the “onion” that’s really garlic (except I found out after the fact I didn’t need to tote it around at all)
You get “locked in” at the last part with all four inventory slots spoken for, so it turns out you don’t need to laboriously bring over the silver ball, the stick that makes fruit, etc.
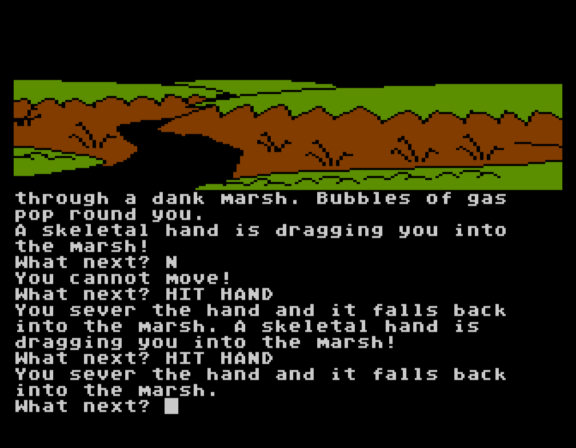
I left off on a marsh where I found a Mist-Stone and teleported to escape (you find boots later which let you just trudge back through quicksand, but I only found them after I already had the stone liberated). The whole marsh area is tricky insofar as hands keep trying to grab you, and you need to HIT them with your sword to shake them loose. The sword occupies one of the four crucial inventory slots.
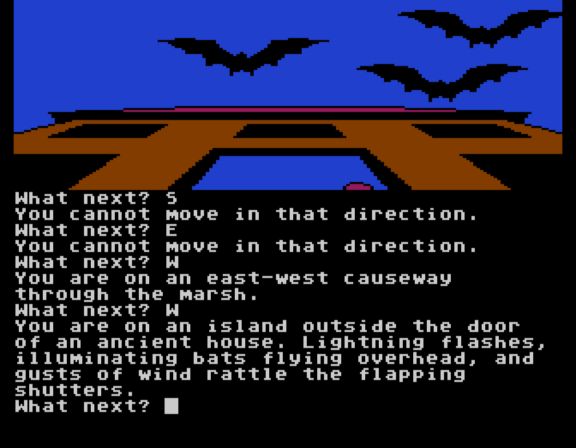
For a while, I was toting the sword and the insulated cloak and the magic lamp and making runs back and forth to tote items forward using my one available inventory slot (it turns out there was a faster way, but just like with the boots and the Mist-Stone I only realized this after the fact). Still, in a text game it doesn’t take that long to shove things forward, and eventually, I had the Stones plus the talisman. I also brought the “onion” (garlic) along because I had found this building on a side path in the marsh:
Gee, I wonder what’s inside?
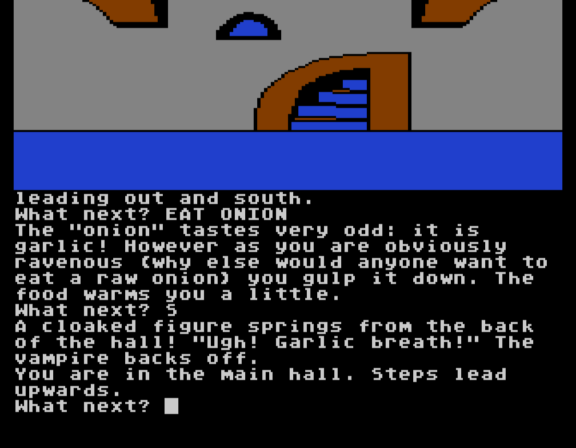
I first thought I needed to cut the garlic or throw it, but you’re actually supposed to eat it, attaining permanent garlic breath. I could have done this at the very start of the game, even.
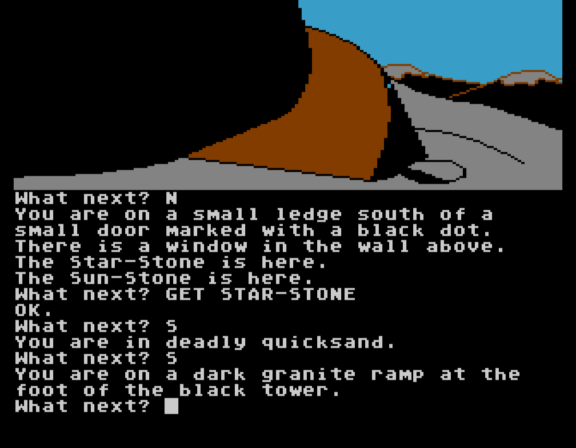
At the top of the building are some boots (the ones that protect from quicksand) and a window. The window is one-way but you can pitch all five items (Stones + talisman) before going through. Then it’s just a short walk through more quicksand (hope you kept the boots) and the Black Tower.
In the room back at the lake that sucks down items, they go to the quicksand room. I found this out after doing most of my work toting things through the biomes of the game, though.
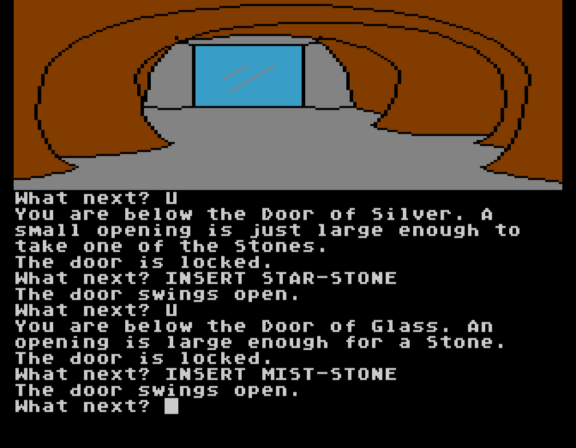
What follows is simply a series of doors of different colors, and you insert each of the stones. This is a satisfying sequence despite — really, because of — the simplicity of it. The work is already done, you’re just proving it.
At the gold door and above you are locked in one-way, which is why — as I mentioned before — you are stuck with all four of your inventory slots full: three Stones, plus the Talisman. This was honestly helpful because it meant I could stop tracking all those previous items in the game thinking they’d may yet be useful. (Maybe the picnic table from the very start is useful in the final battle, who knows!)
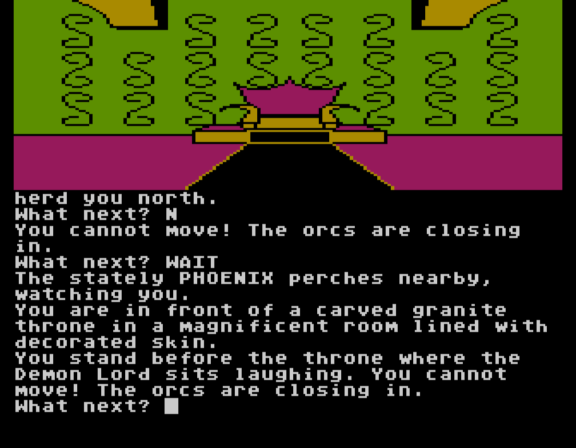
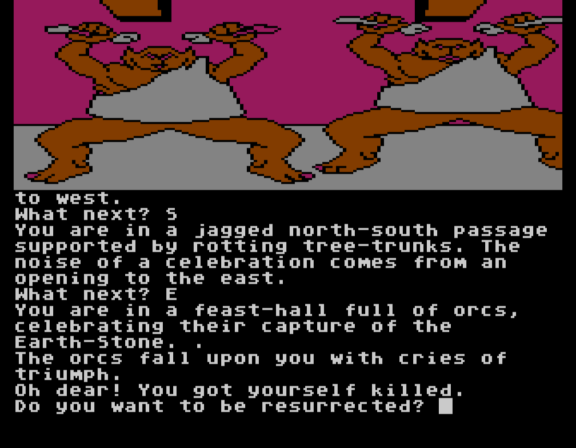
Once on top you get a forced sequence where you are surrounded by orcs and pushed to the face-off with AGALIAREPT. Given there’s only one inventory item left it isn’t hard to figure out what to do.
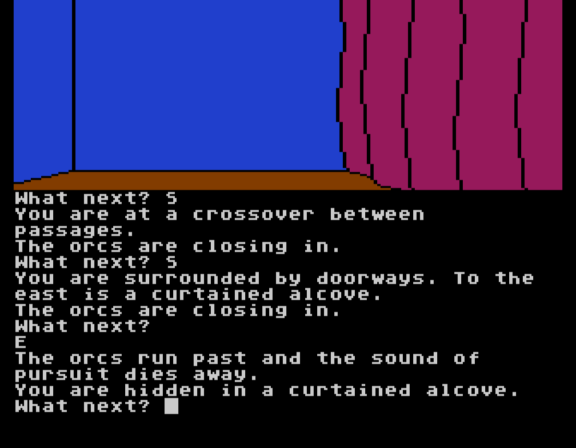
You give the demon chase; the orcs chase you. This is a very short section where there are tunnels with dead ends but you just need to find the right room to hide in.
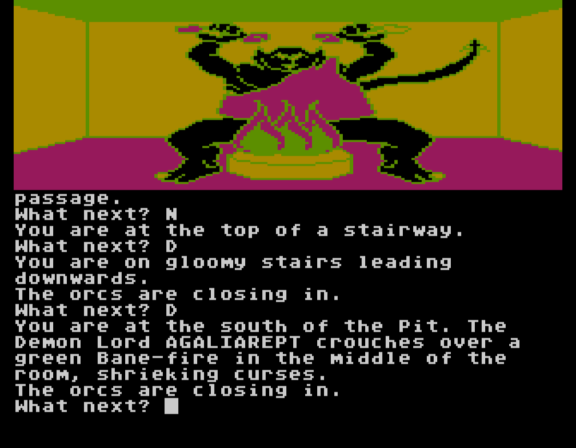
Having juked the orcs, you can go down a previously blocked passage to find the central lair of the demon.
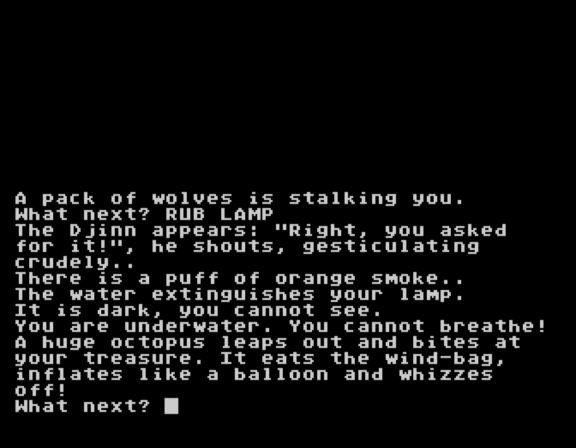
The Phoenix has been following us around (as visible if you just stop and WAIT or LOOK) and now is its time to shine, as was told in the prophecy:
No idea what’s up with the point system, I don’t care much but I am not surprised there’s a wide possible range. The structure of this game led to more alternate solves but in an unusual way. That is, there are some puzzles you can simply ignore.
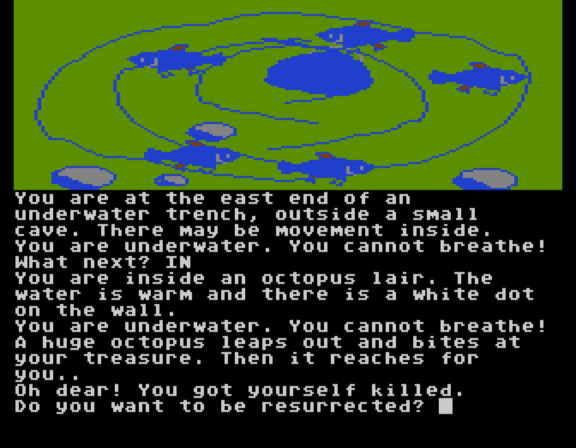
Remember the octopus I killed with an air-filled bag? You don’t need to fight it at all. It lurks at the white dot in the lake, and there’s a black dot right at the final quicksand that goes there, but there’s no need to use it. You can either a.) properly anticipate which items should be tossed through the window to the final area so you don’t have to go back or b.) use the magic lamp to teleport instead. Shockingly, giving how much magic lamp use I had in the game, I went with a.
The moor where you get cold? The insulated cloak works (I was keeping it because I was using the fire-stair at the volcano) but you technically can walk all the way from your teleport landing point to safety without it. Or you can use the brazier (the one that was “glowing like a commercial”) by dropping it so it provides warmth. Or you can eat a fruit (according to Ilmari Jauhiainen, I never even discovered that). And if you’re out of fruit, you can drop the stick which provides more fruit, and finally I understand why the item exists.
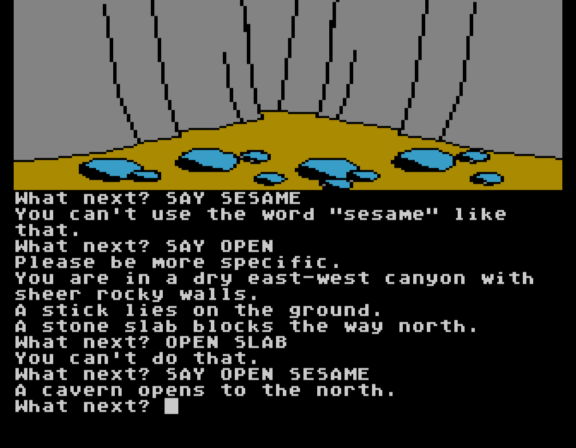
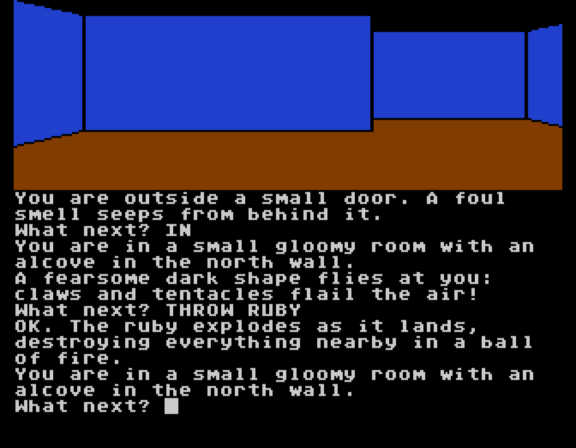
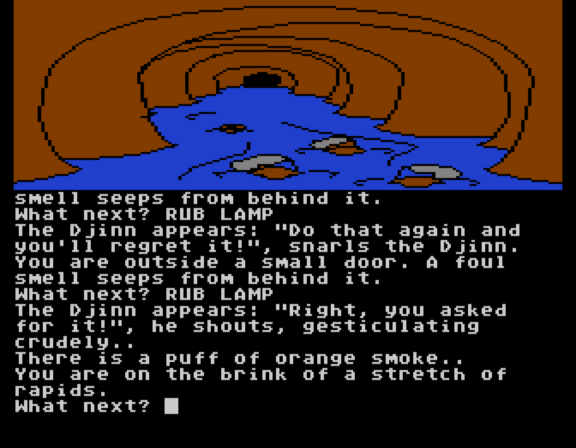
Again, I want to emphasize: the unusual aspect here isn’t alternate solutions so much as the ability to ignore the existence of a puzzle. I had no idea removing the djinn from the oasis was meant to be a puzzle until later. The fact you could run by the tentacles really suggests that the authors purposefully engineered a way to ignore the whole sequence in getting the ruby and throwing it. This means someone could blissfully skip the unfair puzzle at the slab (SAY OPEN SESAME) and maybe even think it was scenery and not a puzzle at all! A player could even skip the sphinx, snakes, and priestess; at least it seems clear you’re intended to solve something there. But it’s definitely still possible to at least skip the sphinx and think that maybe teleportation was the intended route!
While I eventually found the lung-fish model, I ended up never strictly needing it; even lighting up the dark portion of the underwater was optional. You might think that there’s no way someone would pass by dark rooms and without realizing there’s a puzzle, but at the very start of the game — in the first building — there’s a dark room that never gets lit up! With teleport luck you could probably bring the jellyfish down into the well but maybe the authors never even bothered to give the room a description and you’d see a glitch.
I will admit I would only recommend Adventure Quest to others under very specialized circumstances. The mazes weren’t bad — except for the very start I wouldn’t say the game had mazes as much as tricky geography to keep track of — but the four-item limit is really obnoxious after a while, and it gave me tension the entire game wondering if I needed to go back yet again to my stash (a convoluted operation) to test another object out for solving a puzzle.
The endgame was satisfying, though. It was in a way very quick and easy, and I think designers are afraid of something like that — making a gameplay denouement when the plot is at its climax — but it works, as the game was all about pre-planning, so the ending is just showing the result of all the player’s planning falling into place.
Trilogies help. Adventure Quest sells as people play Colossal. Middle Earth was a convenient fantasy setting. It was a way of telling people the type of world they were getting.
Level 9 eventually got called the British equivalent of Infocom. I don’t think they are there yet with this game — the parser is still completely basic, the design is still too tedious in parts — but at least I get the fringes of what is meant, as there’s ambition for some fairly complex overlapping systems at a grand scale. So I’m still looking forward to their next game, but I hope you understand when I say there will be a large gap before we get there.
We’ve had a big chunk of both concentrated fantasy and concentrated Britishness, so for our follow-up let’s go in a different direction. Next up I’ve got two games from the United States: a building that wants to kill you, followed by a hard-boiled detective story.
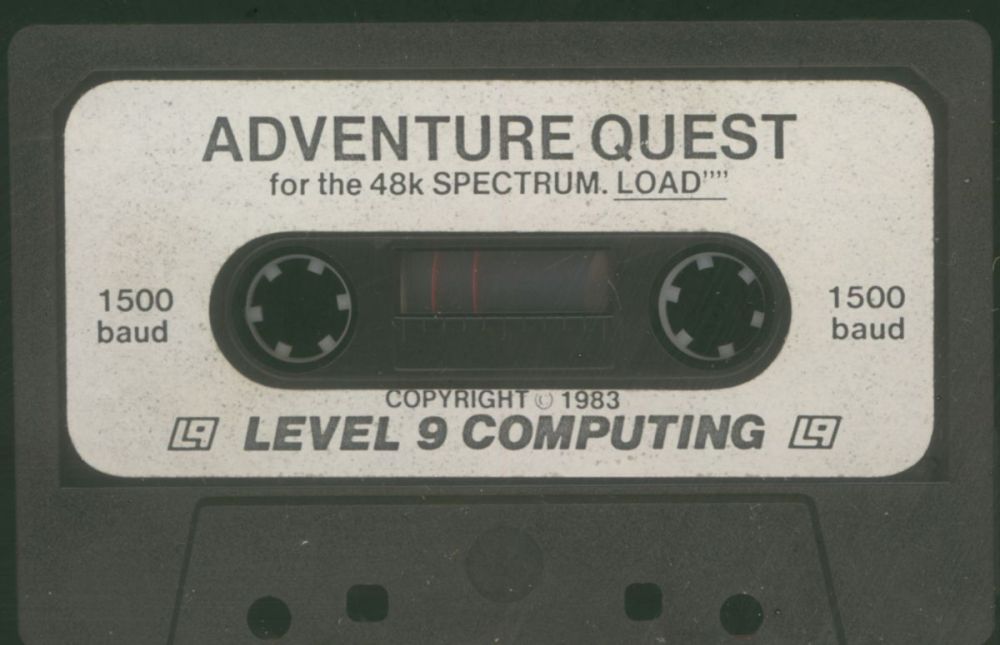
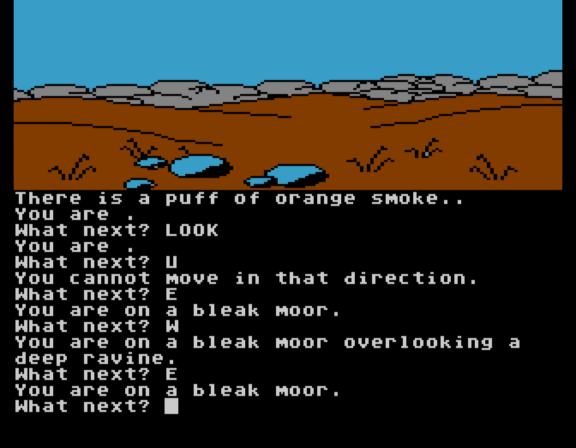
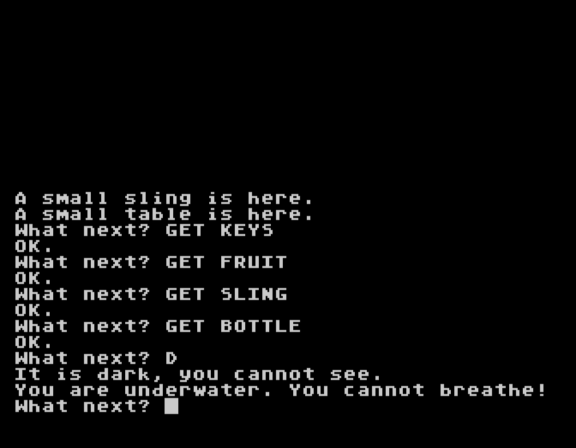
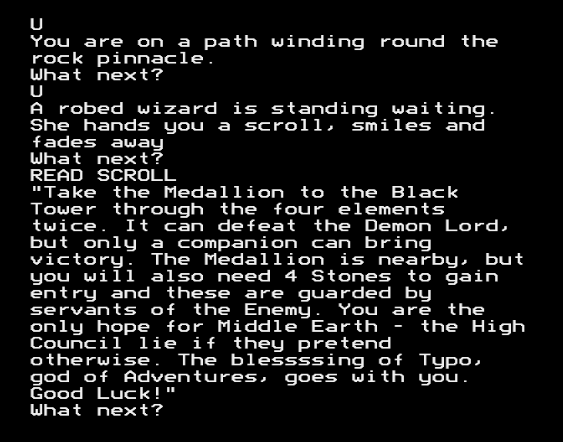
It is a good time once again to peruse the Scroll of Lore Dumping™ that was provided at the start of the game:
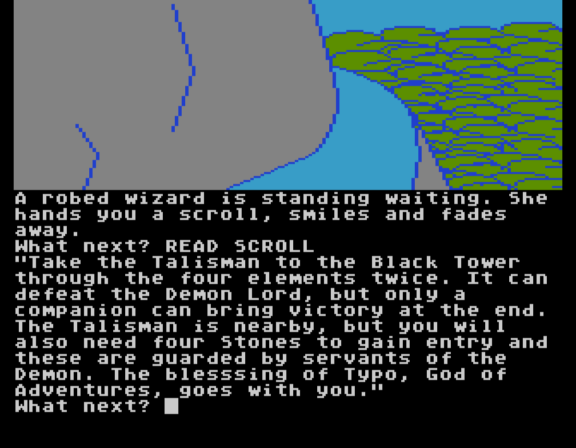
Take the Talisman to the Black Tower through the four elements twice. It can defeat the Demon Lord, but only a companion can bring victory at the end. The Talisman is nearby, but you will also need four Stones to gain entry and these are guarded by servants of the Demon. The blessing of Typo, God of Adventures, goes with you.
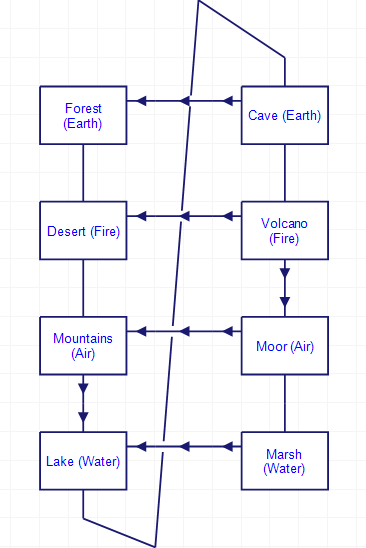
I technically have found all four stones (not all in the same save file, but I just need to go through the process). Even with those I still need to track down the exact location of the black tower. The scroll gives the super-structure of the game as a whole, which is important for wrapping things up. Namely, this is a biome journey that goes: earth – fire – air – water – earth – fire – air – water. Each of the later biomes has a warp back to its previous biome of the same element, in the form of an exit marked with a black dot; the landing point is marked with a white dot. Here’s a meta-map of the situation:
Some biomes let you travel back and forth (for example, you can go from the starting forest to the desert and back again) while some are one-way trips (to get to the mountains to the lake you have to use the rapids). The lamp seems to be oriented to only teleporting to the places on the left (except for the glitched moor trip, but I’ve since been back the normal way).
This is important in that the inventory limit of four is fairly restrictive. At the very least the endgame needs all four Stones plus a talisman, so doing some shuttling back and forth is a necessary part of the game, and in one case (as I’ll show today) you have to be careful with a particular puzzle in order to not shut off a method of passage.
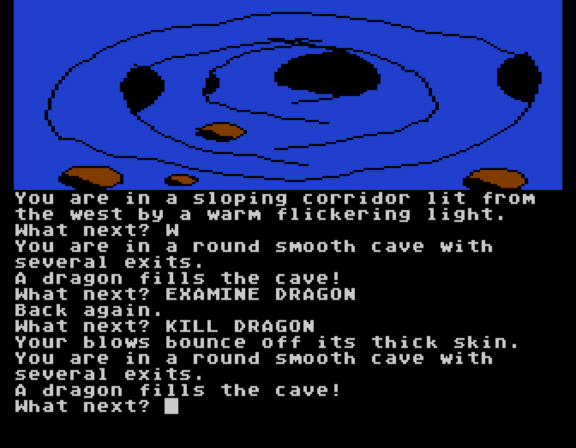
Last time, I had two threads I was stuck on: finding anything else in the bleak moor, and getting by a dragon in the cave. While I used my teleport-glitch game to explore the bleak moor some first, I’m going to trace the path starting from the dragon as it will segue into the moor eventually.
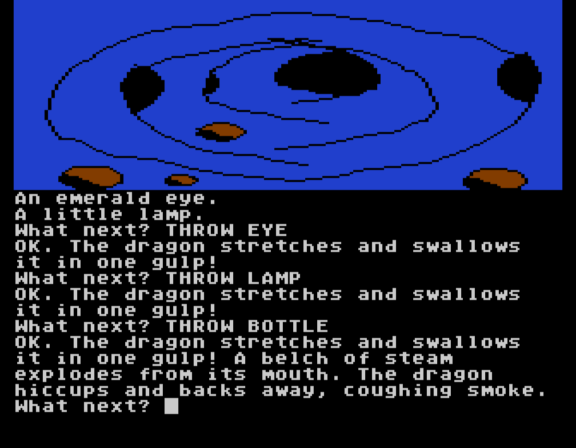
The dragon has the particular attribute of swallowing anything you throw at it, so I decided to do the equivalent of clicking on every item in a point-and-click adventure to see if anything would budge:
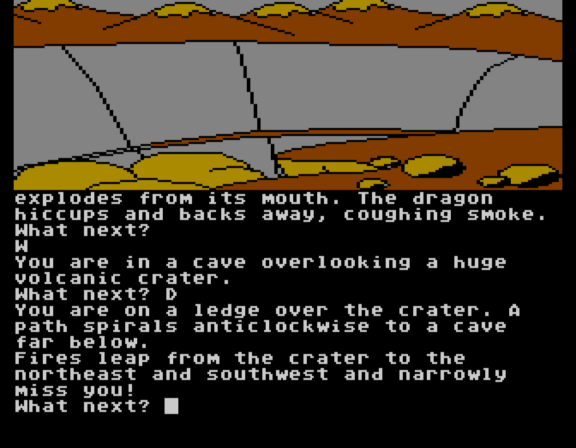
I suppose a bottle’s worth might be upsetting to a dragon if it was insulated really well so it didn’t turn into steam before even entering the gullet, but — well, I’ll accept it under the fantasy physics clause. At least I made it forward, enough to grab an egg from the dragon’s lair to the north, and to be able to enter a volcano crater to the west.
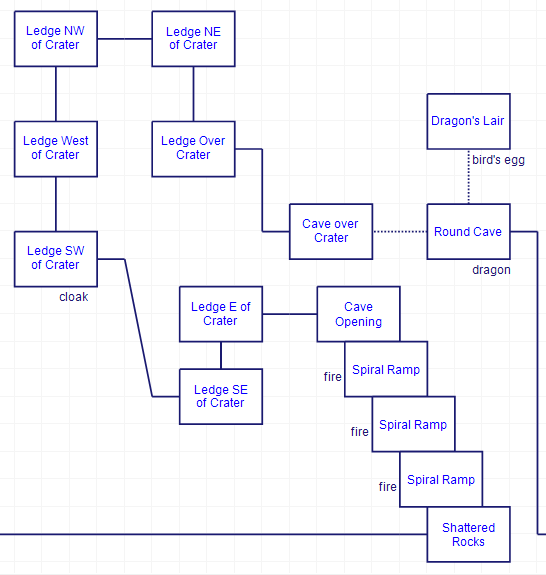
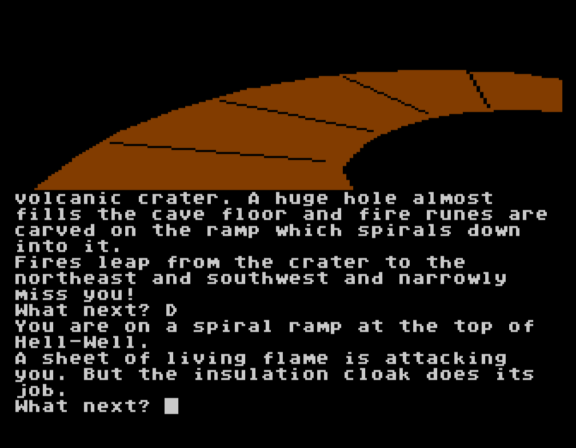
A map, to clarify:
Starting from “Ledge Over Crater”, you need to make your way along the path while fireballs go whizzing by. This is just a simple timing puzzle where you need to wait one turn at each step before going on to the next one. Halfway through the trip you pick up an “insulated cloak”, which is good for the next obstacle, a “sheet of living flame” that harasses you as you go down some stairs.
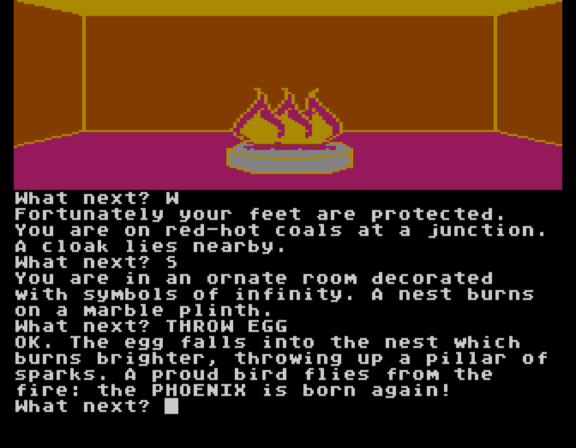
At the very bottom there’s some burning coals where you need to THROW CLOAK in order to cover them and walk across. You can, importantly, TAKE CLOAK after you pass (even though the cloak isn’t
listed as an object in the room!) If you don’t take the cloak again and teleport out (or even just progress to the moor, which is a one way trip), then you are forever unable to get down past the living flame, meaning you’ve quite possibly softlocked your game, so be careful!
Also at the bottom you can find a burning nest, where the egg can be tossed in to summon a phoenix. The phoenix doesn’t follow you, although if visit the top of the crater again the phoenix will make a cameo, so it is clearly active. I suspect it is the “companion” from the scroll who will bring victory at the end.
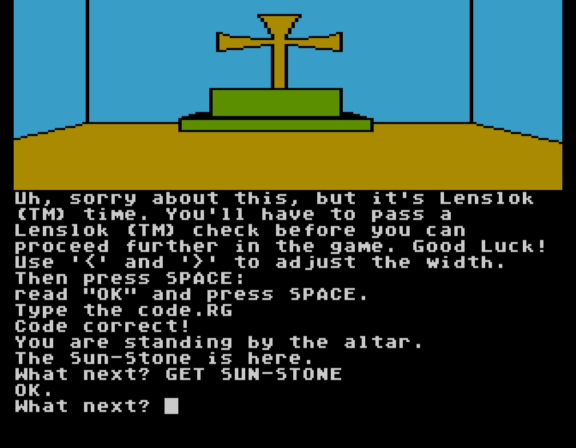
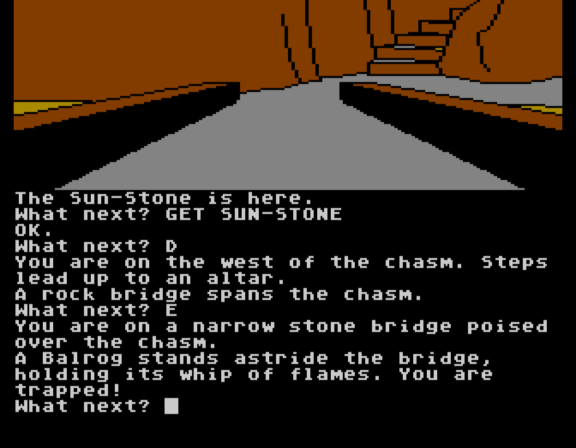
There’s incidentally a black dot door to the north if you feel like warping back. To the west there’s a “rock bridge” which spans a chasm, and on the far end there’s the Sun-Stone.
There’s also copyright protection. I went over details with Colossal Adventure so I won’t repeat them here. This time I managed to get the Lenslok software LensKey to work properly.
When trying to leave with the Sun-Stone, you are confronted with the Balrog.
Oh, you are at the balrog stage! That’s… let’s say… not one of the believable puzzle solutions in the game.
I did manage to solve it without hints, but I also knew enough Tolkien to imagine I was re-enacting the scene from the book. The movie version should give you a hint:
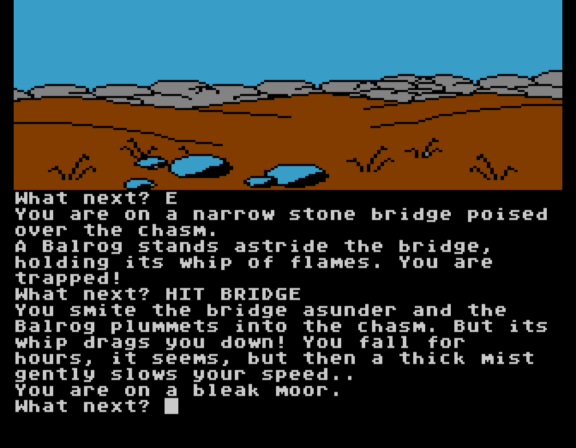
The visual depiction in the game is a bit off. It is meant to be a narrow, crumbly bridge, not a firm, solid one. Plus, we’re supposed to imagine ourselves as Gandalf with magic and so forth, and probably shout YOU SHALL NOT PASS for role-playing purposes which is how I figured this out:
The version I was playing also describes the bridge as unstable if you examine it.
Especially without the EXAMINE description that’s not fair at all. The other wildly unfair puzzle also used external knowledge (OPEN SESAME). I sense a pattern.
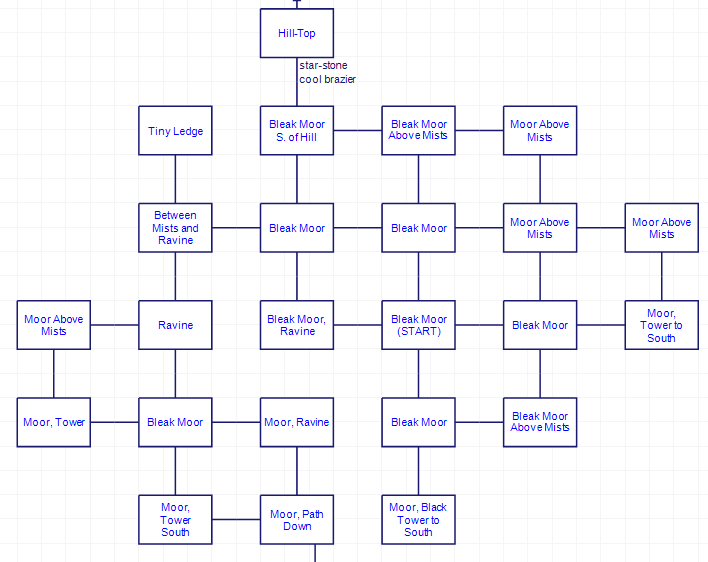
Moving on: this lands you in the same place my glitched teleport did. The insulated cloak (assuming you remember to snag it up) prevents you from freezing as well as heat, so it makes the map much easier to create:
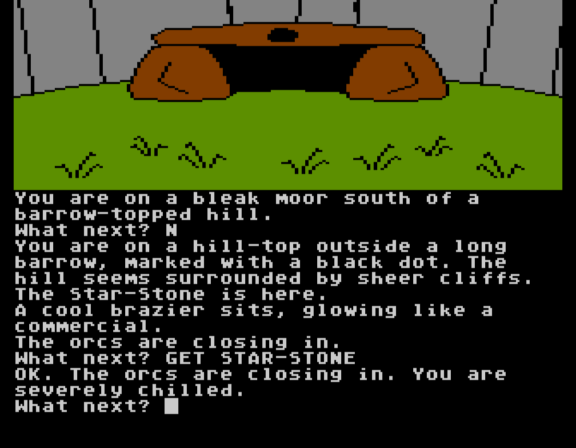
Other than the cold gimmick, and the Star-Stone at the barrow (which I mentioned last time), there’s no other gimmicks. For the Star-Stone you either need to teleport out via lamp or use the black-dot door to wrap; either way you go backwards, meaning if you forgot to grab the cloak, oops!
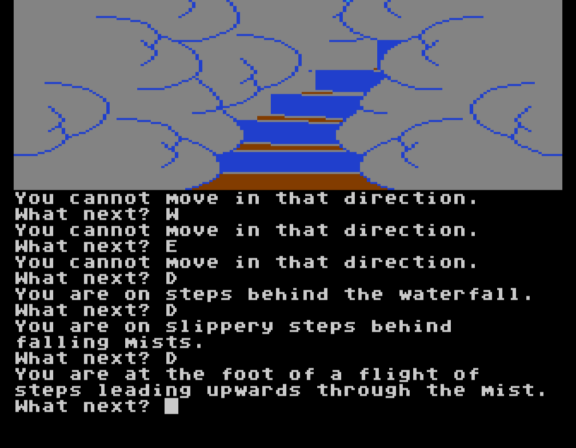
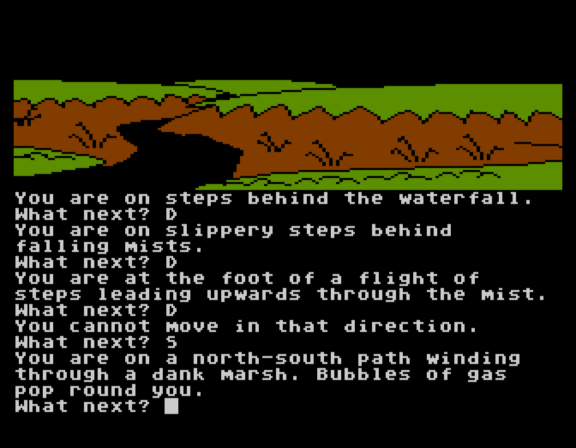
To the south there’s a stairway that leads you out of the cold-zone behind a waterfall…
…and into the eighth biome, a dank marsh.
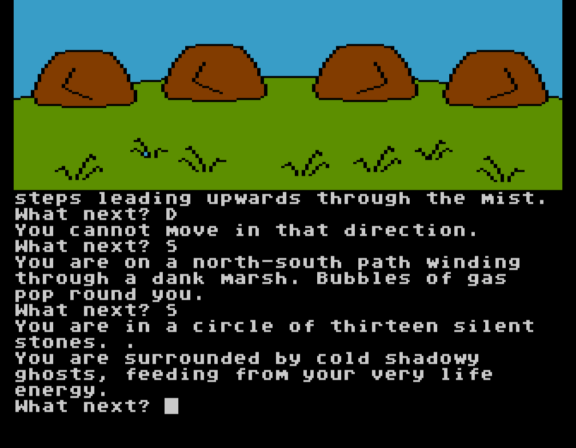
Just a few steps in there’s a circle of silent stones, where you are assaulted by “cold shadow ghosts”.
Fortunately, escape is just a manner of moving backwards two rooms to the waterfall. Going back to the circle, the ghosts are no longer there. (I wasted time at first fussing with the Talisman of Life, but it seems to have nothing to do with the puzzle.)
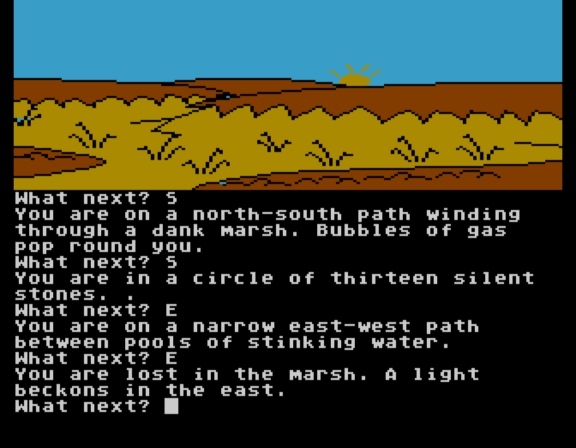
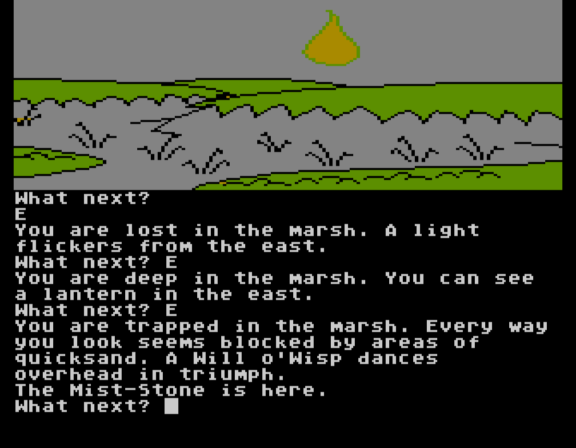
Moving forward, quicksand is many directions, but to the far east you can see light.
Once at the Mist-Stone you can just grab it and teleport out (any other direction leads to quicksand), so unless there’s something else that needs be done with the Will o’Wisp, its triumph is short-lived.
I still have more directions to explore to get out. I haven’t found the black-dot exit nor what I assume is the final biome transition, making it to the black tower. Given I have the four stones and am physically close to the end I think we’ll have a win soon, but I wouldn’t put it past this game to have a very long endgame to reckon with before the final showdown with AGALIAREPT.
(Prior posts here, and definitely necessary for understanding this one.)
Via Mobygames.
So I’ve now rotated my conclusion about the teleportation in this game back to it definitely being random, definitely being chaotic, and (at least in the version I’m playing) definitely designed so you can “short-circuit” a puzzle if you want to.
Everything is normal. T̶̰͚̞͓̞͇̬̍̍̄̓̎ͅh̸̢̧̞̬͙̪͎̺̭͐̾̽̎͜ę̷̣͖̝̥̰̓̐̓̇̽͗̍̌r̴̨̧̮̬̱͙͆̉ẹ̷͔̜̩͍̲̤̳̈́̈́́̉̐̓̐̕ͅ ̸̦̫̯͖͚̣̭̃͋̓͆͒͊̓͛̊ͅị̷̧̫̜͚͇̙̙̉̾͛͋̚͝s̵͔̠̿̀̆̔͛͆̓͆͆͘ ̶̨̨̡̝͚̆̂͠ͅṉ̴͎̳͇͙̬̓̀ỏ̵̭̬̾͊̂̍͑̈̀̇́͜ ̷̢̖͈͖̜͖̹̟͉̈́̒̈́̄͋͌̓̔̚g̸͕̯͍̘͊̓̾͠ļ̷̛̲̯̠̮̼̦̙͑͌̏̔̒̌͊̈́͜ì̷̖̭̟̝̫́͌̇̉̅̄͠t̷̼͉̼͓͚̟͉̪͍̏̅̃̈́̓̏̄ͅc̵̡͖̟͔̘̬̝̮̐̈̍̓ͅḧ̸̝͖̪̄̀͊̊͑̎̇̃̓.̴̜̫̞̮̼͈̹̺͈̤́̐͂
Since last time I popped open the BBC Micro version of the game and tried to go through the same puzzles I had already solved, thinking maybe the text description would be ever-so-slightly different in a way that inspiration would strike.
However, I found that the teleportation steps I found before did not apply at all, and while my first teleport was to inside the oasis in the version I was playing, I could not get inside at all whilst in the BBC Micro version.
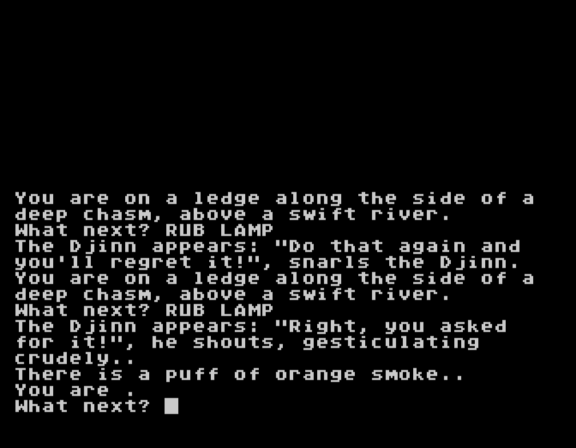
I had also found, via experimentation on the graphical edition, that you could kick the djinn away from blocking the oasis as long as you used the bag…
…the problem is that the bag is behind the tentacled creature, where I needed the magic lamp to escape, and the magic lamp is behind the djinn that is blocking my way in the BBC Micro edition. I clearly had short-circuited the puzzle in my other game.
Using some meta-structural thinking, I decided to go back to working out how to solve the tentacle-puzzle without jumping ahead. I figured even if the puzzle turned out to be technically optional if you toss in the teleports (it is) it would help eliminate some of the clues I’ve been stuck on and narrow things down for solving required puzzles.
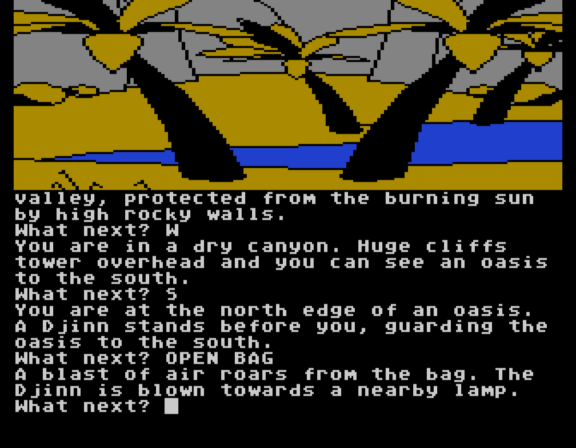
So rewinding all the way back: from the forest I was able to get a bottle, keys, Talisman of Life, silver ball, sling, fruit, an “onion” (really garlic), a stick, and pan pipes. The sling and silver ball I finally got working on the giant, and I swear I had tried this before:
You just have the silver ball in your inventory and it works. I don’t know what my issue was before.
Passing the giant, I could then get the snowman and push the rocks, killing the orcs on the tower. This left the open puzzles as:
– black tentacled thing
– rapids from going down the rope
– a slab near the oasis that did not respond to anything I tried
Going back to the slab, and knowing I was stuck with my item set from before (bottle, keys, Talisman, ball, sling, fruit, garlic, stick, pan pipes) I tried various combinations but nothing seemed even remotely able to knock over a slab of rock. CUT ROCK suggested my blow bounced off, further suggesting if I had a lot of power I could break through, but I otherwise started suspecting there would be no item involved at all.
So if not an item, then what?
errrrrrrrgh no, the phrase doesn’t get mentioned anywhere and yes, I worked this out without checking hints.
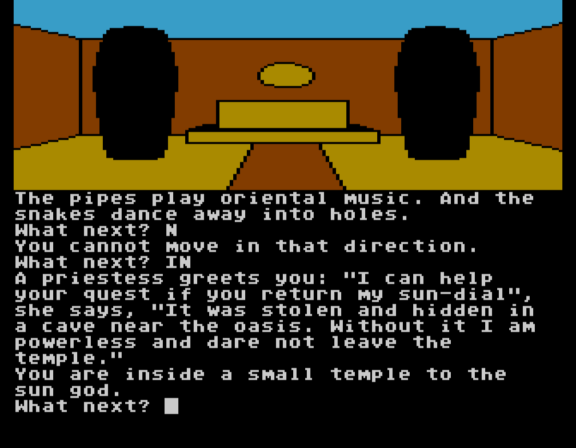
There’s some “Arabian Nights” style theming so I thought I’d try the themed answer out. A very similar puzzle appeared in Time Zone but in that game I came up with the solution right away; I think the presentation (and the penchant Roberta Williams has for random fairy tale references) made it more obvious to try than in that game than this one.
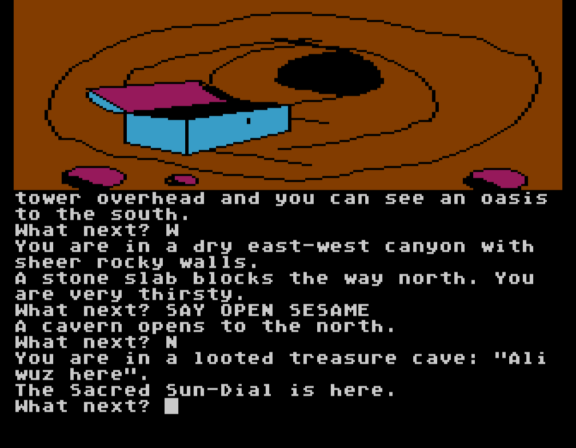
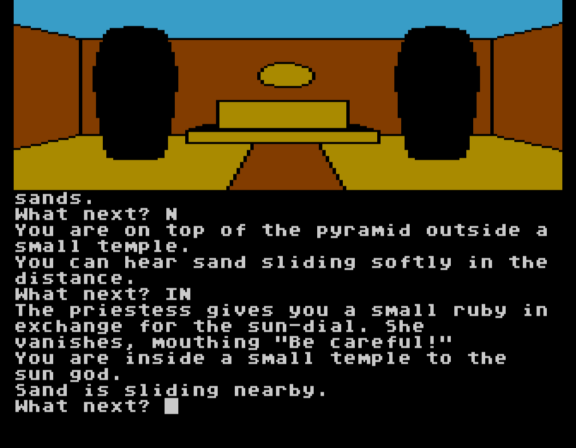
Nevermind. Sun-dial in hand I could return to the temple and deliver it to the priestess.
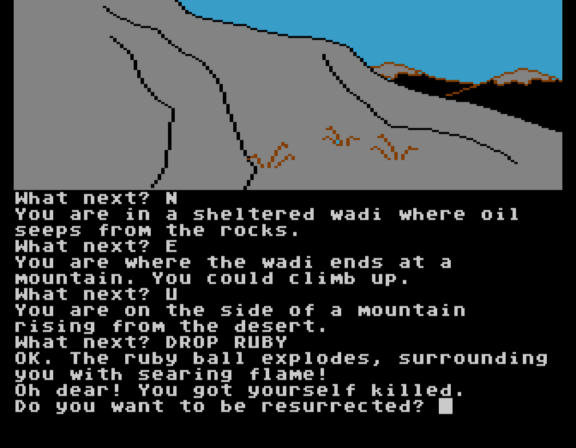
I discovered the ruby dissolved while in water and also kills you if you drop it.
Given blowing things up is not helpful for navigating rapids, I tried the tentacled thing instead:
This opens up the way to the emerald eye and the bag that blasts air. You can then (in the BBC Micro version) blast the djinn into the lamp and go pick it up. Technically speaking you can go on a teleportation spree after that, but teleportation wasn’t helping with the rapids, so I decided to keep going no-teleport and see if I could resolve the issue:
You can teleport to them or teleport away, but end up dying at the end.
Again I quickly decided my item list was of no help, so I contemplated a no-item solution. Swim against the current, maybe?
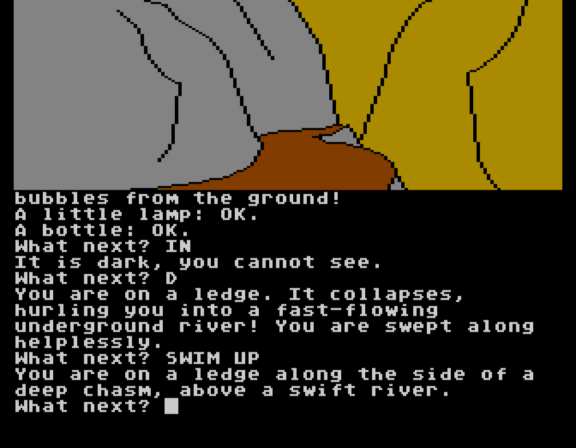
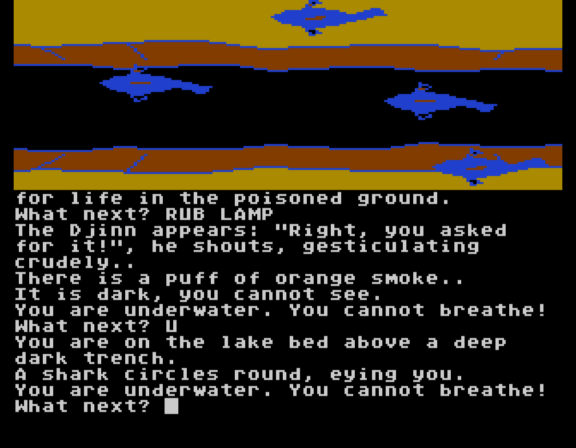
Just typing SWIM oddly enough gets no response at all from the game — it seems like it is broken, but at least it acknowledges the command. This led me to go through trying SWIM N, SWIM S, SWIM E, etc. until I got to SWIM UP.
I found out later CLIMB UP works too, but the ability to somehow grab and stop ourselves on the rapids and climb up is not even close to my visualization of how the rapids operate. I think maybe the text version of the game would’ve been easier here.
Up on the ledge you can find a “model of a lung-fish”, and if you pick up you start being unable to breathe. This is a magic item that was fun to figure out: it inverts your breathing from water to air or vice versa. The inversion happens when you pick the item up, so if you enter water-breathing mode, to switch back to land-breathing you need to do DROP LUNG-FISH followed by GET LUNG-FISH.
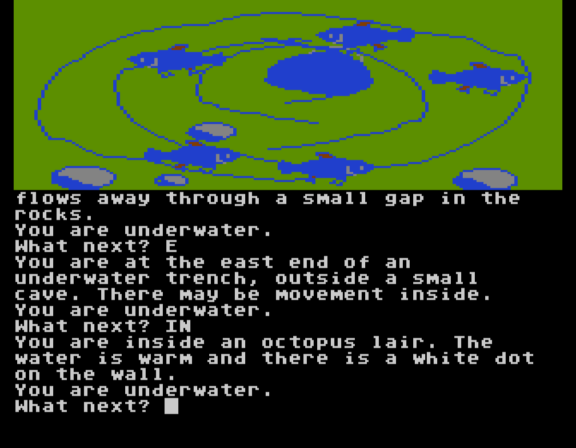
Breathing underwater made it easier to get to the octopus lair. I used the (intended?) lamp teleportation in order to get my items down at the lake, including the bag you need to use to defeat the octopus.
Regarding the white dots: they seem to all simply be teleport destinations. That is, there’s a black dot at the door-that-needed-oil that teleports to the white dot at the building; the white dot in the desert no doubt has a matching black dot somewhere, and they’re all one-way trips. I worked this out because I found another black dot. You see, once the slab was opened up, the destinations of my lamp changed. I was able to land (via teleporting) inside the sun-dial cave, for instance, as well as land on the ledge above the rapids. And from there I went into the glitch-i-verse, as seen on the top of this post. Fortunately I could pick a direction (like east) and end up back in normal-land:
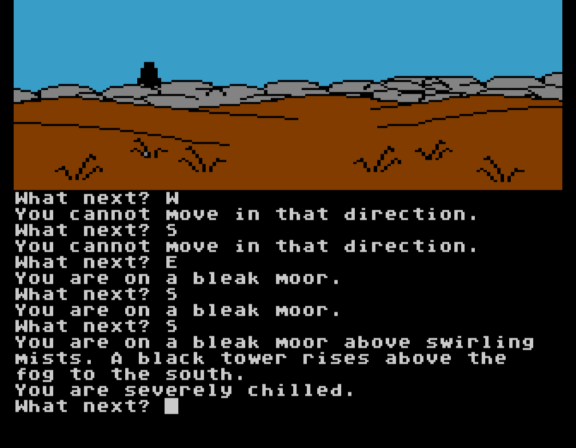
Well, kind of. This is a new area! Wander around too long and you freeze.
Our first sighting of the black tower.
However, just to the north I found another one of the elemental stones: the Star-Stone.
I’m not sure what they were going for with “glowing like a commercial” but it’s evocative nonetheless.
So, two more stones to go? More teleportation brought me back to my regularly scheduled areas, and I’m still stuck on getting by the dragon. The dragon will swallow everything I throw at it so I think I just need to find the right thing (the garlic, if you’re curious, doesn’t work).
I was stalling on writing this post until I also had teleportation figured out, but I’m still at a loss to completely explain it. I’m starting to suspect there’s a completely random aspect but the game is still demanding some parts be done more exactly?
From MSX World.
To continue from last time, I first went back to prod at the various locations of my map to see if I had missed something. Way back where I had received a scroll explaining the quest, I had a “loop” on my map, because I was unable to move any farther up:
What the game had actually done is moved me to a new room but not described the room nor changed the graphical screen. If you LOOK you will find you have, in fact, entered a new room, with an item I previously missed:
The stick, when dropped, grows an endless supply of fruit. I already had fruit from elsewhere and I still don’t know what it is for.
The stick grows incredibly as it hits the ground. Buds form, leaves burst and drink in the light, and the stick is a mass of flowers! Fruit swells and falls onto the ground and the leaves are shed. It is just a stick again.
Another part I prodded at insufficiently was in the tower surrounded by orcs (or at least previously surrounded, if I used a saved game where the snowman had taken care of them). On the top is a tentacle creature which I still have yet to handle.
However, you technically don’t need to handle the creature — maybe — as you can just walk on by. This is different from the sphinx, giant, djinn, and dragon, so I was implicitly assuming the same applied, but no:
This incidentally might still be “wrong” as the creature will now kill you on sight if you enter the room again, so if there’s some item you get via defeating it this will skip by. On the other hand, it seems like the authors had to special-code letting you waltz by, so maybe there is no way to defeat it.
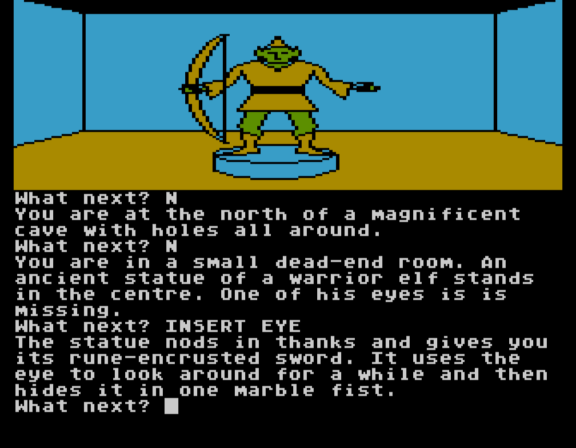
Opening the bag says “A blast of air roars from the bag.” It took me a long time to realize where the bag went but I do have it resolved. (I’ll show you later, feel free to guess! It is one of the obstacles we’ve already seen.)
The emerald eye, on the other hand: I knew exactly where it went, as I had a statue back in the cave with a missing eye.
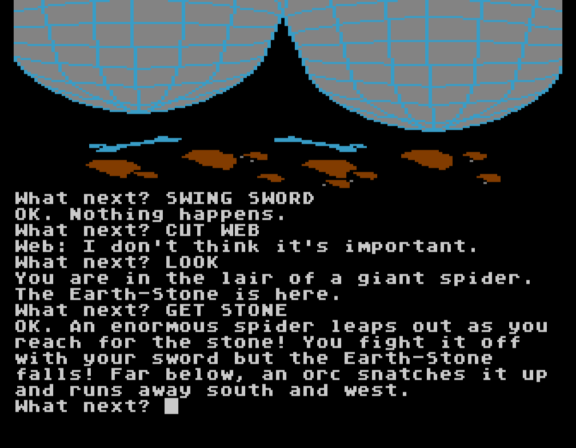
This gave me a weapon past the ARMED INTRUDER door so I immediately tried whacking the various obstacles with it. The dragon? Still no dice. But the spider:
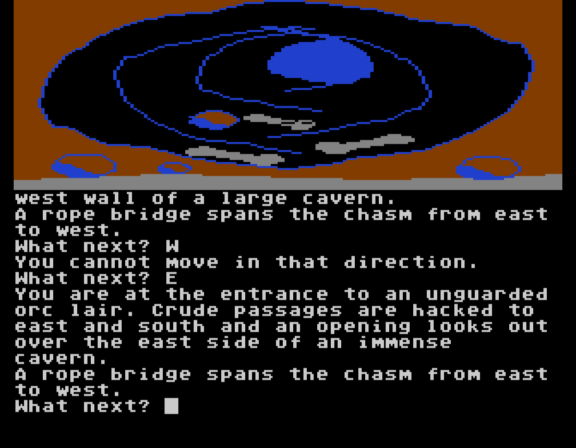
Now you need to give the orc chase. It runs past the “ambush” point, but fortunately the presence of the Earth-Stone apparently now has all the hostile orcs distracted, as it is now an “unguarded” lair.
The earth-stone is stashed in a nearby storage room so you can just grab it, but rather like Adventure 200, the problem is not getting in but getting out.
But given I had just obtained a shiny new sharp implement, and there didn’t seem to be anything else to do in the orc lair, I realized I could Indiana Jones it with CUT BRIDGE:
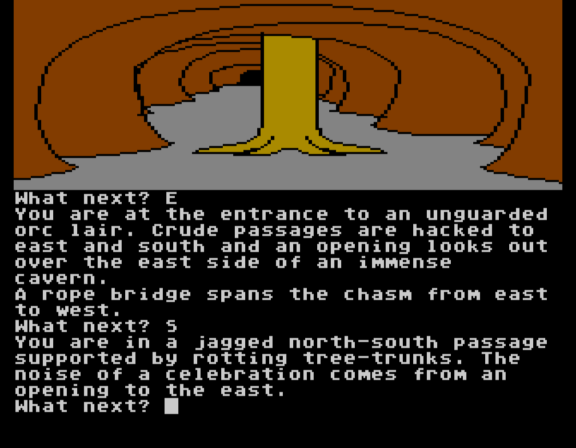
You sever the rope bridge, preventing pursuit.
There are no orc issues in the cave past this point. There’s a still a dragon (would love to get the water trident in there and see what it can do) and some blocking giant rocks (which I think might be the solution to getting the water trident in).
The Earth-Stone itself I haven’t been able to do anything with (I’ve tried waving it, throwing it at things, etc.) so it may just not activate until we reach the final climax.
Frustrated, I went back to trying to decipher the teleport mechanics. There seems to be some sort of background timer. That is, I could be at step 5 of my teleport sequence, wander back and forth ten turns, and jump to step 7. Wander some more and I could jump to step 9. However, I was stuck at 18 (the death rapids) where no matter how much wandering I did the teleport sent me to death.
I would have thought maybe that was that, but then this happened:
This is directly in the temple past the sphinx and the snakes. I think on this particular run I hadn’t even taken care of the snakes yet. I definitely hadn’t reached here before via teleport. Where I had this happen was immediately after entering the building at the start of the game.
Maybe the white dots are part of this? (As far as I can tell, other white dot rooms like the pillar in the desert and the small cave next to where the snowman is don’t have the same effect.) In any case, after my “reset” I had a much more erratic sequence of teleport destinations which I believe is truly random. For example, I went west of the building to some “biting insects” where there’s a direction that loops and tested different number of SOUTH commands before rubbing the lamp twice. I used this same procedure with the Oracle in the game Madness and the Minotaur where I needed to “rotate the RNG”.
from biting insects –> zero steps –> underwater at well
from biting insects –> one step –> lake bed above deep trench
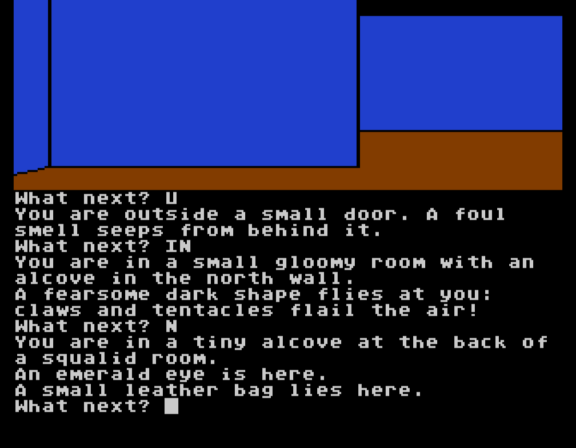
from biting insects –> two steps –> tiny alcove
from biting insects –> three steps –> tiny alcove
from biting insects –> four steps –> wide stone staircase climbing up, narrow path west
from biting insects –> five steps –> brick of rapids
from biting insects –> six steps –> at tentacles
from biting insects –> seven steps –> at tentacles
from biting insects –> eight steps –> at tentacles
from biting insects –> nine steps –> at tentacles
from biting insects –> ten steps –> at snowman
from biting insects –> eleven steps –> outside south door of guard tower
from biting insects –> twelve steps –> outside south door of guard tower
from biting insects –> thirteen steps –> outside south door of guard tower
from biting insects –> fourteen steps –> outside small door, foul smell
from biting insects –> fifteen steps –> underwater, belfry
from biting insects –> sixteen steps –> in rapids, one before brink
At “zero steps” I teleported to the dark room under the building. If that somehow could be done from underwater I could safely take the jellyfish over to see what’s in there. At “two steps” and “three steps” that teleported me directly to the alcove where the emerald and bag were, bypassing the tentacle creature entirely!
The fact that some teleport locations last for multiple turns and some last for only one suggests to me that teleportation is now really, truly, random. I still strongly suspect I’m missing something here.
All this random teleportation did lead me to accidentally solve a puzzle. Remember the bag that blasts air?
I cannot say I had any grand insight. I just happened to have it in my inventory when I hit the right room. I’ll take the luck, this game is an uphill climb enough.
Next up: actually getting light to the octopus-free room (is there an item now?…) and maybe trying to get it in the well too, but that sounds like a major pain. Other than that I really just have rocks to deal with. Also, a shark which I never saw before but now seems to be circling. I think it is a delayed like the wolves and I just hadn’t got “lucky” yet:
My last solve (but the first one I’m going to talk about) came from a simple misreading.
I had interpreted this scene as the snowman was “on the loose” and something still needed to be done. However, it struck me (upon retrying this scene) that the way the bear worked in Crowther/Woods Adventure still required you to GET BEAR even after it had been pacified, so maybe I was just lacking that. And indeed, you can just GET SNOWMAN and have him walk around with you in his inventory.
Further down the mountain are some large rocks. Earlier I had tried to PUSH ROCKS (being on a mountain, thinking they’d roll down and maybe hit the giant) but I was told they were too heavy. The Snowman seemed like he’d be strong, and indeed:
This gets rid of the orcs at the tower and you can go in and encounter the rope and the shape-with-tentacles at your leisure. You can also walk around the giant, suggesting maybe the giant doesn’t get defeated at all.
The big catch to all this is that the mountain path past the giant occurs near the very end of your long teleport-route. If there’s some reason the orcs need to be scared off earlier (maybe the orcs on the mountain are the same as the ones in the cave ambush?) then there’s still an issue.
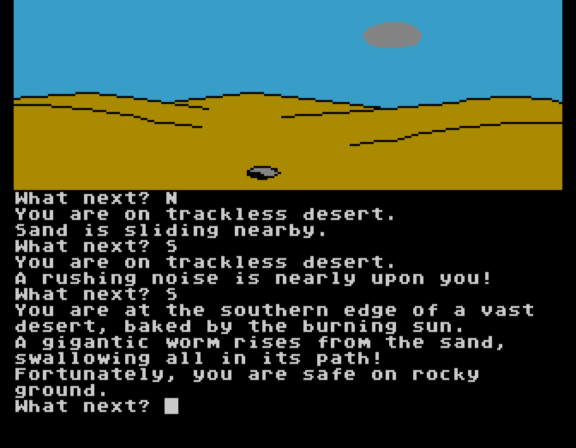
For my second solve, I was still fiddling around with the sandworm in the desert. Remember I had done WAVE TALISMAN and it caused the rumbling of the worm to decrease. I realized (because of the brutal inventory limit incentivizing me to test) that I could WAVE KEYS or any other item and it would work equally well.
I later realized — rather more later than I should have — that in fact WAVE was simply passing time, and any action that wasn’t walking would work, even just WAIT. That is, the sandworm was tracking when you move, but could not hear you if you were standing still!
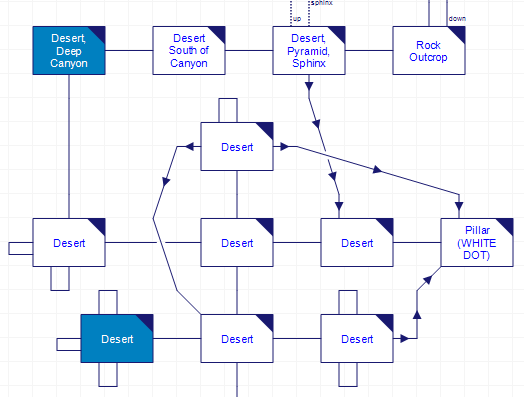
My updated, now-accurate desert map.
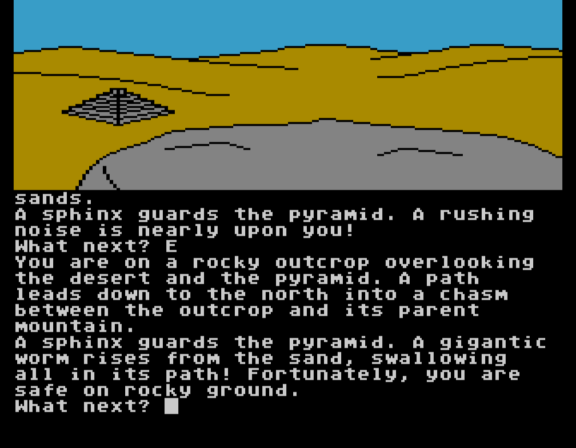
I also got to thinking about the sphinx, and it seemed rather suspicious that the worm was swallowing up “everything” when it surfaced. I had also found — by moving south out of the desert just at the right moment when I was experimenting with the worm in the first place — that you can just barely evade the worm and have it surface anyway.
Combining the two facts together, I messed with my timing so that the worm was just about to appear while I was right next to the sphinx. Then I ran east to the “Rock Outcrop” on my map:
The fact you can see the sphinx from here was another hint this might work.
While it isn’t explicit from the text above, the sphinx is now gone: it has been swallowed. You can freely go to the snakes at the sun temple, charm them away with the pipes, then meet the priestess who tasks you with finding a sun dial.
Just as a reminder. One very long shot is a place to the west of the oasis with many large rocks, kind of like the ones at the mountain. Maybe the Snowman is meant to go down here first and help move these rocks before taking out the other ones? But that would mean I’d definitely need to take out the giant first. Which I feel like the sling has to be meant for (see: David and Goliath) but I still don’t have a small stone to launch.
So yes, those were the easy puzzles. Now we get on to the monster.
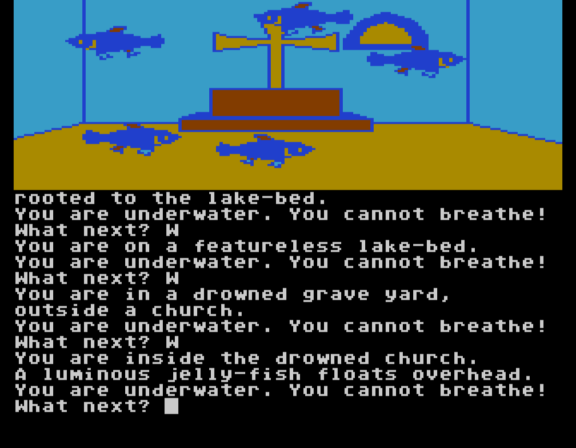
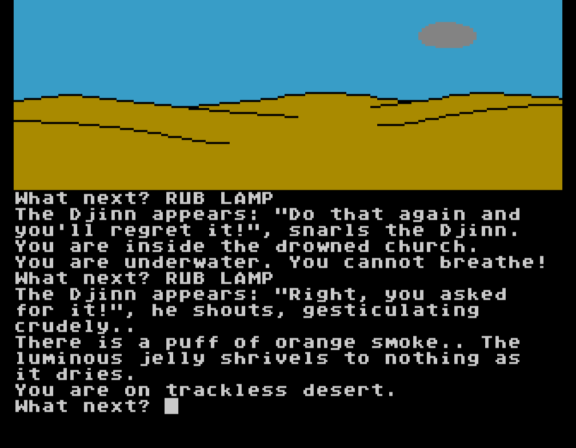
This kicked off with an observation, while messing around in the underwater church, that a jellyfish that I thought was scenery was probably meant to be a thing you could take.
Mentally I parsed “A luminous” with the sentence before that as a single paragraph, but on second glance the “A” would clearly have come on the prior line if it was in the same paragraph. Being in the same paragraph would mean I couldn’t pick the jellyfish up, but since it is on a new line, it is takable.
After finding out I could refer to a JELLY-FISH (just FISH breaks the parser here) I decided the nearby fish net had to be used here. With some fussing about I was able to CATCH FISH JELLY-FISH but died immediately afterwards being out of breath.
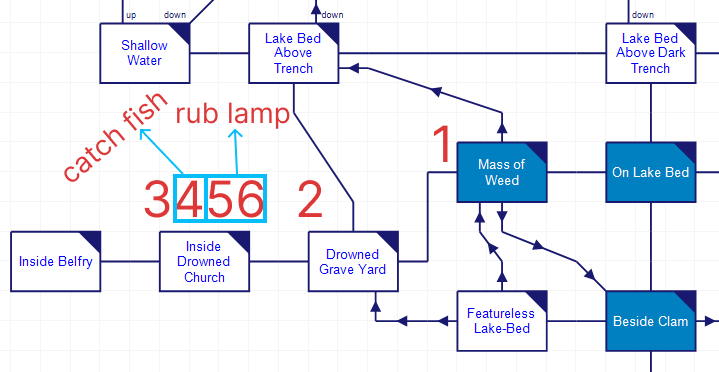
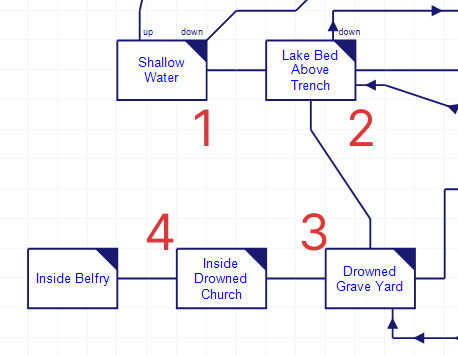
Let me go back to my updated map of the lake, as the positioning is very important for the puzzle. Note the blue locations are teleport landing spots.
You have exactly six actions you can take underwater before you die.
So you can walk from the Gravel Beach (taking a deep breath) down to the Inside Drowned Church, but die immediately upon catching the fish.
1.) down to Quiet Pool
2.) north to Beside Clam
3.) west to Lake Bed
4.) west to Graveyard
5.) west to Church
6.) catch fish
(dead)
Additionally, if you teleport to an underwater place, while teleportation resets your breath-o-meter (that is, you can teleport from underwater to underwater on turn six and still live), your arrival to a new underwater place counts as an action for the purposes of the fresh set of turns.
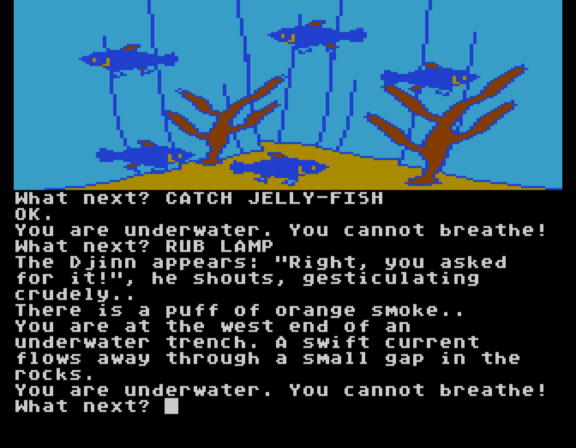
For example, you could teleport to the Mass of Weed, fairly close to the church. As already mentioned starting underwater causes you to immediately give up a turn, but this still gives you enough turns overall to catch the fish and teleport out:
1.) arrival via teleport
2.) step west to graveyard
3.) step west to church
4.) catch the fish
5.) rub the lamp
6.) rub the lamp again (remember you rub it twice to teleport)
Unfortunately, this kills the fish! Let’s go back to that teleport sequence from last time.
1: inside the oasis
2: at the clam, lake
3: path through forest
4: north of oasis
5: rapids
6: inside guardroom, tower
7: at underwater weed, lake
8: trackless desert
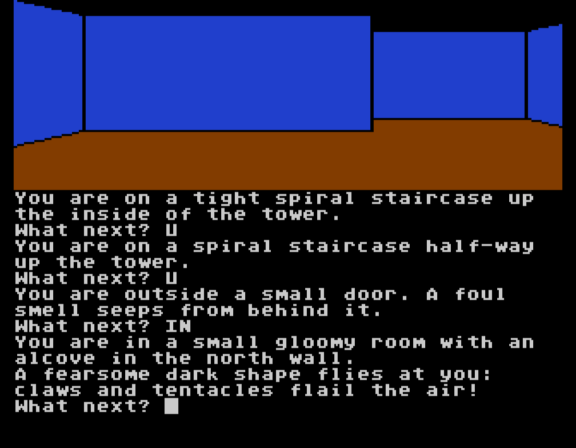
9: tight spiral staircase inside tower
10: lake bed (south of trench)
11: south of oasis at trident
12: underwater (dark), lake
13: road north of building
14: desert south of canyon
15: top of pyramid
16: track up mountain past giant
17: mountain at giant
18: rapids (DEATH)
Being at the underwater weed is step 7. So when you teleport, you go to step 8, the trackless desert. Guess what happens to a jellyfish in a desert?
So despite it being close enough for the full sequence, the teleport start at the weeds is out for catching the jellyfish. What to do?
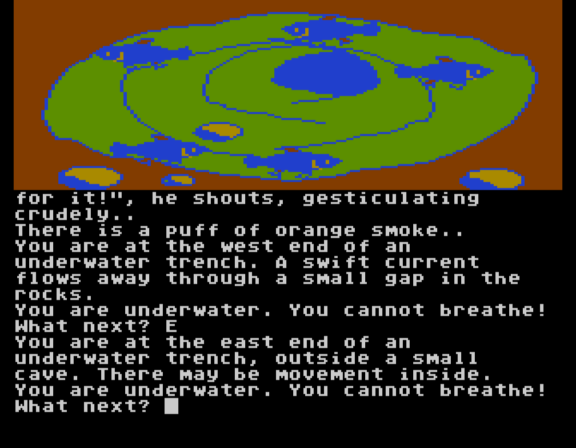
One thing to keep in mind here is the ultimate destination. The jellyfish provides light, so we want to not only get the jellyfish but bring it somewhere dark; in the lake this means the underwater trench, which conveniently is one of the teleport landing spots. Working backwards, here are the previous two spots:
10: lake bed (south of trench)
11: south of oasis at trident
12: underwater (dark), lake
All three are underwater, good! Jumping between these will not kill the jellyfish. However, the teleport spot is exactly one room to the east of the weeds, meaning you need not six but seven moves to make the jellyfish heist; what to do?
If you go to the Shallow Water (far northwest) and go up, you get on land and can breath air. So if you use that as a starting point…
…it looks like you still don’t have enough moves, because that takes four moves, and you need one move to catch the fish and two to rub the lamp and teleport out. 4 + 1 + 2 = 7.
HOWEVER!
The two rubbings of the lamp do not need to happen one after the other. This is irrelevant to a path that starts and ends underwater, but if you can start on land, and rub the lamp once before entering the water, then you only need to rub the lamp one more time before a teleport. That is, the sequence is, starting from just above the shallow water:
This is exactly six steps and it teleports you to water (south of the Oasis, inside the pool itself). You can then teleport again to land at the dark trench and light it up.
Dropping an item here sucks it down a hole (the small gap). I don’t know if this is useful.
Just to the east there’s more trench and an entrance to a cave.
Then inside, an octopus. Which kills me instantly. Of course.
Reaching for your “treasure” happens even if you are carrying nothing. I also tried bringing in the trident and I had no way of using it in time.
Still, that was exceedingly elaborate and required keeping far closer track of teleport destinations than I thought it was going to need. The situation is still even a bit worse, because even given my experimentation I’m still not sure what’s fully going on with the lamp.
You see, sometimes it skips destinations. For example, even though you have two steps from the jelly-fish (10) before the dark trench (12), I’ve sometimes had the game skip from 10 to 12 and I don’t know why. The order still always seems to be the same otherwise (it won’t ever go back to a location the teleporter already skipped) but given how complicated the jellyfish puzzle was, I’m sure mastering what’s happening with skipped destinations is important for winning the game. Maybe there’s still more teleports past the fatal one (18?)
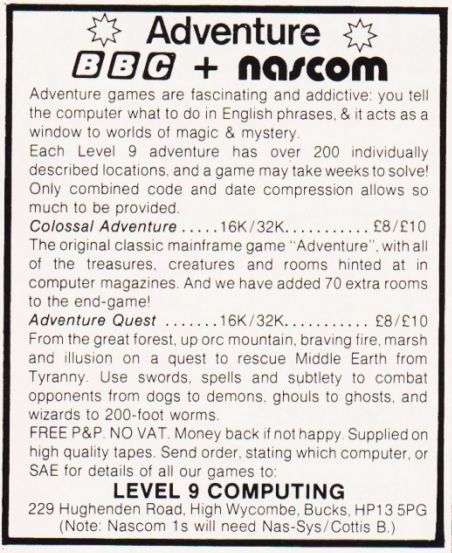
While it wasn’t their first game (“their” being Pete, Mike, and Nick Austin), it was the first to bring them notoriety (eventually), and in the same year it was swiftly followed up by two games to make a trilogy. This was partly made easier because they came up with an “engine” known as A-code (similar to how Infocom had Z-code). Timeline-wise, they were advertising Colossal Adventure in an April magazine while already promising the follow-up by August, a month they managed to hit:
From Computing Today, September 1982. By the rule of magazine publication months this was available in August.
One important detail that I didn’t mention last time is that the three first A-code games (Colossal, Adventure, Dungeon) were dubbed in late 1982 the Middle-Earth Trilogy. Colossal Adventure didn’t include any Tolkien elements but the follow-ups do (see “marching to conquer Middle Earth” from the tape cover). The references were removed from the later Jewels of Darkness version, I assume because copyright issues started to get scary. Well, most of the references; according to the Tolkien Gateway one reference to Amon Sûl was accidentally left in. I’ll keep an eye out for it.
I am sticking with the graphical Atari version for consistency but I will flip over to the 1982 BBC Micro version briefly to show off when the Tolkien comes up.
This time we’re meant to find and defeat the Demon Lord AGALIAREPT in his Black Tower. Switching from a Treasure Hunt plot to a Nemesis plot isn’t that much a shift but it does automatically give an end-game confrontation.
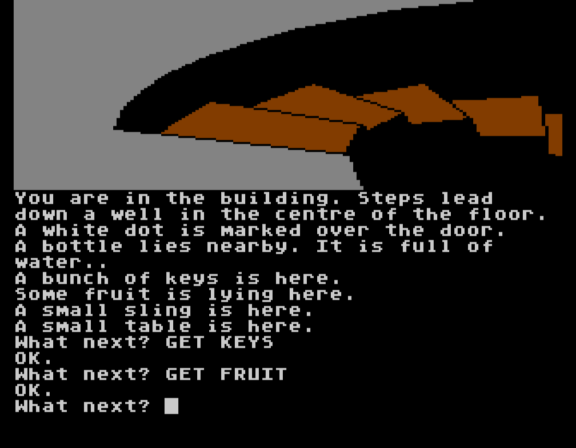
I’m fairly sure the white dot over the door is important, but I’m not sure for what yet. You can take the table but note this game keeps up the four-item inventory limit from Colossal Adventure.
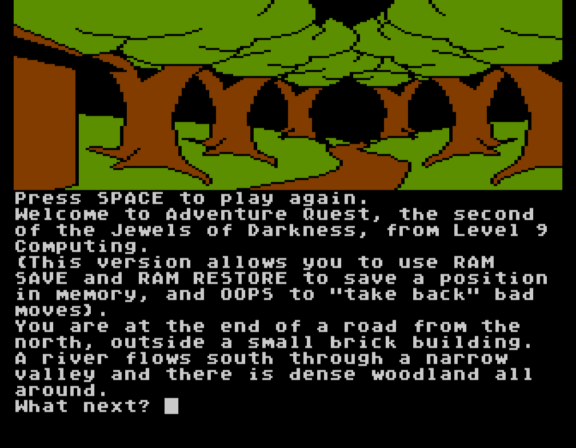
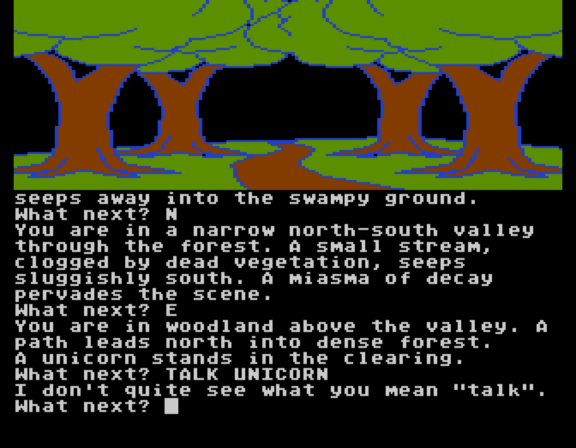
This is based fairly closely in feel off original Adventure in that you start in by building in a forest and can grab some starting items. Going down the stairs leads to darkness.
The overall mood is “Adventure, inverted to be more dismal”. There is a river running to the building but it is described as “clogged by dead vegetation”.
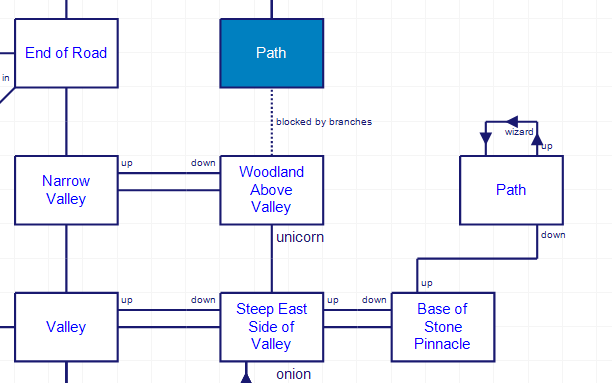
I have yet to be able to interact with the unicorn.
The stream keeps running south to dead land.
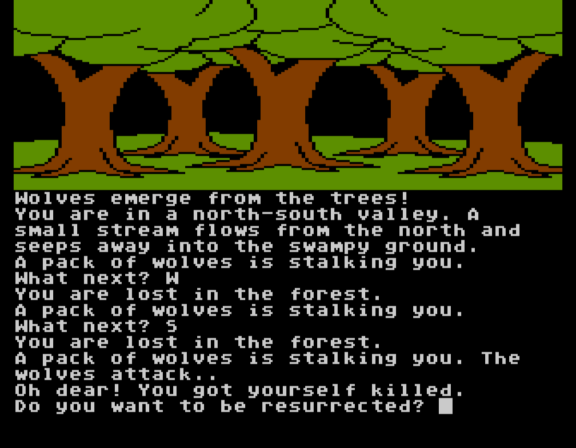
If you wander too long, wolves gather and attack.
Other than the starting building items, I’ve seen an onion, a rare orchid out of reach (you can drag over the table to get it) and a stone pinnacle. Climbing the pinnacle gets a meeting with a wizard, who hands over our quest.
This is incidentally a moment that is different in Tolkien-alternate-world, where we are the only hope of Middle Earth.
I think that’s enough for now; it looks like Original Adventure with the darkness cranked up. I will try to map things out and report back if I’ve managed to outwit the wolves next time.
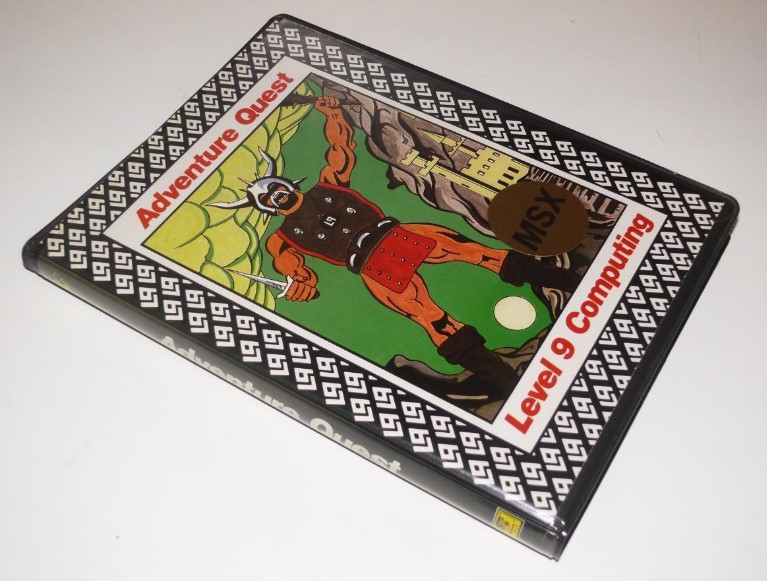
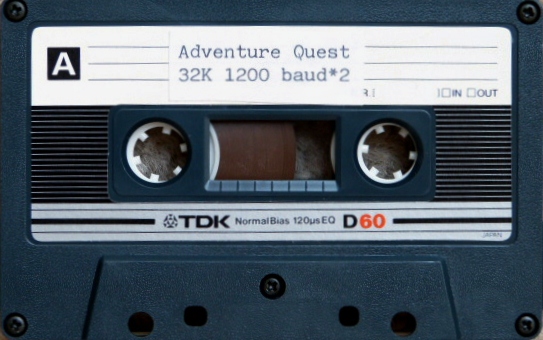
The actual tape from the original version, via the Museum of Computer Game History. I think this may be the first time we’ve had an adventure with such a home-made vibe that the original tape branding is visible.
You are Adam Trent, a trouble shooter for the Federation of Space. You have descended to an alien planet where you will make a horrifying discovery, which will impel you to take on a desperate and dangerous quest.
From the cover of Softside June 1982. Escape from the Dungeon of the Gods is an RPG. The magazine cover art is better than the Arrow One art.
This is probably yet another Peter Kirsch jam — it has the same coding style and feel — but there is no name in the source this time to check. Witches’ only had Peter’s name mentioned in the TRS-80 version so its lack in the Apple and Atari version doesn’t indicate anything either way.
I warned you.
While I previously could predict exactly how his games could go (linear set of scenes, trying to be cinematic) the last two games have thrown a wrench in his patterns (big ingredient hunt, and a non-linear passenger-rescue game). This one (again, assuming it is him) is more of a “romp” structurally, in that you pass through the same areas of an alien planet multiple times revealing new things as you go.
I went with the Atari port this time on a coin flip.
Despite a lot of words being dedicated to an intro, there isn’t much conveyed: we’re Adam Trent, landing on a planet, let’s go explore. There’s something extra going on but you’ll see later.
You start — armed only with a LASER — in a fairly small area with a jungle, beach, and a city being blocked by two aliens. The aliens are not described, but based on actions our hero is about to undertake, they probably look more or less like humans, except maybe for spots on their arms or something. Sort of the Star Trek look. (To be fair, there’s a canon explanation in the Star Trek universe where one older civilization seeded everywhere else, which is why everyone is humanoid.)
In the jungle there’s a GOOBA…
…and a crashed shuttle with an alien. You can search the alien and find a uniform. The uniform fits you and you can wear it, and then the aliens at the city will let you by.
Once in the city things open up quite a bit. I’ll mention now as it becomes important later there’s a broken teleporter with a missing spot for a CYLINDER.
There are lots of “NICE” aliens wandering about and while you can’t converse with them, you can shoot them with your laser.
One of my first encounters was an alien who was not NICE, although I am unclear from the minimalistic BASIC presentation exactly why we know this, or why the police don’t care if we shoot the not-nice alien with the laser. The upshot is we can get some SUNGLASSES that let us see a CONTROL ROD in one of the rooms that otherwise just looks like it is filled with light.
Shooting aliens is ok as long as they look mean.
The most interesting location (from a history-of-games angle) is the library, which has a FROTTI, a LIBRARIAN, and an ENCYCLOPEDIA.
The big gimmick here is that there are “alien words” that need translating, and the encyclopedia can help. You type the letter of the alphabet to get the right encyclopedia volume and then hand it back if you want a new one. (The alien language uses all regular English lettering. It’s less confusing than Followers Adventure which included random odd characters in its alien language.)
The FROTTI you can look up by requesting volume F. After you’ve read the volume, the object’s name changes from a FROTTI to a POWERFUL MAGNET.
The powerful magnet, when taken back to the beach from the start, can be used to find a random alien coin. The coin can then be handed to a beggar back in town to get a translator missing a battery.
You can LOOK POCKET in the uniform to find a battery (no, there was no indication of this, and I looked it up). With the translator active it can make certain puzzles easier (for example, you can understand the librarian is yelling at you to return the encyclopedia volume if you try to walk off with it), but it honestly is completely optional.
You can also look up the GOOBA in the encyclopedia (the critter in the jungle) as well as a XIPPI, a bird you can find in a “hen house”.
There’s potatoes elsewhere (although again, they’re not called that, you need to look them up). The potato can go to the XIPPI who gives you an egg, which then can go to the BABY GOOBA to get a TEENAGED GOOBA.
The process can be repeated for an ADULT GOOBA, which can then be ridden.
This lands you in a new small area with an alien that keeps filching your stuff (and putting it in a nearby warehouse so you can pick it up again, it just serves as an annoyance), a teleporter, a locked door, and a “dying professor”.
Up to this point I had been exploring pretty randomly, so it was very odd to suddenly get a motivated quest. It also isn’t totally clear from this screen but the professor (and his daughter) are human; that will be important later.
The key you get lets you ride an “air car” back to the main town. In order to get to the missing daughter you need to get by a “SNARLING ALIEN DOG”.
There’s no marker this would be where the daughter is.
In order to get by the dog, you need to find a “TRUTH MIRROR” that’s just lying around elsewhere in town and figure out how to activate it.
You can look at volume B (only after seeing this message) to find a torn page:
Elsewhere there’s the other half which says “UPRIGHT”. You can then do a little cryptography to get H— UPRIGHT, which turns into the command HOLD UPRIGHT.
Then you can go to the far north of town to a DESERT, which has the occasional mirage. You can find a CYLINDER and a FREEZE GUN amongst the mirages, but if you turn the truth mirror they “become real” and you can pick them up. (The cylinder can go back to the teleporter, but it will say it needs time to charge up.)
With the freeze gun in hand you can go try to freeze the snarling dog.
However, you can’t just walk on by — you have to pick up the dog and walk over to a BOTTOMLESS PIT where you toss the dog down. Why sneaking by is more likely to defrost the dog then the whole picking-up-and-yeeting process I don’t know.
Past the dog you find the daughter who gives you a DOOR KEY, and then who you can lead back to the professor (using the now-working teleporter)…
…and get a serious, serious, plot dump, which recontextualizes the entire game. It turns out this is a Planet of the Apes situation where Adam unknowingly landed back on Earth, not an alien planet, and almost all the humans are now dead via an invasion of aliens. Given the vast number of aliens we’ve encountered have been NICE ALIENS this is a puzzling turn of events.
Anyway, the computer: it is nearby past a locked door where you use a DOOR KEY. The code the professor hands then lets you kill nearly everyone on the planet.
This is not where I expected the plot to be going. I think the author had something lore-heavy in mind but even if you find the professor early you don’t get any context about how the aliens are all deserving of destruction somehow (by that point you’ll have likely seen about 30 “NICE” aliens). You can see how people at this time were struggling to fit in plot beats at the same time as the gameplay; something like G.F.S Sorceress worked by framing the major plot events at the beginning and the end, but this one just had the plot at the end.
As a moment-to-moment experience this game was still genuinely fun, especially with the language shenanigans; I realize they’re not even remotely “realistic” but I assumed we were in pulp sci-fi mode anyway, like going to Mars and finding aliens. Structurally you have to loop through the same places multiple times and find new things, yet the game didn’t feel “constrained” in geography and I still had a grand sense of exploration.
Coming up: Level 9, the highest level reachable when only using single digits.
One fascinating thing about history — and this is true can be true of both older and more recent — is how often namespace clash can interfere with research. Is the John Smith you are checking in 18th century records the same John Smith you are looking for, or an entirely different one? In modern times, see my hunt for Doug Rogers. Some people are forgotten to history simply because their names aren’t easy to search for. Maybe parents who pick unusual spellings for their children are onto something.
This can apply to companies as well.
There’s Ramtronics, the US company who manufactured hardware for processing motion pictures and was up for technical Academy Awards, like this 1968 one for “engineering an automatic exposure control for printing-machine lamps.” One of the nominees (E. Michael Meahl) shows up later as an engineer at Caltech.
They seem to have no relationship to Ramtronics, the company out of London, who I’ve only seem manifest via ads in a narrow window of 1982 (like here) for the game Africa Diamond, on the Acorn Atom computer. I’ve seen no evidence of them appearing before or since but I’m getting overwhelmed by references to the other, much more prominent Ramtronics, so maybe one history is blotting out another.
The source code contains the line (c) BEND 1982 which suggests the name of a person, by my guess the sole proprietor of the company who put out ads for their single game.
As the ad above explains, we’re searching an Old Country House for a diamond, and spooky and/or fantasy-adjacent things are about to go down. This of course is an identical plot to Mystery House (Japanese version) and Mansion Adventure; transferring finding loot in a cave to finding loot in a house just seemed like the easiest next step.
What also isn’t really a copy of Crowther/Woods — but people tried a stab at — is the adventure-roguelike genre. Here the overall map is always the same, but items are randomly placed. There are also enemies that appear at random, and the moment of getting at the diamond also requires getting past a random puzzle.
I’m wondering if this is another case of a player who had seen Madness and the Minotaur as there’s a bit of a similar vibe, especially in the somewhat mechanical way room directions are mentioned.
The problem is that room directions don’t always seem to work as described. For example, on the screen above, you can’t go north, you have to GO STAIRS. Rather more egregiously, rather than being able to GO SOUTH, you need to GO OUTSIDE (which also requires a key, which is a little unclear from the game’s setup).
Some rooms just describe exits that aren’t there:
I did, after great pains, produce a map of a “ground floor”…
…and an “upper floor”. No objects are listed because none are in stable positions.
In order to see any objects, you need to LOOK, and do it in every single room.
The RNG packed this one, usually there’s 0, 1, or 2.
I do say pains because, in addition to the slight mismatch between room description and exits, enemies randomly appear.
They are technically only deadly if you insist on hanging around in a room. You can always leave and come back. The monsters are not dictated by positioning (so not Crowther/Woods style, which actually keeps tracks of where the dwarves and you can get chased around) but can appear anywhere at any time and with no particular logic.
They can be killed, usually by dropping the right item. Vampires succumb to a SILVER CRUCIFIX. The man-eating rabbit can be scared away with a FERRET.
I say “usually” for two reasons. One is that sometimes even if you are using the right object it just doesn’t work and you die anyway.
This is flashing green and orange.
The other exception is because one enemy you use no item at all, the dwarf. Typing KILL DWARF will have the game prompt if you mean with your bare hands, to which you can say YES, and the game will just repeat the question.
The fact the message repeats makes it appear that this really is a rhetorical question and you should move on, but no, the game is just wanting you to be persistent: you have to type YES three times in a row to the “with your bare hands” prompt before the game lets you do it.
I’ve observed games improving on the Crowther/Woods “fight the dragon” moment, but I’ve never seen a game mimic it and then make it worse! (This is made triply worse by the fact this is the only enemy not defeated by dropping something.)
It would be nice if you could just ignore all the different monsters, but unfortunately certain exits are predicated on score, which increases based on killing monsters. For example, if you bring a torch into the secret passage past the library, you still can’t go down if you haven’t killed enough — I guess this is “experience points”?
Going down incidentally leads into a cave, which follows the exact same map as the upper floor, and actually is the upper floor, because any items left up top show up in the same places in the caves.
The ad vaguely alludes to advanced programming. It must mean something like this (we’ve seen this re-use before in Wolpert’s Mystery Mansion where a maze collapses and turns into a different maze, but not otherwise as far as I know).
The cave is much more explicit about exits and is much easier to map than the upper floor.
Upstairs has the cupboard with a safe containing the diamond, but again, you are stymied from opening the cupboard. by your lack of monster-killing: you need a certain score. The game is never clear about this.
The upshot of all this is that, gameplay-wise, is that you should wander the map looking for a key (that will allow escape later) and grabbing whatever weapons you can. You can also grab the torch when you find it but going into the caves is technically unnecessary (given the items duplicate from the top floor to the caves). Either while you are at it or after you’ve obtained enough items you should start killing enemies.
Even though you are technically never in absolute danger — you can always leave the room when there’s an enemy you can’t handle — I still found it very easy to mess up and died multiple times just getting through the house. Hanging around a monster without killing it right away is usually death, and you often just end up going east-west-east repeatedly while you wait for a random roll of a room that doesn’t contain a monster.
The saving grace — and this game is far too miserable to play to say this saves the game, but at least it helps — is all you really need is points, and the game doesn’t care what monsters you kill to get those points. So you can kill the same monster more than once (you should pick up the item you use after you drop it) so if you don’t have a monster-item correspondence down, you just avoid killing that particular monster.
You could even technically just kill dwarves (via bare-handed method) and only pick up the key, eventually getting the right amount of score (something like 700).
On my way to enough points in my winning run. I never saw the torch, so it is good you technically never need to enter the caves.
Just to make things even more of a headache, even if you drop the correct item to defeat an enemy sometimes the game kills you anyway.
Exemptus valiantly figured this game out only a few months ago and has a full list. (Although it seems to indicate you need to kill one of each monster; I can confirm this is definitely not the case, it is just based on score.)
After all the mess above opening the cupboard magically works over a certain point threshold, but you still have to deal with opening the safe:
This is technically timed — you’ll start to get threatened if you stay trying to open the safe too long — but fortunately my old Mastermind reflexes came through.
After you do this all the objects in your inventory are randomly scattered through the house again. This includes the key you need to escape, so the best thing to do (assuming you know about the trick beforehand) is to drop the key before opening the cupboard. I did not know so I had to find out where the key went, which fortunately didn’t take too long.
Yes, this was absolutely a cavalcade of mysteriously bad game design decisions. I can understand with a lack of models to work from producing something like this in an attempt to produce a “generative” game, but the random monster appearance is utterly spastic and the fact correct items still don’t always work is utterly cruel; the bizarre “you can’t open the cabinet yet” was done with a gameplay goal in mind (“I want the player to fight the monsters”) but with zero clarity to the player that’s what’s going on.
It’s still interesting to have another instance of adventure-roguelike genre, which to be fair, has mostly been a cavalcade of terrible. I have a weird soft spot for Madness and the Minotaur but I still recognize pragmatically it is a mostly terrible game; other than that Lugi has been the only one I felt hit the mark by having a wide variety of possible objectives.
One last bit of strangeness in Africa Diamond before signing out — check out Exemptus’s map of the caves. You’ll notice it has a branch that I didn’t include.
Specifically, the duplication of the top floor in the caves is so extensive that if you’re in the same room as the stairs were, you can GO STAIRS (even though they aren’t in the room description). This gets you a whole new set of caves which duplicate the ground floor of the game, with each of the rooms using the same Caves description. This is truly odd and remarkable and might not even technically be a bug. Whoever BEND was tried to extend their abilities to the limit in order to fit 10K of memory on the Acorn Atom.