This continues my series on Marc Leduc starting with Epic Hero 1. At least, unlike the previous game, this game is traditionally hero-like.
Before going into the gameplay: I’ve managed to unearth an autobiographical statement! It comes from the first issue of Chewing Gum (the publication for the Colour Genie group that Leduc ran); the entire issue was written by Leduc himself.
Via Everygamegoing.
He was not British at all but Canadian. He moved in 1979 and to work at a telecommunications company (before founding his own); his wife was from Nottingham and by 1983 they had three kids. (Or he met his wife before moving, it’s unclear.)
He gave lectures on machine programming and was “an avid reader of science fiction and fantasy novels.” He also described how his wife Anji sometimes joked about starting a “Colour Genie Widow Users’ Group” and he intentionally made sure the computer stayed turned off over the weekend.
I don’t have a copy of what the packaging looked like, but Molimerx was fairly consistent during this era, so a sampling:
From both the Centre for Computing History and the Museum of Computer Adventure Game History. The bottom two are Scott Adams games, the hand-written “Golden Baton” is based on a Brian Howarth game.
There might be yet more buried out there, but for now, let’s play–
This time we are a warrior tasked by King Brion to find a jewel that will “nullify” the evil spells of the wizard Sharloebon. The Jewel of Derojhen is hidden within the wizard’s castle itself.
The structure here is fairly novel; rather than starting outside the forest of the Evil Magic Person, we’re in the grounds of King Brion’s castle, and we need to collect ingredients in order to get to the bad-side. I’m reminded (very slightly!) of Temple of Bast, which had some elaborate puzzles at “your house” that needed to be solved before crossing dimensions.
We start in a garden and there’s a frog that jumps away if we try to pick it up.
The frog leaps ….
…. and slips through your fingers!
The frog hops over to the other side of the royal garden.
You are in the east end of the royal gardens.
Objects you can see are: Breathtaking Pond ■ Green Frog ■ Stick of wet blue chalk ■ Tree
Possible exits: WEST
The “wet” blue chalk is just a straightforward item, and the tree has a branch you can grab and turn into a stick. If you try to grab the frog again it will jump back to the west side of the pond (where the game started). We’ll deal with the frog later.
For now, let’s head over and get our briefing, going to the northwest corner of the map at the “sitting room” where King Brion awaits.
To the east is a “Royal Kitchen” with kitchen drawers (containing a knife), an oven, and a monocle. I’ll give away right now that if you try to use the chalk it will break (because of the “wet” part); I came up with HEAT CHALK as a way to use the oven to dry it out.
This is the same “ambiguous control” issue we just saw in Seiko’s Adventure. Rather than specifying a set of micro-actions (open, put chalk inside, close, turn a knob) you just specify the whole result in one go. It can be tough to come up with a verb in this case, although I got lucky because the screenshot above represents my first try.
South from the sitting room is a “Chapel of St. Barendon” where you can PRAY and cause a candle to appear, followed by a holy chalice and some incense.
Pray a fourth time and “Lightning strikes you for being so greedy!” There’s not really a way to know what the limit is until you find it, so it’s essentially an intentional death that’s part of the meta-narrative.
Stepping south again is the last room of the start area, a “wizard’s laboratory” containing a “book” and a “dusty wand”. If you don’t have the monocle you can’t read the book (the text is too small). With the monocle it still is broken up:
It’s faded a bit. You can read :
“Draw pentagr…Chali…Fill with Blo…Frog…Wand wav
Lit Candl…Smo..Incen” The rest is unreadable.
This suggests a ritual:
1.) Draw a pentagram
2.) Fill a chalice with blood (from a frog?)
3.) Wave a wand
4.) Light a candle
5.) Smoke some incense
With the chalk dried out, we at least have step one.
I was still lacking the frog part, so I went ahead and did my verb list…
…and noting I was trying to play nice with the frog, and we’re after blood, I just decided to use one of the killing verbs instead.
What will you do now? ATTACK FROG
Tell me how to do it. (I.E. WITH ROCK)
What will you do now? WITH KNIFE
That was a cold-blooded thing to do!
But it had to be done!
(Other verb observations: CLEAN and WASH are good to remember. If I hadn’t already used PRAY at the altar I would have tried it now.)
I went back to the wizard’s laboratory and tried to do the ritual. After some fussing about I did DRAW PENTAGRAM, GET BLOOD (FILL doesn’t work), WAVE WAND–
Except the game said I couldn’t do that yet. I realized it was a “dusty wand”, so the CLEAN I just saw off the verb list might be useful. Let’s try again!
Curious. Looking back at the book again it didn’t seem like I left anything out (“Draw pentagr…Chali…Fill with Blo…Frog…Wand wav”) but there is a gap between the blood and the frog part, and even though we used the blood of the frog, maybe it there’s an extra frog step?
1.) Draw a pentagram
2.) Fill a chalice with blood from a frog?
2 1/2.) Do thing with frog
3.) Wave a wand
4.) Light a candle
5.) Smoke some incense
I tried to place the frog (and various other acts) but no luck. I also tried wand actions other than just waving and still no luck.
I figured now would be a good time to turn to you, the readers. Any thoughts on what I’m missing? I would say “please only people who are playing along, no help from people who looked at a walkthrough” except there is no walkthrough. (No help from people who have looked at the machine code yet, though!) I’m having fun with this (I’ve always liked “ritual” style puzzles in games) so I’d rather solve it as normally as possible before breaking things open.
Yasuhiro Fukushima was the child of entrepreneurs (his father: movie theaters and pachinko parlors, his mother: a restaurant) and had his own desire to start a business after graduating from Nihon University in architecture. His first enterprise involved making a monthly magazine dedicated to the shopping complex Nakano Broadway in Tokyo, as there was no central organization by category.
Inside the mall at its launch in 1966. Source. The mall had declined by the 1980s before rebounding as an otaku hotspot.
The idea was to print 50,000 copies and distribute them each month; businesses were interested in the idea, but he ran into trouble with his own “company” not being registered as an official business himself and the project got scuttered.
After a stint of travel abroad (including taking housekeeping jobs in the United States) he returned to Japan, got married, and came across his next entrepreneurial scheme. He was looking for housing; the typical route in Japan was to start with a public housing project and save money for a house. Public housing ads tended to be hard to follow and he found that he needed to track them daily to get a spot; spots were so popular they got sold by lottery from the applicants. With the notion that others were having just as much trouble as he was, in 1975 made a new company called the Eidansha Boshu Service Center, publishing a monthly newspaper which eventually reached a circulation of 30,000 and profit of 70 million yen a year. (In 2026 USD accounting for inflation, that’s roughly around $700k a year.)
While this was respectable enough, Fukushima remained dissatisfied and looked around for another follow-up business. Rather than just brainstorming on his own, he set up a “Conference of the Future” and invited both employees and friends for a series of meetings to discuss business possibilities.
Fukushima tried one idea, an automated sushi shop using technology from the US, aspiring for a national chain, but ended up closing up after three months. (The price was low, but the sushi looked unappetizing.)
The sequence of business shenanigans gets a little complicated from there. Kabushiki-Kaisha Eidansya Fudousan was established in 1980 as “a real estate sales and brokerage company” wholly owned by Eidansha Boshu Service Center…
…but Fukushima decided to pivot not long after. He noticed that personal computers were starting to seep into businesses and that someone could handle creating software for tasks like accounting and customer management. Around this time he also learned of Toshiba’s new line of office computers and was impressed enough to ask to become a sales agent. The company was apparently quite good at it, beating all other sales partners over a 6 month period.
Here we have the one gap in the story and I’ve pulled from every account I can find: why did Fukushima switch from thinking of business software and selling “office machines” to selling games? This was not natural or inevitable (Fukushima even talks about visualizing a price for his application software). My guess would be, based on the company not having any programmers (this, at least, is documented), Fukushima ran into a problem: business applications only made sense to develop “in house”. He still dreamt of software so to get programmers “on the cheap” the only way was to switch to games instead. This isn’t glamorous so it would explain why sources skip over this part, but it does fit with his serial-entrepreneur-who-tries-things-until-they-stick career arc.
However it happened, the company did one last major pivot, transforming into Enix in August of 1982. (The name comes from a combination of the computer ENIAC and the mythical Phoenix.) Without programmers, they decided to attract authors with a contest. Top prize: one million yen. (Although note the fine print: it was an advance on royalties, not a straight payment.)
From bowloflentils, via Tumblr. I don’t think this would have worked to solicit accounting software.
There was initially very little interest; as Enix was a brand-new company and it was natural to be suspicious if the contest was even real. He ended up calling stores and visiting clubs and even contacting authors directly throughout Japan, promising they would “give the top award without fail”; in the end they received around 300 entries.
13 of them were chosen as contest winners, although rather than just publishing the games “straight” they had editors check the software and send feedback to the entrants, who then changed their programs before publication. The whole set of 13 was published in February of 1983. The one million yen went to Morita no Battle Field by Kazurou Morita (who founded his own company with the proceeds); the game best remembered now is one of the runner ups (“Excellent Program Award”), Door Door by Koichi Nakamura. (It’s the only one of the games to get a 21st century port for Keitai phones.) Yuji Horii wrote another one of the winners (“Winning Program Award”) and both him and Koichi Nakamura ended up collaborating on the Famicom RPG Dragon Quest. Both authors also worked on one of the most important Japanese adventure games, The Portopia Serial Murder Case, but that’s a story for a different time.
For now, we’re focused on the adventure(s) that came out in February of 1983. The ambiguous “s” is there because I’ve seen the “adult” game Mari-chan’s Close Call also sorted as an adventure (ADV by the Japanese abbreviation system) although I don’t think it counts. It was written by Tadashi Makimura, the author of pioneering erogē game Yakyūken (which I mentioned briefly back in January); while the original game is a straightforward game of strip rock-paper-scissors, Mari-chan’s Close Call adds a plot, where rock-paper-scissors is used to escape various dangerous situations (where the heroine can die via stabbing, electrocution, etc.) and where surviving a scenario causes clothing to be removed.
Seiko’s Adventure admittedly only barely counts too, but you’ll see why in a moment.
The school of today’s author, at the time he wrote the game.
Seiko’s Adventure was instead written by Toshiyuki Asanuma, a teenager from Gunma Prefecture attending Gunma Prefectural Kiryu High School, who had two years of computer experience. We know this because it says so on the back of the packaging. I do not have any records of what he did after high school.
Also into gymnastics and soccer! From the Game Preservation Society.
Seiko’s Adventure involves a different hapless heroine situation, although there’s a starting screen before the game explains what’s going on:
The game (or rather, Seiko directly) is asking what is your name. I responded “Blue”; Seiko responds “nice to meet you” and then the title screen shows up:
I’m Seiko. Right now, I’ve been tricked by a man and am trapped in a spaceship. In just a little time, this ship will launch into space. Please use the star-shaped communicator I gave you before and talk to me to save me. Please be careful!
We then return to the star (which is the communicator, I assume) and Seiko observes “it’s a big ship, isn’t it.” The game then prompts you to type. You’re supposed to agree with her and you have to use an exact phrasing. After a brief amount of time (real time, only a few seconds) you get prompted with a little more help on that exact phrasing.
What it is showing above with the { _ _ } is a sort of game of Hangman. If you type the first character correct but not the other it will show up in the position, like
{ ウ _ }.
Assuming you don’t get past this part at all, after enough time (again, real time!) our heroine ends up in a hospital and you get a game over screen.
The right response is “ウン” (“un”), a somewhat informal “yes”. It isn’t supposed to be used with strangers (I guess the implication is we know Seiko, given she gave us a communicator.) Even in an informal sense, I would have expected “sou” (it’s not really a direct question, just something we’re agreeing with), but the Hangman is supposed to kick things over to the right answer.
After correctly affirming in the right way, you get a slightly more traditional adventure-view:
I’m unclear if we’re supposed to be seeing the image (via the communicator) or it gets described somehow, but the text here has Seiko say “it looks like the entrance.” Again, after a pause the game gives a number of spaces to fill in.
_ _ _ _ _ _ _
I tried ロロロロロロロ (7 “ro” symbols, this game just uses the katakana set) and the game responded with:
ロ _ _ _ _ _ ロ _ _ _ _ _ _ ロ
There are two phrases here, and either one works. One starts and ends with “ro” and one only ends with “ro”. Unfortunately, this kind of brute force doesn’t work with everything, and I’m honestly unclear when it works or does not work. For example, “a” (or “ア”) shows up with both words, but just trying アアアアアアア doesn’t give feedback as far as the correct position goes. I’ve tried applying various types of logic but I don’t know the pattern.
The majority of the game is this way: you get some kind of prompt from Seiko, and then you play a game of guess-the-word/phrase in Japanese to figure out the right response, where if you get a character in the right spot the game will tell you.
The two correct options are ロックヲアケロ (open lock) or ハッチヲアケロ (open hatch).
As I was solving this, it wasn’t clear to me how Seiko was supposed to be doing the unlocking. (It’s not a key lock, just a trigger for an airlock, but this only became clear after passing through.) In a normal adventure game I’d check her inventory, ask her to examine things more closely, look in different directions, etc. but that’s not how this works: you are forced at each scene to give the right prompt in a short amount of time or die.
The next part I was baffled enough I needed help from the walkthrough.
The scene opens to a 3d hall and you’re asked to tell “where” and “how far” Seiko should go. This is followed by a top-down map.
This includes a line complaining about me (Blue) being too slow.
Assuming this is from Seiko’s perspective in 3d, I figured this would involve walking forward by some amount. Or possibly north (assuming the top-down map is something like a traditional adventure map). What I did not expect is ミギヘ1ホ, which is “turn 1 to the right”. Just a little ahead on the right wall of the 3d picture (which you can’t see now because it has gone away) is a thing Seiko can turn and look at.
“This is the controller for the hatch.”
I did “all ro” again; seven characters, last character ro:
“Close hatch”, I guess? (“ハッチヲシメロ”, hatch is the same, the verb changed from “open” to “close”.) It’s not like there’s an obvious button Seiko’s supposed to be pressing, though. It’s almost more a conceptual command as opposed to, say, PUSH BUTTON; usually CLOSE is applied in adventure games to things like doors where the mechanics are clear.
At least the next I could do (ヒダリヘ1ホ, turn 1 to the left) and I tried to do walking forward again but had issues again. The game quickly went straight to END (no hospital, even) if I was typing in wrong. I eventually tried “マエヘ10ホ” (10 meters ahead) and the dot moved on the screen a little bit:
I stepped back and tried the same thing with 50 meters and got the exact same amount of map movement. I randomly tried different number values until the game decided to loop and walk the rest of the way at 250 meters.
I went back and repeated the sequence and found what happens is the game moves the exact same amount no matter what you put as a distance, and then after enough small moves forward the game automatically travels the rest of the way to the end of the hall. (No idea what’s going on with that branch to the left; you skip that.)
“You have done well to make it this far.” I have?
I might have missed some text, but the game then shifts to asking, and I am not kidding, “how many keys are on this keyboard?” Hope you aren’t using some third party keyboard.
20 + 2 + 13 + 14 + 14 + 14 + 5 = 96. Why are we doing this?
Wait, what? Oops, I was looking at an 8001, the game’s platform is PC-8801, which has 92 keys. (ALSO: can’t add either, one extra +14, whoops.) Sigh.
With that done, I got an…
…out of memory glitch. Terrific.
I peeked ahead and everything after this is a minigame. I’m going to just give the screenshots from the walkthrough, so it isn’t “Blue” any more; the author named themselves after a hallucinogenic leafy substance.
Here, we’re supposed to type all 50 sounds on the Gojūon chart (that is, all the Katakana keys, for some reason).
This is followed by a minigame where you aim at three places on a ship.
Then there’s a minigame where you need to cut 5 of the 9 parts of the LSI chip, except that some of them (totally at random) will cause you to fail. This is like the switch-choice partway through Cosmo Cross where you can lose at no fault of your own. Also just like Cosmo Cross, there’s no saved game feature.
The walkthrough says you don’t need to do anything at this screen.
Finally, Seiko — this is her face apparently — manages to return safely to Earth. Good job! How did she get to the hospital if we failed since I presume that’s on Earth too?
Perhaps you are wondering if the Japanese in 1983 were impressed by the inscrutability. At least in the one review I’ve found, not really. This is from long after the game was published (Micom Basic, May 1997) but the author, Akira Yamashita, remembered Seiko’s Adventure because it was his first adventure game.
He had read a feature article about adventures, and how the player will “solve mysteries” and “become the protagonist” of a story; this was appealing to him as he had previously thought of gaming as a “test of reflexes”. He was most interested in the Sierra Hi-Res games, but he owned a PC-88, and there weren’t (at the time) many options available. Even the Micro Cabin Mystery House wasn’t ported to the PC-88 yet.
He came across Seiko’s Adventure, which had the prestige of the Enix contest attached, but he quickly found himself disappointed. He had a “sense of mismatch” with the game where it felt quite different from what he had read about, with no characters to talk to or items to use and the weird semi-Hangman which I described; he calls it (accurately, I think) essentially a series of minigames rather than an adventure.
Seiko’s Adventure really makes me wonder what the 287 or so games that didn’t make the cut were like.
Many thanks to both f_t_b and Alex Smith for their help. My major sources were an article in The Japan Economic Journal, April 20, 1991 (“Road toward Dragon Quest sometimes rocky; Enix Corp. founder encountered setbacks before massive success”), a story in Japan on the Upswing that pulls information from a December 1999 profile in Asahi Shimbum, and a direct interview with Yasuhiro Fukushima on Youtube.
BONUS: Gunther Schmidl has a fixed version that I’ve placed here (no doubt some proper computer settings would also do the trick, but this should work on any regular PC-88 emulator without a hitch).
I’ve finished the game; this continues from my previous post. (As predicted, it didn’t take that long, but I wanted to talk theory a little more so you get a whole new post for the ending.)
Picture from Suns, another Kreis game published by CLOAD.
I had a TRS-80 that didn’t turn on; the trick here was something from earlier that I thought was a red herring. Back where you pull a white lever to open a secret door, you die by turning the red knob…
YOU HAVE ENTERED A SECRET UNDERGROUND CAVERN. THE LIGHT IS DIM HERE, BUT YOU CAN MAKE OUT A PATH GOING WEST.
-W
YOU ARE IN A VERY DIM UNDERGROUND CAVERN.
A RED KNOB, A WHITE LEVER, AND A GREEN SWITCH ARE ALL ON THE NORTH WALL.
-TURN KNOB
SUDDENLY THE CAVERN STARTS SHAKING, THE WALLS AND CEILING GIVE WAY, AND ROCKS START FALLING. HOW NICE. YOU ARE KILLED AND BURIED AT THE SAME TIME.
GAME OVER. START OVER (S), STEP BACK (B) OR QUIT (Q)?
..and if you try to FLIP SWITCH, it just breaks off the wall.
-FLIP SWITCH
AS YOU FLIP THE SWITCH, IT BREAKS OFF FROM THE WALL AND FALLS TO THE FLOOR.
This feels like the “there are three buttons, only one is useful, the other two do nonuseful things and/or kill you” pattern I’ve seen elsewhere (including in the other Kreis game) so I stopped thinking about the switch past that.
Getting back to the main action…
…after INSERT DISK, you can also INSERT the SWITCH too.
-INSERT DISK
O.K.
THE DISK FALLS TO THE FLOOR, LOOKS AROUND FOR A SECOND – SPOTS THE TRS-80 DISK DRIVE, YELLS “OH BOY!” AND JUMPS INTO THE DRIVE!
-INSERT SWITCH
O.K.
THE SWITCH FALLS TO THE FLOOR, LOOKS AROUND FOR A SECOND – SEES THE TRS-80, YELLS “OH BOY!” AND JUMPS ONTO THE COMPUTER EXACTLY WHERE IT BELONGS!
-FLIP SWITCH
SUDDENLY THE TRS-80 COMPUTER COMES TO LIFE! AN AUTOMATIC BOOT PROGRAM LOADS IN, AND THEN THE SCREEN FLASHES,
“PRESS ENTER FOR DOOR: “
PRESS ENTER will open the closed door to the east, although there’s one more obstacle.
YOU ARE IN A ROOMS WITH A SMALL GLASS CUBICLE TO THE NORTH. IT HAS A GLASS DOOR ON THE FRONT.
THE DOOR IS OPEN.
A VERY LARGE MULTI-GIRAFFE-LEGGED, FLAT FACED, ONE GREEN-EYED, ELEPHANT NOSED, HAIRY CREATURE IS HERE, STARING AT YOU HUNGRILY AS IF IT HAD NOT EATEN FOR YEARS!!
After all the creatures going back to Death Dreadnaught that you couldn’t shoot with a normal gun, this was highly satisfying:
-SHOOT CREATURE
YOU SHOOT THE CREATURE. HE IS VAPORIZED INSTANTLY. (WHAT DO YOU KNOW? IT ACTUALLY WORKED!!!!!!!!!!!!!!!!!!!!!!!!!!!!!!!!!!!!!!)
The pattern of nonviolence in old adventure games (due to ATTACK X generally not being much of a “puzzle”) still continues, just as a reversal of the pattern that had been holding where just shooting the thing won’t work. It honestly came off like a themed ending to the trilogy.
YOU ARE INSIDE OF THE GLASS CUBICLE.
-S
YOU HAVE JUST STEPPED OUTSIDE OF THE TELEPORTATION ROOM. YOU LOOK AROUND, AND YOU SEE PEOPLE ALL OVER! THIS PLACE IS YOUR REAL PLANET! YOU WALK WITH SOME OFFICIALS TO A BUILDING, AND ASK THEM WHY THEY DESERTED THE OTHER PLANET. THEY EXPLAIN THAT SOME CREATURES THAT YOU MUST HAVE ENCOUNTERED GOT TO THEIR PLANET AND STARTED DESTROYING EVERYTHING. SO THEY HAD TO MOVE SOMEPLACE ELSE, AND THEY DID SO USING THE TRANSPORT CHAMBER THAT YOU USED. THE OFFICIALS ALSO MENTION THE FACT THAT THEY ARE SURPRISED THAT ANYONE COULD HAVE MADE IT THROUGH TO THE TRANSPORT. EVERYONE CONGRADULATES YOU!!!!!!!!!! YOU MADE IT!!!!!!!!!!!!!!!!!!!!!!!!! (GREAT FEELING, RIGHT?)
I’m a little unclear on the lore — surely we would know the way to our “real planet”? We landed on a fake planet somehow, then moved over to the real one?
A recent map by the author he made while replaying the game.
Returning to the switch puzzle a moment–
I’d say it has a positive and a negative part at the same time. On the positive end, I liked the idea of messing with the two-deadly-buttons-out-of-three concept to have one of them end up being seemingly useless but end up in a puzzle later. On the other hand, the game diverges into straight-out fantasy there, when none of the rest of the series has quite done that (there’s a torso screaming about wanting to die in Death Dreadnaught, but that’s still within the bounds of weird-science-sci-fi). There’s some signaling with the disk talking and jumping into the computer, but that came across to me as an isolated joke (like getting lost in RAM in Adventureland or getting your vision blocked by garbage characters in Takara Building Adventure). Alex hinted that the switch was the key and there really wasn’t anything else to do; it certainly was a solvable puzzle given it’s the only extra object in the game. I still ended up (for that specific puzzle) on the negative side, but I want to emphasize that while I’m pointing out mostly objective things, the scale of my actual reaction is subjective. (When a game “scores” both a 5 and a 9 from different outlets, I sometimes find it’s because both reviewers noted the same positive and negative design elements, but the negative which overwhelmed one person’s gameplay was a minor irritant to another.)
Alstair asked about if the “step back” feature would have changed my thoughts on the original game. It’s hard for me to be sure; at the very least, the design of the first game is oriented around restarts. There’s a passage described as hot; you’re supposed to avoid it and go a different way; doing this properly (even if you step in the trap to document things later for, say, a blog post) gives more satisfaction just because not having to replay to the same point is a “reward”. The choice of wrong rod near the end probably would break the back up system anyway (requiring you make a choice and go all the way back to the ship) but assuming it didn’t, it wouldn’t make the false choices less tragi-comic. However, it would be a very rare taste indeed to prefer this, and certainly on the balance I’d rather have an undo option. I just try to keep conscious — especially as someone documenting the history of old games — what gets lost in the process.
Escape from the Robots, the third Kreis game published by CLOAD. This is a port of the classic Robots/Daleks game; unfortunately, it’s still unknown who wrote the first version.
Still coming up: As promised, the wild tale of Enix and their unusual first adventure game.
Alex Kreis, the author of Domes of Kilgari, recently dropped notice that back in 1982 he had written a sequel, and rescued it off an old disk. (You can find it on Github here.) I was able to talk to him further so I can give the story of how both games came to be; The Missing People was technically published, but as far as Alex remembers it sold one (1) copy. To take the history back to the beginning:
Alex Kreis first had exposure to programming through a class at his school (in California) which had access to a Unix mainframe via a teletype. Beyond the use in class, it was possible to pay for computer time, and his parents were happy to handle the bill. As part of his teletype experience he ran across Crowther/Woods Adventure (other than one other game which I’ll talk about shortly, it was the only adventure game he had played prior to writing his own games). One month he ran up a $47 bill which was “a lot of money” for the late 1970s, and his parents realized that with a personal computer he wouldn’t be racking up monthly charges. They sold their family’s upright piano to contribute to buying a TRS-80 (4K) which steered Kreis on his journey to becoming a professional programmer.
Kreis spent his own money on upgrades, including going from 4K to 16K of memory in 1979.
He was local to CLOAD in Santa Barbara and started publishing games through them, beginning with Stars in their January 1980 issue.
Screenshot from Stars. This is essentially a port of Atari’s Space Race from 1973, their arcade game follow-up to Pong. Alex did not know the game but rather it was described to him by the editor Dave Lagerquist. More details at an interview here.
In the same year he had noticed (with a friend of his, Warren) an ad for Death Dreadnaught. This had fairly unique advertising that leaned to the sensational, claiming a rating of R for “EXTREME depictions of VIOLENCE”.
Via 80-U.S. Journal, September/October 1980.
The game was published with pseudonyms (“Biff Mutt” and “Spud Mutt”) and Kreis didn’t even know the real authors until I mentioned them in an interview (Robert and Richard Arnstein). Robert Arnstein normally published directly with Radio Shack (including famous games like Bedlam and Xenos) but put this one through the The Publisher’s Guild, likely just because Tandy wouldn’t go for all the gore. For the owner of The Publisher’s Guild (Bob Lidell), self-professed huckster, this was entirely up his alley.
THE DISMEMBERED ARM ACTIVATES THE FINGER PRINT LOCK OPENING THE DOOR AND REVEALING A HUGE MULTILEGGED FLAT-FACED, ELEPHANT-NOSE, ONE-EYED CREATURE PERCHING ATOP A BLOODY MESS. THE CREATURE REALIZES IT HAS BEEN FREED, GRABS YOU AND RIPS YOUR HEAD OFF, PUTS IT ON A STRING, AND WEARS IT AROUND HIS NECK AS GOOD LUCK CHARM TO WARD OFF EVIL.
(Note we had the same death in The Lazurite Factor, the game I just played! Clearly it built up a fanbase.)
The game was unique in that it mostly was dedicated to building atmosphere and delivering the occasional instant death, but only having really one puzzle, where in order to defeat a creature you give it your gun.
THE CREATURE GRABS THE GUN. HE EXAMINES IT CURIOUSLY AND PRESSES A HIDDEN LEVER. THE GUN SELF-DESTRUCTS DESTROYING THE CREATURE AND RUINING HIS DAY.
Alex (and Warren) ordered the game, shared the tape, and it, and hatched the idea “it would be really fun to write a sequel.” Alex called The Programmer’s Guild directly (that is, Bob Lidell) and asked if he’d have interest in a sequel; Lidell responded yes, hence the genesis of The Domes of Kilgari. (This explains one of my questions back when I played it, because the game includes a direct reference to the same monster you give a gun to in the first game. In the sequel, giving the gun kills you. So it was written as a sequel, but in a semi-unofficial way.)
There is another direct reference, as there’s a moment in Dreadnaught where you can get a tank of what looks like O2 except the first part is removed, and the tank is really CO2; if you try to hook the tank up to your ship you die. He echoed this with the puzzle at the end of Kilgari which has you picking a rod to put into the ship; if you grab the first rod you see, it won’t be the right one and will kill you. (He hadn’t read any gamebooks like Choose Your Own Adventure; this was entirely riffing off of Death Dreadnaught as the inspiration.)
He received something around $1300-$1400 total for the product (mostly re-invested into the computer); he asked Bob Lidell about making a follow-up sequel; Bob said yes, but when Alex sent the game in, he heard nothing back at all. 1982 was when The Programmer’s Guild was bailing from TRS-80 games altogether (a Commodore 64 book was still upcoming, but they mostly licensed their TRS-80 programs to other sellers by this point). Alex Kreis ended up advertising the game himself in CLOAD in their August 1982 issue. He used a company name he had used before to sell BASIC programs, Superior Software.
This means the game was “published”, but as mentioned on the top, he only remembers selling one copy. He did not recoup the $50 he paid for the ad. Hence the game essentially went missing until quite recently when Alex started pulling out his old TRS-80 materials.
This adventure was written in 1982 and is the sequel to The Domes of Kilgari text adventure, although it is not really necessary to have played the earlier adventure in order to play this one.
We’ve managed to escape the deadly planet of Kilgari, arriving on your home planet, only to land in another life-or-death scenario.
You take a quick look around and discover that NOBODY is here. Where are all your people? What has happened to them??
Rather like Dreadnaught (moreso than Kilgari) this game tries for “environmental storytelling”, that is, including plenty of rooms that are there just for building the plot rather than serving a particular puzzle purpose.
YOU ARE IN THE WEST SIDE OF THE SHIP TAKEOFF/LANDING TERMINAL. YOU NOTICE THAT SOMETHING IS VERY STRANGE HERE. THERE IS NOBODY ELSE AROUND, WHEN THE PLACE SHOULD BE PACKED!
-E
YOU ARE IN THE EAST SIDE OF THE TERMINAL. THERE IS NOBODY HERE EITHER.
A meta-map first of the environs:
The Underground and City are available at first; an item from the City is needed to get past the Highway and to the Futuristic City.
The regular map of the starting area.
Going to the underground part first, the opening obstacle is a room with a red knob, white lever, and green switch. The green switch falls off the wall, the red knob kills you, and the white lever opens a secret passage. There isn’t a clue or anything: this is just a random choice. What makes this feel much different from Kilgari is that the game offers an “undo” style option.
YOU HAVE ENTERED A SECRET UNDERGROUND CAVERN. THE LIGHT IS DIM HERE, BUT YOU CAN MAKE OUT A PATH GOING WEST.
-W
YOU ARE IN A VERY DIM UNDERGROUND CAVERN. A RED KNOB, A WHITE LEVER, AND A GREEN SWITCH ARE ALL ON THE NORTH WALL.
-TURN KNOB
SUDDENLY THE CAVERN STARTS SHAKING, THE WALLS AND CEILING GIVE WAY, AND ROCKS START FALLING. HOW NICE. YOU ARE KILLED AND BURIED AT THE SAME TIME.
GAME OVER. START OVER (S), STEP BACK (B) OR QUIT (Q)?
Thus, you can treat the death more like one in a Choose Your Own Adventure story where you peek ahead at a choice to read a colorful death and flip back to where you start to move on. (Again, the author had no gamebook experience, I’m just making a comparison of how the effect feels on gameplay.)
-PULL LEVER
YOU NOW NOTICE THAT A PASSAGE NORTH IS REVEALED!
-N
YOU HAVE ENTERED A SECRET PASSAGE. THE ROOM IS WELL LIT FROM SOME HIDDEN LIGHT SOURCE. A TUNNEL GOES WEST, AND ANOTHER GOES DOWNWARD. YOU COULD GO DOWN IT, BUT IT LOOKS AS IF YOU WILL NOT BE ABLE TO MAKE IT BACK UP.
If you go down the tunnel, this will trap you in a room with a creature who blocks your way.
YOU HAVE ENTERED A SECRET PASSAGE. THE ROOM IS WELL LIT FROM SOME HIDDEN LIGHT SOURCE. A TUNNEL GOES WEST, AND ANOTHER GOES DOWNWARD. YOU COULD GO DOWN IT, BUT IT LOOKS AS IF YOU WILL NOT BE ABLE TO MAKE IT BACK UP.
-D
YOU ARE IN ANOTHER SECRET PASSAGE. ANOTHER TUNNEL LEADS DOWN, AND IT LOOKS AS IF YOU WILL NOT BE ABLE TO GET BACK UP THIS ONE EITHER.
-D
YOU ARE IN A SMALL ROOM.
A VERY LARGE MULTI-GIRAFFE-LEGGED, FLAT FACED, ONE GREEN-EYED, ELEPHANT NOSED, HAIRY CREATURE IS HERE, STARING AT YOU HUNGRILY AS IF IT HAD NOT EATEN FOR YEARS!!
-W
THE CREATURE WILL NOT LET YOU PASS!
This is a softlock and you have to restart the game. You can try to KILL the creature to trigger the “STEP BACK” mechanic…
-KILL CREATURE
YOU ATTACK THE CREATURE. HE GETS VERY UPSET AT YOU AND SWATS YOU ONE. UNFORTUNATELY, HE DOES THIS SO HARD THAT IT KILLS YOU. GAME OVER. START OVER (S), STEP BACK (B) OR QUIT (Q)?
…but it will only step back as far as still being in the room with the creature and no way out. This is the only major softlock in the game; however, it does seem engineered to trick players into falling for it.
Past the drop and some more rooms you can find a “strange tool”, followed by yet another one of the creatures. With only one item in stock, I tried THROW TOOL and died.
YOU ARE IN A SMALL VALLEY.
A VERY LARGE MULTI-GIRAFFE-LEGGED, FLAT FACED, ONE GREEN-EYED, ELEPHANT NOSED, HAIRY CREATURE IS HERE, STARING AT YOU HUNGRILY AS IF IT HAD NOT EATEN FOR YEARS!!
-THROW TOOL
O.K.
THE CREATURE GRABS THE STRANGE TOOL AND EXAMINES IT CLOSELY. HE PULLS A HIDDEN LEVER, SEES THAT THE TOOL IS ABOUT TO VAPORIZE HIM, AND QUICKLY TOSSES IT BACK TO YOU! THE TOOL THEN VAPORIZES YOU INSTANTLY. AS YOU DIE YOU CAN HEAR THE CREATURE LAUGHING HYSTERICALLY IN THE BACKGROUND.
GAME OVER. START OVER (S), STEP BACK (B) OR QUIT (Q)?
Using STEP BACK doesn’t trap you in, though. With the tool you can loop back over to the first creature and try the same trick, who apparently isn’t as educated as the second one.
THE CREATURE GRABS THE STRANGE TOOL AND EXAMIMES IT CLOSELY. HE PRESSES A HIDDEN LEVER AND THE TOOL VAPORIZES HIM INSTANTLY. A FEW MOMENTS LATER THE TOOL RE-ASSEMBLES ITSELF.
Past the creature is a “strange rod”; you can throw the strange rod at the creature who previously outsmarted the tool.
The whole point of the sequence is to pick up a TRS-80 DISKETTE. This will get used at the end of the game. For now, let’s swerve back to the city portion of the game.
YOU ARE AT THE TOP OF A HILL. TO THE EAST, IN THE DISTANCE, YOU CAN SEE BUILDINGS. IT APPEARS TO BE A CITY.
-E
YOU ARE AT THE ENTRANCE OF THE CITY. AN EMPTY ROAD EAST LEADS INTO THE MIDDLE OF THE CITY. ANOTHER PATH LEADS WEST.
-E
YOU ARE RIGHT IN THE MIDDLE OF THE MAIN STREET OF THE CITY. ROADS LEAD NORTH AND EAST.
-N
YOU ARE IN SHOPPING CENTER AREA OF THE CITY. ALL THE DOORS AND WINDOWS OF THE BUILDINGS ARE SHUT AND LOCKED.
Again, lots of “atmosphere building” rooms; none of these rooms are strictly “necessary”; you can’t sneak into any of the locked buildings in the shopping center. Just north is the “outskirts” which does have one shop you can go into, and get zapped by a LASER DEFENSE SYSTEM.
YOU ARE AT THE NORTH/WEST OUTSKIRTS OF THE CITY, AND ALL THE BUILDINGS ARE LOCKED EXCEPT FOR AN “UNUSUAL WEAPONS SHOP” TO THE WEST.
-W
YOU HAVE ENTERED A LASER GUN SHOP. A PASSAGE GOES NORTH. A LASER DEFENSE SYSTEM IS HERE, IN FULL OPERATING ORDER!!!!!!!! YOU ENTER THE ROOM, THEN SUDDENLY SOME LASERS MOUNTED IN THE WALLS TURN TOWARD YOU AND FIRE! YOU ARE VERY FAST, DODGING ALL OF THE LASERS, BUT YOU HAVE NO DEFENSE! ZAAPPP!!!! YOU GOT TIRED OUT, AND WERE KILLED.
GAME OVER. START OVER (S), STEP BACK (B) OR QUIT (Q)?
Giving the overall map…
…two easy stops to make are down a “side street” to pick up a KNIFE and a DEAD END to pick up a STRANGE BALL.
THIS IS THE UPPER CLASS CITY AREA. A PATH LEADS EAST AND SOUTH.
-E
YOU ARE IN A DEAD END.
A STRANGE BALL IS HERE, GIVING OFF A STRANGE ENERGY GLOW!
-GET BALL
AS YOU PICK UP THE BALL, IT GIVES OFF A TREMENDOUS AMOUNT OF INTENSE ENERGY! YOU ARE BLINDED FOR A SECOND–AS THINGS BEGIN TO CLEAR UP, YOU SEE THAT THE BALL IS NO LONGER HERE! BUT YOU NOTICE THAT NOW YOU HAVE MUCH MORE ENERGY, AND YOU FEEL STRONG AND QUICK!
Going into what the game describes as a “SLUMMY” area you can find an alley with an abandoned bus, and a coin at the back of the bus. If you try to leave, a mugger will take the coin from you unless you have a knife. This is the only one of the “missing people” that appears. Maybe they’re all hiding from the mugger.
SUDDENLY A MUGGER JUMPS OUT FROM BEHIND A BUSH, LOOKS AT YOUR SHINY COIN, AND ALSO LOOKS AT YOU BRANDISHING YOUR SHARP KNIFE AT HIM, AND HE RUNS BACK INTO THE BUSHES.
Going down from the place the mugger appears, you can find a RECTANGULAR PLATE in a basement, and a cryptic phone booth. The coin goes in the phone to get a hint.
To get the actual hint you need to follow the prompt and HEAR THOUGHTS. It doesn’t seem like that great a hint, since a normal player would be trying to get past the highway (which you’ll see in a moment) anyway?
YOU THINK FOR A SECOND – THEN A THOUGHT COMES INTO YOUR MIND. IT IS, “ESCAPE IS BEYOND THE ROAD.”
With the rectangular plate in your inventory, and with the power from the mysterious ball, you can take down the security system at the laser store.
If you haven’t energized yourself the game says you are too slow and you die. It’s easy to back out, though.
With the protection defeated you can pick up a LASER RIFLE and shoot anything you want to, more or less. This includes key items
THE AMAZING WEAPON VAPORIZES THE (THING) INSTANTLY.
This does not allow for the backtrack mechanic but at least it takes some intentionality to land in this softlock. The first thing the weapon goes to is the long-promised highway. I wonder if Mr. Kreis was having issues with California traffic.
YOU ARE AT A HIGHWAY CROSSING. A PATH NORTH LEADS AWAY, AND ONE SOUTH LEADS ACROSS THE ROAD. IT LOOKS KIND OF DANGEROUS TO CROSS IT.
-S
YOU ARE ON THE NORTHERN LANES OF THE FIVE LANE HIGHWAY. IN THE DISTANCE YOU SEE THE FRONT END OF A CAR COMING STRAIGHT AT YOU AT A HIGH RATE OF SPEED!
-SHOOT CAR
YOU WHIP OUT THE RIFLE, QUICKLY AIM AND PULL THE TRIGGER. YOU SEE A RUBY RED BEAM OF LIGHT JUMP FROM THE BARREL OF THE LASER TO THE CAR, WHICH THEN EXPLODES IN A BRILLIANT FLASH OF LIGHT!!
Oh, I guess that was a second missing person, huh? Except now they’re missing for a different reason.
On to Futuristic City!
YOU APPEAR TO BE ENTERING A FUTURISTIC TYPE CITY, AND IT APPEARS TO BE A GHOST CITY. THERE IN NO ONE IN THE STREETS!
-S
YOU ARE RIGHT IN THE MIDDLE OF THE FUTURISTIC CITY. FUNNY – NO ONE IS HERE, AND ALSO THIS CITY DOES NOT LOOK FAMILIAR TO YOU AT ALL.
To the east are buildings marked as belonging to Tandy, including a welding building and a power building. The power building has a control box that is locked, but the key is fortunately not far: head through Manufacturing and Customer Service and you can follow the path to a beach, which has an old key.
YOU ARE IN THE QUICK EXIT OF THE CUSTOMER CENTER. THIS WAS TO BE USED BY EMPLOYEES IN CASE OF ABUSIVE CUSTOMERS. HALLS GO NORTH AND EAST.
-N
YOU ARE OUTSIDE OF THE PLANT, AND FROM HERE YOU CAN SEE THE
ENTIRE INDUSTRY SECTION OF TOWN.
-E
YOU ARE ON AN EAST/WEST DIRT ROAD.
-E
YOU ARE AT THE BEACH. A PATH WEST LEADS AWAY.
AN OLD KEY IS LYING NEARBY.
The old key unlocks the power box and you can push the button to turn on all the power to the city. (You can also close and lock the box again, if you so feel inclined.)
Heading west instead, there’s a “large building” with a wall that blocks your way early. Fortunately you still have a Big Gun.
YOU ARE STILL IN THE CITY. TO THE WEST IS A LARGE TOWERING BUILDING, AND A PATH LEADS EAST.
-W
YOU ARE INSIDE THE LARGE BUILDING. IT APPEARS TO BE A COMPUTER ORIENTED BUILDING, AS EVERYTHING LOOKS COMPUTERISTIC.
THERE IS A STRANGE WALL BLOCKING A PATH WEST.
-SHOOT WALL
THE AMAZING WEAPON VAPORIZES THE WALL INSTANTLY.
-W
YOU ARE IN A STAIRWAY.
The stairway leads up to a roof where you can get a view of the city (just atmosphere) and down to computer rooms. In one of the rooms is a TRS-80. The DISK from underground seems to go here.
-E
YOU ARE IN A HALL WITH MANY COMPUTERS ALL AROUND. NONE OF THESE COMPUTERS LOOK LIKE THEY MIGHT WORK.
-E
YOU ARE IN ANOTHER HALL WITH MANY COMPUTERS AROUND. NONE OF THESE LOOK CAPABLE OF WORKING EITHER.
-S
YOU ARE IN A SMALL CHAMBER. TO ONE SIDE LIES AN OLD TRS-80 MODEL I MACHINE WITH AN EXPANSION INTERFACE AND DISK DRIVE. IT MIGHT WORK IF THE PROPER THINGS WERE DONE.
-INSERT DISK
O.K.
THE DISK FALLS TO THE FLOOR, LOOKS AROUND FOR A SECOND – SPOTS
THE TRS-80 DISK DRIVE, YELLS “OH BOY!” AND JUMPS INTO THE DRIVE!
I say “seems” because I can’t get anything to happen past this point. There’s a closed door in the room to the east that I assume the computer is intended to open but it doesn’t open even with the power on and the disk inserted.
YOU ARE IN A ROOMS WITH A SMALL GLASS CUBICLE TO THE NORTH. IT HAS A GLASS DOOR ON THE FRONT.
THE DOOR IS CLOSED.
-N
YOU CANT GO THROUGH A CLOSED DOOR!
-OPEN DOOR
THE DOOR CANNOT BE OPENED MANUALLY.
You can try vaporizing the door; a creature comes out and kills you. I am guessing I am close enough to the end that this is going to be a “update my blog post with the ending” type deal rather than making a whole new post about the ending, but when you’re stuck you’re stuck. I tried dumping the verb and noun lists and no dice; I’ve used all of them, and no novel nouns come up either. (The actual messages are not plaintext, so I can’t straight-out cheat.) No nouns seem to correspond with the computer, which seems particularly suspicious, and even though they aren’t listed, I tried start-a-computer verbs like BOOT and START with no luck.
Just judging based on what I saw, I did find the experience enjoyable and I liked some of the spots of storytelling-by-place. I found the game more fair than Domes of Kilgari in a modern sense but less atmospheric. This is hard to articulate, but reflects a point that’s come up here before: certain finesses that game authors did in the 80s sometimes would be completely against modern standards yet still served a gameplay purpose. The number of deaths in Kilgari (and lack of UNDO command) made the game more tense; I felt like I was descending into a crumbling structure which could (and did) fall apart at a touch. “Lonely city” can make for interesting atmosphere (see Xenos) but it didn’t loop in with the gameplay here quite as well, and the deaths being easy to undo gave it a light touch. (Again, I am not endorsing painful game design that arises from sudden-death-and-no-saved-games: I’m just saying that it served a particular purpose that needed something swapped in to compensate.)
Just a reminder that for any UK-based author, “TRS-80” may actually mean a Video Genie instead. Computer & Video Games, March 1982 issue.
This is another circumstance like Marooned where I bailed on a game because it was broken, and a reader (Rob Browning in this case) came in later to repair it. The Lazurite Factor’s file had some kind of corruption and couldn’t be run on the original hardware (TRS-80). The game was one of three that Browne wrote over the summer of 1982 and all of them give off a “private game” feel; somehow the games tumbled into the various archives so we have them now.
The Lazurite Factor in particular apparently was stored in GW-BASIC format, even though that’s for DOS, not for TRS-80. (The easiest way to run the program is to get GWBASIC for DOS, copy the LAZURITE.BAS file in the same place, run DOSBox, and start the program with GWBASIC LAZURITE.BAS.)
Despite the Atari here in this Italian manual, this was for IBM-compatible computers. Source.
(Trivia: the Original GW-BASIC source code was released by Microsoft to Github. It includes COPYRIGHT 1975 BY BILL GATES AND PAUL ALLEN and ORIGINALLY WRITTEN ON THE PDP-10 FROM FEBRUARY 9 TO APRIL 9 1975; that is, the code for the paper tape for Altair that Microsoft started their company with carried over to GW-BASIC.)
The game is mostly a remix of Argorath Adventure: you start in a random spot in an underground area and try to escape, you find various discs and insert them in slots to open up the map, and you use a beverage to dissolve an obstacle.
On the map above, anything on the north side (not past the dotted-line connections) is a potential random start point.
This room has blue tiled walls. There is a table against a wal
There is a red disc inside a safe with a slot in it.
This room is one of the goal points; you find a different color disc to put into the slot in order to get the red disc.
A small library, the books have decayed badly. There is a sign but it’s unreadable.
There is a bottle of lemonade in the middle of the room.
You can just drink the lemonade if you want, but it softlocks the game.
A room like nothing ever experienced before. There is a hit of some dark prescence.
There is a glowing lever on the south wall.
Pulling the lever here kills you.
You were transported inside a small fishtank full of water. Naturally you drowned.
(Note I’ve fixed weird spacing and carriage returns; there’s a fair chance some of that got mangled in the TRS-80 porting process so it wasn’t fair to include them.)
While wandering the halls, you will occasionally meet a monster. You can FIGHT if you want; this will give you experience points if you win. There seems to be no purpose to experience points other than a more congratulatory final message at the end of the game. (This is exactly like Argonath Adventure, and seems to be the exact same source code ported over.)
An esgaroth is lumbering towards you.
It is small
It is of average strength
It has eaten 35 adventurers & now it wants to eat you.
>? FIGHT
It staggered off and died in a pool of blue ooze.
Having the fight go the wrong way (more likely if you pick on one that’s “powerful” rather than “average strength”) kills you. Death messages include
It ripped your arms out of their sockets and you die of blood loss.
and
It tore your head off and put it on a chain to wear as a good luck charm.
The right path is to first grab the lemonade and the blue disc, and head to the east side of the map to a chasm.
There’s a slot there, where you can INSERT BLUE DISC and it will cause a bridge to appear.
A small subterranean structure, this is the first part of a vast underground network. There is a screen with a slot below it.
There is a chasm preventing you from going south.
>? insert blue disc
A bridge swung across the chasm.
>? s
There is a pungent puttylike substance blocking your path.
The substance is very similar to a puzzle from Argonath, except rather than using Irn Bru to get by you use lemonade. The tricky part is that USE LEMONADE isn’t understood (despite this being comparable to the syntax with the blue disc); instead, you type the word “USE” alone, and then afterwards specify you want to use the lemonade. We’ve seen many perils with the bespoke parser but I think this is a new one. (Not even Argonath had this issue: it has the player type USE IRN BRU in full!)
>? use
Use what? lemonade
The puttylike substance vapourises.
Past that, there’s a button you’re not supposed to push…
There is a small poster which says, ‘THE LAZURITE FACTOR By Danny Browne jnr’ stuck on a black slimy wall. There is a red button on a wall.
>? push button
The roof caved in on your head.
…and instead you’re supposed to swerve west and pick up a white disc and a rom cartridge.
This room was totally white but, an evil darkness has escaped from an air vent in the ceiling and floods the room.
>?w
This cave is separated into two bits. In one there is an air vent behind which is a fan.
There is a white disc lying on the floor.
>?e
This physics lab has lots of different computer bits and pieces strewn around. But mostly in a large heap.
An inconspicous ROM CARTRIDGE lies on the floor.
>?
With those in hand, you can now walk to the far west of the map and the safe.
The safe opens with the white disc, letting you get a red disc. One room to the east you can find a door with a slot that needs the red disc.
You are facing a blue door. There is a screen with a slot to the left of it.
>? s
The door is in the way.
>? insert red disc
The door opened.
Head south, push a button, and you’ve won.
There is a large red button jutting out of the ground. On the ceiling is an grate above which is a camera like object.
>? push button
You are teleported.
You have escaped with the valuable rom cartridge! You are RICH!
By the way, will you lend me a few million?
In isolation, not terribly impressive, but just remember this has the context of the author just noodling around trying to learn how to make adventure games (here, by scavenging the code from his previous game). Despite the text-munging being cleared up the code was still broken, with one line in particular leaving a comment:
2110 PRINT ” You are teleported. “: GOTO 1202 : REM ***** THIS IS PROBABLY WRONG!!
Rob Browning fixed this so the game is winnable, but the comment means this is a snapshot of a private game rather than something published.
Coming up: an unpublished game recently rescued by an author from an old disc, then we’ll return to Japan.
Long back when I first wrote about Roberta and Ken Williams and their first game (9 years ago), I mostly deferred the history to other authors like Jimmy Maher. More sources have come up since then, including new interviews and three books:
Throughout the 1970s in southern California, Ken Williams was driven by the Quest for More Money; he started as a computer “operator” before graduating to be a “programmer”, and from there hopped from job to job.
I remember needing to fudge how long I had been at each job, and leave out companies I had worked at, in order to minimize the number of companies for which I worked.
He would sometimes claim knowledge of whatever system or programming language was being used (when he had none) then get up to speed quickly enough with a cram session that it didn’t matter. This backfired for one job, involving assembling language for an IBM mainframe where the programming manager realized he couldn’t do the job, but he quickly managed to jump over to another company with a higher salary and the assembly knowledge he picked up in that window of time.
Despite Roberta Williams raising a child, she also started working with computers (with the simple calculus that two incomes makes more money than one); as she notes, while helping Ken during programming she picked up enough skills she didn’t need any training. In 1978 (while the pair was in Illinois) she took an operator job with the government; her boss originally wanted her to make coffee (she declined) and later type a letter (ditto); she had to firmly establish her job was computer operator, not secretary.
Their stint in Illinois was short lived, and they drifted back to California in 1979, where Ken and Roberta both picked up programming jobs (Ken at Informatics, and Roberta with the county as a COBOL programmer). Despite their attachment to California as a state, by now they were dreaming of a place away from Los Angeles.
There were plenty of reasons; but mostly it boiled down to our saying, “Wouldn’t it be nice to live in the woods?” Our second son, Chris, was born in May of 1979 and our eldest, DJ, would soon be six years old. Did we want him growing up in Los Angeles schools, where we worried about drugs and violence? Plus, the drive time was killing me. I was spending multiple hours a day sitting in Los Angeles traffic.
To really make the kind of money Ken needed (and the flexibility of location) he needed to found his own business. He had meetings with a colleague from Informatics (Bob Leff) where he tossed around ideas of what could be done with these new “personal computers” emerging from the market. In particular, he noticed how a company called Microsoft had done well for themselves selling a version of BASIC, and wondered about selling other (more capable) programming languages for home machines.
Roberta got Ken an Apple II computer for Christmas 1979, and in January he (along with Leff and others) started work on a Fortran compiler, with the notion of commercializing it. Around the same time, while Ken was using a home teletype (to connect to remote mainframes), he discovered a program, ADVENT (Crowther/Woods Adventure).
You are standing at the end of a road before a small brick building. Around you is a forest. A small stream flows out of the building and down a gully.
From the 1989 La Aventura Original version.
After some struggle getting it to work, he came across GO BUILDING.
You are inside a building, a well house for a large spring.
There are some keys on the ground here.
There is a shiny brass lamp nearby.
There is food here.
There is a bottle of water here.
He showed it off to Roberta.
This was getting very interesting. Roberta was nearby in the kitchen, so I called her over to the computer. She read over my shoulder and then pushed me aside. She wanted to try. I was not happy! I had just gotten rolling and she took away my toy.
According to Ken, she started “ignoring the world around her”; quoting Roberta:
I began playing it, became obsessed with it, had to play it, had to solve it, did and then decided that I could design my own game after playing it.
Roberta wanted to keep going, using the Apple II; she got a hold of some Scott Adams games as well as the otherwise-obscure Journey by Steve Baker; the latter has the feature of “hang yourself by your own rope” style comedy deaths which strongly resemble the ones that would become a signature of Sierra games.
Part of the map of Journey. At the alley behind a police station you need to open a manhole to get into some sewers, but it’s possible to loop back around and land in the police station itself. Escaping through a window, you die by falling in a manhole that some fool adventurer had accidentally left open.
She worked out a game of her own on the kitchen table and set-up a date to reveal her creation; according to Ken:
She tried to show me what she was working on a few times but I was busy and never really focused on it. I was keeping busy working on my compiler in addition to working both a full-time and several part-time jobs.
And then, one Saturday night, our lives took a dramatic turn when Roberta said she wanted to take me to dinner and had a surprise for me. I had no idea what the surprise could be. We made reservations at a fancy steakhouse (The Plank House) and arranged a babysitter.
Whatever it was she wanted, it seemed to be important to Roberta.
At dinner, Roberta laid out her idea for an Adventure Game of her own. Roberta was envisioning a game, to be called Mystery House, which would be loosely derived from a combination of Agatha Christie’s novel, “And Then There Were None” and the board game “Clue.” In Mystery House there would be eight people, locked in a house, and murdered one by one. As Roberta was describing the killings, I was trying to hide under the table. Roberta was using words that are not typical during a romantic dinner, like: “kill,” “murder,” “gun,” “knife,” “blood,” and “strangle.” The couple at the table next to us was overhearing pieces of the conversation and could see Roberta across the table animatedly and loudly saying things like, “Wouldn’t it be great if I could give him an icepick in the eye?”
Continuing the conversation at home, Ken wondered if graphics would be possible. This was non-trivial; while Atlantean Odyssey had full graphics the year before, these were “character graphics” on a TRS-80 (and the game was the kind sold in baggies in a single store so nobody had heard of it yet besides). Roberta thought it would be “fun to try” and Ken decided to take a break from his compiler project for “a few days” to see what he could make.
Roberta started drawing pictures; in the meantime Ken tried to devise a way to store graphics on a single disk. Visiting a computer store, he came across the Versawriter.
I have a timestamp cued up to a demonstration of the device on video (including unboxing from the original packaging)!
(As pointed out in the video, Apple had their own more-capable art tablet including a pen, but the Versawriter was half the price, and Ken was still unsure how much video games were going to sell.)
The Versawriter, by default, stored “medium” and “high-res” pictures in a pixel-based format; as the manual states, a standard diskette will store 10 high-res pictures. This is on a disk with only pictures, no program! The format was too large for the purposes of an adventure game, so Ken Williams designed a setup to store images in “vector” format instead, specifying points and lines that would essentially re-create the process of drawing a picture every time it showed up on screen.
Ken wanted the process to allow “multi-tasking”, that is, he wanted the game code to be a separate entity from the program code so that Roberta could work on the game separate from Ken’s work on the program. The program was initially written on paper and typed in as a combination of a light “database” format (VERB 1, for instance, was GO/ENTER/RUN/EXIT/LEAVE/WALK) and a message file which was simply a list of text strings. This point is important and will come up later.
Ken still thought the Fortran compiler would be the way to fortune. While visiting Rainbow Computing in Northridge and hyping his product, he also showed a demo of Mystery House in progress.
Gene Sprouse in 1980. He was one of the owners of Rainbow Computing and was present at the Mystery House demo. He’s shown here giving a prize here to young Harvey Shapiro who won a Softalk contest (source).
It was a showstopper. Everyone in the store gathered around the computer and watched. They all wanted to type. I didn’t want them anywhere near the computer because I knew how fragile the game was. Type the wrong thing and the game would crash. Unfortunately, I couldn’t hold people back. Everyone wanted to try typing into the game.
Prior to this, he considered the project a “distraction”, but he realized now he had something much bigger. He tried shopping the product around for distribution; Programma (publishers of the original version of Goblins) offered a 25% royalty with an estimate of $9000 over six months, which was more than double the amount the Fortran compiler was projected to earn. He also tried selling the game direct to Apple, but after sending a copy he got no reply after a month (they did eventually respond with interest, but only a year later).
Ken and Roberta decided to first sell the game on their own, and go to Programma if it didn’t work.
This involved both shoe leather hustle, getting the product (baggie, one sheet, disk) hanging in stores, and print advertising. John Williams (Ken’s younger brother) was at school in Illinois and was asked to show the game around (while having essentially no computer background at all). Quoting him writing in 1990:
The product was, as those familiar with the story know, Mystery House. I examined the package as soon as I got it, and it claimed that what I would find inside was a computer game.
To be honest, this surprised me. Ken didn’t have a fun bone in his body back then (he was a chronic workaholic). I’d have expected it to be a database or a compiler (whatever those were). Anyway, I took it to the Computerland in Downers Grove, Illinois the next day.
I arrived on a Saturday to find the store full of people, and the retailer was a bit irked because this was a big sales day for his little store, but [he] decided to help me out anyway. He pulled the diskette out of the baggie and helped me boot it up, and what appeared on-screen was a game called Mystery House. I had seen text-based adventures and in fact had spent a summer playing them on a mainframe terminal with Ken and Roberta a few summers before, so I quickly got the hang of how to play the game.
I drew an immediate crowd around the small green screen. Almost as an afterthought, I told the retailer I had some copies, and would he be interested in selling them. Before I left that day, we had sold all ten copies at about $25 a copy, and I had gotten through about 10% of the game. After I discovered that retailers liked what Ken had to offer, I made it a habit to visit computer stores as often as I could. In fact, over the next months I pinballed everywhere I could reach, like Wisconsin and Indiana, and that summer I started south and didn’t stop until I hit ocean, then went west and got as far as Denver. Before the summer was over, I’d hit eleven states.
For print advertising, they dropped an ad in MICRO magazine, their May 1980 issue…
…and included were two games written by a friend, Trapshoot and Skeetshoot (the friend is credited as “Kieth Yilt” on Trapshoot and “Kieth Wild” on Skeetshoot; the games are insanely rare and only one authentic copy of Trapshoot is known to exist).
Their phone started ringing constantly; they made $11,000 in May. For the next issue of MICRO, they reprinted the same ad, and made roughly double. For the issue after, they printed a new ad:
In addition to starting to sell the graphical tools Ken developed to help make Mystery House, the ad has one important addition: French
version available upon request.
And now we finally get to the protagonist of today’s story, Tom Nalevanko.
Nalevanko grew up in the Pittsburgh area and got a Bachelors in Mathematics in 1969, followed by a Masters in mechanical engineering from Penn State. He followed this with moving to Los Angeles to work at Hughes on a fellowship, where simultaneously getting yet another degree (a master’s in engineering) from UCLA. He stayed in Los Angeles until 1974 before going to Paris, where he lived and worked for five years, still working for Hughes. I haven’t been able to find out exactly what project he worked on in Europe, but my guess would be (given his career afterwards) he was working with NATO to coordinate with satellite information. (By this time, NATO’s system was using the Hughes H5118ME computer, each with a luxurious 1 megabyte of memory, and each with a cost of $300k to $400k.)
After this, he went back to the Los Angeles area to form a computer store, Malibu Computing. Here’s an ad from Micro December 1980, and there’s an important item on the bottom:
Zooming in a little:
SIVEA was one of the big computer stores in Paris at this time. By 1984, SIVEA had three locations in Paris, as well as stores in Lille, Nantes, Bordeaux, Cannes, Rouen, Lyon, Montpellier, and Nice.
Nalevanko kept his ties with Europe, including in his later companies. He founded Funsoft in 1982 (with arcade-style games like Flak: The Ultimate Flight Experience and Snokie), but got into financial difficulties (“our bank account was down to $100”) but knew one of the Apple people (Alain Rossman) from his time in Paris; he reached out and got development tools for the Macintosh early, switching his company name to Mainstay with more a focus on programming and utility software.
We were interested in doing serious software, and the Mac seemed to be the second serious rebirth of the personal computer. The IBM PC — I didn’t believe in it. At the time we had one full-time programmer, Yves Lempereur from Belgium, and he didn’t want to work on the IBM PC either.
Mainstay kept a development group in Brussels, which kept up by e-mail and “large phone bills”.
We have a product marketing manager there, and we all attend the major Mac trade shows. Also we do cross-localization — U.S. products are localized for Europe in Belgium. In Japan our distributor does the localization.
Returning back to the main product at hand, Mystery House, Nalevanko must have encountered it quite early (very plausible running a computer store in the LA area); on his own initiative he contacted Ken Williams. From my own correspondence with Ken:
He wrote to me. That said, I don’t remember how he would have written to me in the days before email — so, maybe he telephoned me, or found me at a computer show. I don’t remember, but I wouldn’t have contacted him.
Ken did not provide source code, and he thinks the translation was done even before he got contacted. He would have needed the product essentially a month after product release to get it in the advertising in time. Pyramid of Doom had a similar genesis where the lawyer Alvin Files deconstructed the Scott Adams format on his own and sent a finished game; just this was on a much tighter time-table.
The major messages of the game are all in a TXT file and could be edited “straight”.
C’EST TROP HAUT
OK
C’EST SAM, LE MECANICIEN. ON L’A FRAPPE SUR LA TETE AVEC UN OBJET ARRONDI.
C’EST TROP LOURD.
TOUTES LES FENETRES SONT BOUCHEES SAUF CELLE DE GRENIER.
VOUS VOUS TROUVEZ DANS LE JARDIN A L’ARRIERE DE LA MAISON.
IL VA FAIRE NUIT BIENTOT.
VOUS VOUS TROUVEZ DANS LE JARDIN A COTE DE LA MAISON. VOUS POUVEZ SUIVRE LA CLOTURE VERS LE SUD.
The “database” section is a little trickier; while no English terms were removed (so you can still refer to things by the English names) French synonyms were added; for example, according to the paper Inspecting the Mystery House, the NOTE from early in the game can also be called a LETTRE or a PAPIER. That same paper also claims
Different assembly source code fragments were captured on this disk image.
so that “Nalevanko must have had access to Mystery House’s source code to do his work” but … apparently not? He was a programmer used to fairly low-level code (see: Hughes computers) and with enough determination it would still be possible to tweak assembly code; we saw a similar high-wire act recently with Madhouse which was a straightforward “mod” of TRS-80 machine code to create a brand-new game.
However the work was done, it was an official port, and it did make its way over to French-speaking countries. Hugo Labrande located ads in France, Belgium, and Quebec; the earliest is from December 1980 by (who else) SIVEA, back when they only had one location in Paris.
Notice this also has the Malibu Microcomputing checkers program.
There’s an opening splash screen with color…
…but otherwise everything is black and white, like the original game.
Unfortunately (?) I remember the game too well to tackle it quite “from scratch” but I did attempt to replay it through. I’m going to switch to screenshot-with-commentary style with focus more on the translation than the original design (you can read my posts from 2017 for my original playthrough). One thing to note off the bat is that translation from English to French tends to increase the length of text; the translation service I just linked estimates 20-25% expansion, and another one also estimates 20% for English-to-French.
The original: YOU ARE IN THE FRONT YARD OF A LARGE ABANDONED VICTORIAN HOUSE. STONE STEPS LEAD UP TO A WIDE PORCH. The translation just refers to an “old English house” (rather than “large abandoned Victorian house”) and stone steps leading to a door (without mentioning a “wide porch”). I suspect this is already an instance where the translator was running out of text characters (since he was doing one-for-one swaps in the message file).
The original here is: YOU ARE ON THE PORCH. STONE STEPS LEAD DOWN TO THE FRONT YARD. The French has the player under (SOUS) the porch. The word “porche” can refer to a covered entrance, which is the reason for the confusion (in English, that’d imply you were under the floorboards). Note that the “WELCOME” is still in English — no graphics are changed in the game — and there’s a double period mark.
“NOTE” in English. You can refer to most things in the game in English, but the hack job on the parser meant a few things broke down.
The game displays a translation alongside the picture of the English text. Even if there was the time/ability to redo images, I’m not sure it would have been a good choice; if I was playing a game investigating a French manor with French texts lying around, I’d rather have the translation alongside to maintain the atmosphere. Also, FINDERS-KEEPERS was still being drawn when I took this screenshot.
This is where my first major issue of the game happened. This is west of the start. You are supposed to nab some MATCHES, a PITCHER, a BUTTERKNIFE; then you turn the sink on and fill the pitcher with water. The problem is I couldn’t turn the water on, and checking walkthroughs, they used WATER ON which isn’t understood.
I finally came across OUVRIR working. OPEN WATER does not work in the original. I was worried for a while the crack had broken the game, but I suspect it’s just the verb list being messed up slightly via the hacking needed to get the game to work. “ON” is in the data file but it must have been detached.
With the water in the pitcher, you can survive lighting a candle, starting a fire, and accidentally making a hole in the exact spot there’s a key. This is still one of the most miraculous coincidences in any text adventure I have played.
Original: YOU ARE IN A SMALL FENCED CEMETARY. THERE ARE SIX NEWLY DUG GRAVES. Essentially exactly the same in French. Not every text needed modification. The spelling mistake is in the original.
Note in the library, again with the mixed English/French.
One of the bodies scattered through the house. Roberta Williams clearly had the most fun drawing these. I wish there was a better plot moment where the player is away for long enough for the bodies to all “teleport” in place without it feeling magic.
This needs to be referred to as a “SLEDGEHAMMER” if you’re using English, “HAMMER” doesn’t work for some reason even though it does in the original. In the data file, it lists SLEDGEHA MARTEAU MASSE; possibly one of the English words was removed because of space restrictions, possibly it was by accident.
In English, this needs to be a TRUNK rather than a CHEST (which is allowed in the original). In the data file, it is written as TRUNK TRONC MALLE TROMPE. That’s plenty of synonyms in French; I doubt many people ran into an issue. (Except: two of those are the wrong kind of trunk!)
You’re supposed to USE BUTTERKNIFE in English but that got removed, I used WITH BUTTERKNIFE instead. Pushing the button behind the picture reveals a secret exit down to the basement.
YOU ARE LOOKING THROUGH THE ATTIC WINDOW. YOU SEE A TRAPDOOR IN THE ATTIC CEILING. Again extremely close to the French. Roberta Williams used a lot of straightforward wording which helped make it easier for the translation to match.
DAISY EST MORTE is somehow more satisfying than DAISY IS NOW DEAD (original) for me.
Finding the treasure in the basement. The BRIQUE is exposed by removing the algae. Note that you’re supposed to GET BRICK after but the only English word that works is BRICKS. Again, I doubt many people discovered this at the time (I used BRIQUE, I only found out there was an English possibility at all going over the data table later).
Original: CONGRATULATIONS YOU HAVE BEATEN ADVENTURE AND ARE DECLARED A GURU WIZARD. The French drops the wizard part: “you are hereby declared a Mystery House guru”.
Again, it helped that the wording of the game was mostly straightforward so literal translations were fairly common, despite the character expansion issue. While a couple English words were removed, having them present in the first place was more like an extra feature of the game; I thought the sprinkling of French synonyms was plentiful enough, and only the sink faucet caused me trouble. (It’s trouble in English too, to be fair.) There’s still all the issues the original had (the hammer I originally thought was some boards lying around, for instance) but this ended up being better than I expected a file-hacking job to be.
As far as I can tell, this is the first “official” (sold in stores) translation of an adventure game. Bilingual Adventure was an “unofficial” conversion (no endorsement by Crowther/Woods). I don’t have enough understanding of the landscape to claim it’s the first official translation ever; for example, I’m unclear if the Spanish version of Kingdom (1979) in Creative Computing ever made it to an official package, and there were other genres besides where a translation may have happened and I just don’t know about it.
In both games some grammatically incorrect sentences are accepted without hesitation or explanation.
It’s funny to think about a parser that tries to be more picky with the player just because of slight phrasing issues when what was said was still clearly understood! Besides this they did have less objection to the French itself.
It was my impression that the French of Mystery House was considerably better than that of La Grande Adventure, though reviewers found things to quarrel with in both programs.
At the time I wrote about it, I claimed the parser was the worst I had ever seen. Clearly I needed the Bart Simpson meme (“worst day of your life so far“) because I eventually came across parsers much, much worse; the all-time champion might be Deathship.
Related to Star Trail, the CRPG Addict recently produced a list of “conventions” that a CRPG game has that need to be worked out (“the part I enjoy least”) with issues like “What kind of karma meter does the game have? What are its consequences?”
A similar situation exists with text adventures, despite their apparent consistency. Issues like:
a.) can you refer to things that aren’t mentioned in the description? do you need to?
b.) can you refer to the player’s body parts and/or clothing, even if they aren’t mentioned?
c.) can you do things while in darkness, or is essentially all action shut down?
d.) is there always going to be an indication if there is a hidden object?
e.) are any seemingly essential items actually red herrings?
All five elements I’ve singled out above have the potential to increase difficulty; if you need to start pressing explicitly at floors or walls, for instance, that represents referring to a noun that might be implied in the game but is never directly referenced. Allowing action in darkness makes for puzzles like the lamp in the first dark room of Philosopher’s Quest; referring to clothing is so out-of-scope that one game used the idea to make an “impossible puzzle”.
In Intercept, all five elements go the hard way. I’ve finished the game, but I needed to check the walkthrough a large number of times. Brace yourself.
Before diving in, I should mention Rob’s observation that one of the Michael Wile games I haven’t gotten to yet (Merlin’s Treasure) gives enough clues to locate the man; he lived in Massachusetts and spent his career doing technical layouts for textbooks. I’ll give a little more detail next time we visit a Wile game, one that hopefully is a smidge more solvable.
Last time I had a theater (where I was thrown out by an usher wanting a ticket), a cottage (with an enemy agent that kills me) and two obstacles in an “Eerie Mansion”: some bats guarding a paper and a spider guarding an arch.
To handle the bats (who can see in darkness) you need to turn off the flashlight. This will plunge the room entirely back into darkness, but you can still refer to the page (even though it seems like you shouldn’t be able to!) and also go south to leave. The first time I tried this I messed up by going “down” from the attic rather than south and that led to death when I turned the flashlight back on.
I was still stuck with the spider; it turns out back at the statue (no clue at all you can do this, and the statue already hid a key … which turns out to be a red herring!) you can TURN STATUE to reveal a secret passage.
COMMAND—> look statue
I see
nothing special.
COMMAND—> turn statue
Stairs
raise
The new room has some suction cups and a fusebox. Doing LOOK FUSEBOX reveals fuses; if you try to TAKE FUSES the game queries if you want to pull them or replace them.
Taking them disables the spider. If you now LOOK SPIDER, you see a switch that wasn’t there before, and PUSH SWITCH will disable the spider (it isn’t clear this is the right verb, and pulling doesn’t work). You can then go back to the fuses and REPLACE FUSES to put them back on (you’ll need to in a moment).
As an extra kick in the pants, if you tried to DROP FUSES or PUT FUSES, they’ll end up in the room, but they won’t be properly “replaced” so the game is now softlocked. You might think to PULL FUSES again but the game will just say you’ve already done that.
Back to the spider and arch, past that is a laboratory. There’s a red button that opens a case, which is why you needed to put the fuses back.
(In principle, the sequence is interesting: shut down power to a whole section, use the opportunity to shut off one thing individually, then turn power back on. The actual implementation which requires seeing a previously invisible switch, using the right verb with no feedback, and having the fuse-softlock issue makes it a drag.)
The case has some test tubes and a beaker. The test tubes have acid, and the challenge is getting them out. You can go back to the chute that sent you to this area and climb up with the suction cups, but if you are carrying the acid this will result in an unfortunate accident. The right action is COVER BEAKER (!!!) while holding the stopper stolen from the Chief’s wine (how did we know it was the right size? … and of course the verb choice is absurd).
The whole point of that sequence, other than getting the page, was getting some acid. Now we’re able to tackle the theater. Just as a reminder, we were stopped by a ticket-taking usher; we also found an empty soda bottle in upstairs seats.
The usher asks for a ticket, and the way through is to show your id card.
??
I guess it indicates some kind of authority, but it isn’t described in the game! (As a general rule, the game has rooms and items where you are just supposed to guess things that are there.)
With that done, now we can apply the acid and melt the padlock (pour acid / on padlock), and the usher doesn’t mind.
Eventually you can reach “stage left”.
Curtains. Ladder. Ropes and levers. Stage manager.
The “ropes and levers” does technically mean there are ropes, but combining the items suggest they stay as a unit; instead, you need to refer to the rope individually.
You need to BREAK BOTTLE (this only works if you’re holding the hammer, apparently) which is sharp enough to CUT ROPE. The whole reason to go through this sequence is to get a rope.
That’s the whole point of coming here: going backstage and stealing a rope by cutting it via a sharp bottle. Adventure game logic can lead to some bizarre object use, but this seems almost ludicrously absurd; we don’t have ropes back at headquarters? (Yes, Time Zone had you travel across millions of years just to get things like a ladder, but there’s a sense there of “the time machine knows where it is best to go” which isn’t present in this game.)
With the rope in hand, you can now:
a.) go back to the cottage where the agent was hiding
b.) set the car to neutral
c.) push the car, which reveals a manhole that the car was covering
We didn’t see the manhole driving in?!?
Then you can tie the rope to the bumper of the car (yes, you need to use the noun BUMPER, not CAR) and DROP ROPE which lets you go down the manhole. There you can find a lever, and pulling the lever opens the front door of the cottage.
Oh, and make sure you DROP SHOES before going in, because a squeaking sound will otherwise alert the enemy agent you are there and they’ll shoot you. The shoes are not mentioned anywhere in the game, you’re just supposed to guess from the description of squeaking that you are wearing some and they can be referred to.
Then, you can sneak up to the (still-awake) enemy agent and FRISK them (??) in order to get a wallet. The wallet has a card with the number 622 (which will be used shortly).
The wallet has a number. If you go to the coat closet, which has nothing in it but coats…
…it turns out you can PUSH WALL, despite no hint indicating this. A safe will be revealed, and then you have to struggle with the parser (again with the impossible codes) and type left six / right two / left two in order to open the safe. (You’ll need to also insert your id card in the slot. Why would an enemy agent safe respond to our ID?!?)
The safe has page number two. Almost done! To get page number three, it turns out after finding two pages, an Actor has magically appeared back at the Stage Left room.
(Event-based drama clocks sometimes make sense. Here they do not.)
To take down the agent here, you need to use the pen from the headquarters near the start. The pen is described as being a tranquilizer dart shooter, so SHOOT ACTOR and then FRISK ACTOR (the stage manager doesn’t care). This yields the third page and now we have a “booklet”.
The thing I found consistently frustrating was that the author was working with some interesting ideas — it was just the implementation fell colossally short. Many of these issues could have been “patched” over (some better hint about the manhole under the car, some more workable synonyms, better descriptions of things being examined, some indicator you can mess with the wall in the coat closet). It feels like the author was going for maximum difficulty without considering what the gameplay would be like, and what aspects of difficulty are fun and unfun to grapple with.
I was going to plunge immediately into the author’s next game, but this is going to need a breather, so coming up: an Apple II game you might know, at least in a different form.
I don’t consider it that unusual to have an author for All the Adventures so mysterious it’s unclear where they even lived; we’ve had plenty of one-shots, including from people who were teenagers and likely never went into a field resembling games. Where it starts to get a little more unusual is when an author is not only mysterious but published multiple games with five different companies, not including distribution by a sixth company in the public domain. I don’t even know with certainty what country Michael D. Wile is from; likely the United States given the choice of publishers, but Canada is still possible.
Wile’s catalog includes
Intercept (originally 1981 likely for TRS-80, later 1987 for a DOS release)
Mutant Invasion (originally 1982 likely for TRS-80, later 1987 for a DOS release)
Merlin’s Treasure (1982 for TRS-80, Adventure International)
Miller’s Cove (1983, Windcrest Software, both TRS-80 and Timex Sinclair 1000, apparently published later by Tab Books and republished yet again by Pyramid Electronics)
Medieval Quest (1983, Instant Software)
with the last game being for the exceedingly rare Panasonic JR-200. I can’t make a claim of certain comprehensiveness given I just learned about Miller’s Cove this week and it isn’t indexed on any of the usual sites, and I wouldn’t count having an entry on Amazon as usual. Only the first three are listed on CASA as of this writing, with the JR-200 not even existing as a possible computer platform to choose from.
Intercept, while given a 1981 copyright in the game, shows up to us now in a DOS format instead from later in the 80s; specifically, it was on PC-SIG Disk #911 in a compilation of four programs (“Mix It Up”). Intercept and Mutant Invasion are both included, as are PRO LOTTO and POKER by entirely different authors. You can check the entire disk on an emulator here.
Same page as NETHACK: An Adventure Game.
PC-SIG (PC Software Interest Group) were one of the groups that sold access to a “library” of “public domain” software (the terminology “public domain” being fuzzy in the normal 80s fashion). They started quite early, in 1983 by Richard Peterson, one of the first to actually think of transitioning public domain from internal distribution “user clubs” to paid copies, $6 per disk. As Nelson Ford (from one of the later competing groups) pointed out, “BBS denizens thought this was the equivalent of charging for free air”.
One slight difference with other similar catalogs is that donationware is explicitly encouraged as a possibility (“The donation in most cases enables the author to provide software support for the product”); on Mix It Up, while there’s no fee for either of the Wile games, $2.00 is suggested for POKER and $10.00 is suggested for PRO LOTTO. I do not know how much money actually arrived in such circumstances.
Welcome to INTERCEPT. I am agent 68, and I will be your guide through the adventure. You will give me two-word commands to get me through the various rooms. Make sure you have me look at all the objects in the different rooms. Sometimes an object may appear in the room which was not there the first time the room was entered.
Your mission is to recover the stolen pages containing a top secret rocket formula to Mission Headquarters.
Despite the DOS version having some personal flavor to the layout, the game is fairly Scott-Adams-like; “you are in ROOM”, “list of objects separated by periods”, “obvious exits”. In inventory you start with a watch (“346” on the back) and an ID card with your picture on it.
The game gets confused with the “car” and “id card” both in the same room.
The phone booth includes a “strange suit” with a “S” symbol in front, and if you put it on, leave, and try to get in the car, the police arrest you and lock you in a padded cell. I guess we aren’t in a Krotts game any more.
The 346 suggests you’re supposed to dial it in the phone booth, but games from this era insist on making combinations / codes / etc. as inconsistent as possible. Call 346, dial 346, type 346 don’t work; neither do the same commands with individual digits. You are instead supposed to spell out three, four, and six as words.
COMMAND—> look watch
346 is engraved on the back.
COMMAND—> dial 3
I can’t.
COMMAND—> dial three
OK
COMMAND—> dial four
OK
COMMAND—> dial six
I feel a sudden jolt!
This lands in an elevator and even more trouble with the parser (not LEAVE ELEVATOR, EXIT, etc. etc…. only GET OUT works). This leads to a desk with a security guard, and I got SHOW ID CARD in one try.
Inside is the Chief at a Desk; a little further is an Equipment Room with a pen and a hammer. The desk has a decanter with wine and the Chief, predictably, resists mightily being talked to. You can open the decanter (which lands a “glass stopper” in your inventory) but the Chief merely serves to take the decanter back if you walk about it. Uh, nothing about a briefing or whatever?
Heading back outside to the car, the glove compartment has a flashlight, and the shift is in park and stubbornly refused to move. Not actually physically, no: just it took me a long time (yet again) to work out the right combination: PUT SHIFT / IN DRIVE. (Even after getting this right, later in the game I often forgot the exact command and tried SET SHIFT, MOVE SHIFT, etc. a few times before remembering.) You then need to DRIVE DIRECTION although with no guidance where; there’s no “exterior view” so it isn’t even clear DRIVE is working. Also, be sure to put the car back in park before getting out!
Car runs over me!
So far there’s been five major “stop points” (putting in the number, dealing with getting out of the elevator, realizing the Chief will never talk and no command will work, changing the shift-stick, getting the car moving to the right place) and the plot hasn’t even really started yet! (Essentially, “false” puzzles where if someone was in the physical location they wouldn’t have a problem. I’m not even counting applying the watch number to the phone, there’s only one number around and one place for it to go.) How will things go when we have to deal with something intended as an obstacle?
There are four driving locations, including the start.
Starting at the theater, there’s a revolving door leading to a lobby, and a “girl” selling tickets.
Our player has no money (yet) so “buy tickets” doesn’t work, but you can “go stairway” (where a “soft drink bottle” can be found amongst the seats). Trying to “go entryway” leads to a “crowded theater” where an usher is getting tickets, and will throw you out without a ticket. You can see the stage and a “padlocked door” but that’s it for now.
The cottage (south of the theater, west of the starting place) has a “puddle” and a “closed door” that is locked.
Heading north leads to nothing but a window, and trying to “look window” results in death as an “agent inside” spots you and shoots you. So the correct starting place is apparently the “eerie house”.
Last up is the “eerie-looking” house. There’s no indication of if we’re even supposed to be here, other than it is a location in an adventure game. Ringing the bell activates a trap door and you fall into a “cellar”.
I am in a cellar. From here I can see:
Chute. Winding Steps. Large crate. Shovel.
The shovel can simply be taken (and I’ve tried “dig” everywhere after with no luck yet); the crate is described as locked but after chewing on what “large” meant I tried “climb crate” and got something useful.
Top breaks from the weight!
I am in a crate. From here I can see:
Oilcan.
Going up the stairs instead leads to a locked door at the top. The door has some hinges; you can apply the oilcan to the hinges, then pull out some pins inside in order to bust through the door. (The parser didn’t give me much trouble here, but this is “bread and butter” type manipulation for basic parsers. My basic principle has been that a not-so-fancy parser can work as long as the actions demanded of the player are relatively simple.)
Through the doorway, you can choose to go east or north. Taking east first…
There’s a “niche” with a “statue”; looking at the statue closer reveals a key (I assume it goes to that cottage from earlier, but I haven’t gotten back to it yet). Going upstairs it is dark and the flashlight (from the glove compartment) needs to be turned on.
The desk contains a paper that is marked “1 of 3” so I assume this is part of the plans we are supposed to be finding (where our “briefing” came before the game started and the Chief just got fussy about taking his wine away). Unfortunately, if you try to take the page, you get killed by the bats.
Going back to the branch and heading north instead…
…the mechanical spider here is guarding the arch. I tried poking at the bones but the spider pounced and ended the game.
To summarize, I am blocked by a.) a mechanical spider b.) some bats guarding a paper c.) a locked door at a cottage and/or an agent inside and d.) a ticket-taker who wants some money. It’s pretty clear there’s more to do at the eerie house but after my last (spider-related) death I figured it was a good time for at least an update. I’m hoping the author has gotten the tricky parser shenanigans out of their system and will stick with straightforward commands from here, but I know my chances aren’t good.
THIS TIME, THE SYNTONIC ROVING SPOTLIGHT HAS LANDED ON, -ICK- BOB KROTTS! THIS VERMIN CHARACTER IS THE -GASP- VICE PRESENT OF OUR CLUB! BOB IS A RESIDENT OF KETTERING, OHIO AND HE IS AN AVID MARVELITE … HE HAS ABOUT UH 300 TO MAYBE 700 COMIC BOOKS … ANYWAY KIDS, HE HAS BOASTED THAT SOMEDAY HE’D GET HIS NAME & LETTER PRINTED IN MARVEL AND HE’S FINALLY DONE IT…
Continued from my previous posts about the “Misadventures” series. (1, 2, and 3; 5 alone)
“Published by some fans in Ohio. Todd Freeman, Bob Krotts and Steve Flock with contributions by Tony Isabella, Mark Evanier and Dwight Decker. Once again some 15 year old kid from the Bronx, NY, who signed his artwork, GEM, provided artwork and some stories.”
While there was a superhero-themed action-adventure in videogame history quite early (Superman from 1979) this wasn’t a genre that struck text adventures with the same verve as fantasy. Scott Adams would eventually launch Questprobe Featuring the Hulk as official software in 1984, but as far as I can find, Misadventure 6: Super Hero Adventure is the first superhero-themed text adventure. This kind of statement is always dangerous to make but I really have been playing all the adventures, and my loop-around list doesn’t include any, so…?
From Basic Computing, July 1983. The other product advertised is a Frogger clone (Leaper) and the copy this time gives no hint of the “naughty” aspect to the series.
Our hero has 10 abilities. These abilities are activated by typing an appropriate number.
This is essentially a “tool-based” game where the player brings their abilities and/or inventory in and choosing the right one to apply is the “puzzle” at any given moment. We’ve only seen this format twice before I can remember:
a.) Haunted House, the DEC BASIC version. The player is given a large list of items to start: TOILET PAPER, CROWBAR, RADAR JAMMER, DICTIONARY, etc. and while the game uses regular parser commands, they involve applying the starting inventory. Their display is hard-coded:
10270 PRINT “You have with you…..”
10271 PRINT ” TOILET PAPER, a CROWBAR, a LANTERN, a FLASHLIGHT,”
10272 PRINT ” a RADAR JAMMER, a MACHETE, A CAN OF GHOST REPELLANT,”
10273 PRINT ” some MATCHES, A DICTIONARY, and a FLY-SWATTER.”
10280 PRINT “You have collected…..”
10285 FOR N8=1 TO 30
b.) Kaves of Karkhan. There’s a list of people that will come on your expedition with various tools. Some of the tools help with particular obstacles, and in some cases the character abilities will help instead.
Thus Misadventure 6 enters rare company, although it has the same issue the other games did: trying to match the right thing already held to an obstacle doesn’t feel very adventure-like. More on that in a moment.
I visualized the main character as sort of a budget Superman (although Spidey Sense and levitation, skills 5 and 6 respectively, are from different heroes). You start at the DAILY GALAXY and get a message that Lois Laid is missing.
Head west and you can pop into an elevator (PUSH BUTTON), complete with a small animation of the door opening and closing…
…and then after hit the town.
Despite the town being full of malfeasance, there are no real obstacles. You can travel over everything without stopping, and see almost the entire map (including the second part I’ll show later) without solving a single puzzle.
Some example encounters:
If you do want to engage, you just need to pick which of the ten powers (strength, vision, hearing, breath, Spidey-sense, levitation, speed, martial combat, climbing, sexyness) you want to engage. If you pick wrong (“THAT POWER WILL NOT HELP YOU HERE!”) you get a message about you are vulnerable now and need to leave, but there’s no other negative effect other than time lost. This means — especially for the more esoteric encounters — you might as well just lawnmow your way from 1 to 10 until getting the right effect that you want.
In some cases it’s pretty easy to predict, like the battle against the Hulk-like creature involves invoking “strength”. It’s a little less obvious you are supposed to apply your climbing acumen to the dinosaur.
Imagine doing Insult Swordfighting in Monkey Island except that the jokes are only sort of half-formed so you have to test all the punchlines.
The skull, which I assumed to be a mystic floating ghost-thing, just needs regular combat skills applied. Just to the west where there are some “oriental” fighters you instead don’t fight at all but rather use bad breath.
You would think this encounter would involve climbing, but instead you want to levitate your enemy instead.
As I already mentioned, nothing is blocked/hidden, with two exceptions. One is at an “abandoned building” you can find earlier where using super vision spots a hole. You can GO HOLE to get to a new small sewer area.
This lets you find a bomb you can disarm and a worm you can stomp.
One is a safe near the beginning where your super vision can’t penetrate the lead lining.
Despite the “rapid falling”, you can do many things and come back here later.
The safe turns out to be essential, as this is where Laid is stashed. Your ultimate goal is to use STRENGTH to bust the hydrant, which will shoot some water and slow down the safe and cause it to come to the ground. The problem is if you try to use strength right away the game claims it won’t be useful here, and the game fails to mention a particularly nasty flag it is checking.
17000 IFSC>14THENGOTO17020ELSEGOTO13999
If you try to use strength in this room, it first checks the variable “SC”, which is the “BONUS POINTS” that have been referenced in various screenshots. Essentially, you’re supposed to do 15 heroic deeds, which is enough to come back here and win the game. It isn’t at all clear this is a special area or you are failing a score check! I couldn’t even find a way to check your score in the game, I thought for a while it might be simply mentioned in the text for humor.
The regular part of town isn’t nearly enough to get the right score, so you have to head into the sewers.
Encounters include ants, a tank, Madame Rosa (referencing the first game), Moleman, Dr. Doom, the author (as “Dirty Bob”), E.T.’s parents, and “An advertisement salesman from 80 MICRO”.
It wasn’t clear until this point super vision included eye lasers, because it gets used earlier just to see more clearly.
The tank succumbs, for some reason, to bad breath. Not everything can be “defeated” (I tried all 10 actions with Dirty Bob but no luck, you’d think he’d respond to sex appeal).
Upon scrounging enough heroic points, strength on the hydrant at the safe will now mysteriously work.
There’s one last nasty surprise if you’ve taken too many turns to beat the game:
She suffocated…you took too long!
which “fixes” the lawnmower aspect but gives no sense the player is on a timer to begin with.
While I found the graphics to be amusing, and some of the takedown actions were good, the game was more inscrutable than satisfying. Every one of the Misadventures has been bespoke-coded and with the lack of much in the way of a world state or inventory. The games are thus reliant on atmosphere to get by, which worked for Krotts early (1 and 2), not so much with the superhero game (even though one does not expect Superman to bother with much in the way of an inventory!) There’s still one more Misadventure to go (MADAM ROSA meets E-Z), but it’s dated 1983 so I’ll save it for later. E.T.s sister was kidnapped by Madame Rosa and the player needs to rescue and return the poor alien home before kinky stuff ensues. Maybe Krotts will return to giving the people what they really want, which is unbridled raunchiness.
This is a continuation of the story of Bob Krotts, which I wrote about here, so you should read that post before you read this one. Krotts ran a “Softcore Software Company” which published seven TRS-80 games, six of them landing in 1982, and I had played the first three.
I still can’t play Misadventure 4, Casino of Pleasure, but I can link to the Launchbox entry which includes a tape picture as well as cover art.
The blurb reads:
Your first problem will be finding the hidden casino! This is accomplished by using traditional adventure-type methods.
If (and when) you make it to the casino with the money, you must increase it so that you have enough money needed to pay-off the gangsters who await you at the casino exits! Beware the pit boss! Don’t have too many free drinks brought to you by sexy young drink girls! Above all, enjoy the many gambling devices…
This suggests a dual-gameplay, starting with “traditional” adventure and turning into a straight gambling game after. Perhaps the game will show up someday, but for now let’s get to that sexy, sexy, existential dread of Naked Nightmare.
From the Museum of Computer Adventure Game History.
I’m not kidding with the existential dread, not just in the weird image on the cover (Krotts ran a photo studio so I’m sure this was intentional) but the blurb on the back.
In Naked Nightmare you awake with no memory and no clothes! It will take all of your cunning to successfully complete this Misadventure! Beware the helicopter of death! Avoid the lethal laser beams! Try to find out why the naked lady laughs at your groin!
WARNING before moving on: early on there is a slur for a little person. No need for a not-safe-for-certain-work-environments notice this time, though.
The opening drops you in what is essentially a random-message maze; locations are fixed, some places have fixed descriptions, but lots of places pull a message from a random pool.
At the start, you have the choice between going north or east, but east kills you with hidden laser beams.
AUTOMATIC LASER BEAMS SLICE YOU
INTO A USELESS MASS OF FLASH!!!
Going north leads to the first random description room.
Other possibilities include:
YOU SEE NOTHING IMPORTANT AT THE MOMENT.
YOU SEE A RAT LAZILY CRAWL AWAY FROM YOU!
YOU SEE A BAT FLYING DOWN THE LONG HALL.
YOU SEE AN INSANE WOMAN RUN PAST!
As all the exits are north/south/east/west, I decided to try a grid style map rather than a node style map. However, since there are “jumps” (because otherwise rooms would land on top of each other) I’ve marked each room with a dot (for “random” rooms) or words (for things fixed in place). I first saw this trick with an article by Richard Ramella so let’s call it a Ramella-style map.
The spirals indicate to me this might be what the author had in mind in the first place.
The “sign & kicked” is just two steps away from the start, where a VIBRATING SIGN claims that PATIENCE IS A VIRTUE – SOMETIMES!
The sign is a clue that sometimes, actually quite rarely, you’ll have an encounter in this room (just leave and come back repeatedly). I only came across it via luck on a reset, as I had tested this theory with 20 no-shows in a row.
Following the path past all the “random” rooms…
…eventually leads to a button.
Pressing the button causes a sound in the distance. I wandered a bit trying to figure out what that was; this included going all the way back to the start and testing the laser defense. The dead end immediately adjacent to the first button now shows a second button.
After pressing the second button, I went searching again; the spiral up to the north passes by a “sign” which says BEWARE CIRCLEVISION and a red telephone. The reverse 7-4-1 clue suggests DIAL 147 but that gets no answer. Where the 147 goes to instead is at the end of the hall, where a portrait on the wall has moved aside.
DIAL 147 gets a third button, and again you are left to search all over the map to hunt down an effect. Nothing seems visible now, because it turns out the laser grid to the east of the start room (marked with a ! on my map) is finally down.
No indication otherwise this would happen. This reminds me of Asylum where you find a key and have to hunt over previously-searched territory.
Continuing with a new map…
…going south results in an ALARM where YOU ARE CAUGHT! (No more detail than that. Stormtroopers? Ninjas? Old ladies with deadly purses?) Going all the way to the end to the east results in another laser beam barrier.
Most of the side rooms are deadly, too; three of them have ropes where if you PULL ROPE you either have the ceiling drop on you or the rope turns out to be a snake and you die.
One room has a ladder, but it, too, is death. (This is feeling a lot like the office-building maze from Misadventure 2 with lots of trial and error.)
The exit is at a room with a dresser, where you can climb it and then pull a rope to reveal an attic. Before that I should mention you can MOVE DRESSER to find some pants, then WEAR PANTS. There’s no inventory tracking other than if you have pants or not.
Getting into that aforementioned attic, it is described as completely dark. Taking a cue from Sewers of Moscow (Misadventure 3), just FEEL is enough to make progress.
The door can be bashed open with just KICK DOOR, leading to a roof.
Things get a bit dicey here; I found a cord on the flagpole from examining it, tried PULL CORD, and found that it sent my pants up to the top.
YOUR PANTS ARE NOW AT THE TOP OF THE FLAGPOLE!
UH OH… A HELICOPTER IS APPROACHING!
IT DROPS A BOMB – YOU DIE!
(Suddenly it feels like I’m playing Lost Pig.) Somehow, it works to examine your pants (which describe a belt loop with no belt) and CLIP LOOP; then when you pull the cord you go up the flagpole with the pants. But how did they go up when you were just pulling the loop? It’s almost like there was an implicit action there of hanging the pants if you don’t do the beltloop trick.
Now you need to get the attention of the helicopter, but if you just WAVE (my first impulse) you fall off and die. I had some visualization trouble here, because I assumed the player is clinging to the pole here, but following the steps above, you are being held solely by your pants. You need to HOLD FLAGPOLE (I got this from the source code) and only then WAVE. The helicopter will lower a ladder; you can unclip the loop, then CLIMB LADDER to victory. It is unclear why they were bombing us in the other reality, other than the lack of pants.
Sewers (Misadventure 3) was mostly “clean” but still had one scene; here I have no idea why this game falls into the series other than the “naked” part. I wonder if anyone bought the game and was disappointed purely for that reason (not that it’s mostly a random maze of death where you have to push buttons and pull ropes in the right order, except for the final puzzle with some guess-the-verb tossed in). I think the final 1982 installment ramps the action back up, so to speak, so coming up: Misadventure 6, where you are a super hero with unusual powers.
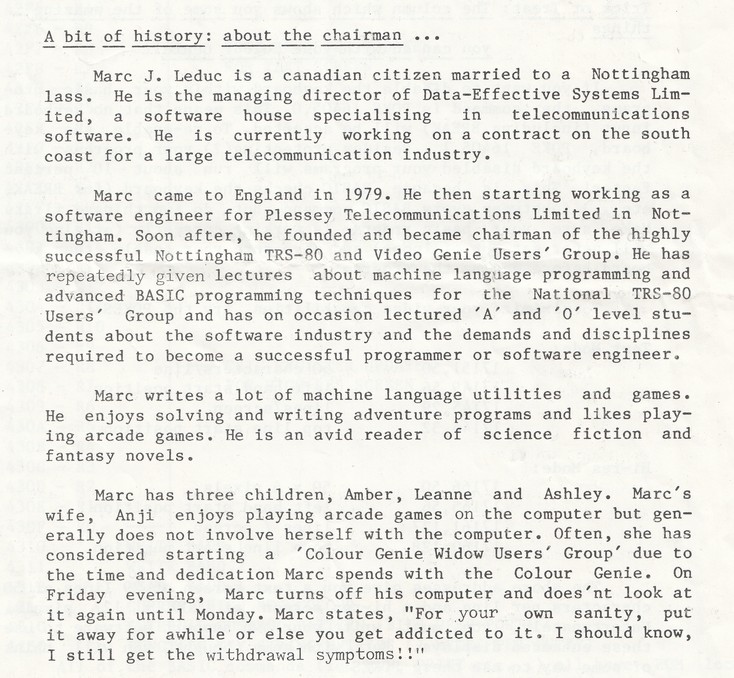
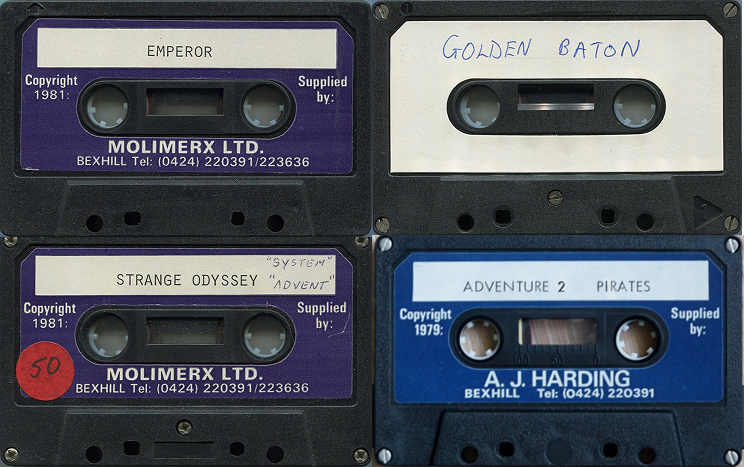
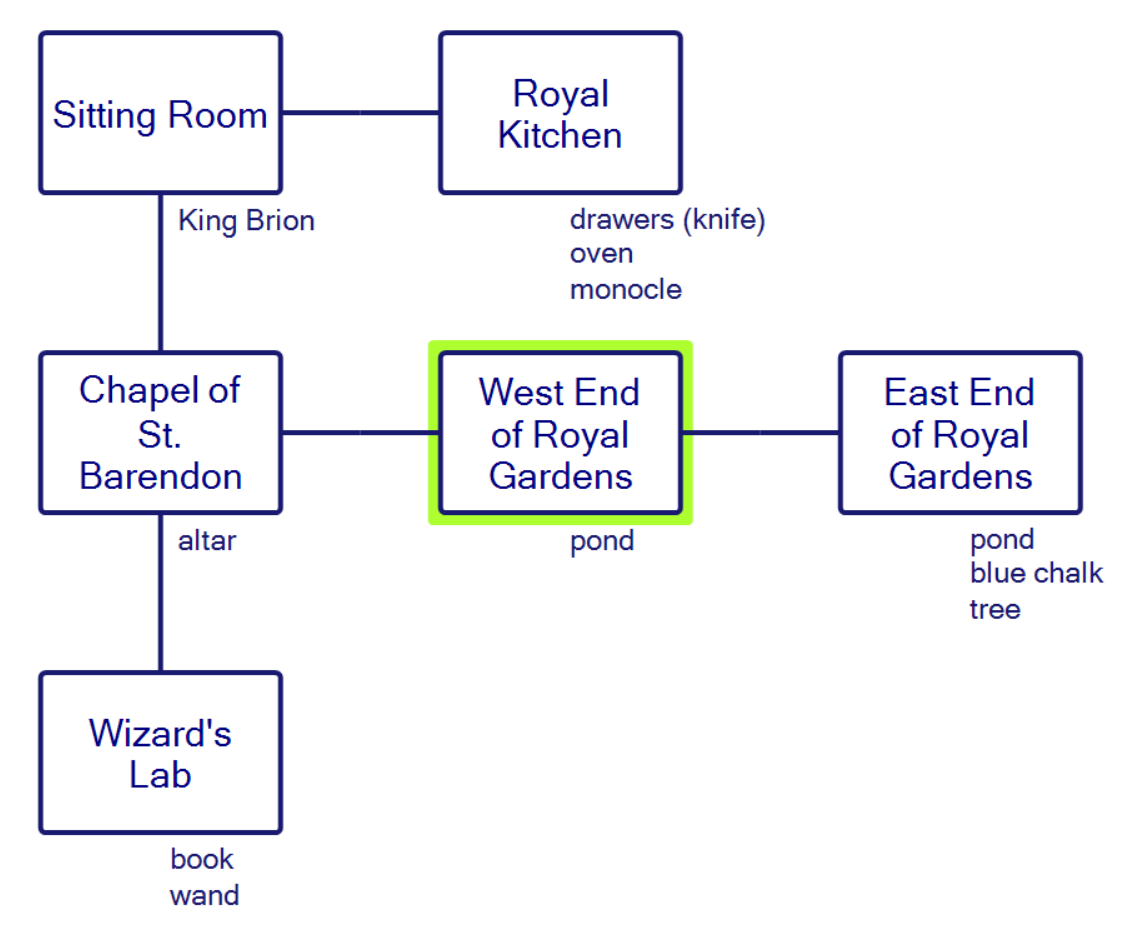
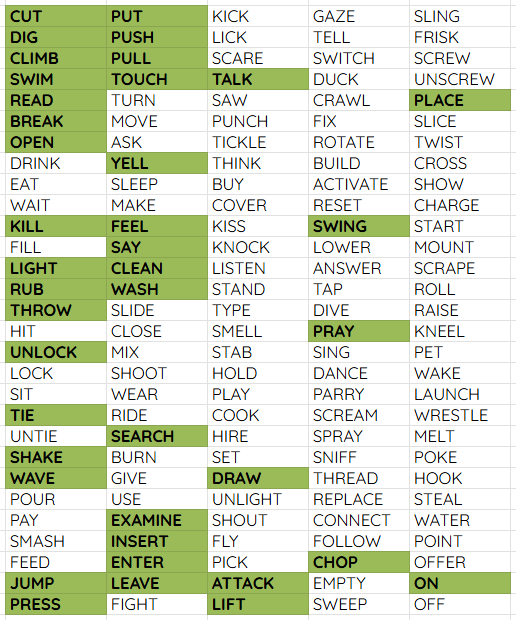
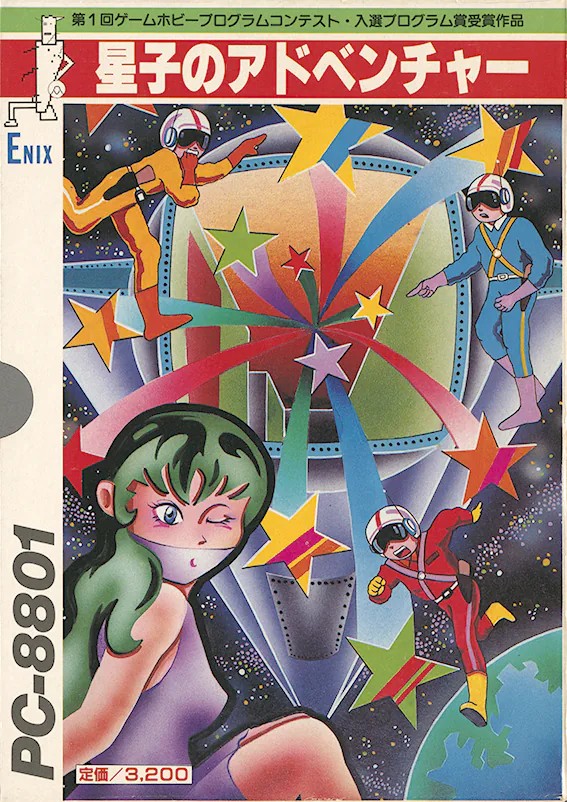
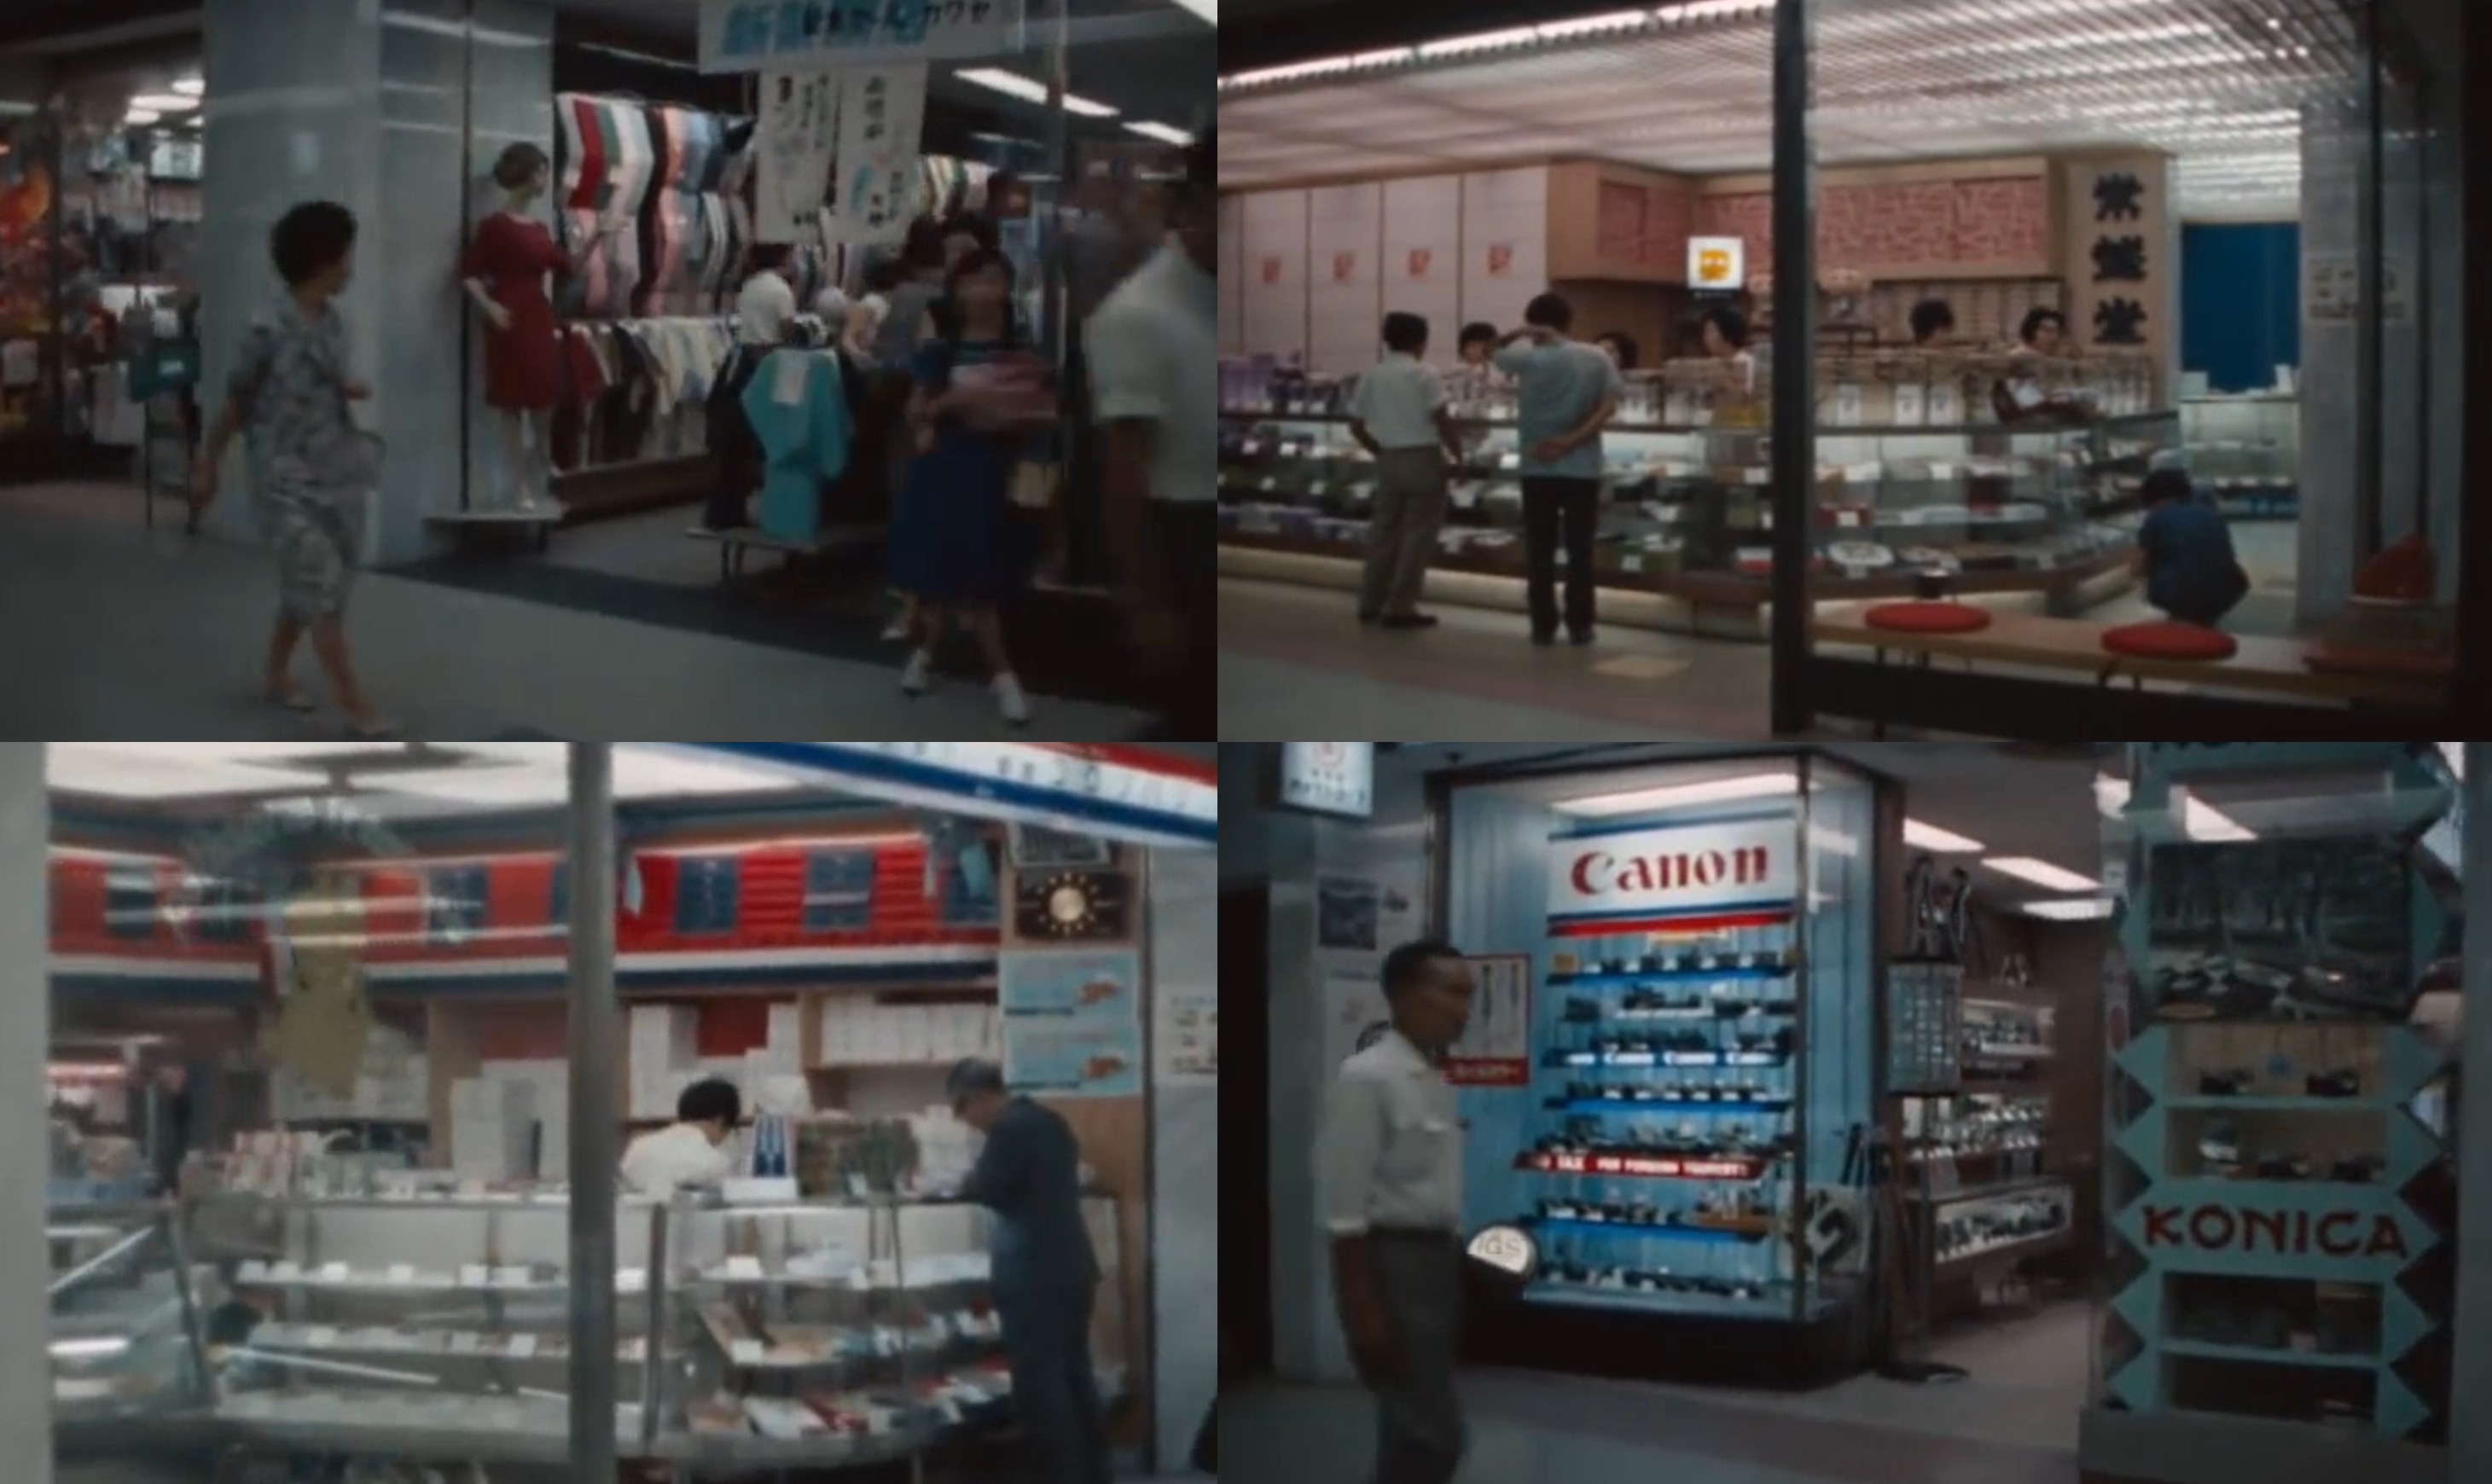
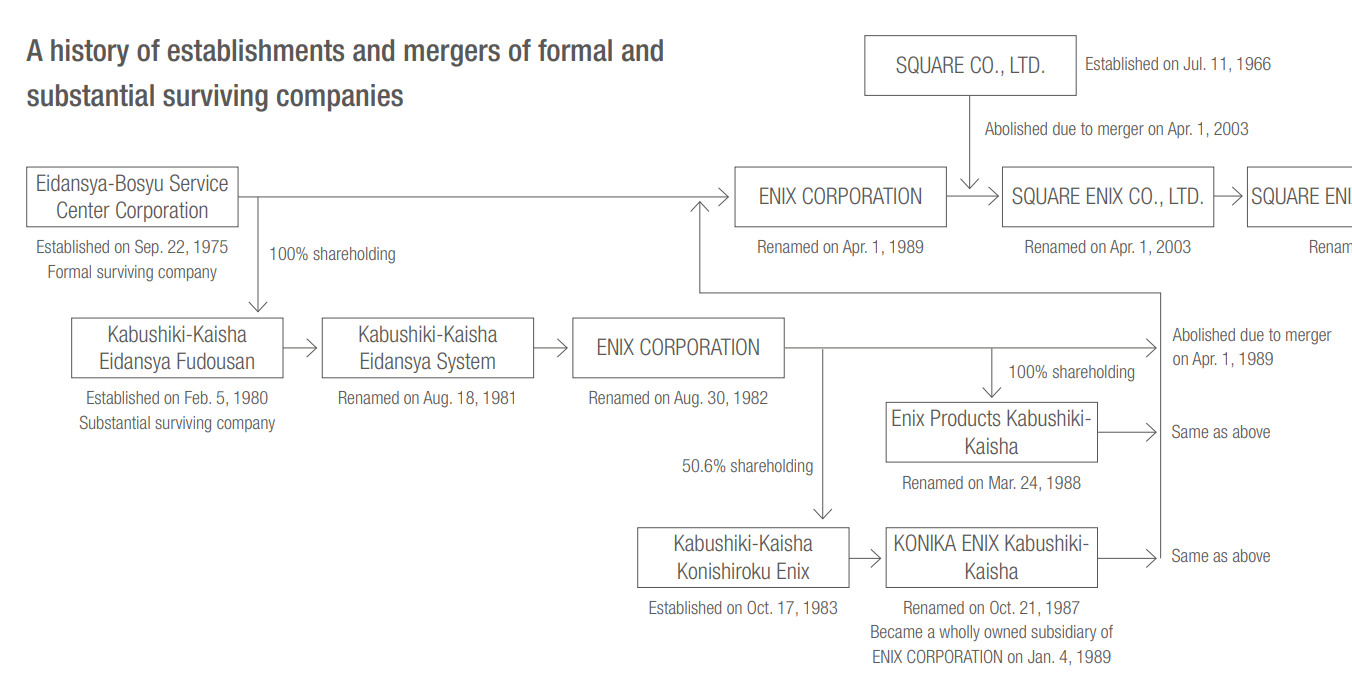
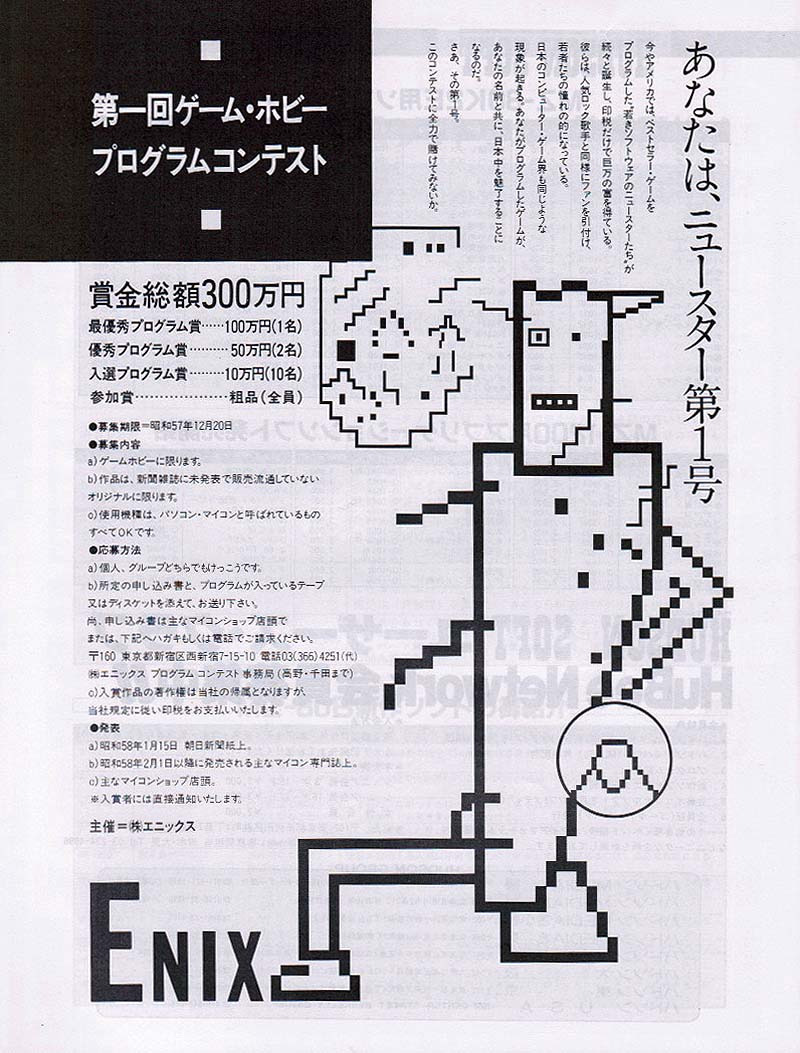


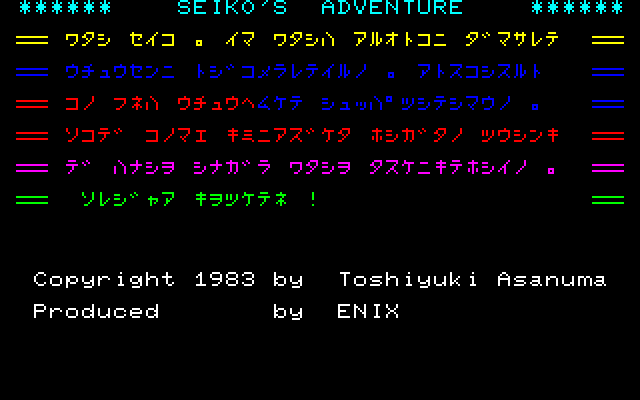
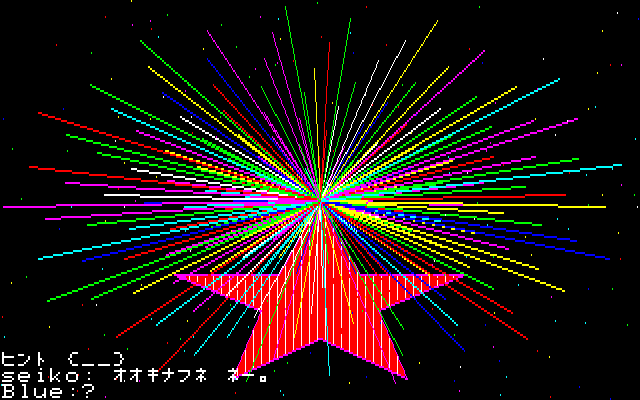

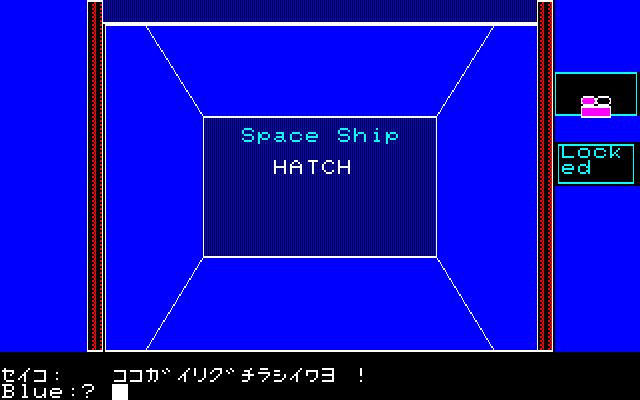
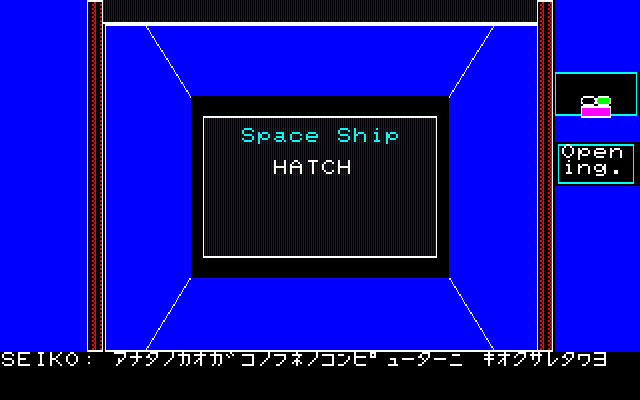
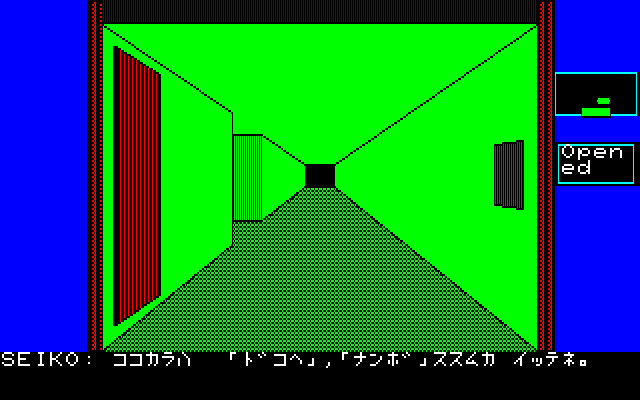
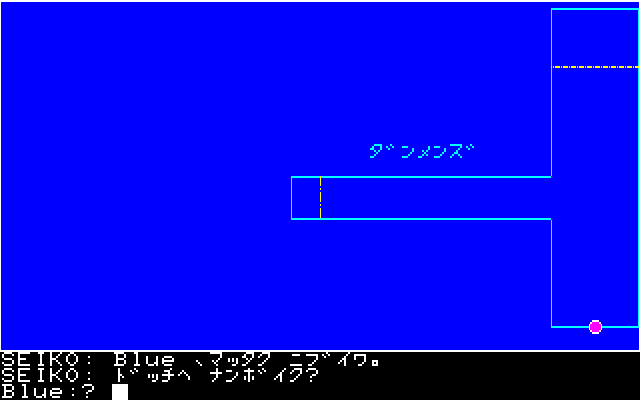
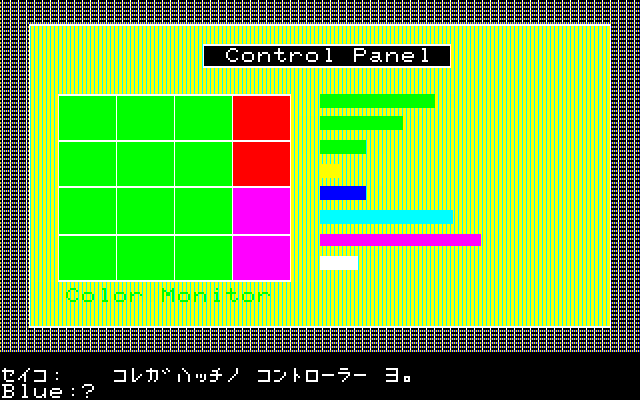
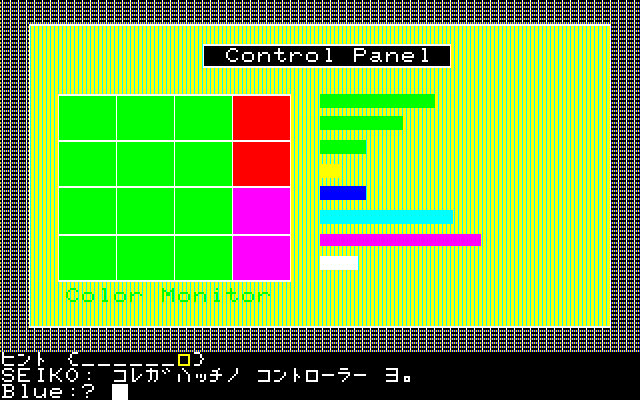
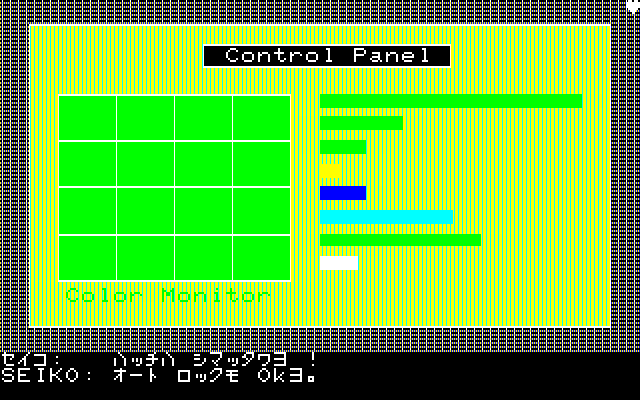
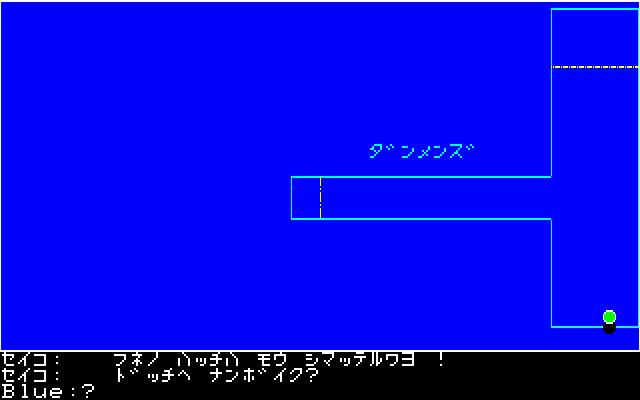

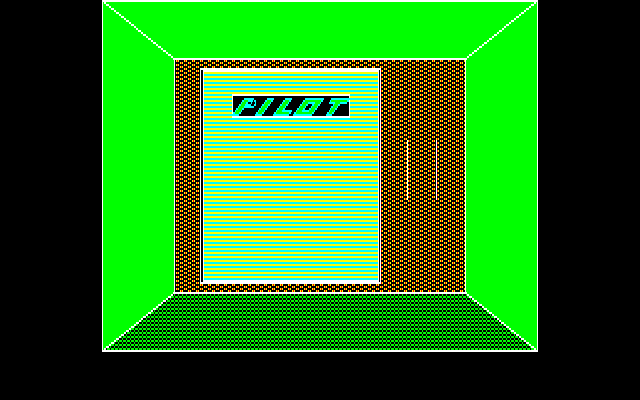

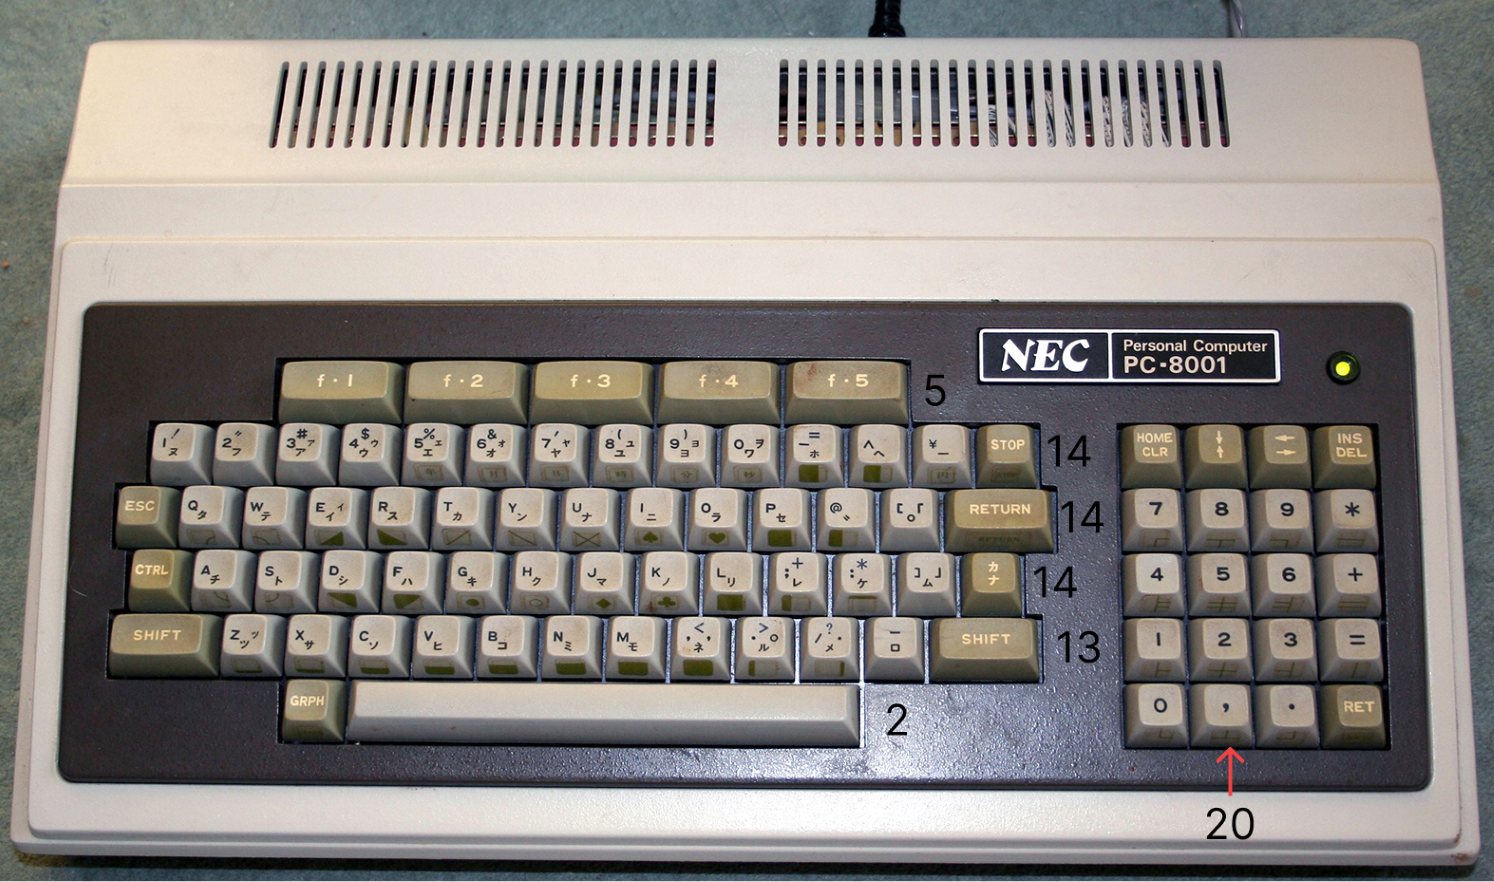
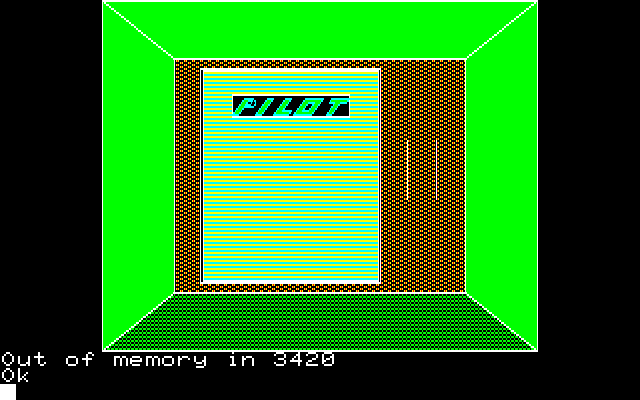


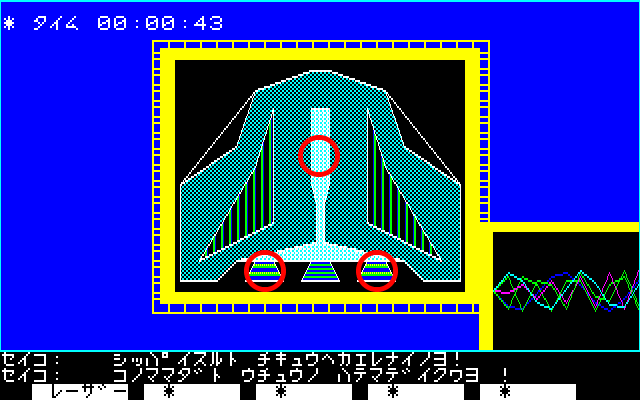
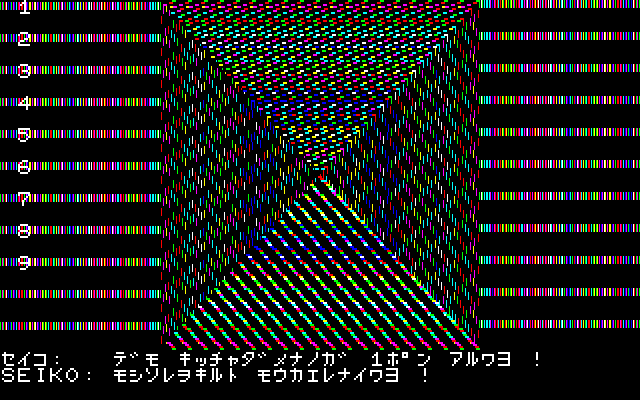

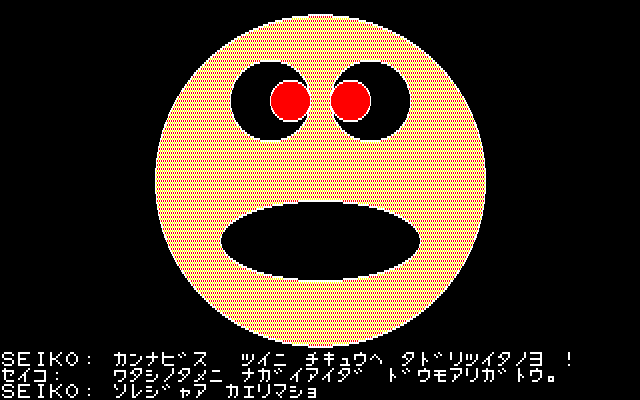
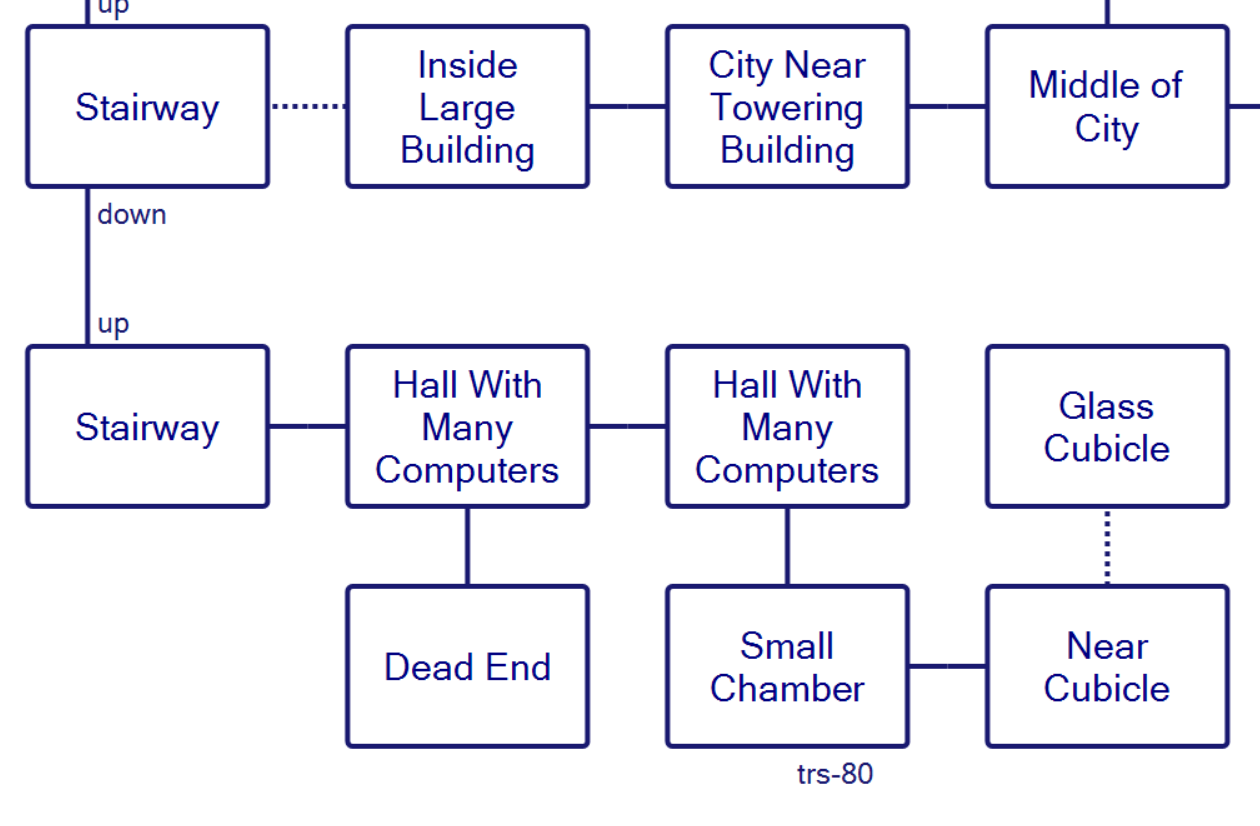
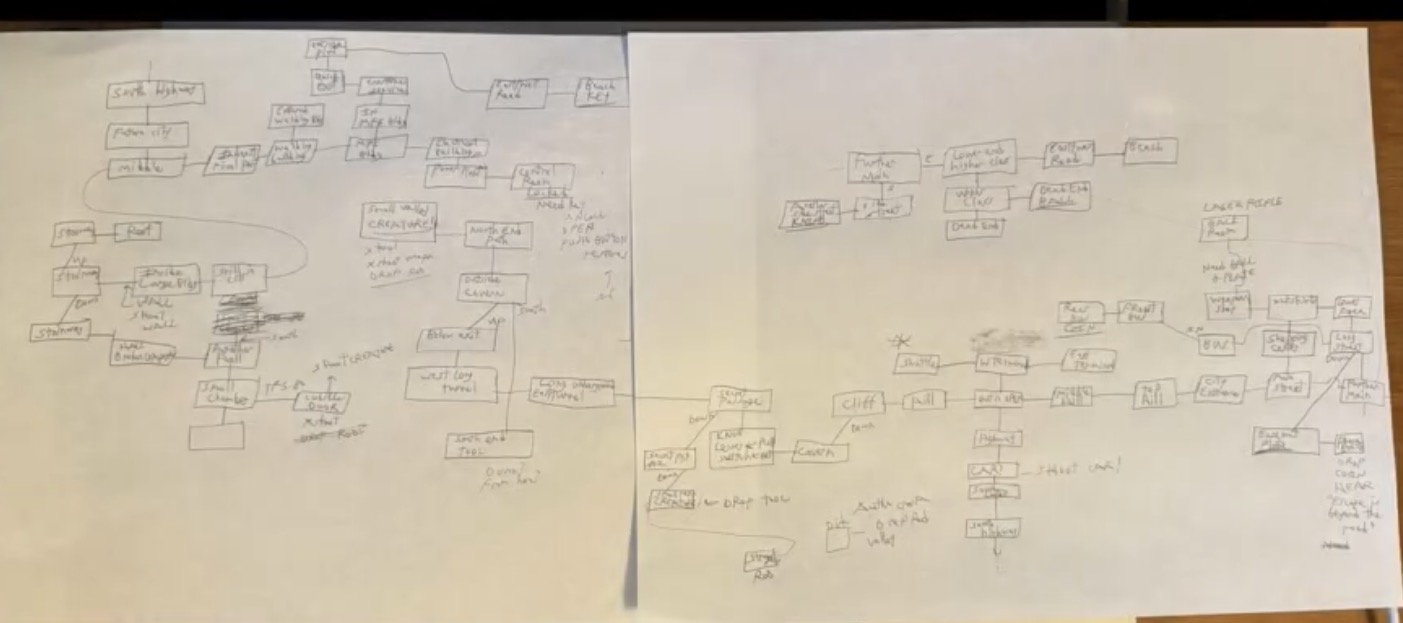

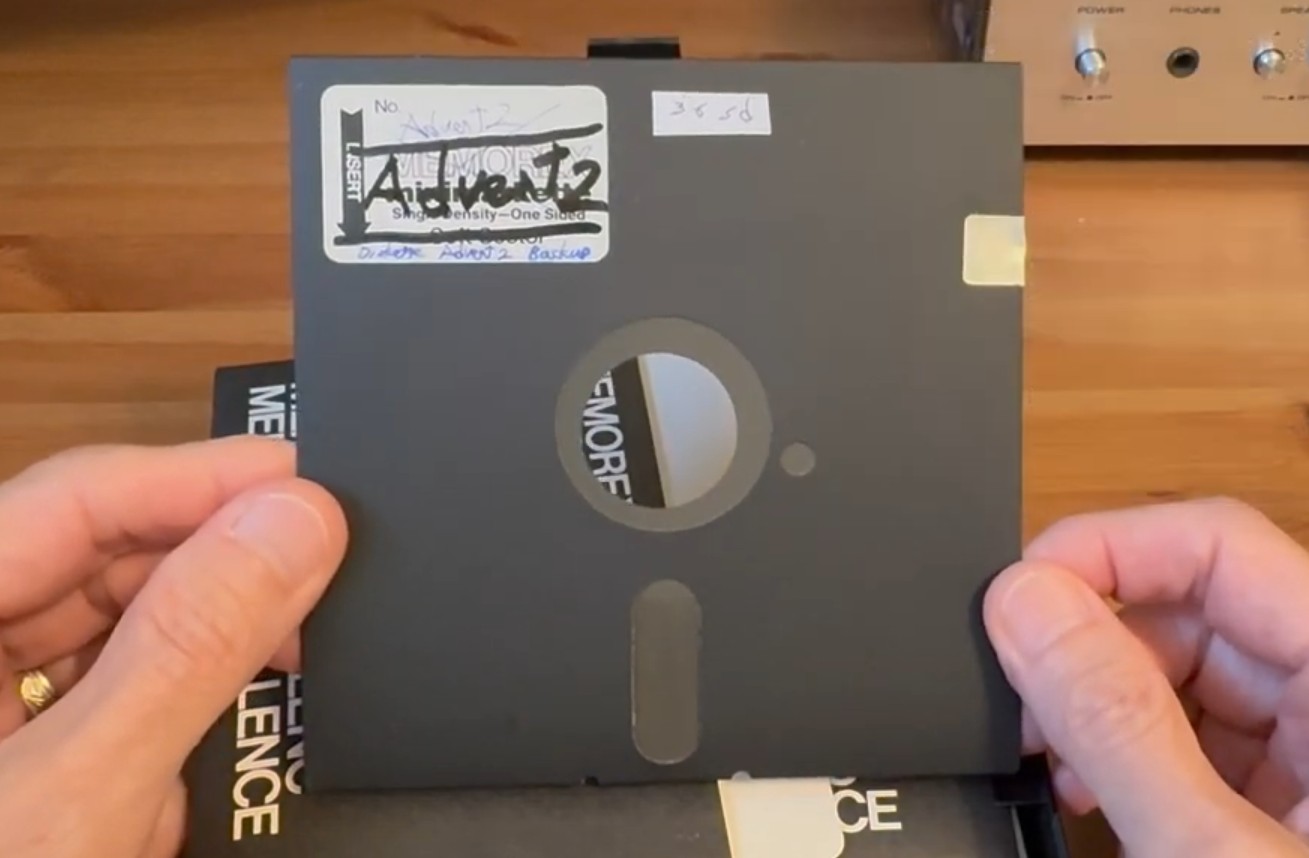
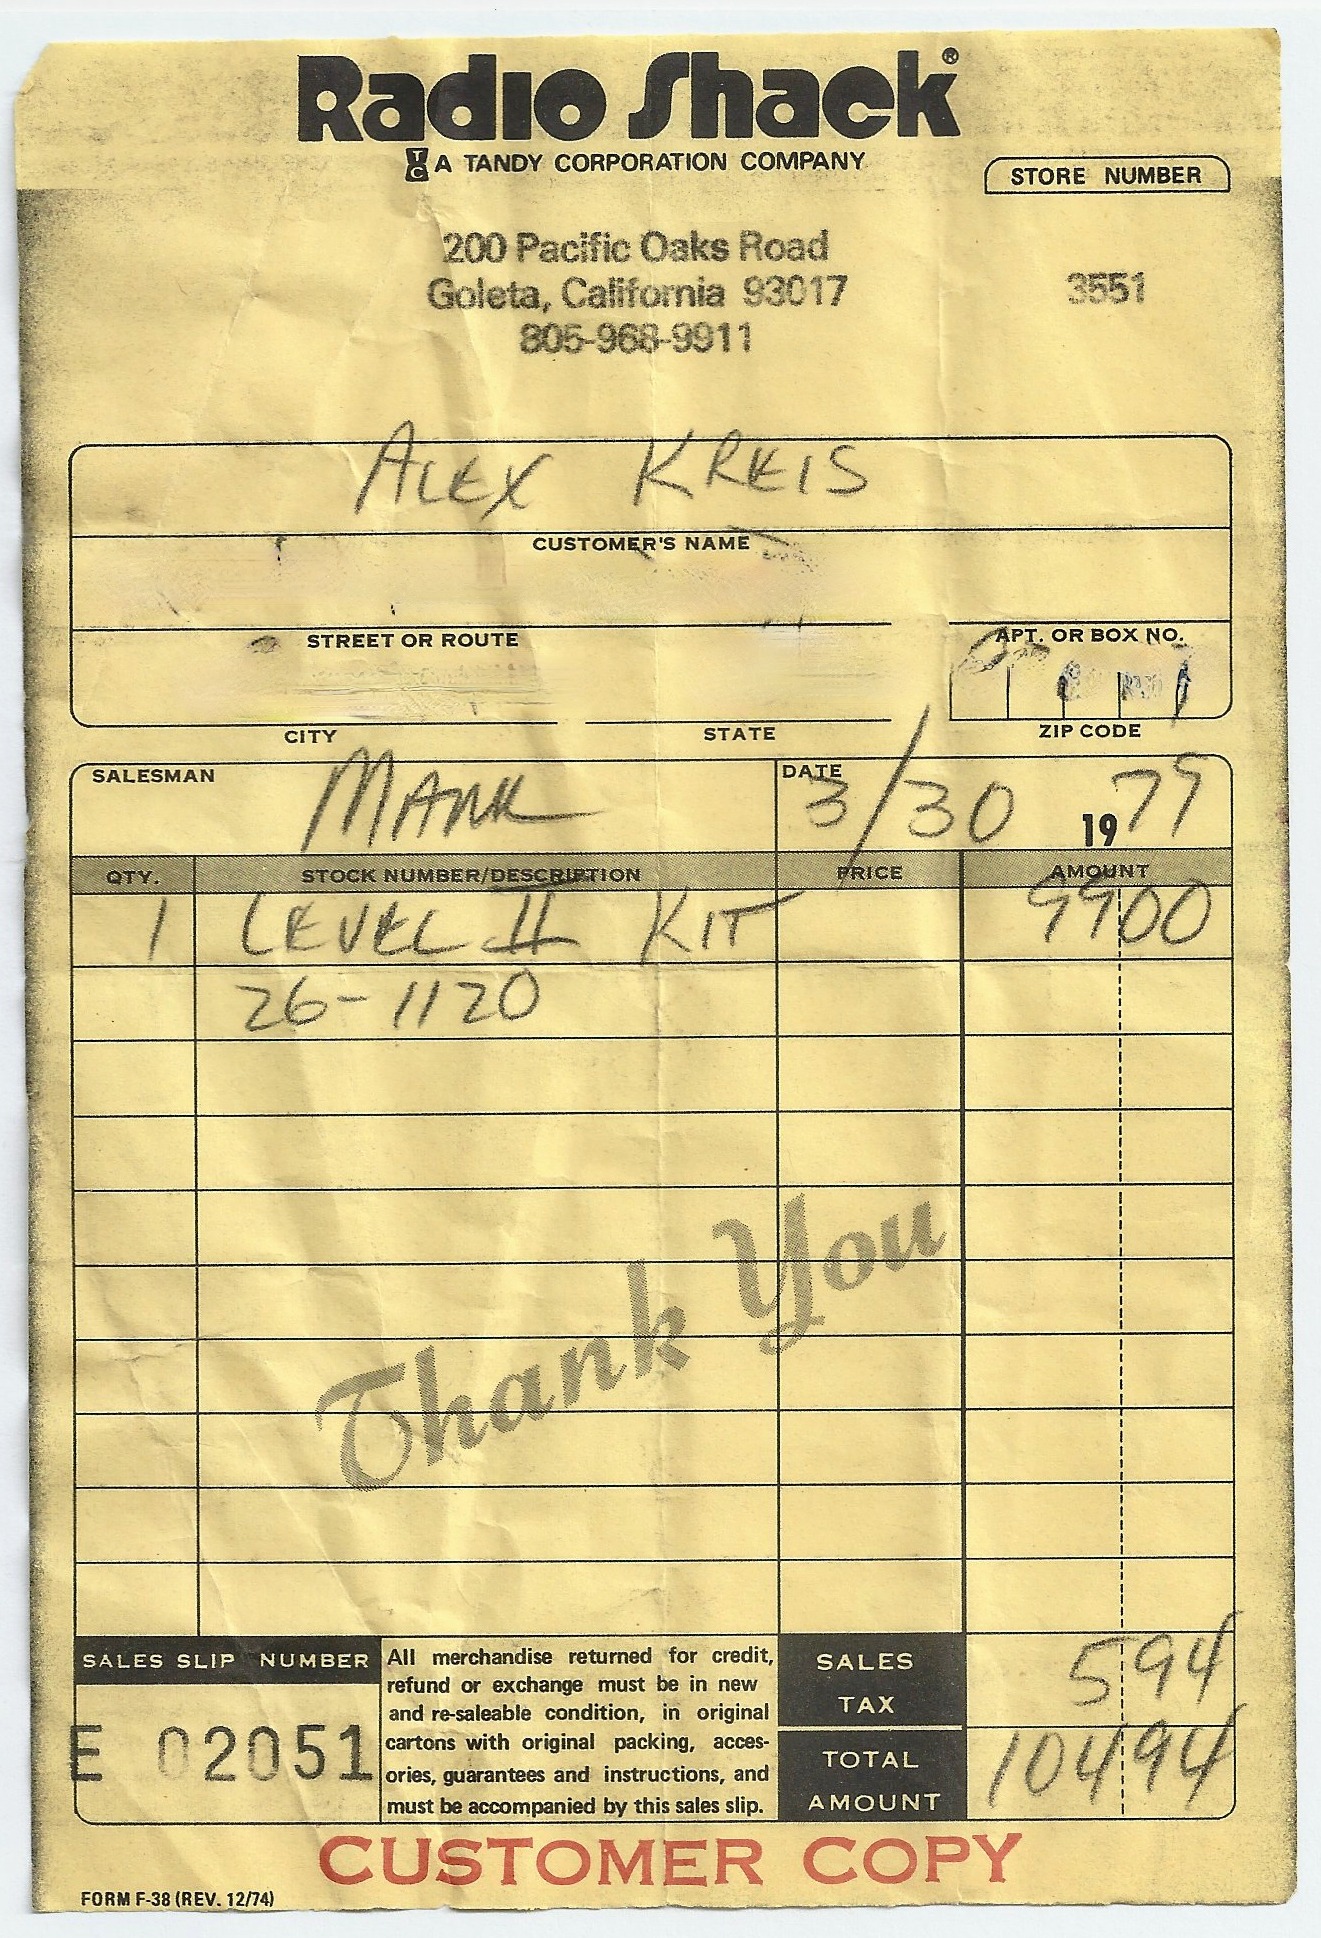


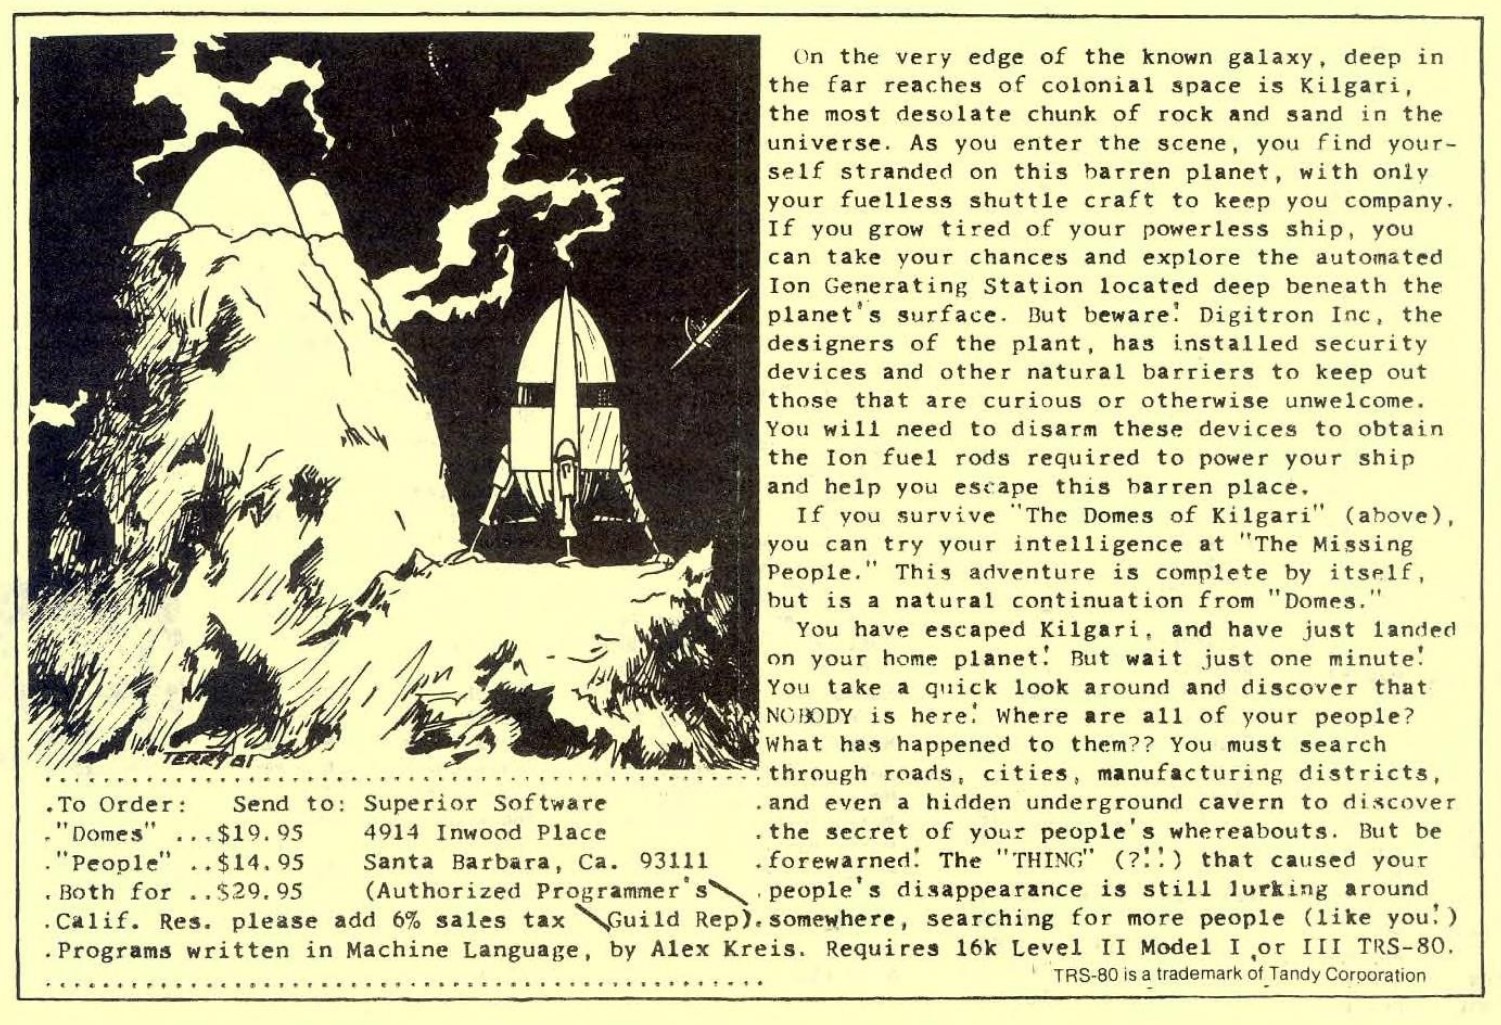
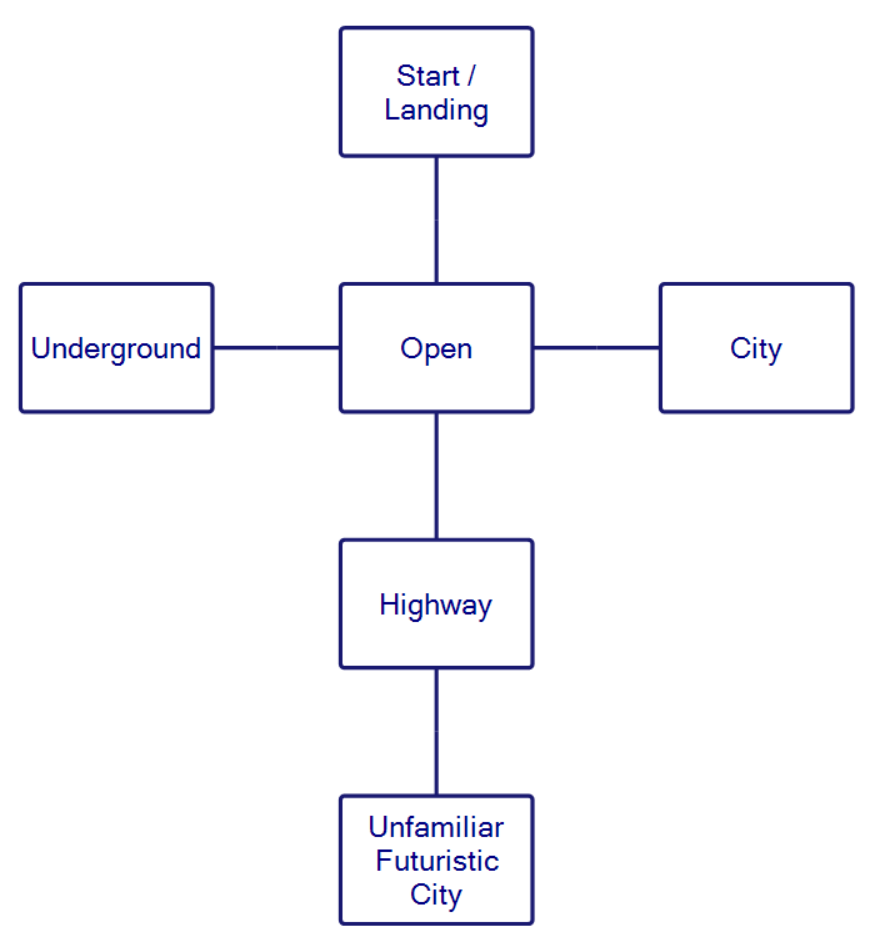


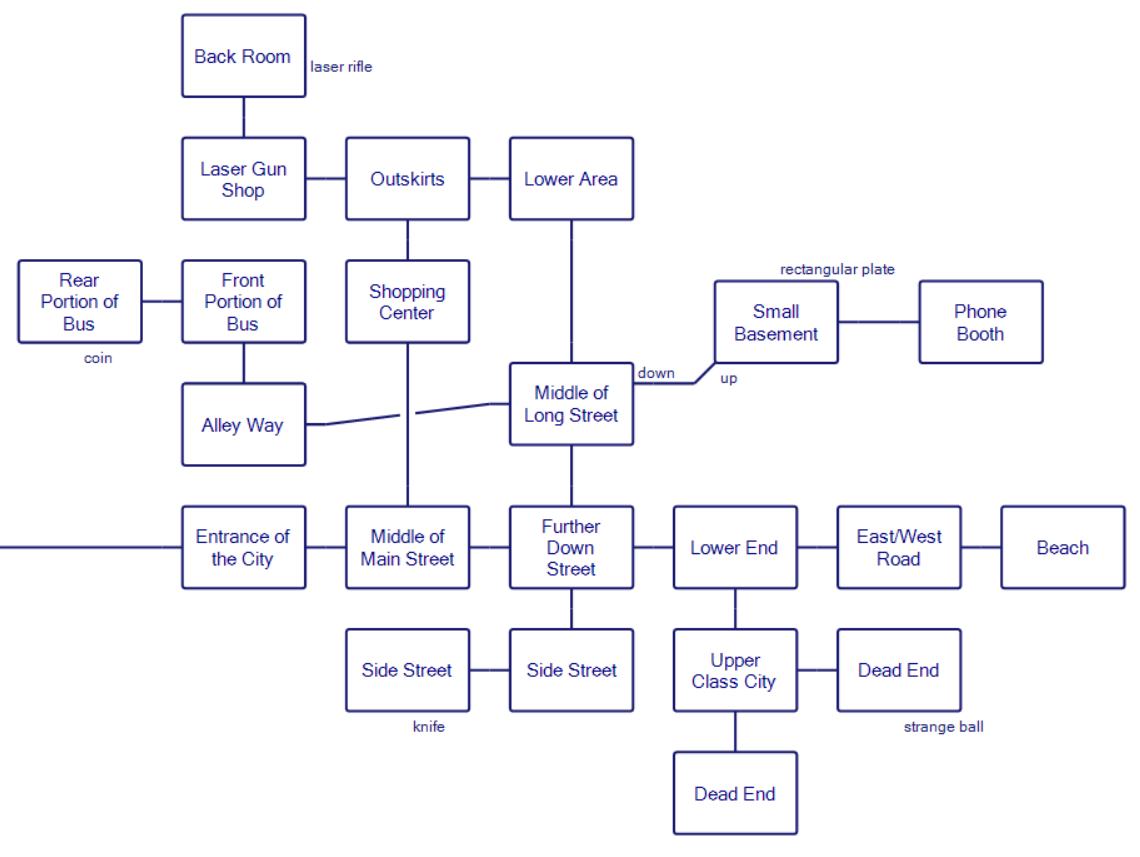
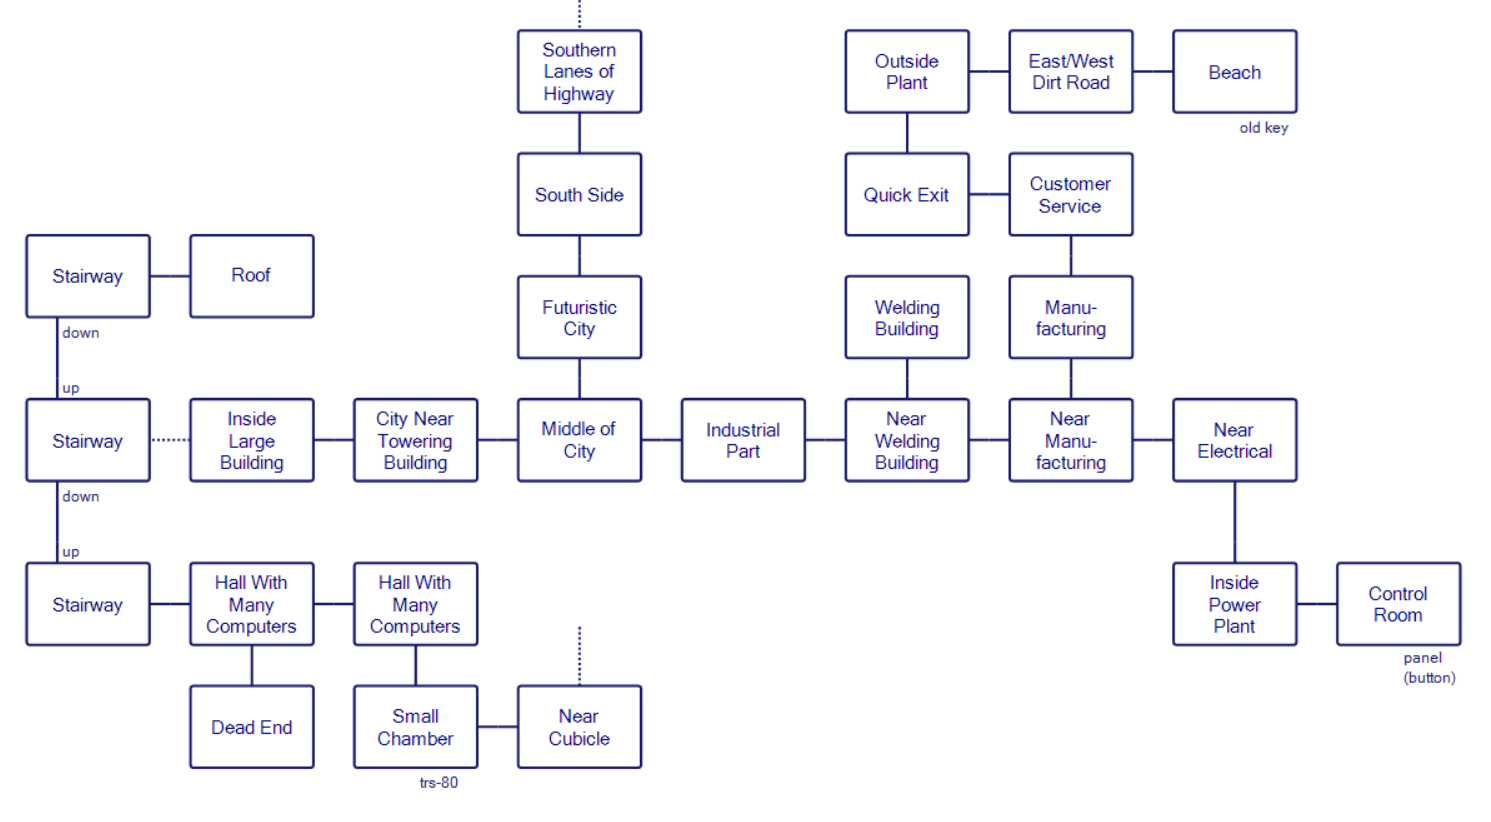
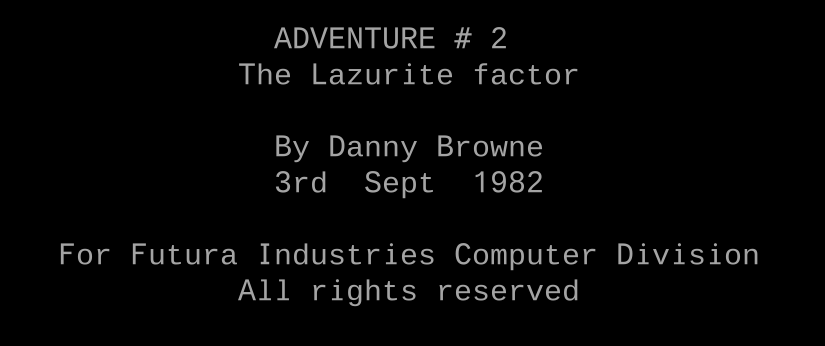

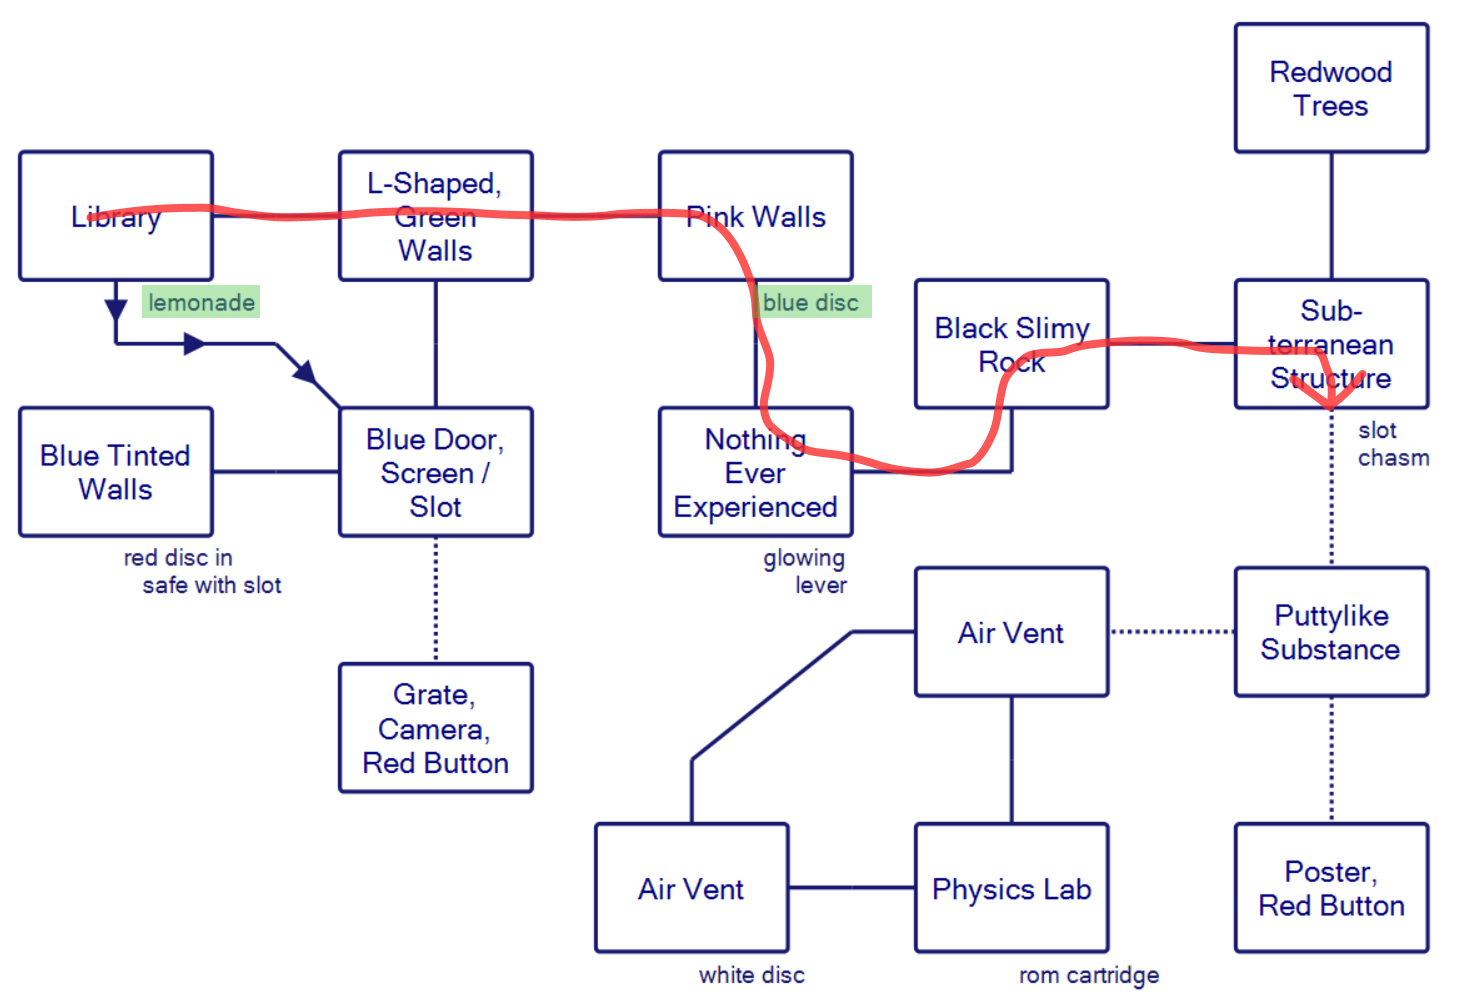
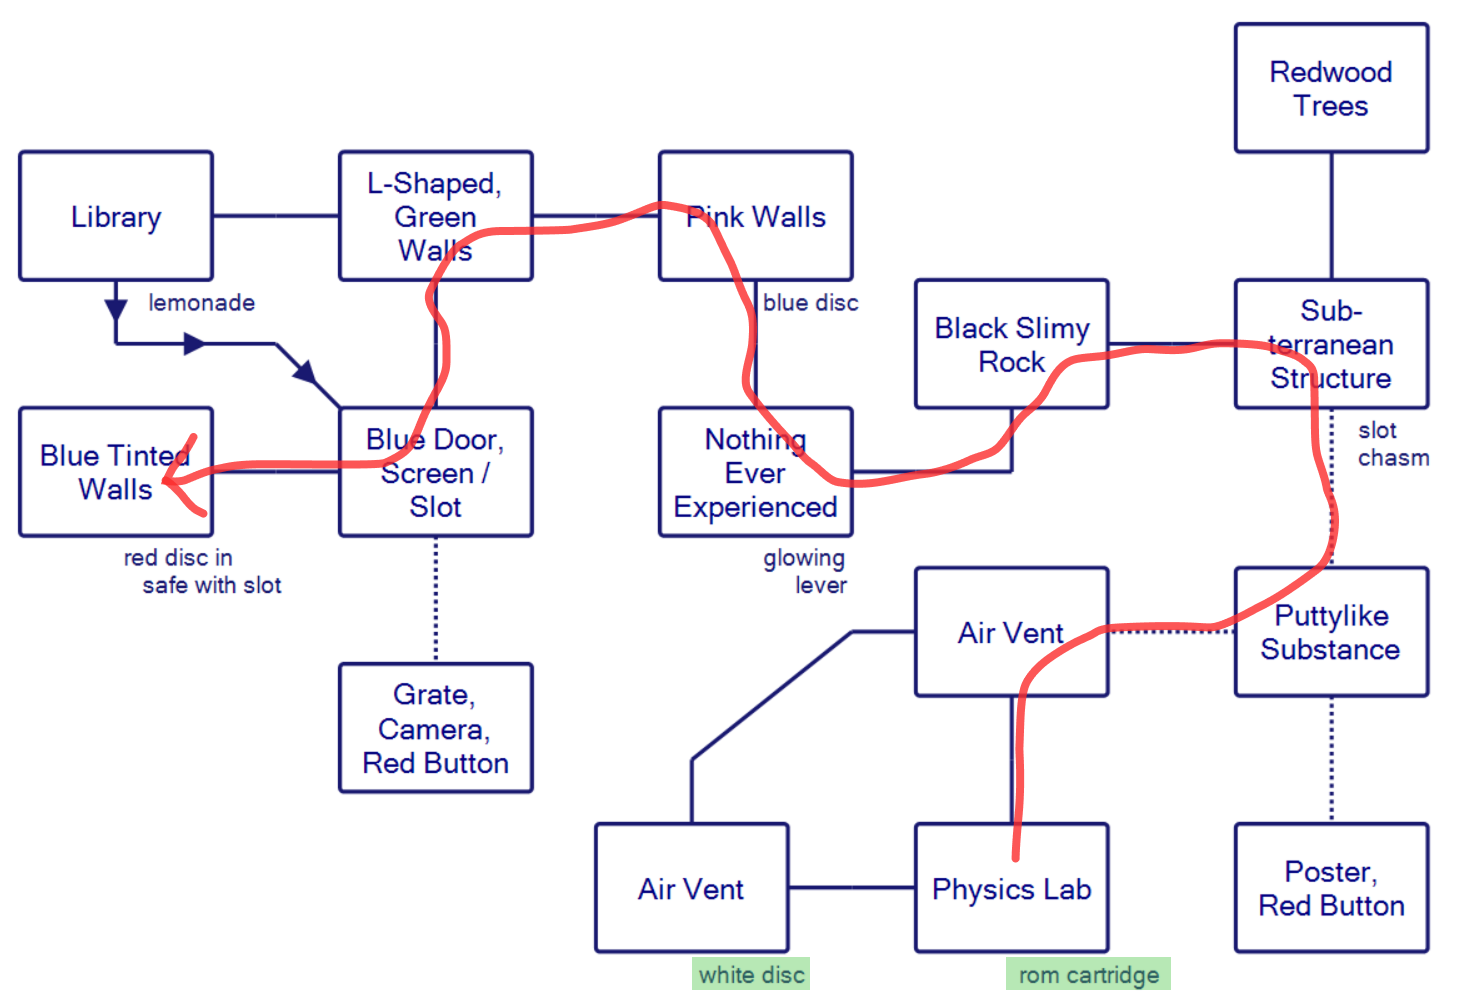

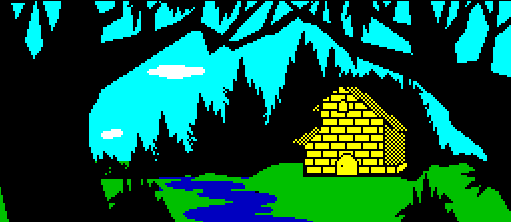
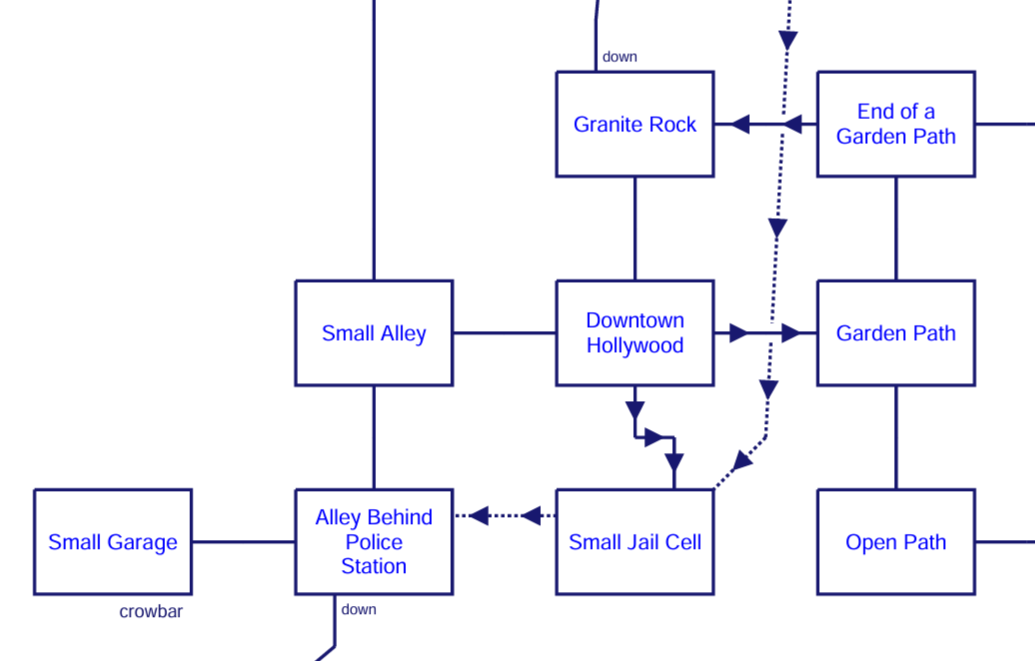
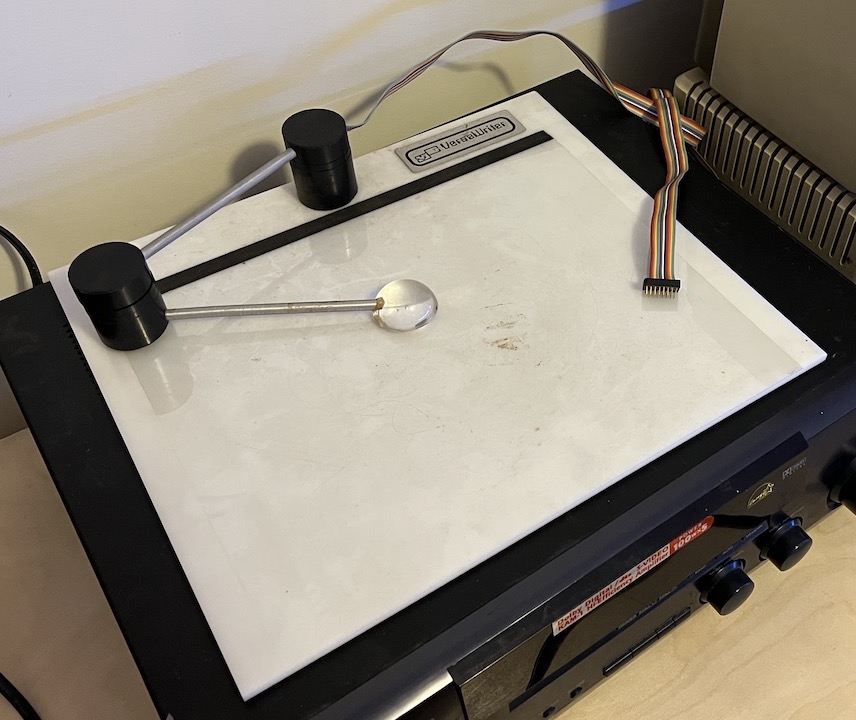

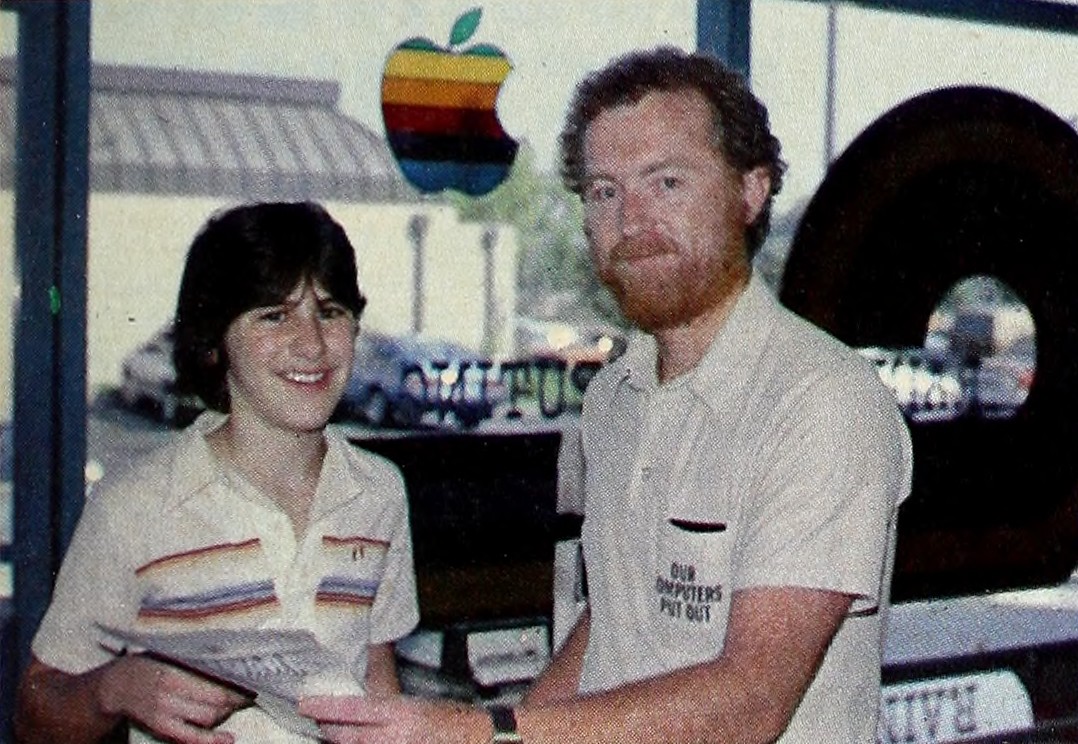
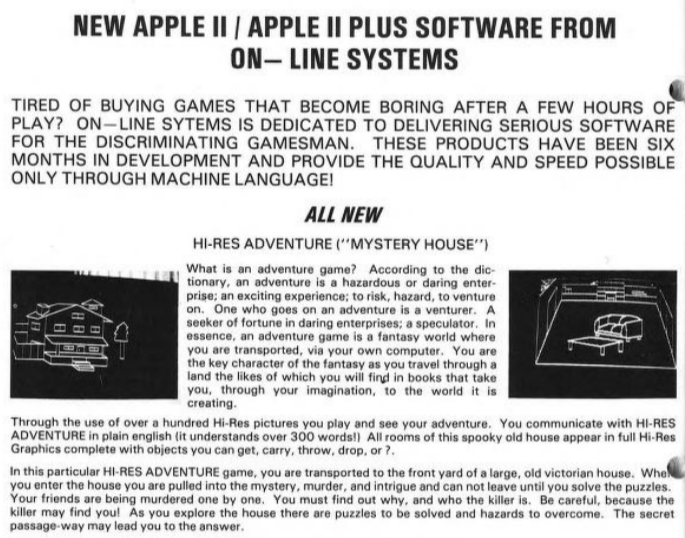
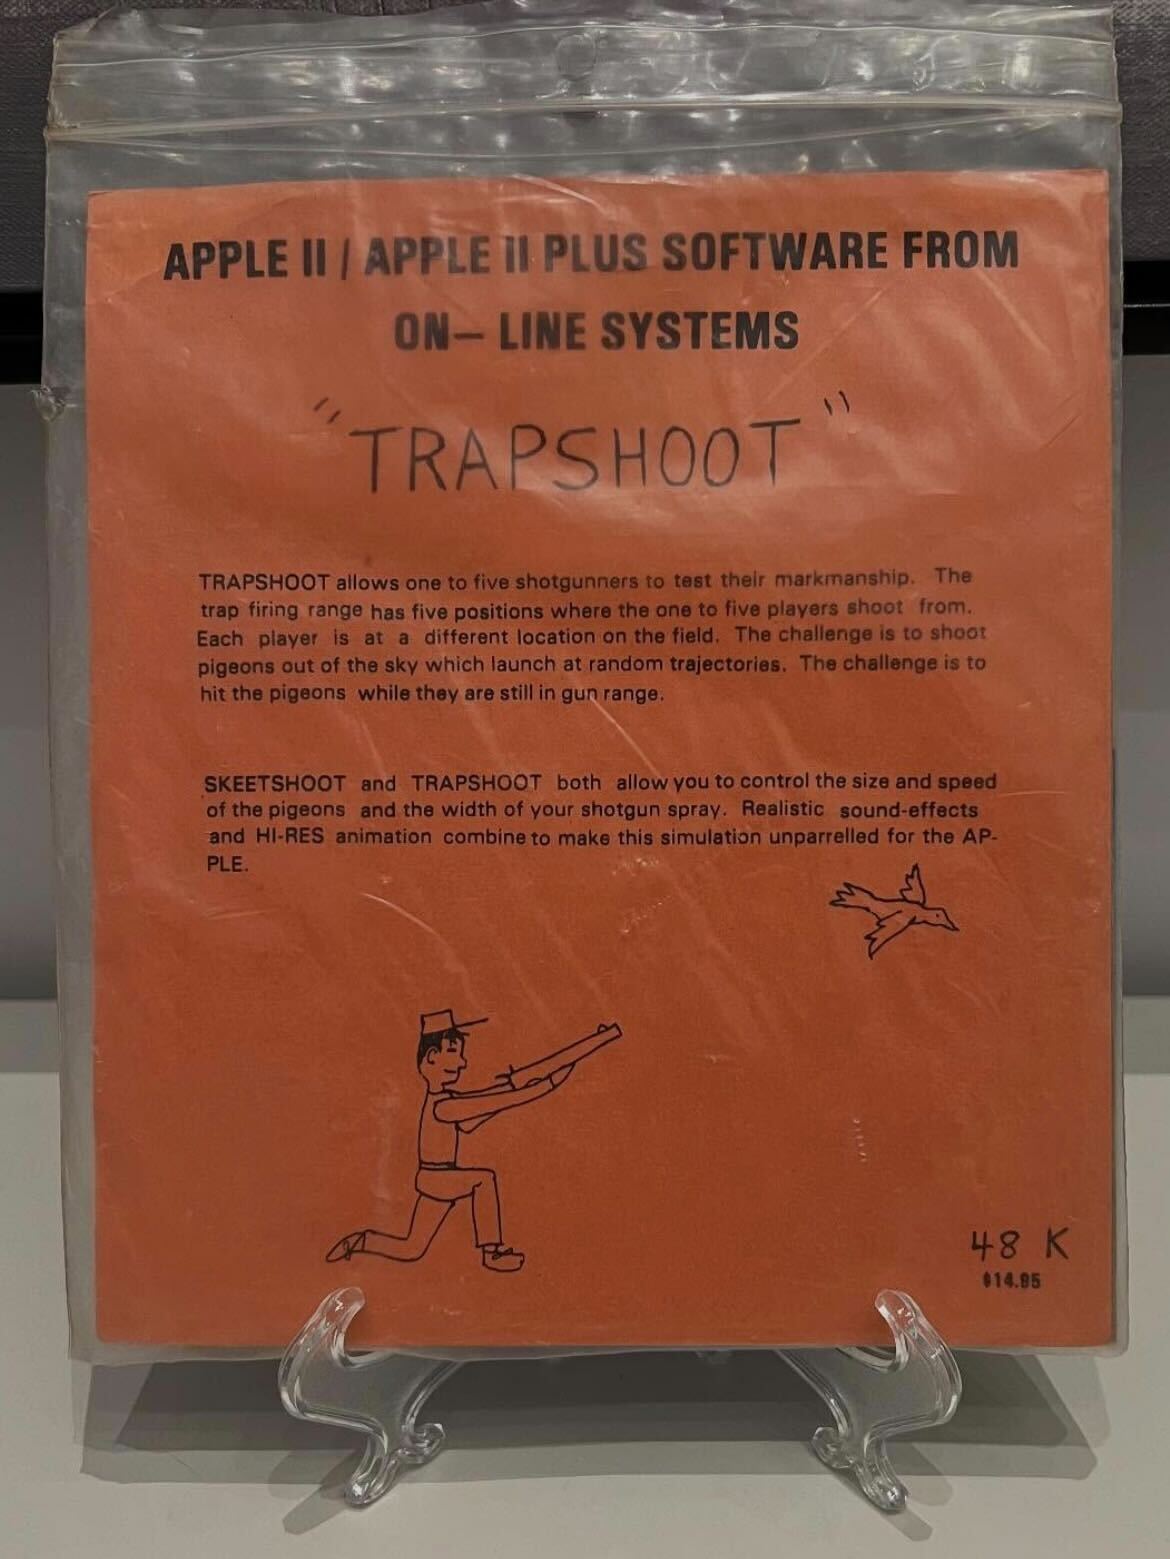
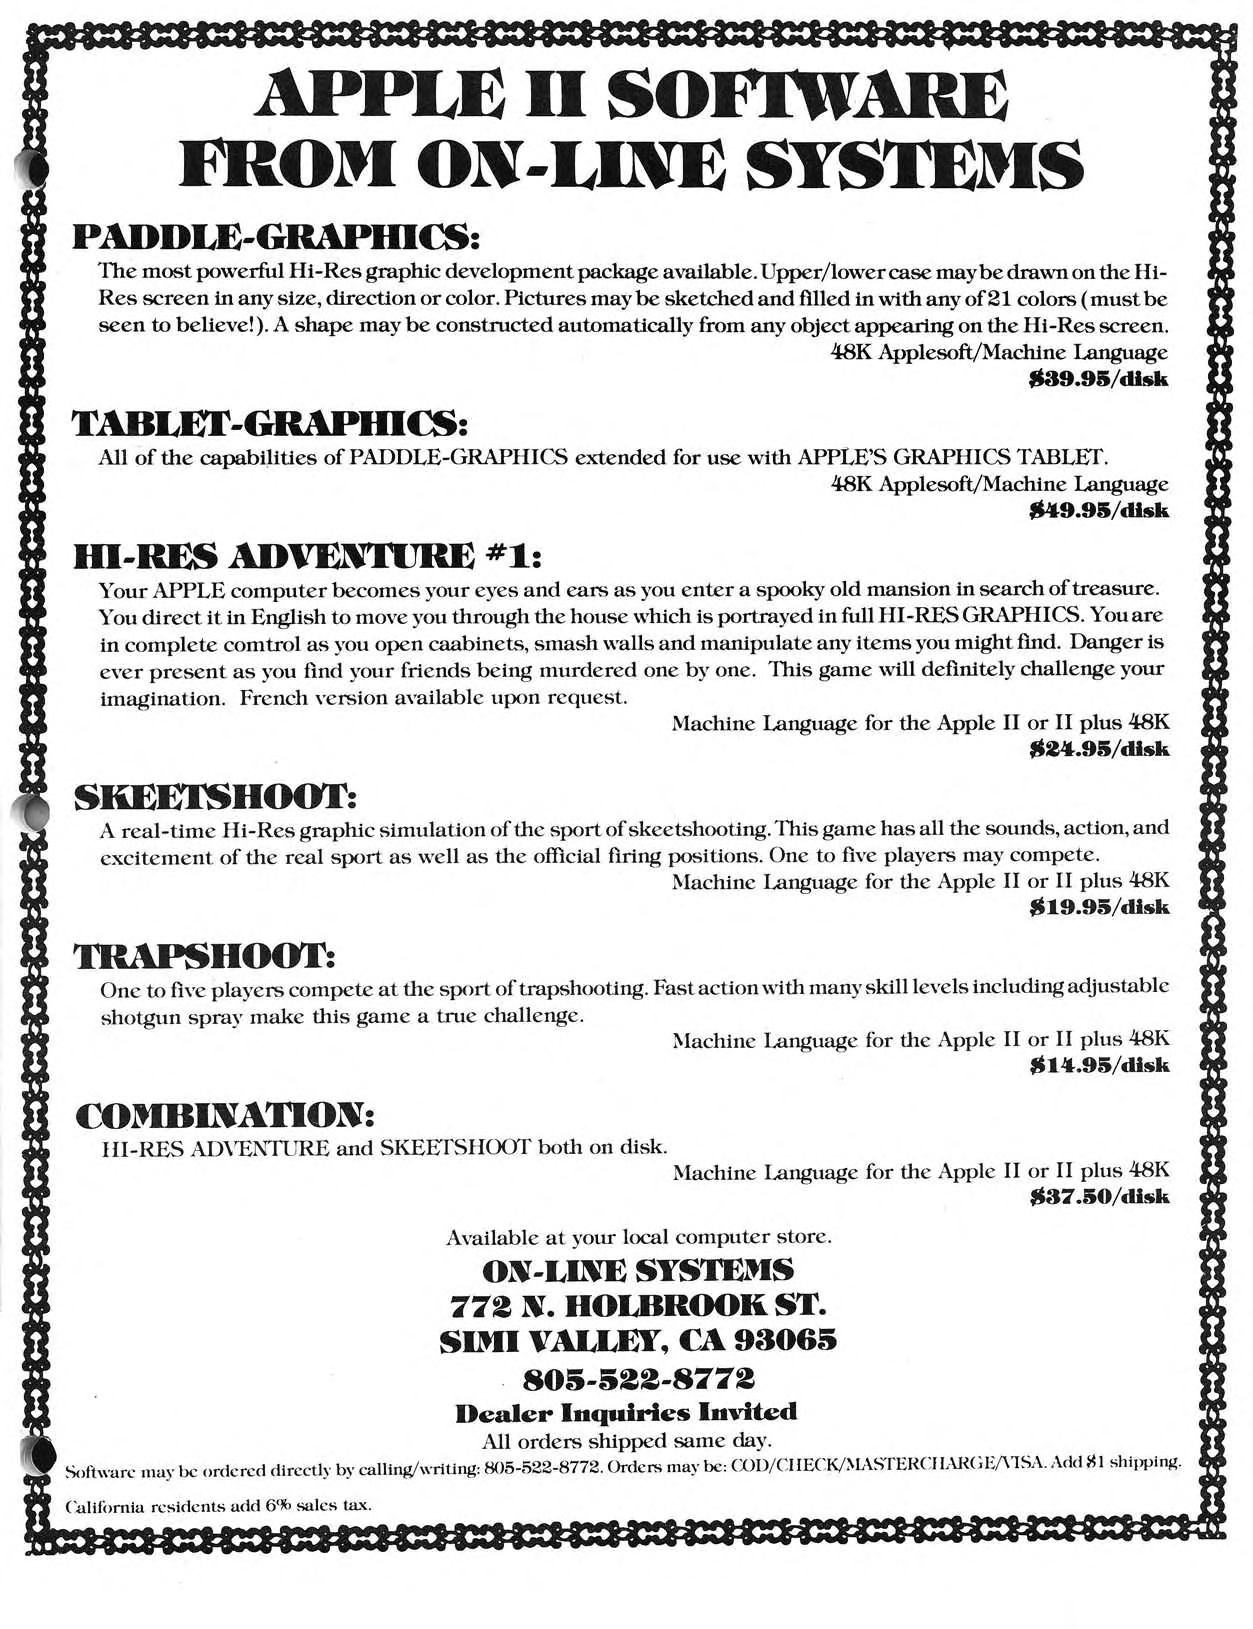

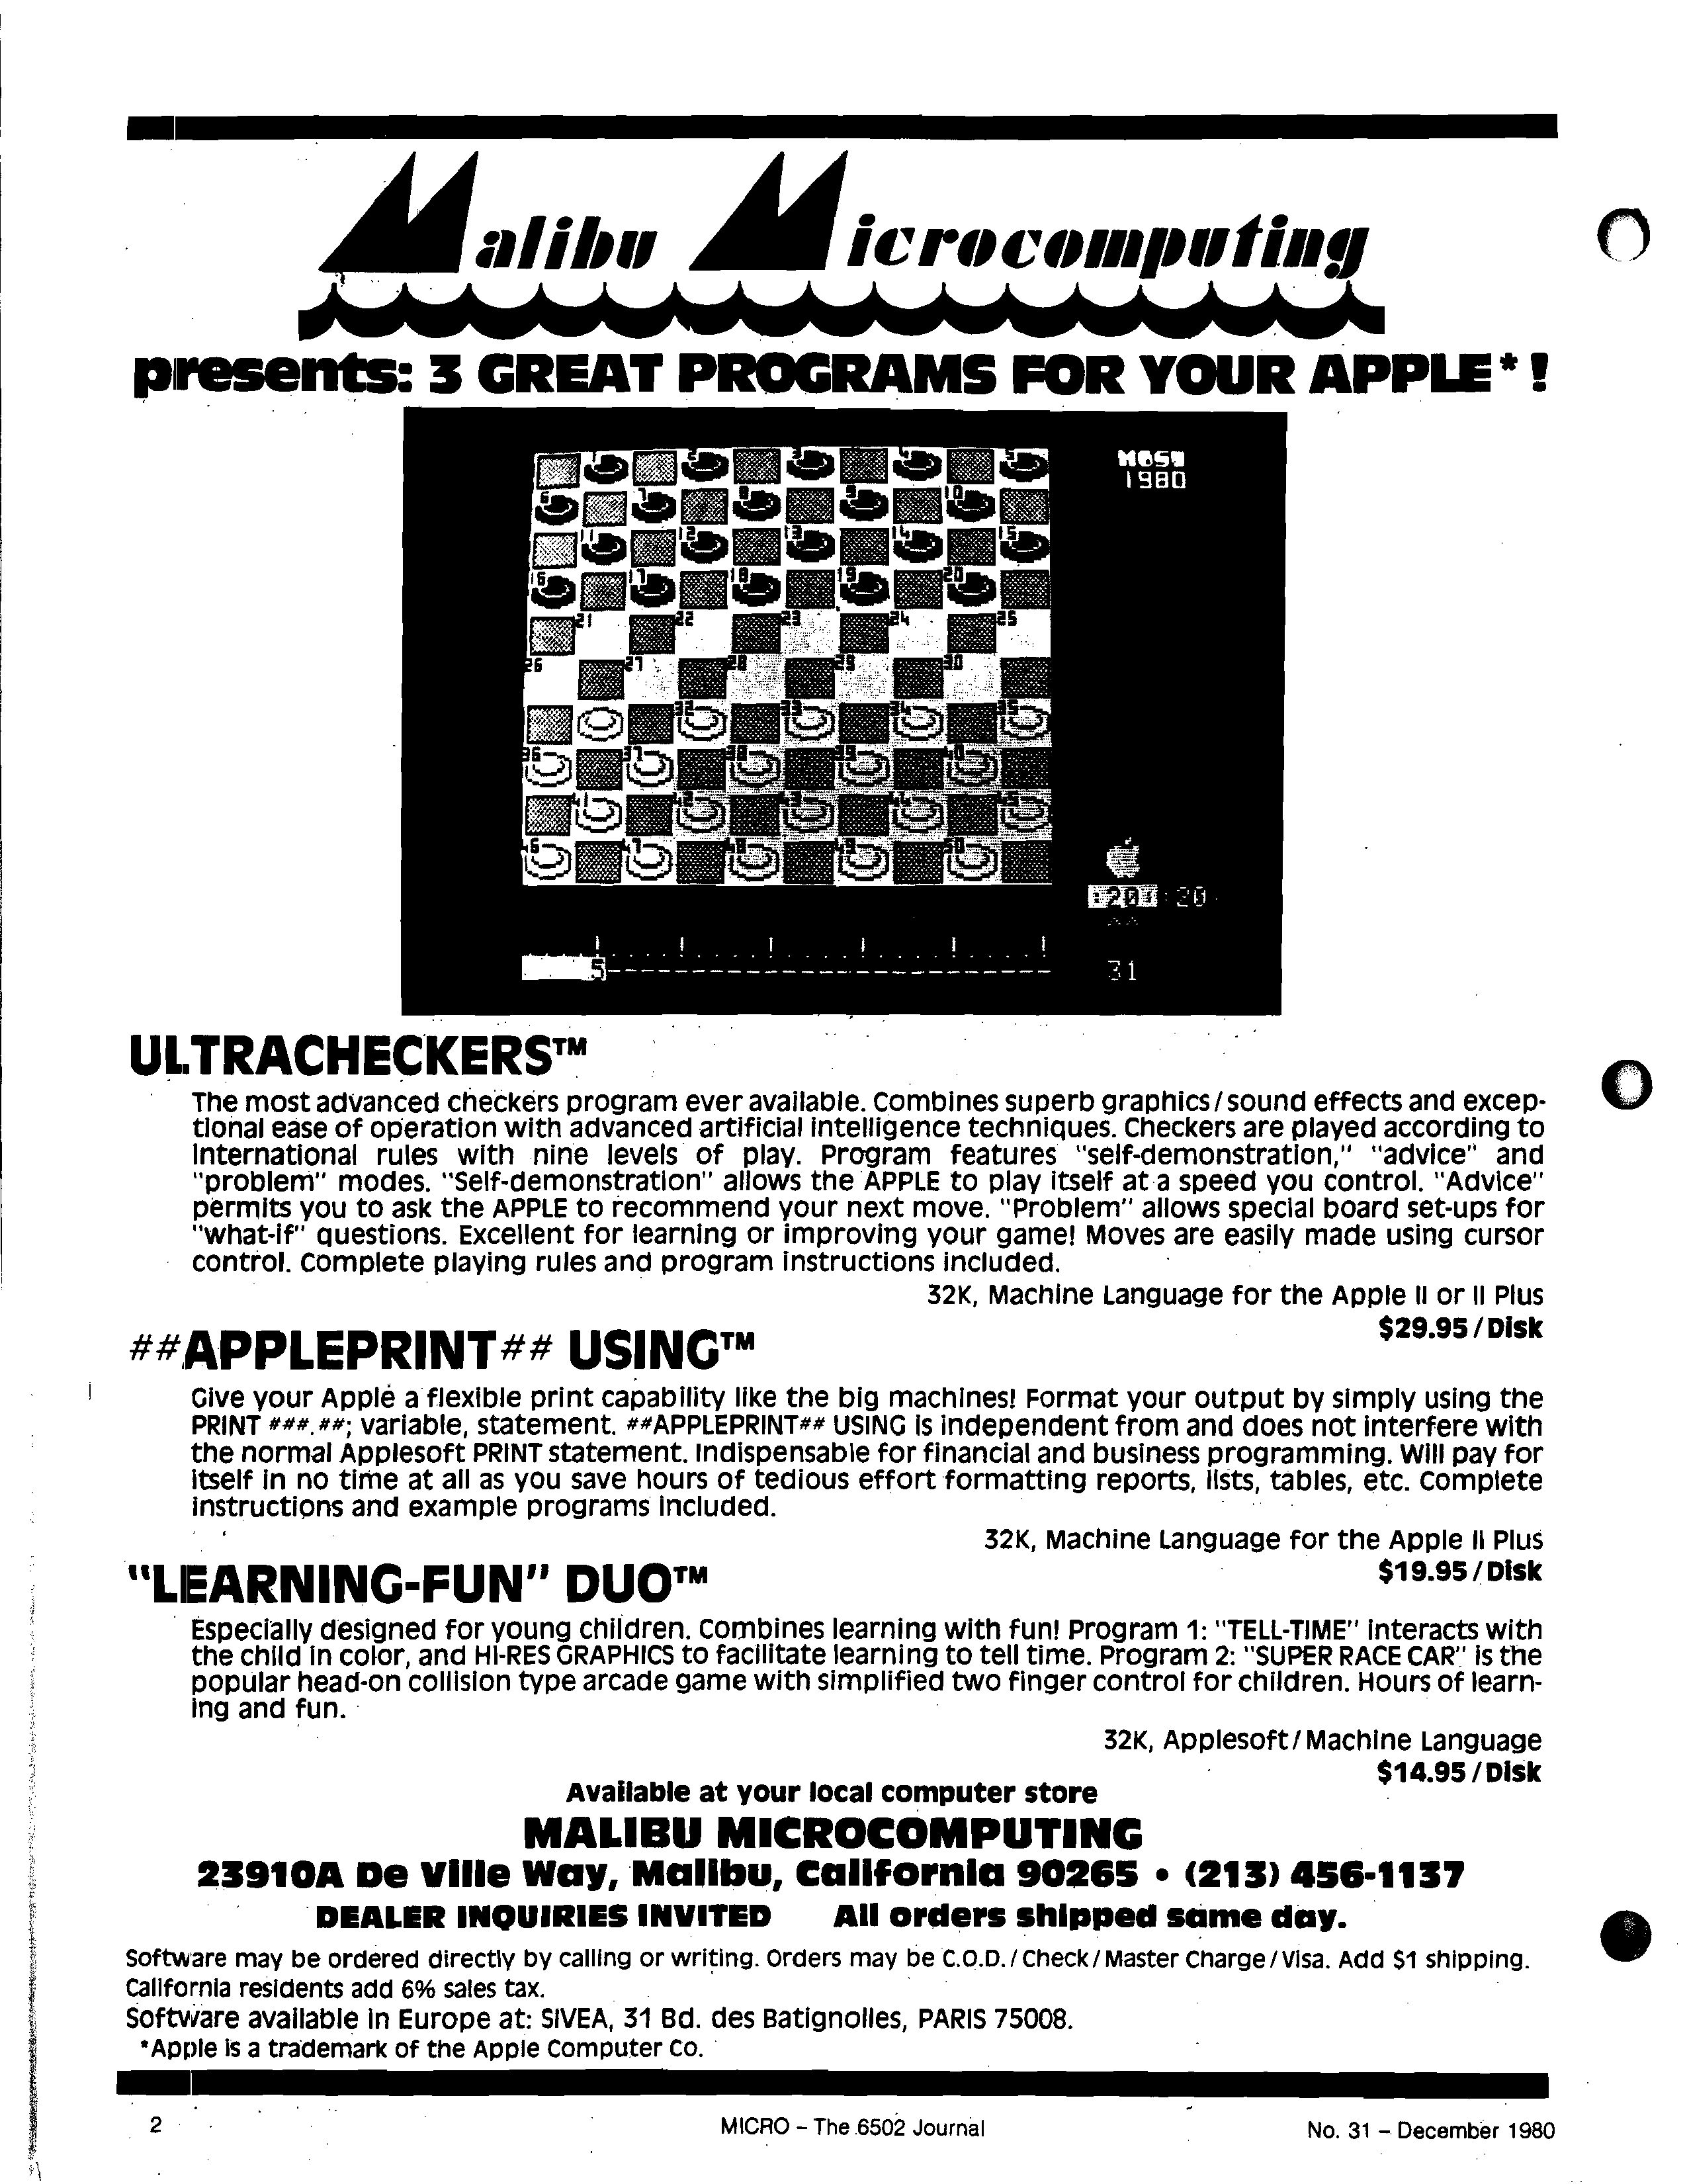
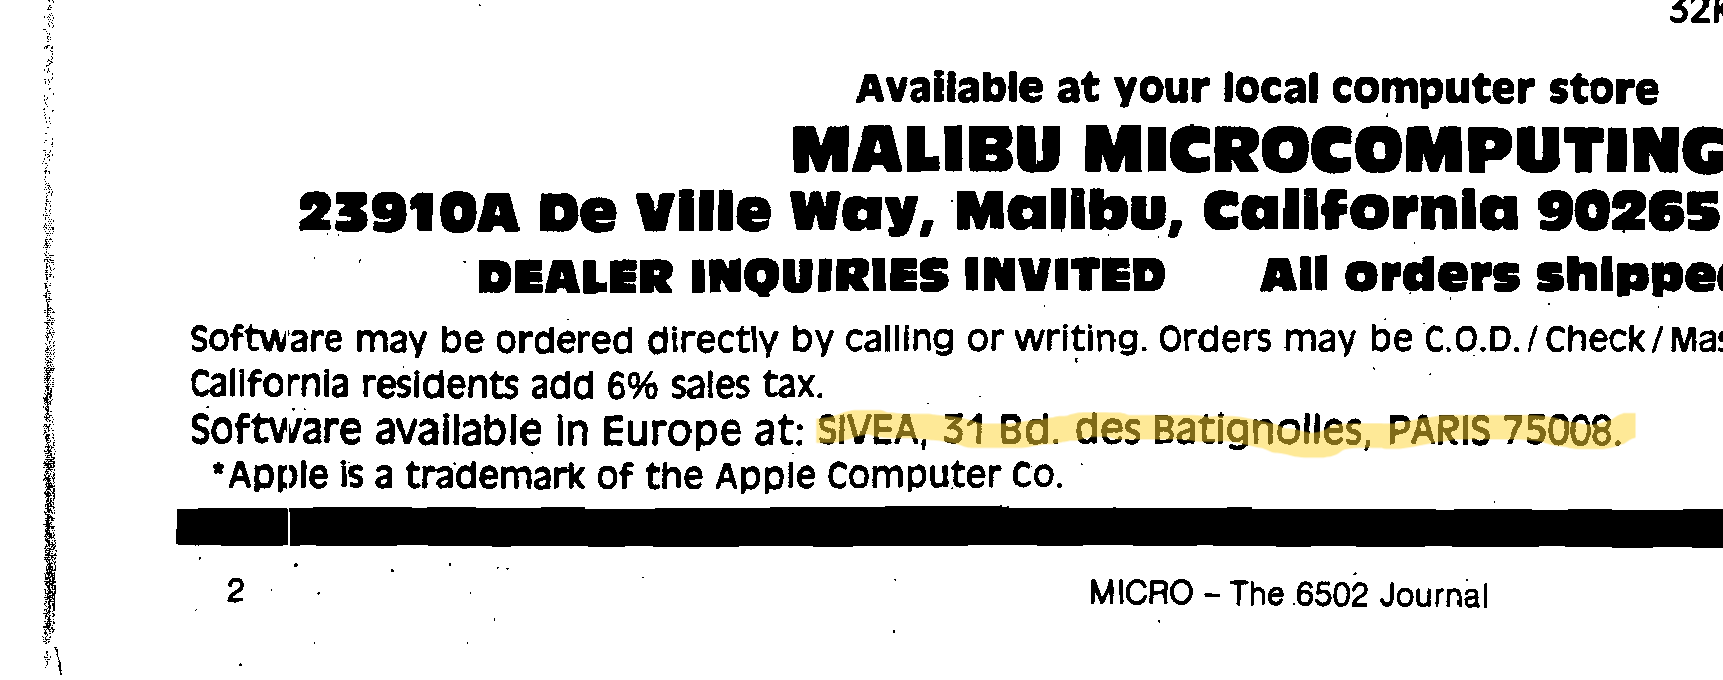
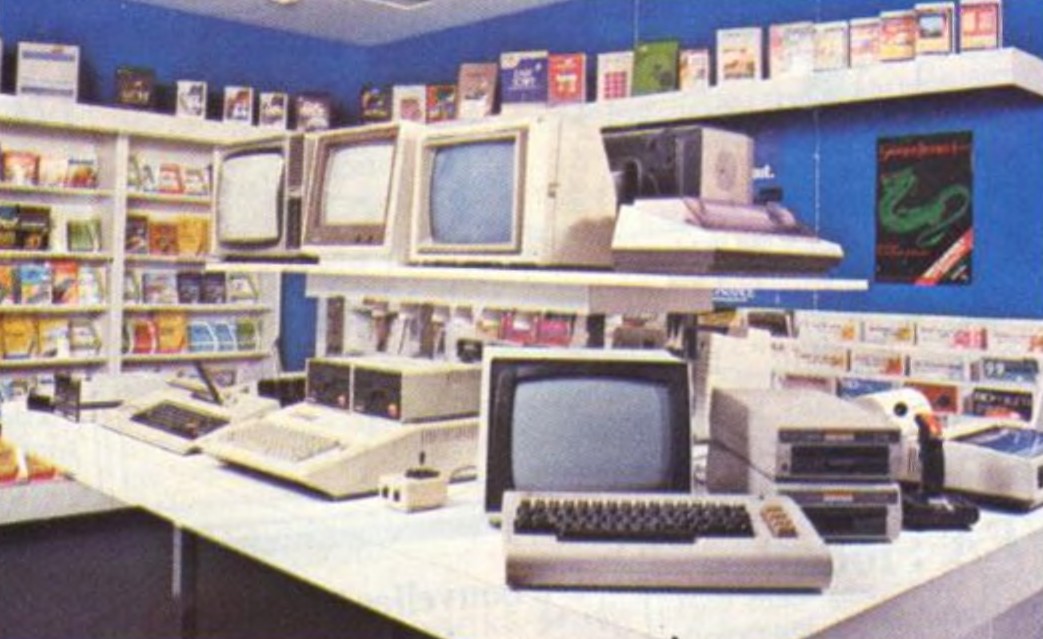
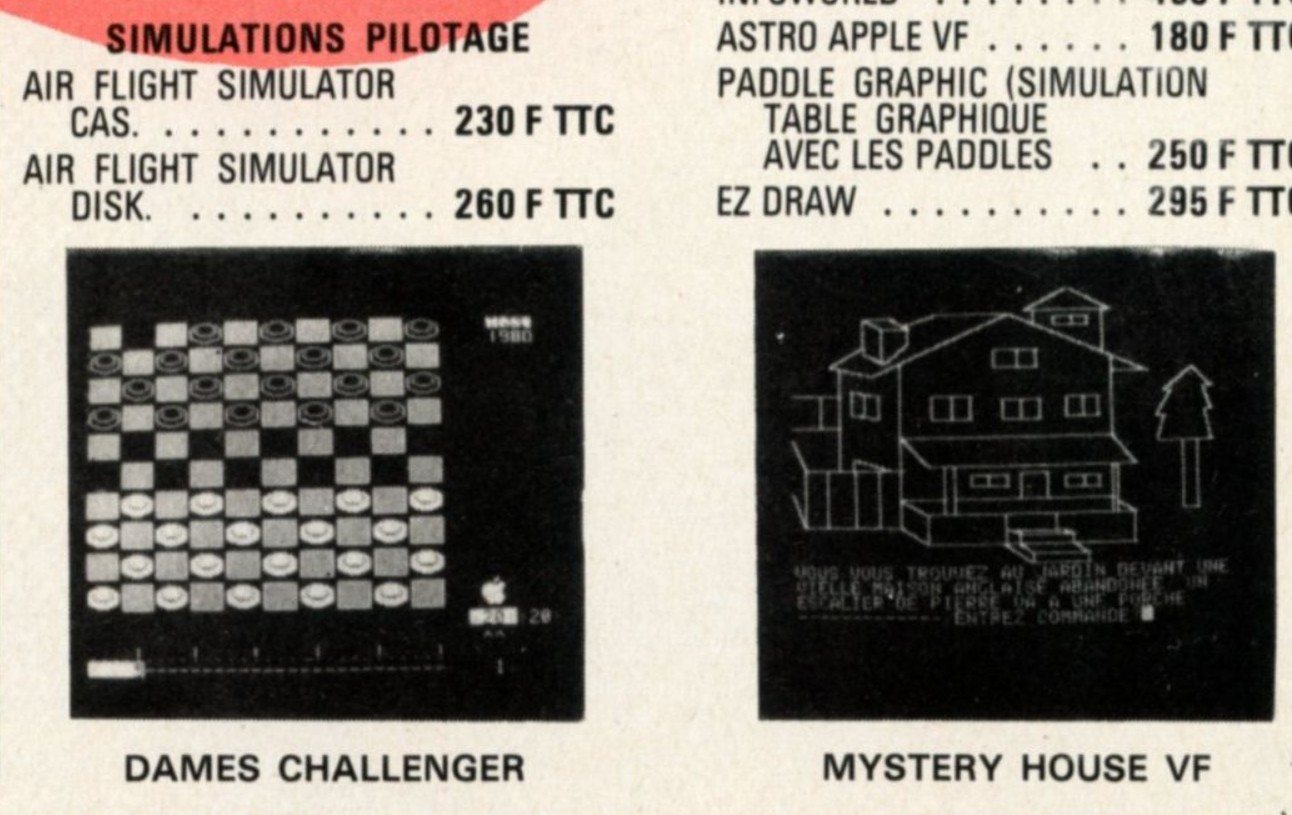
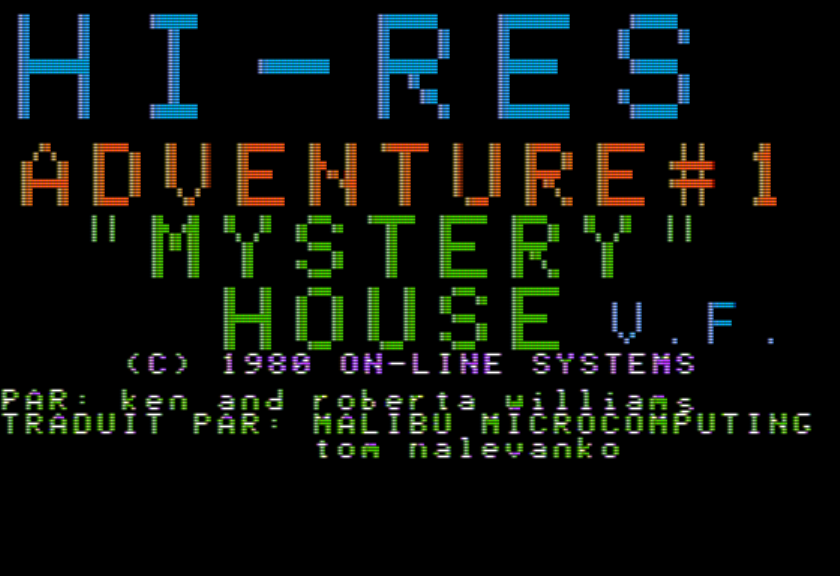
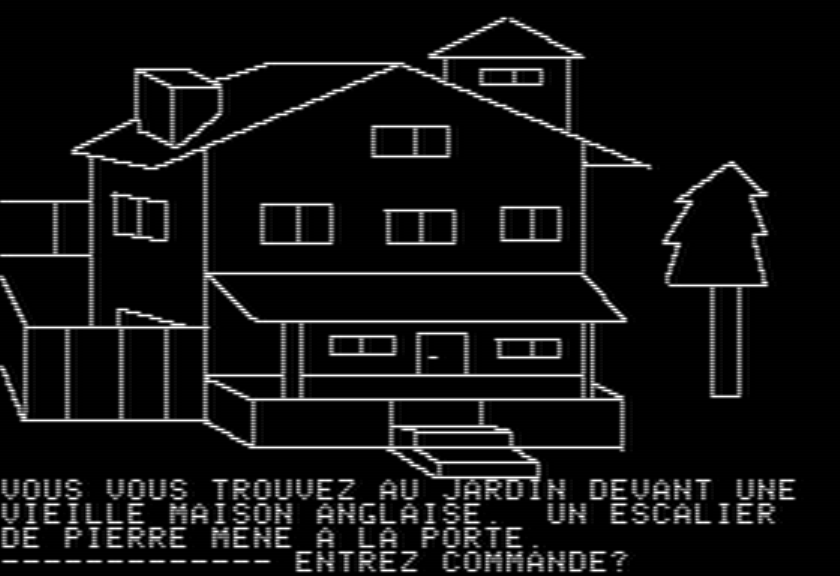
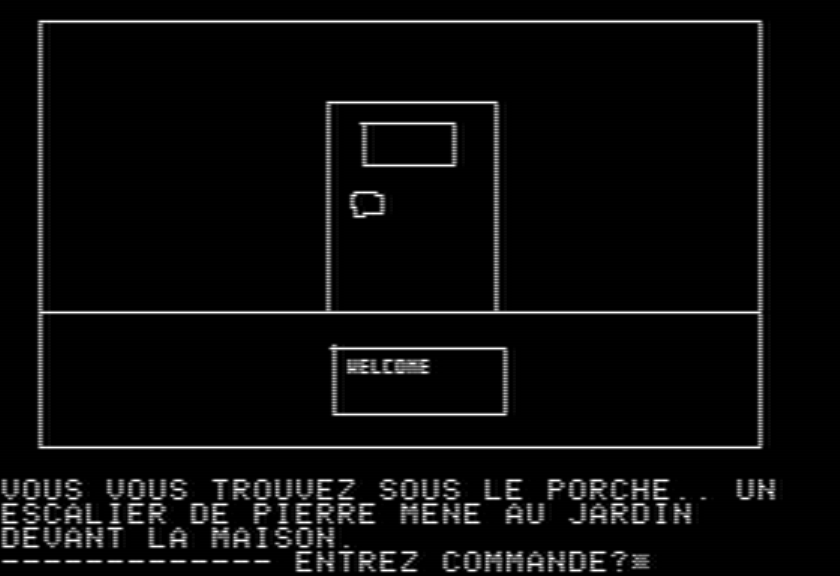
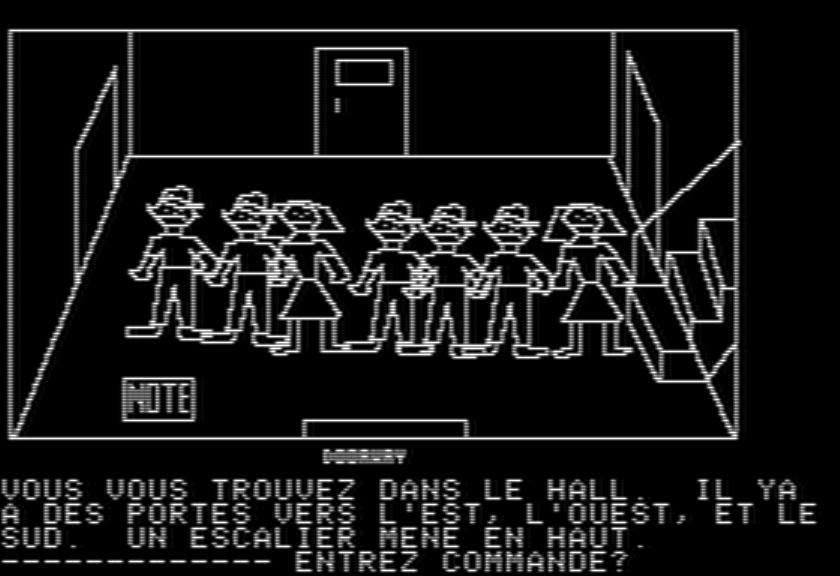
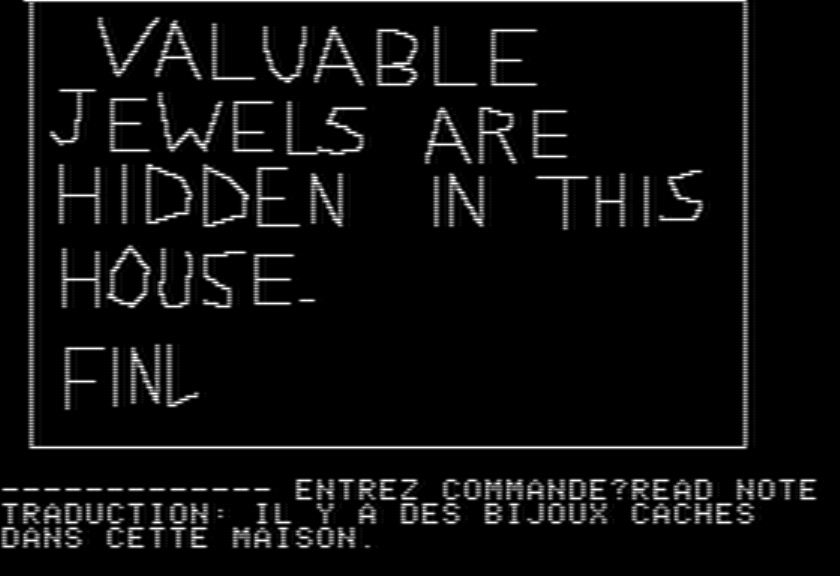
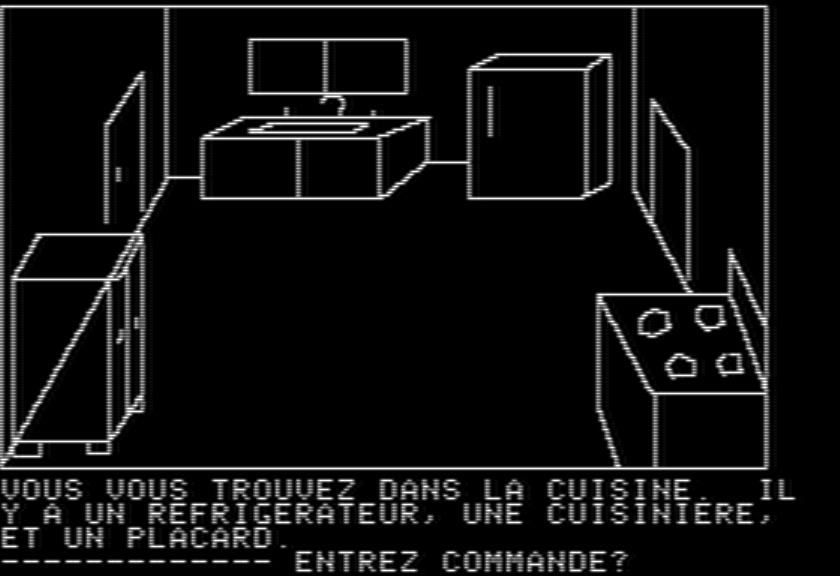
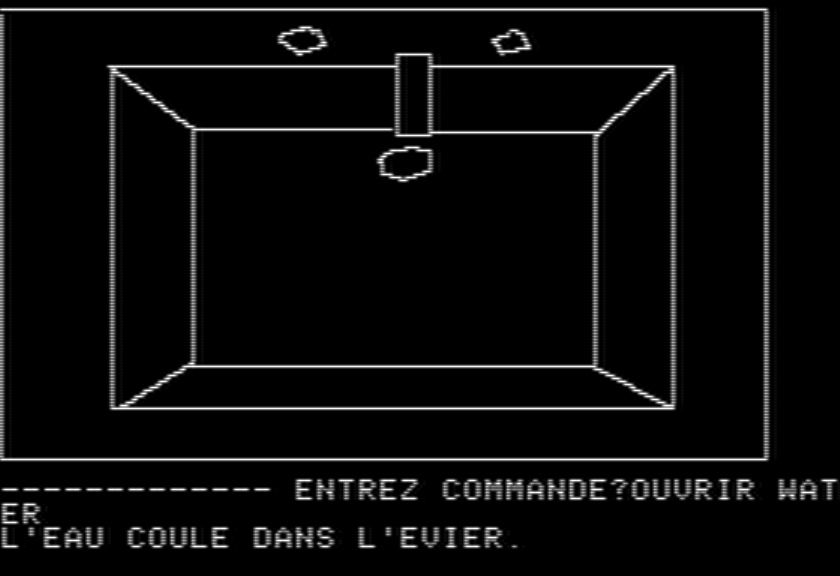
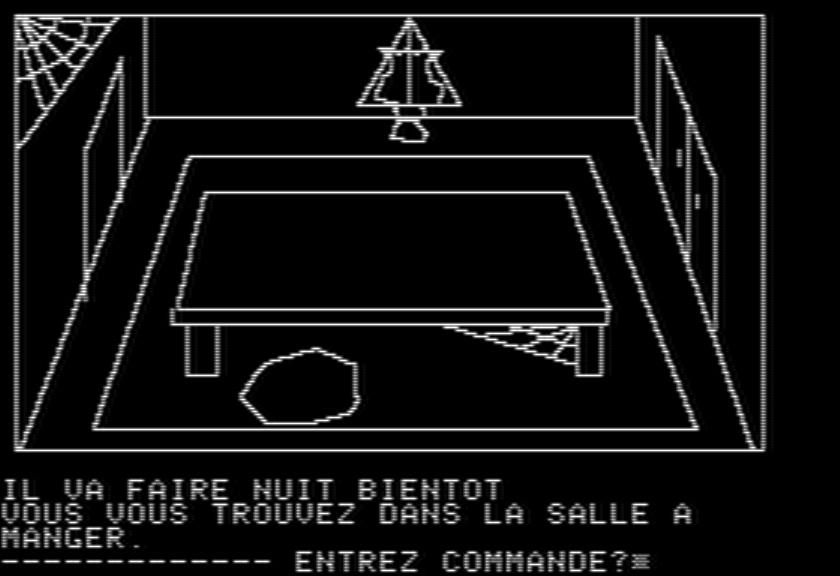
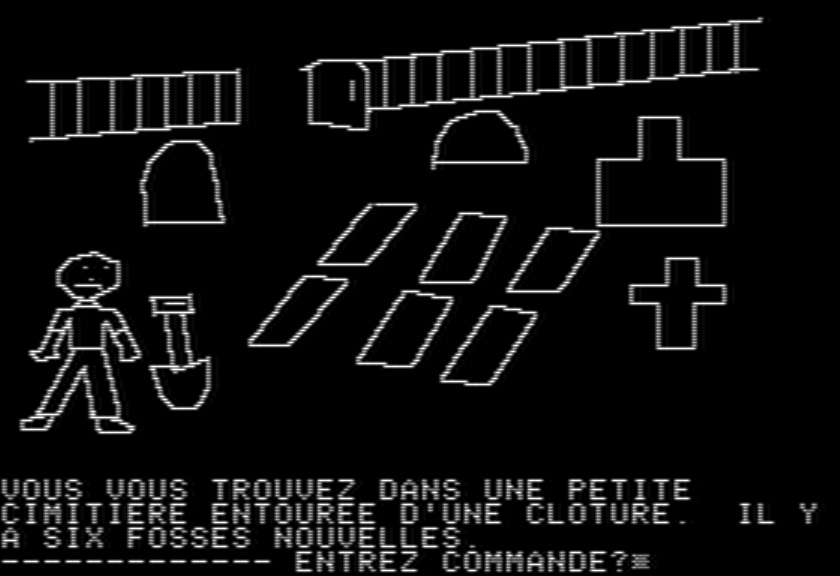
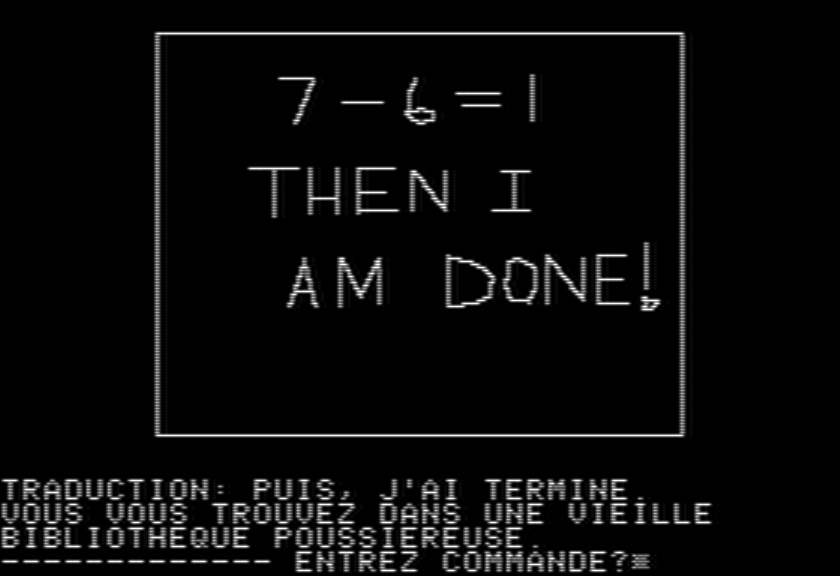

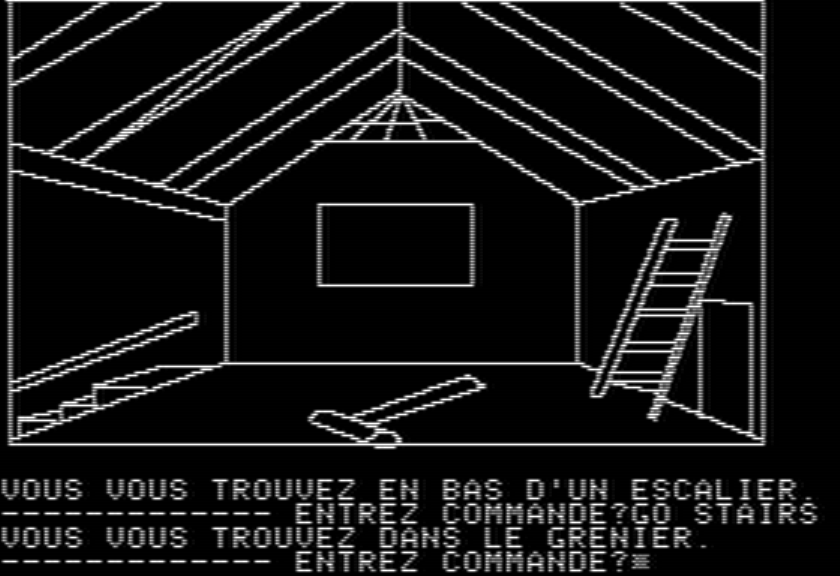
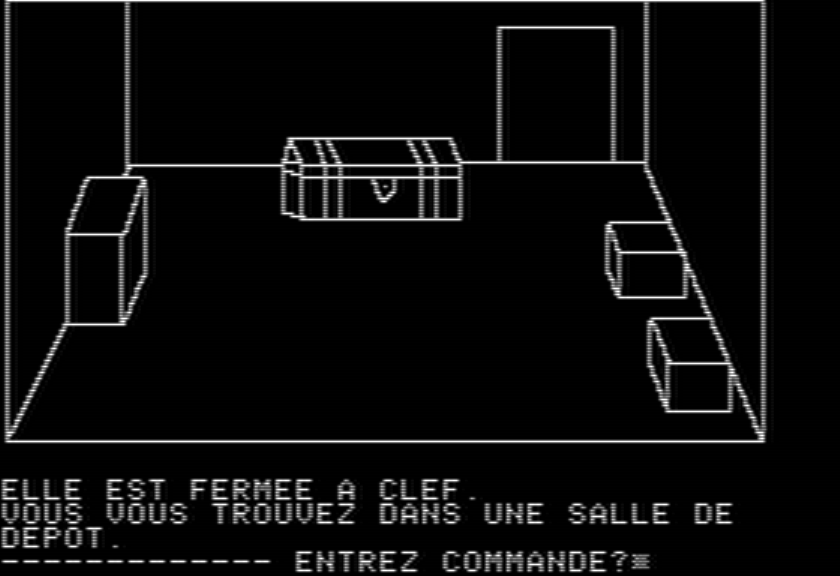
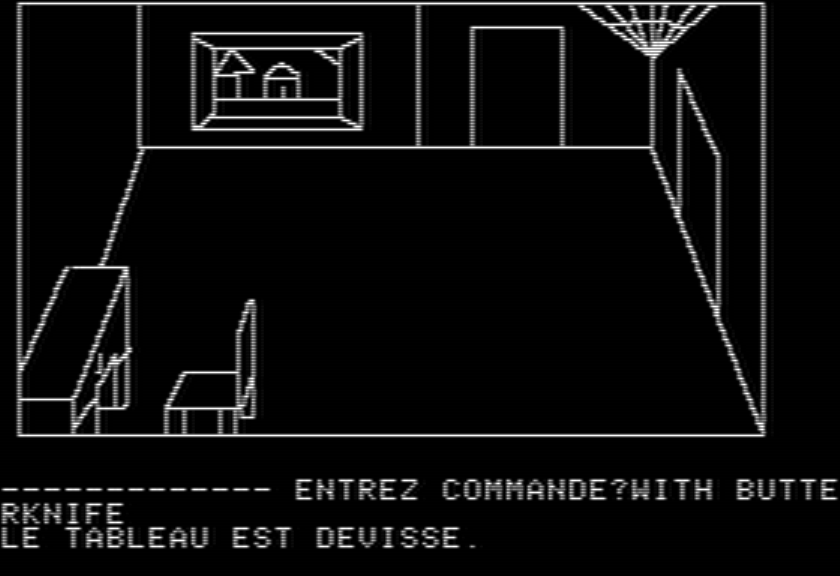
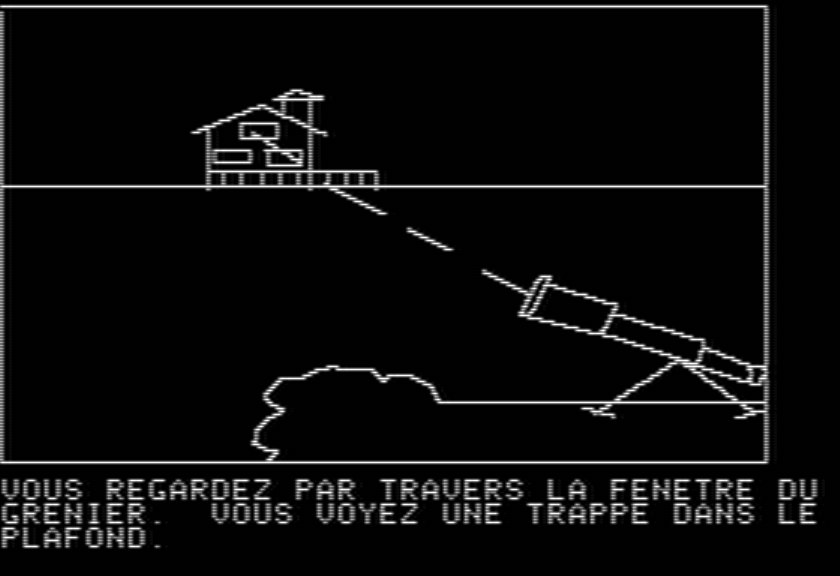
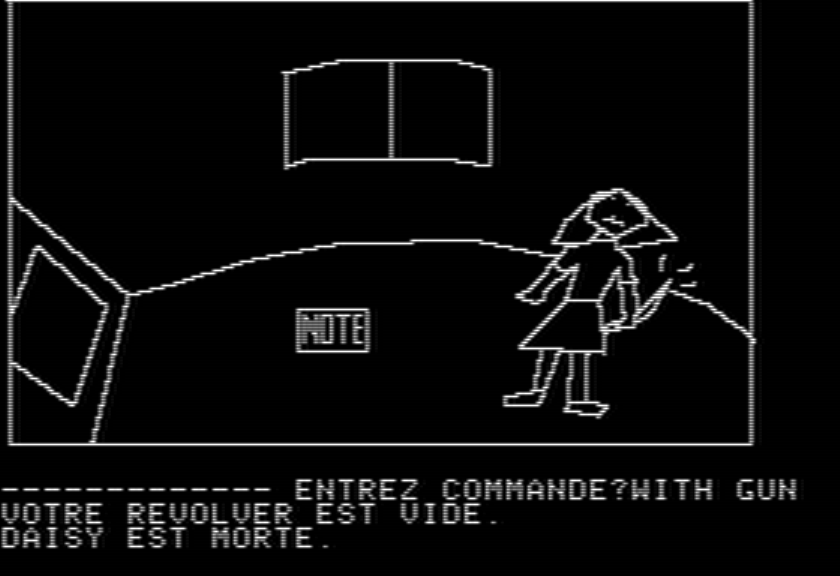
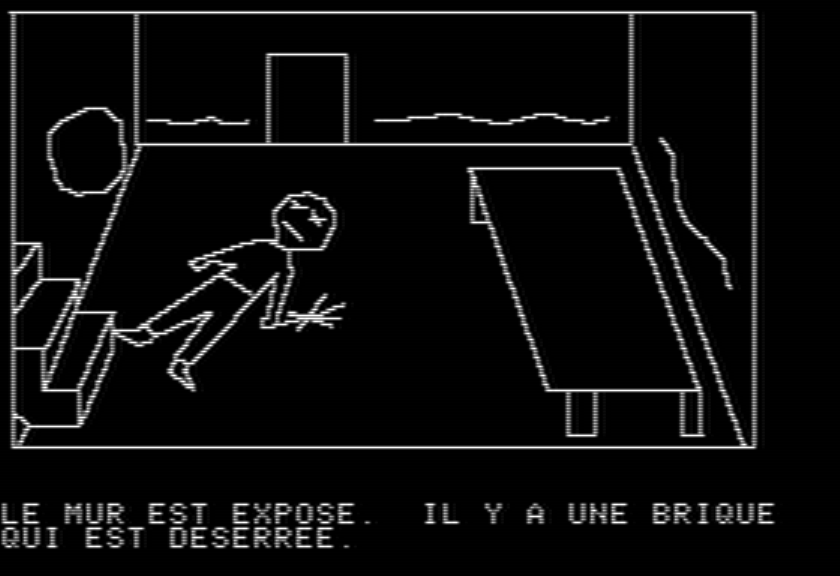
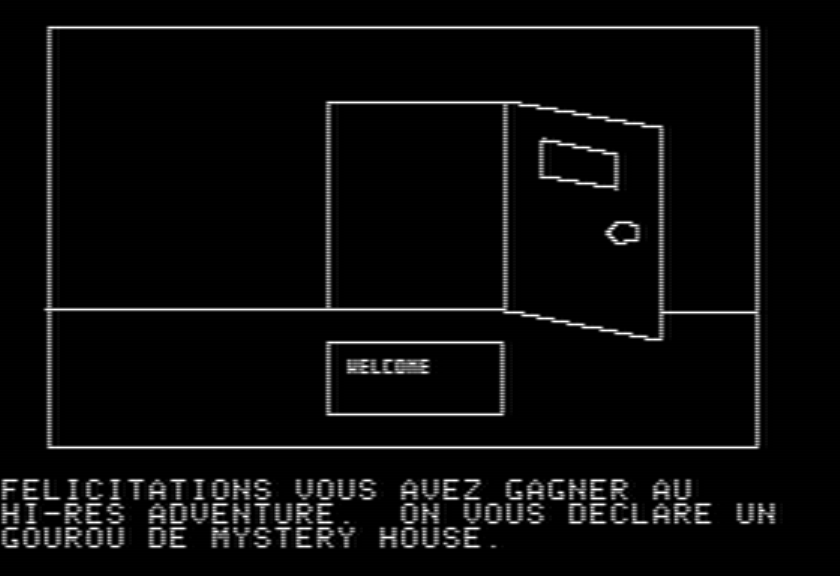
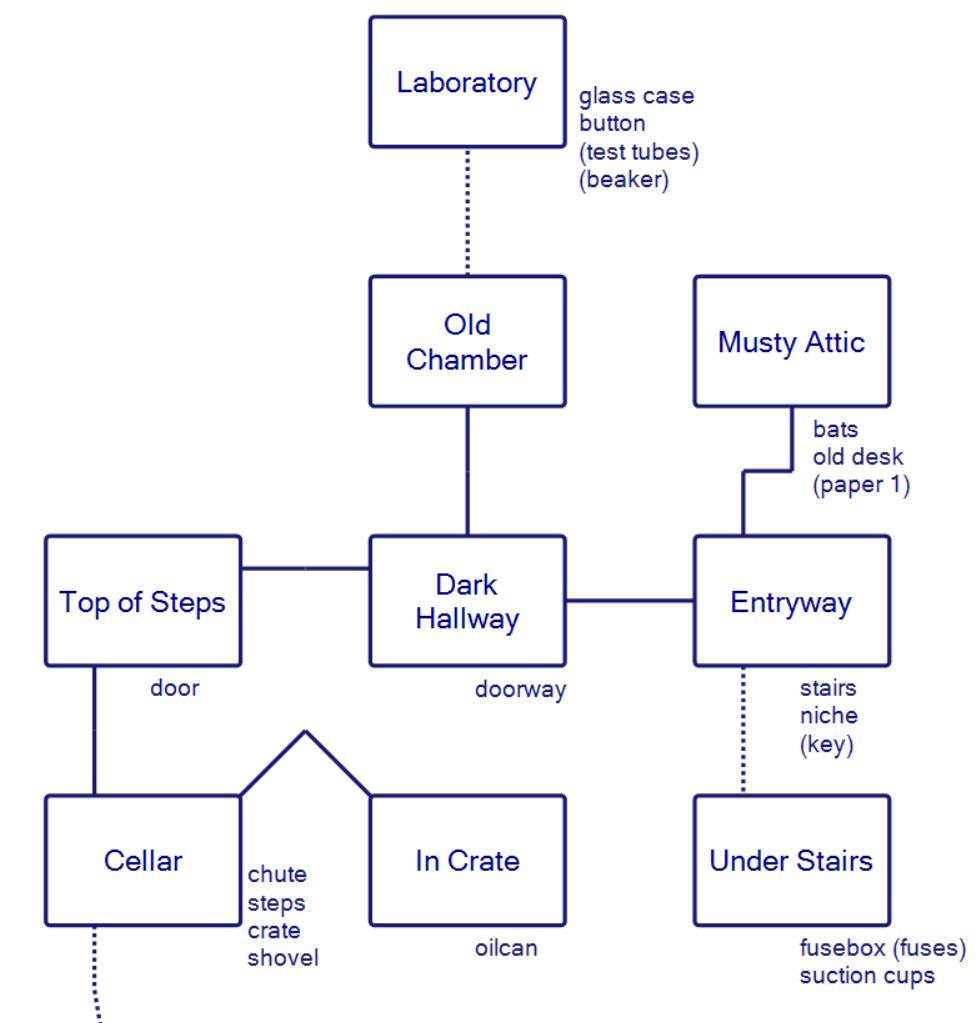
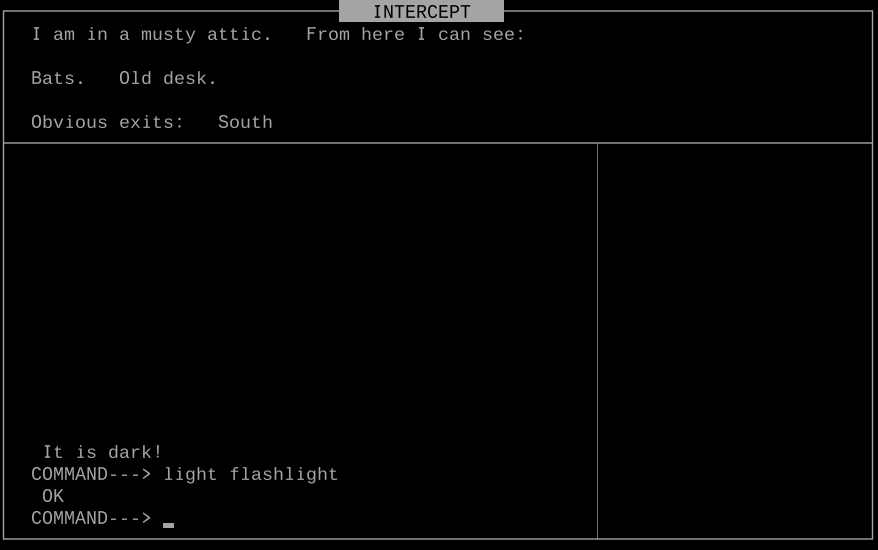
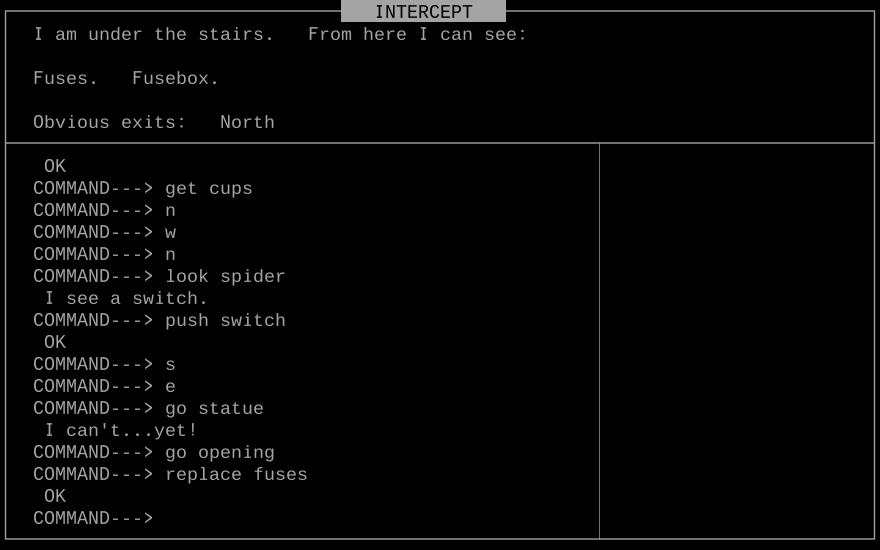
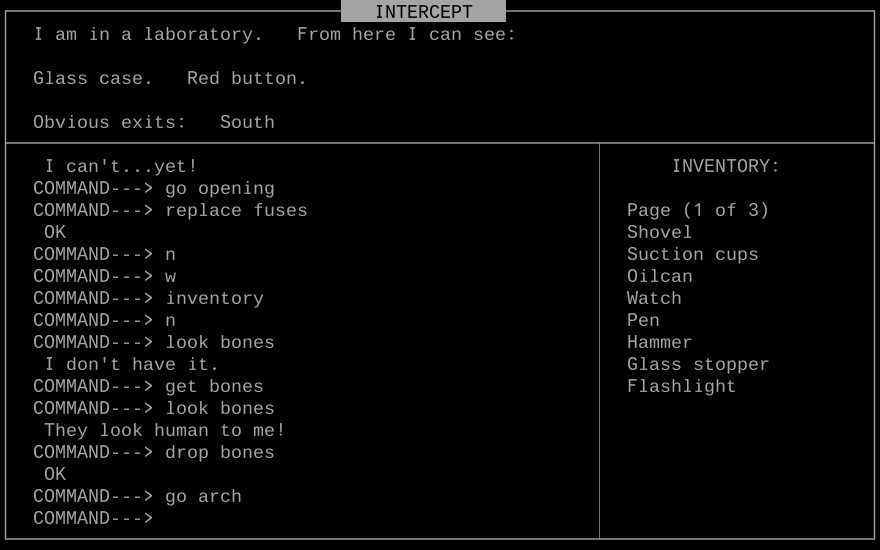
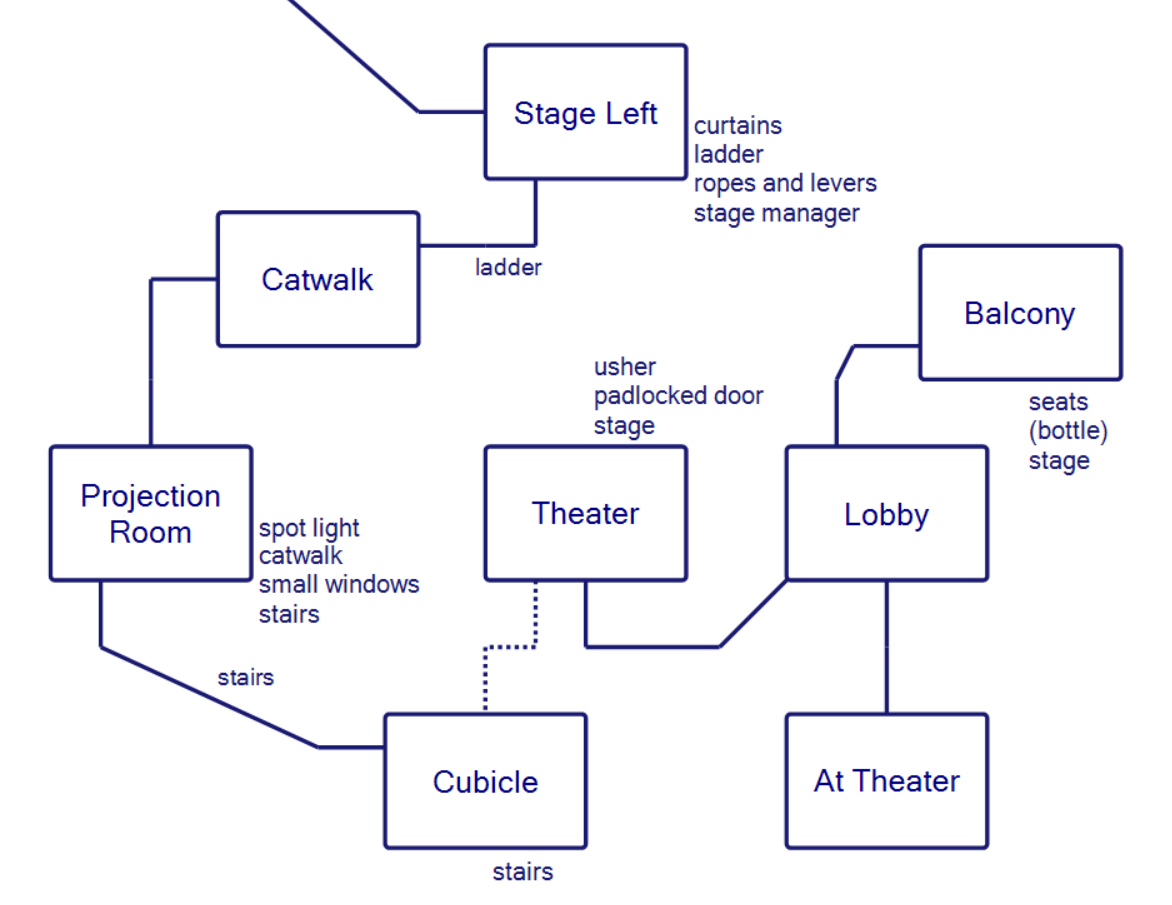

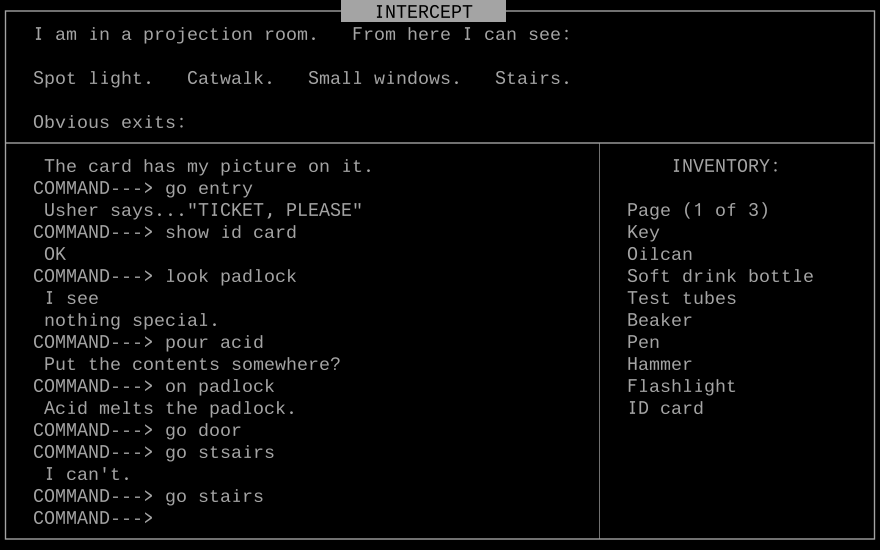
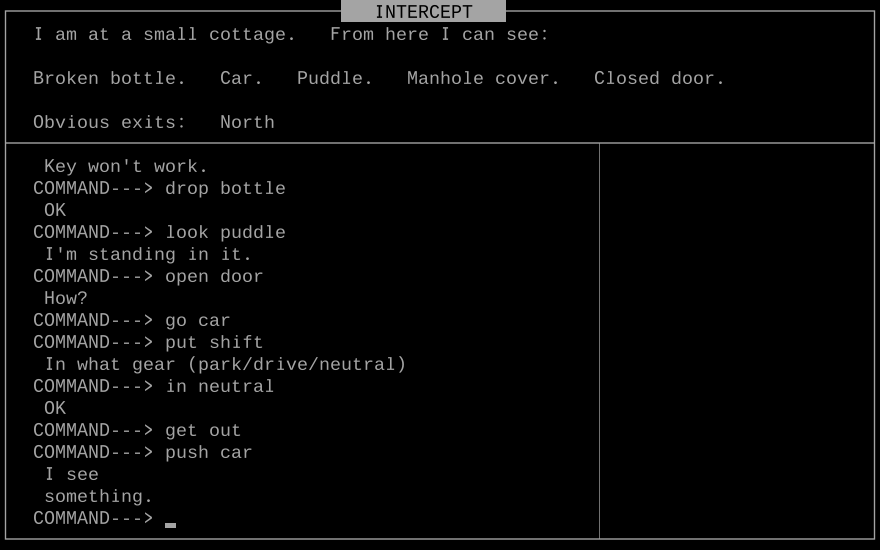
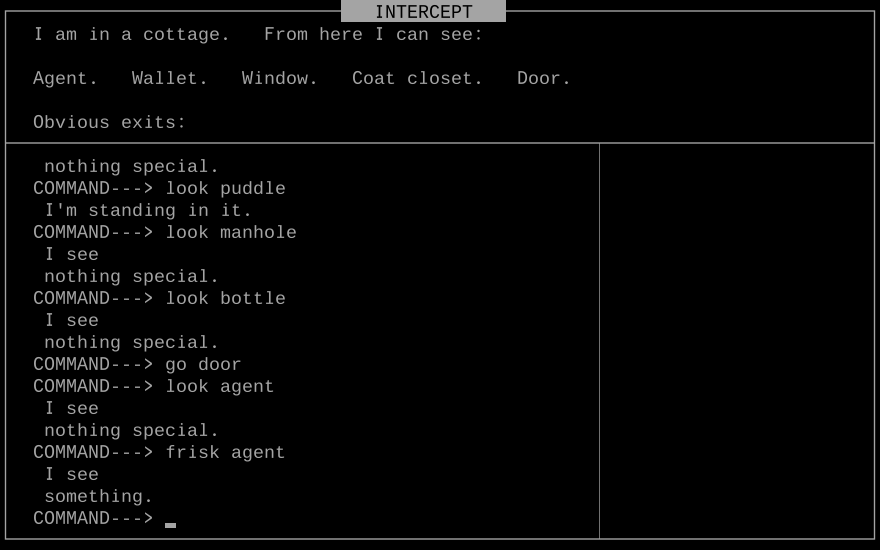
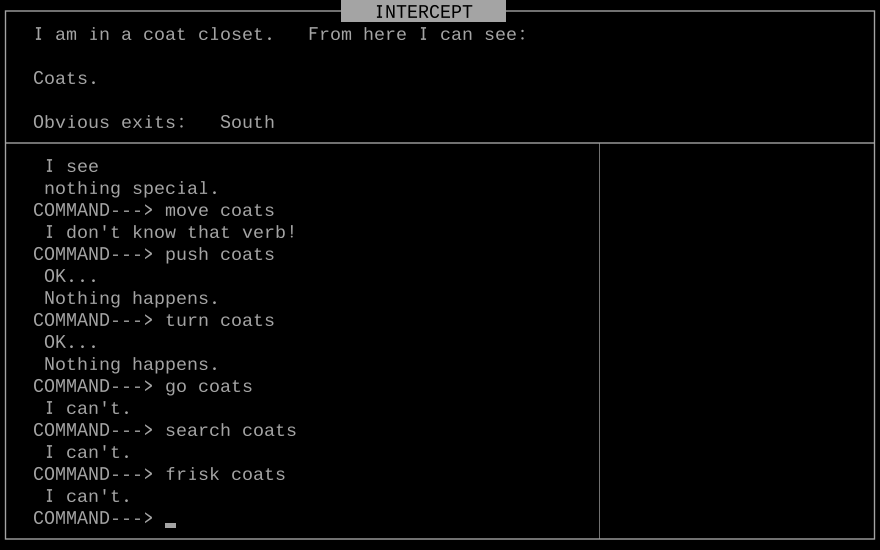
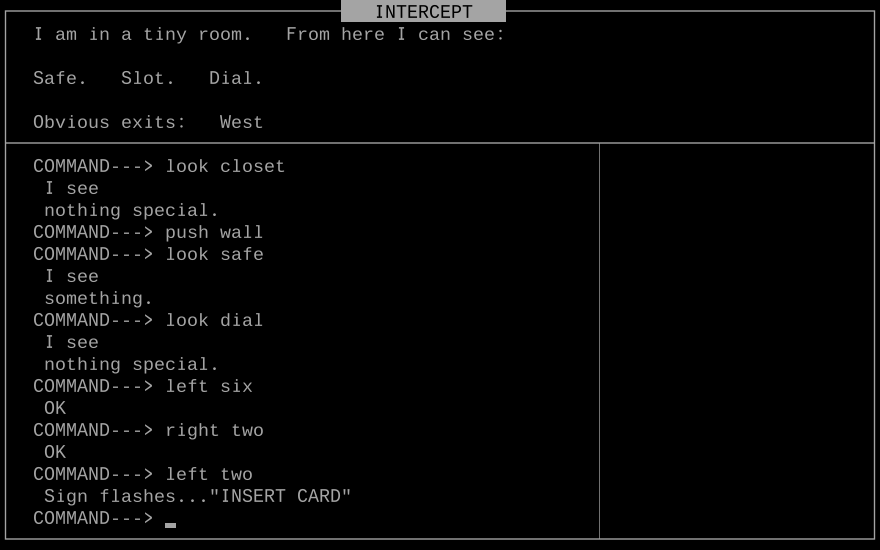
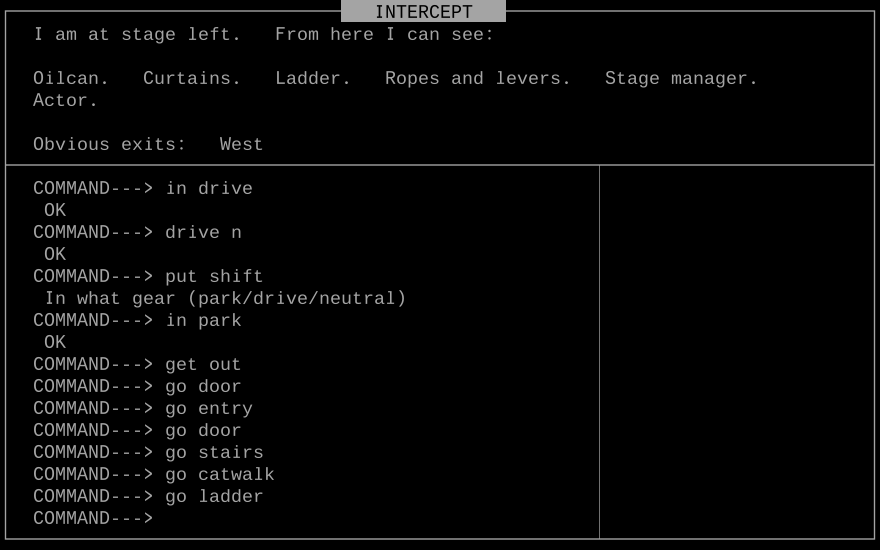
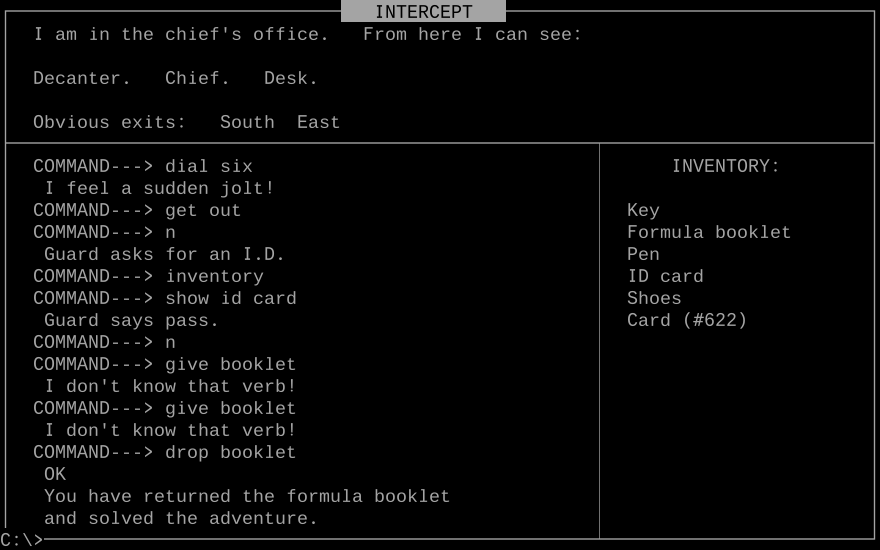
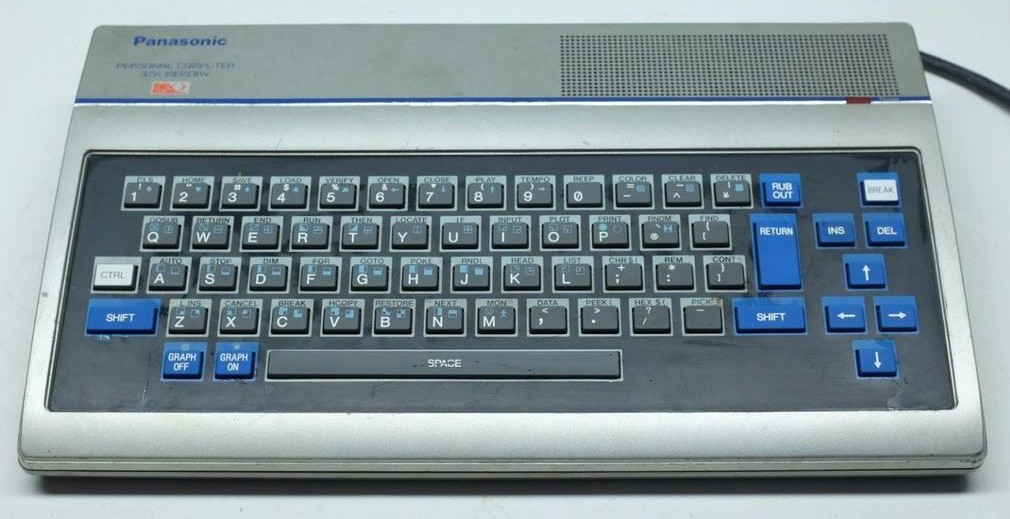
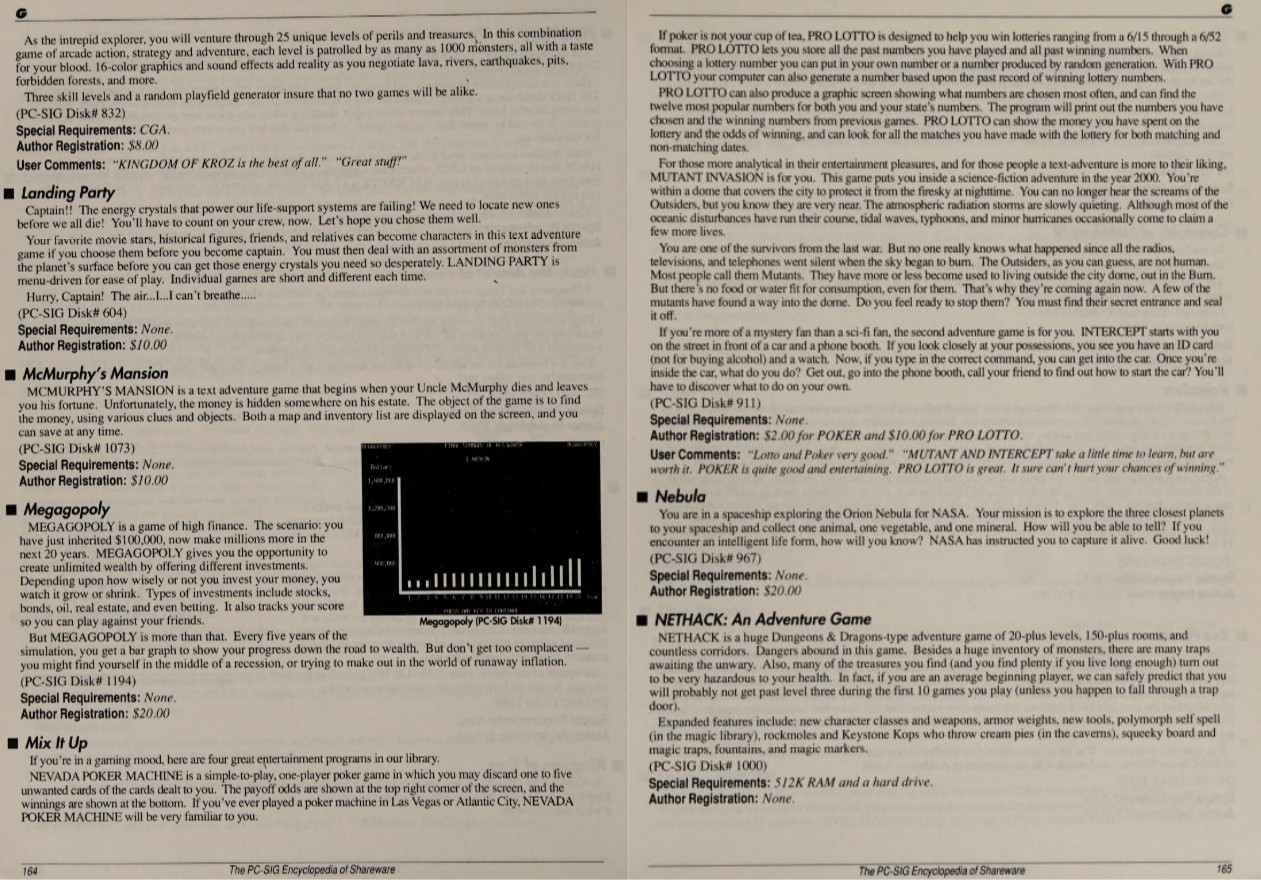
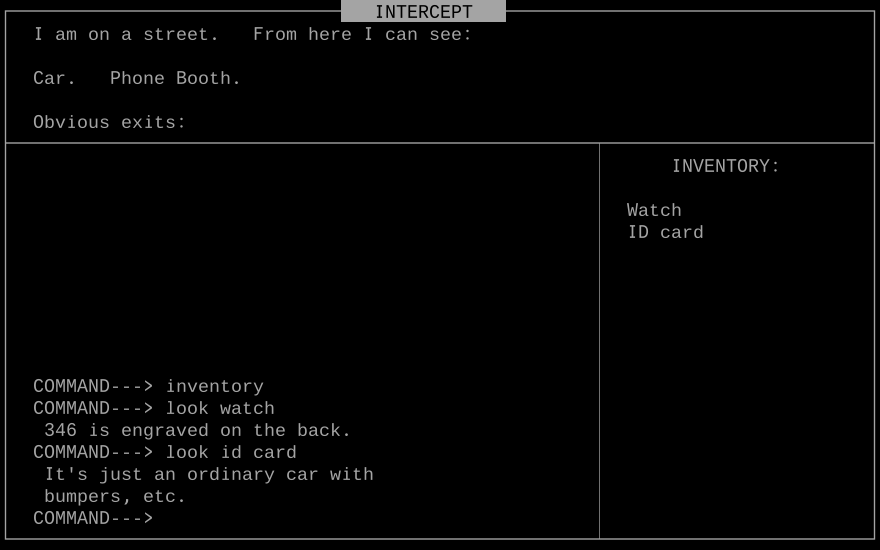
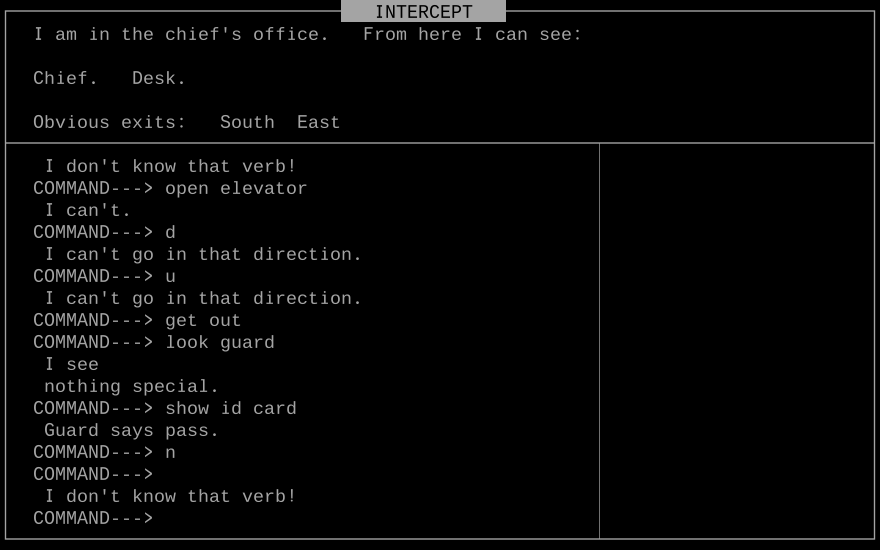
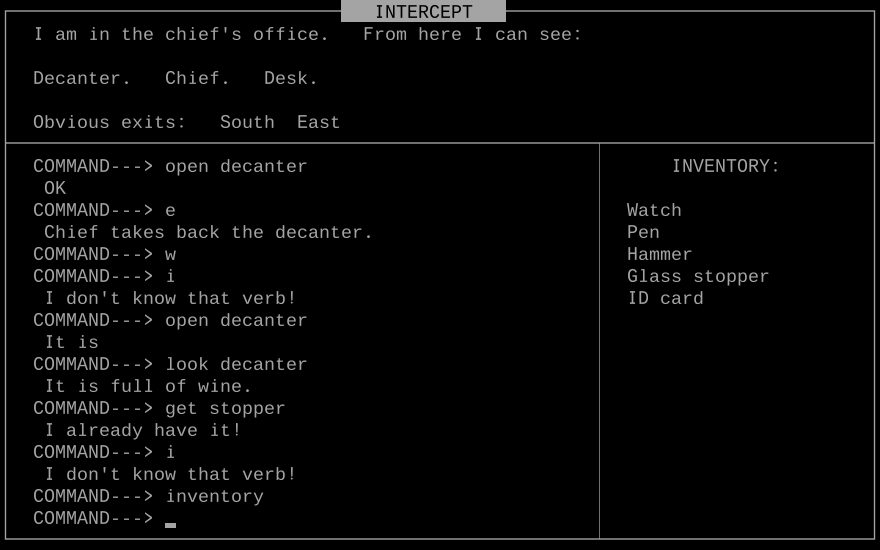
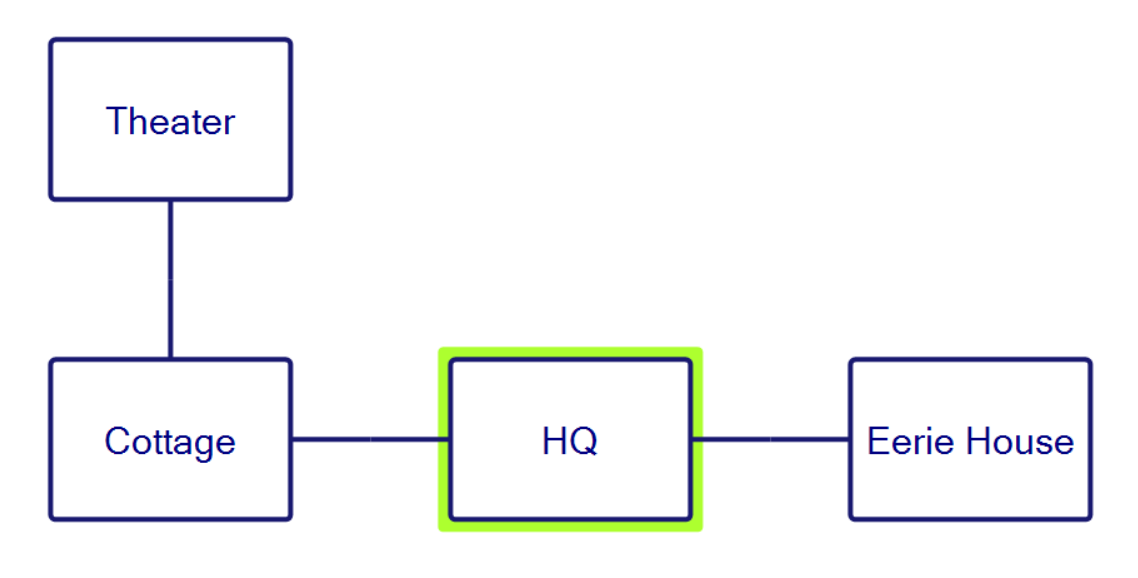
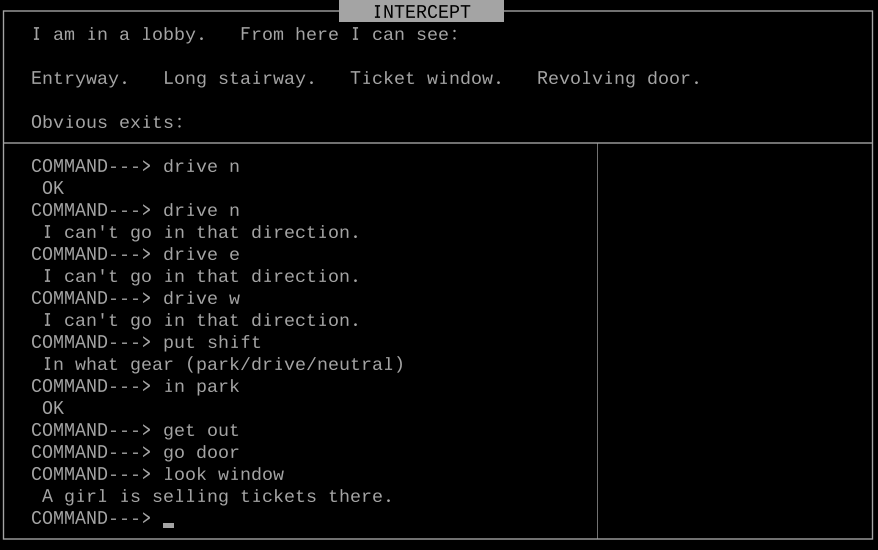
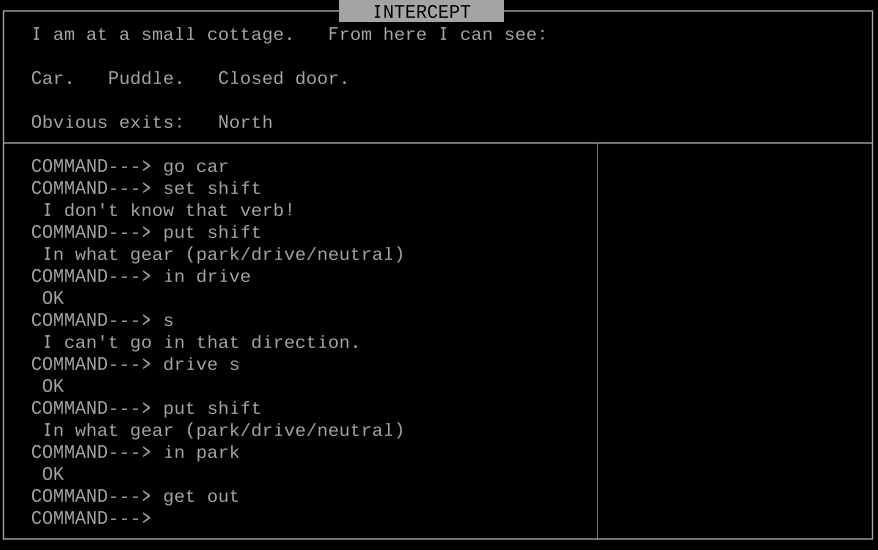
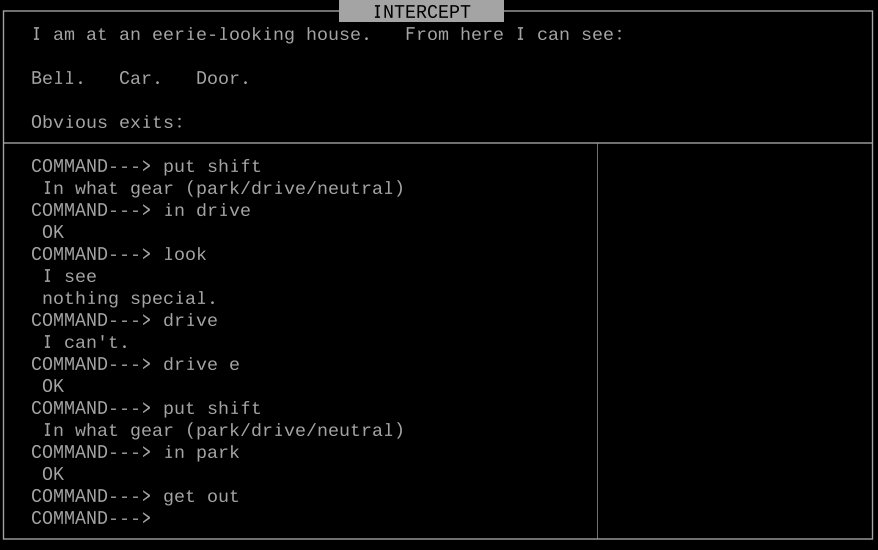
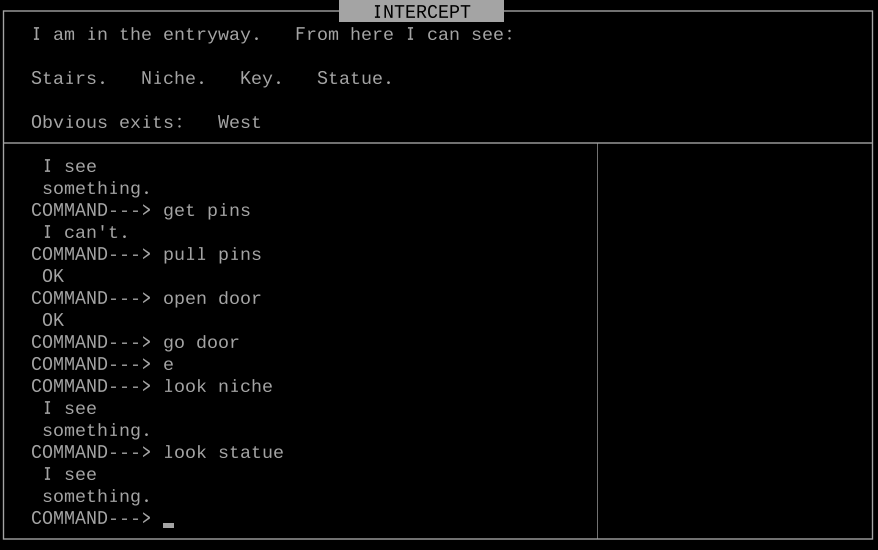
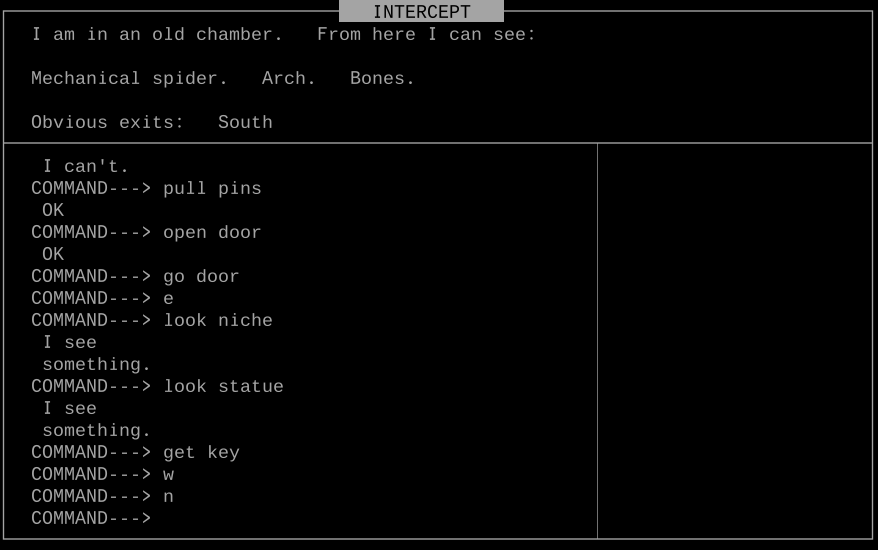
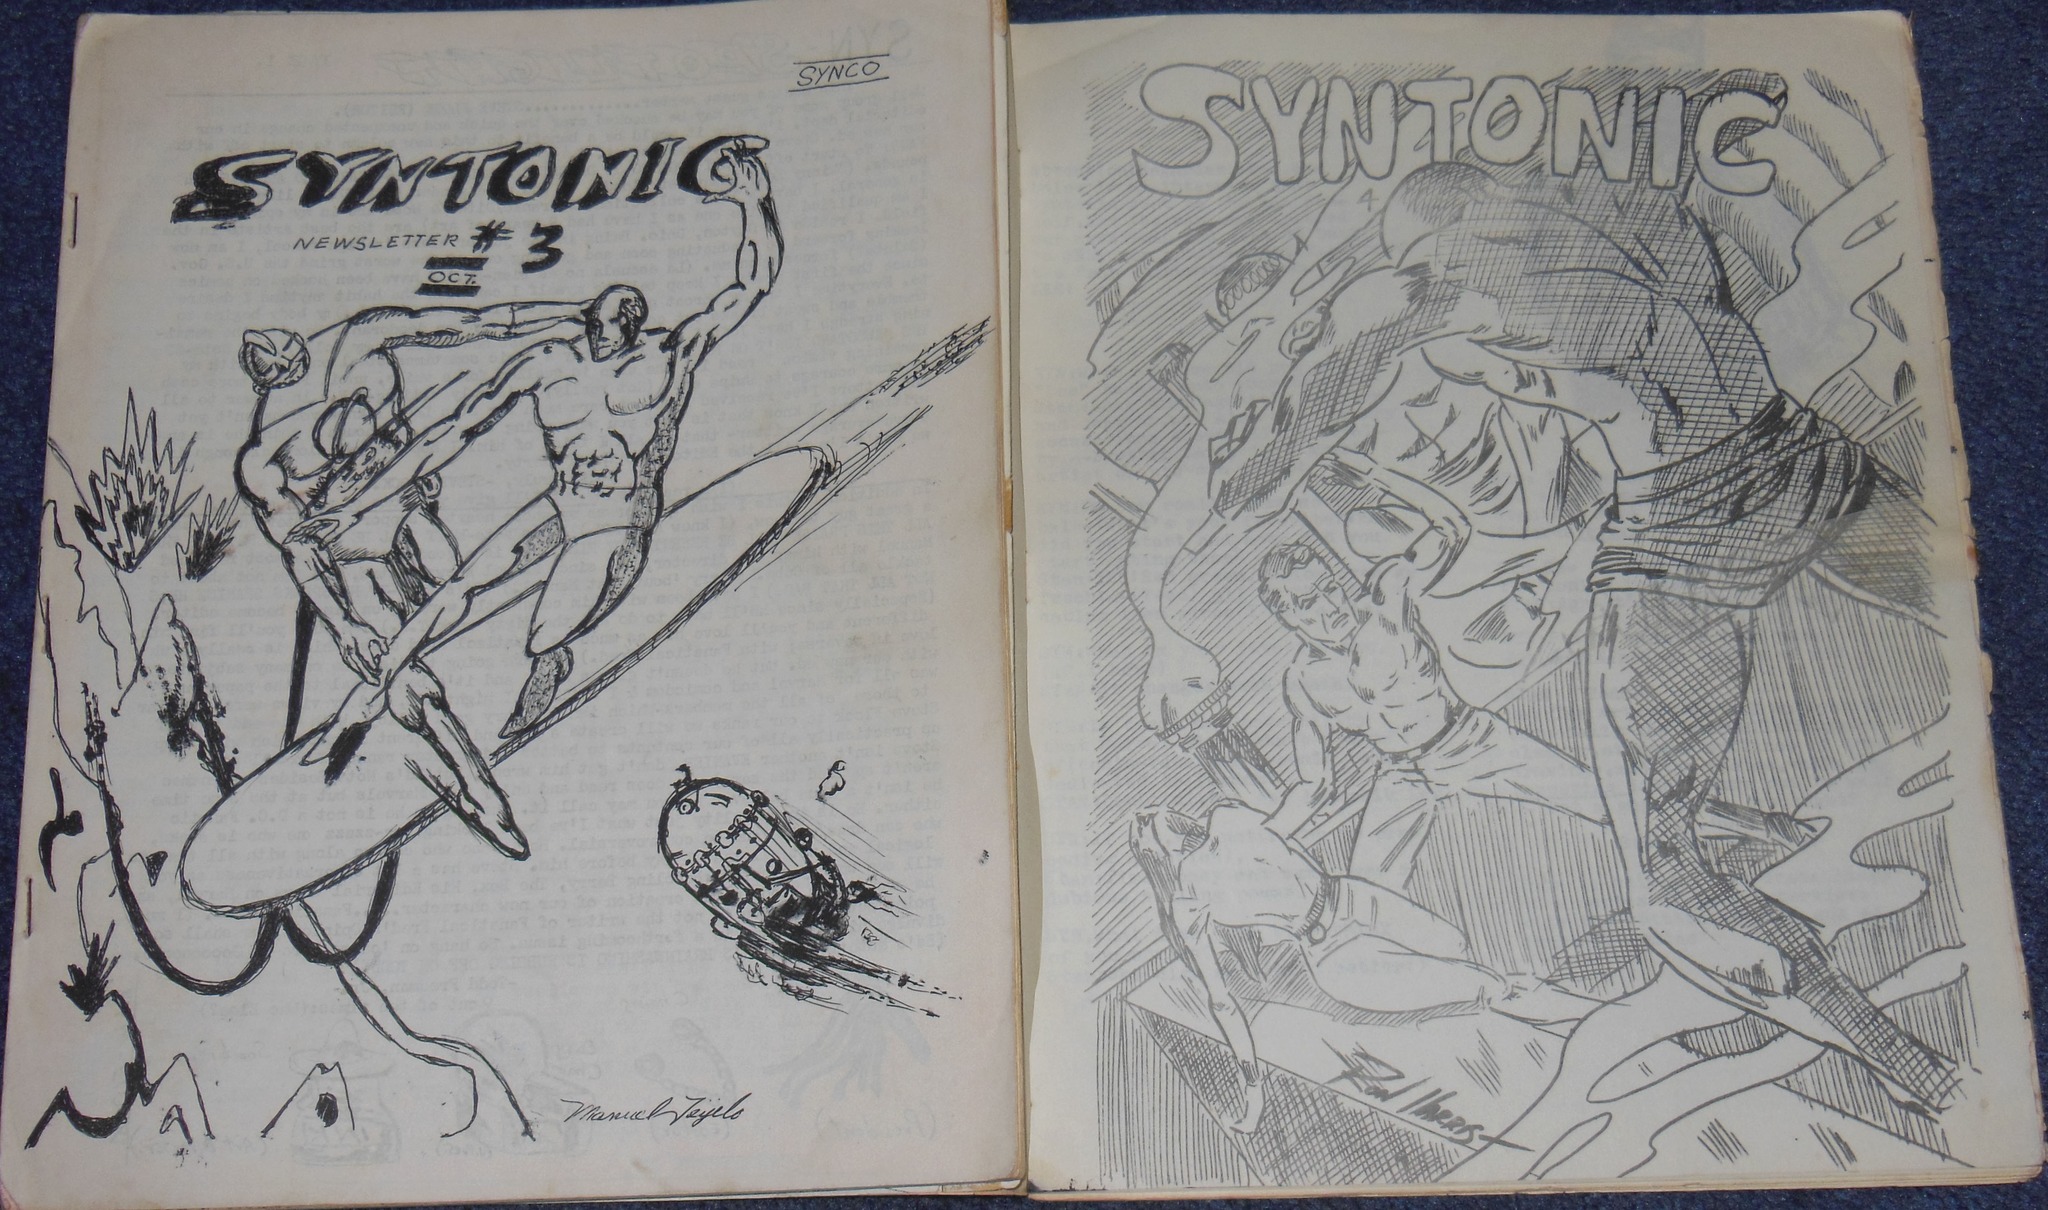
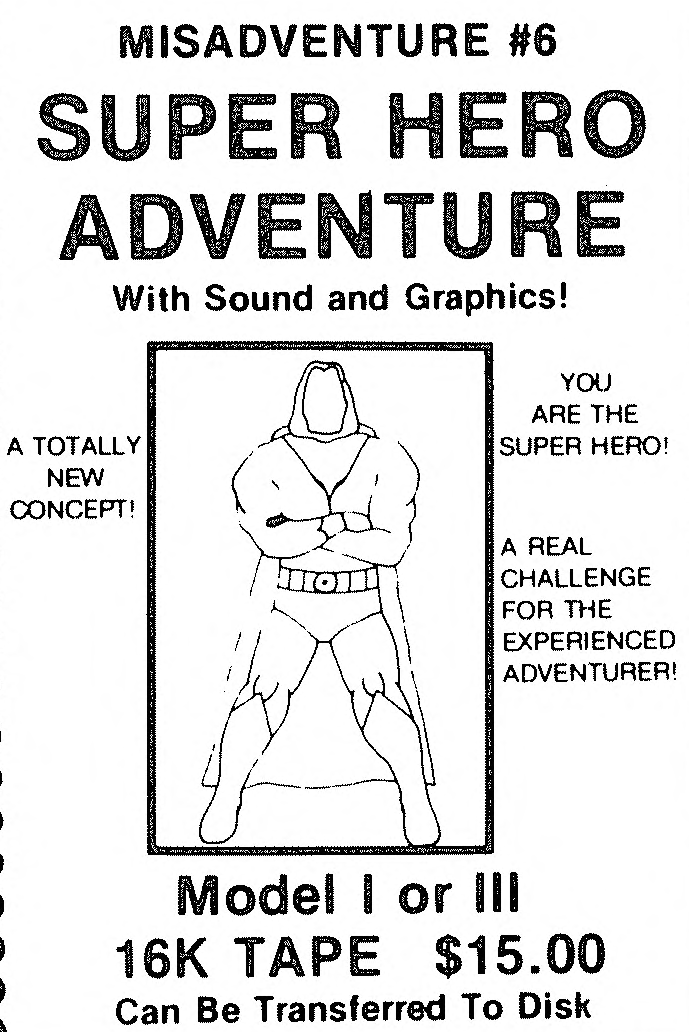
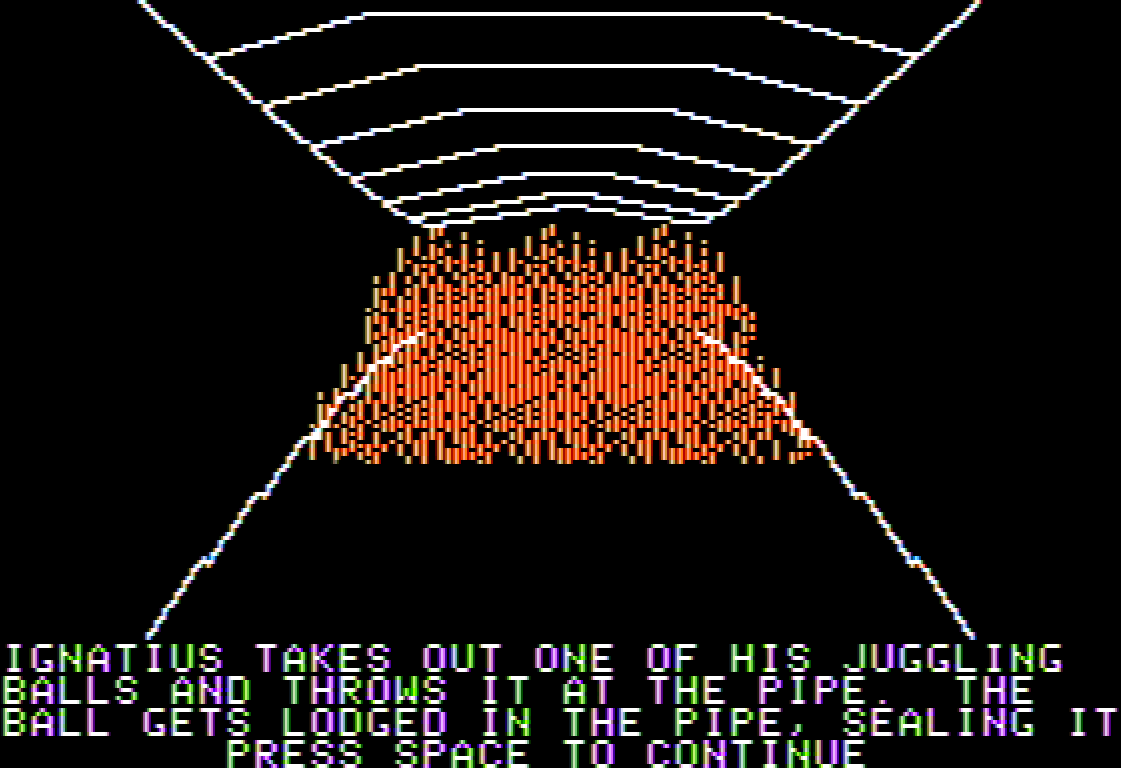
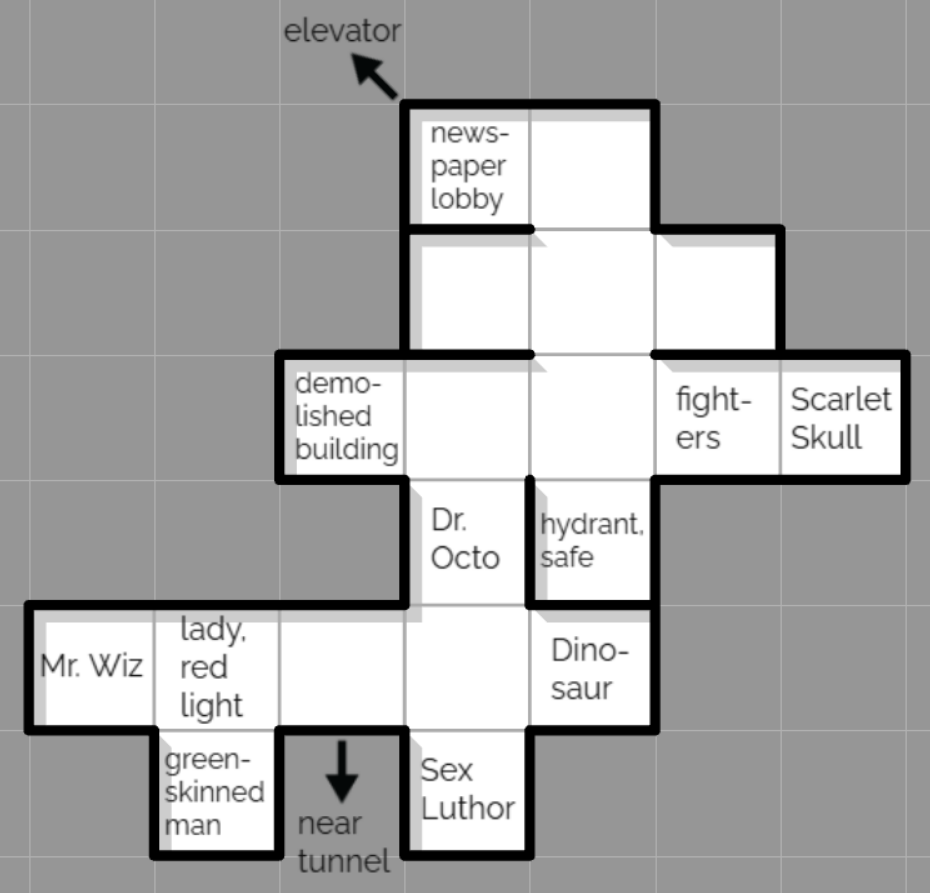
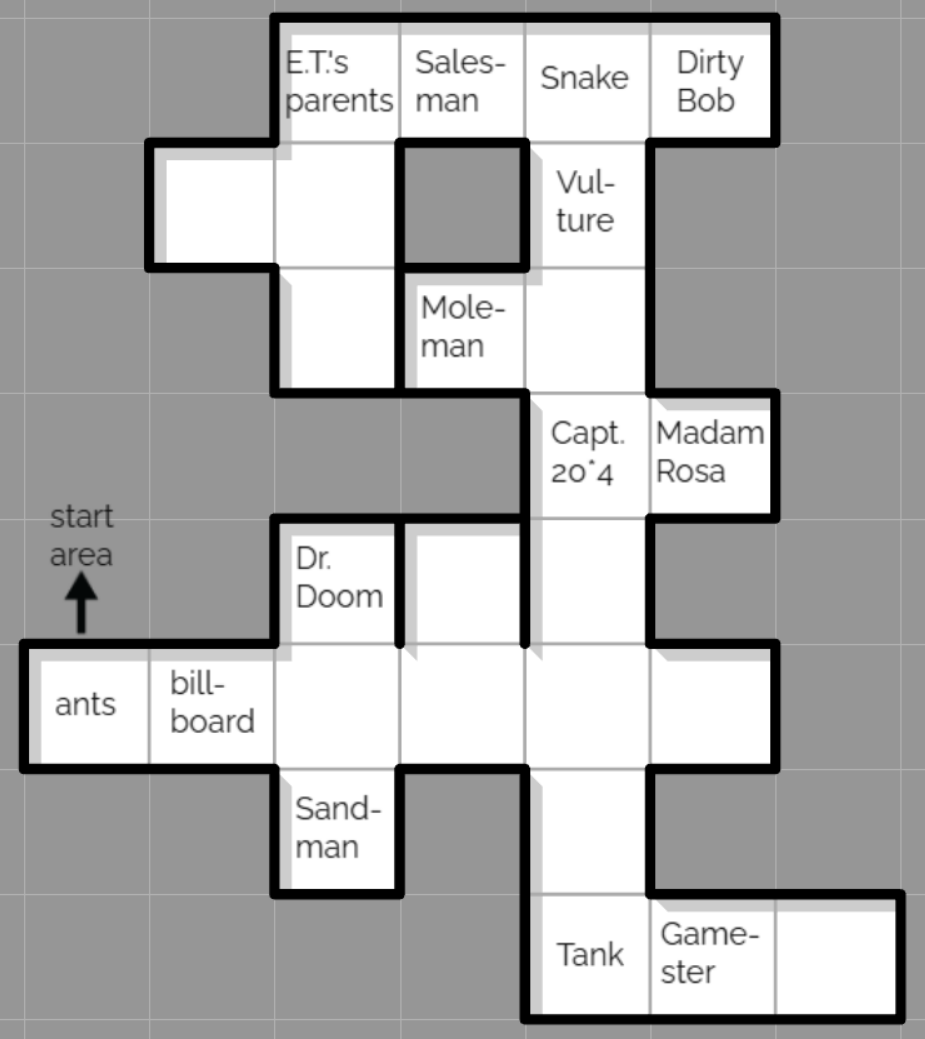


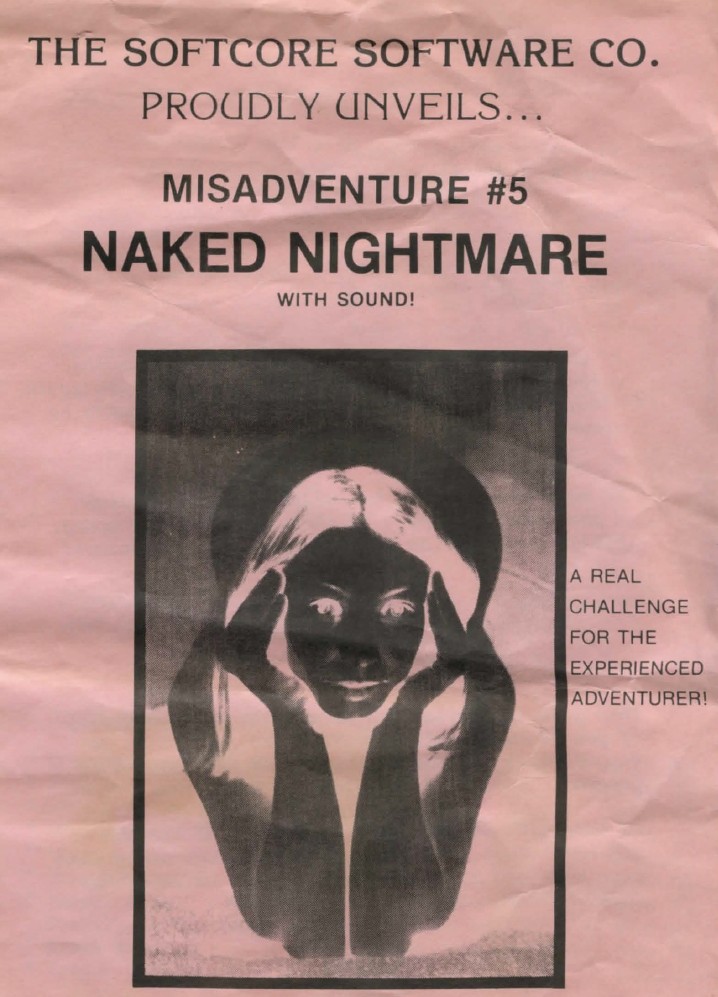
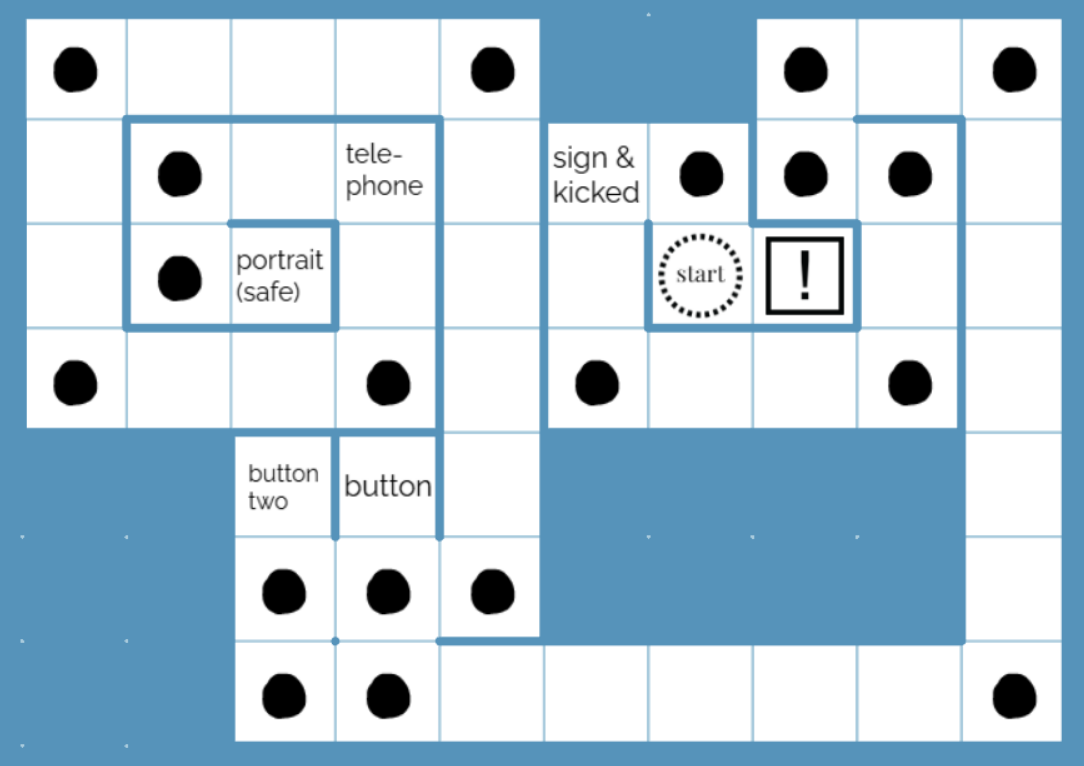

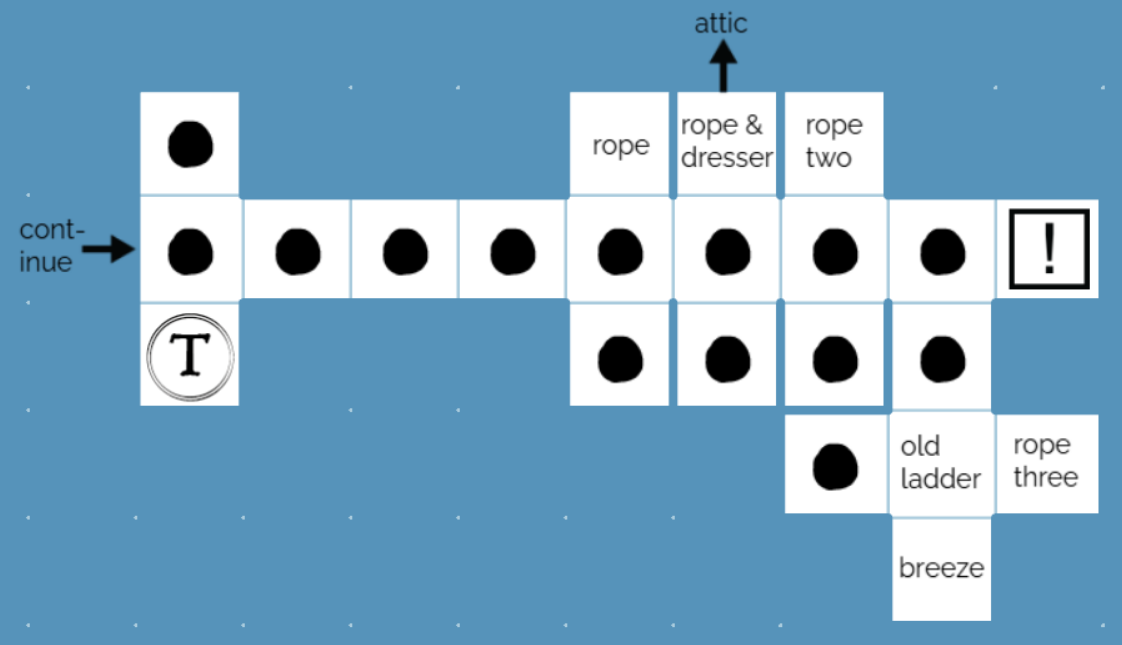

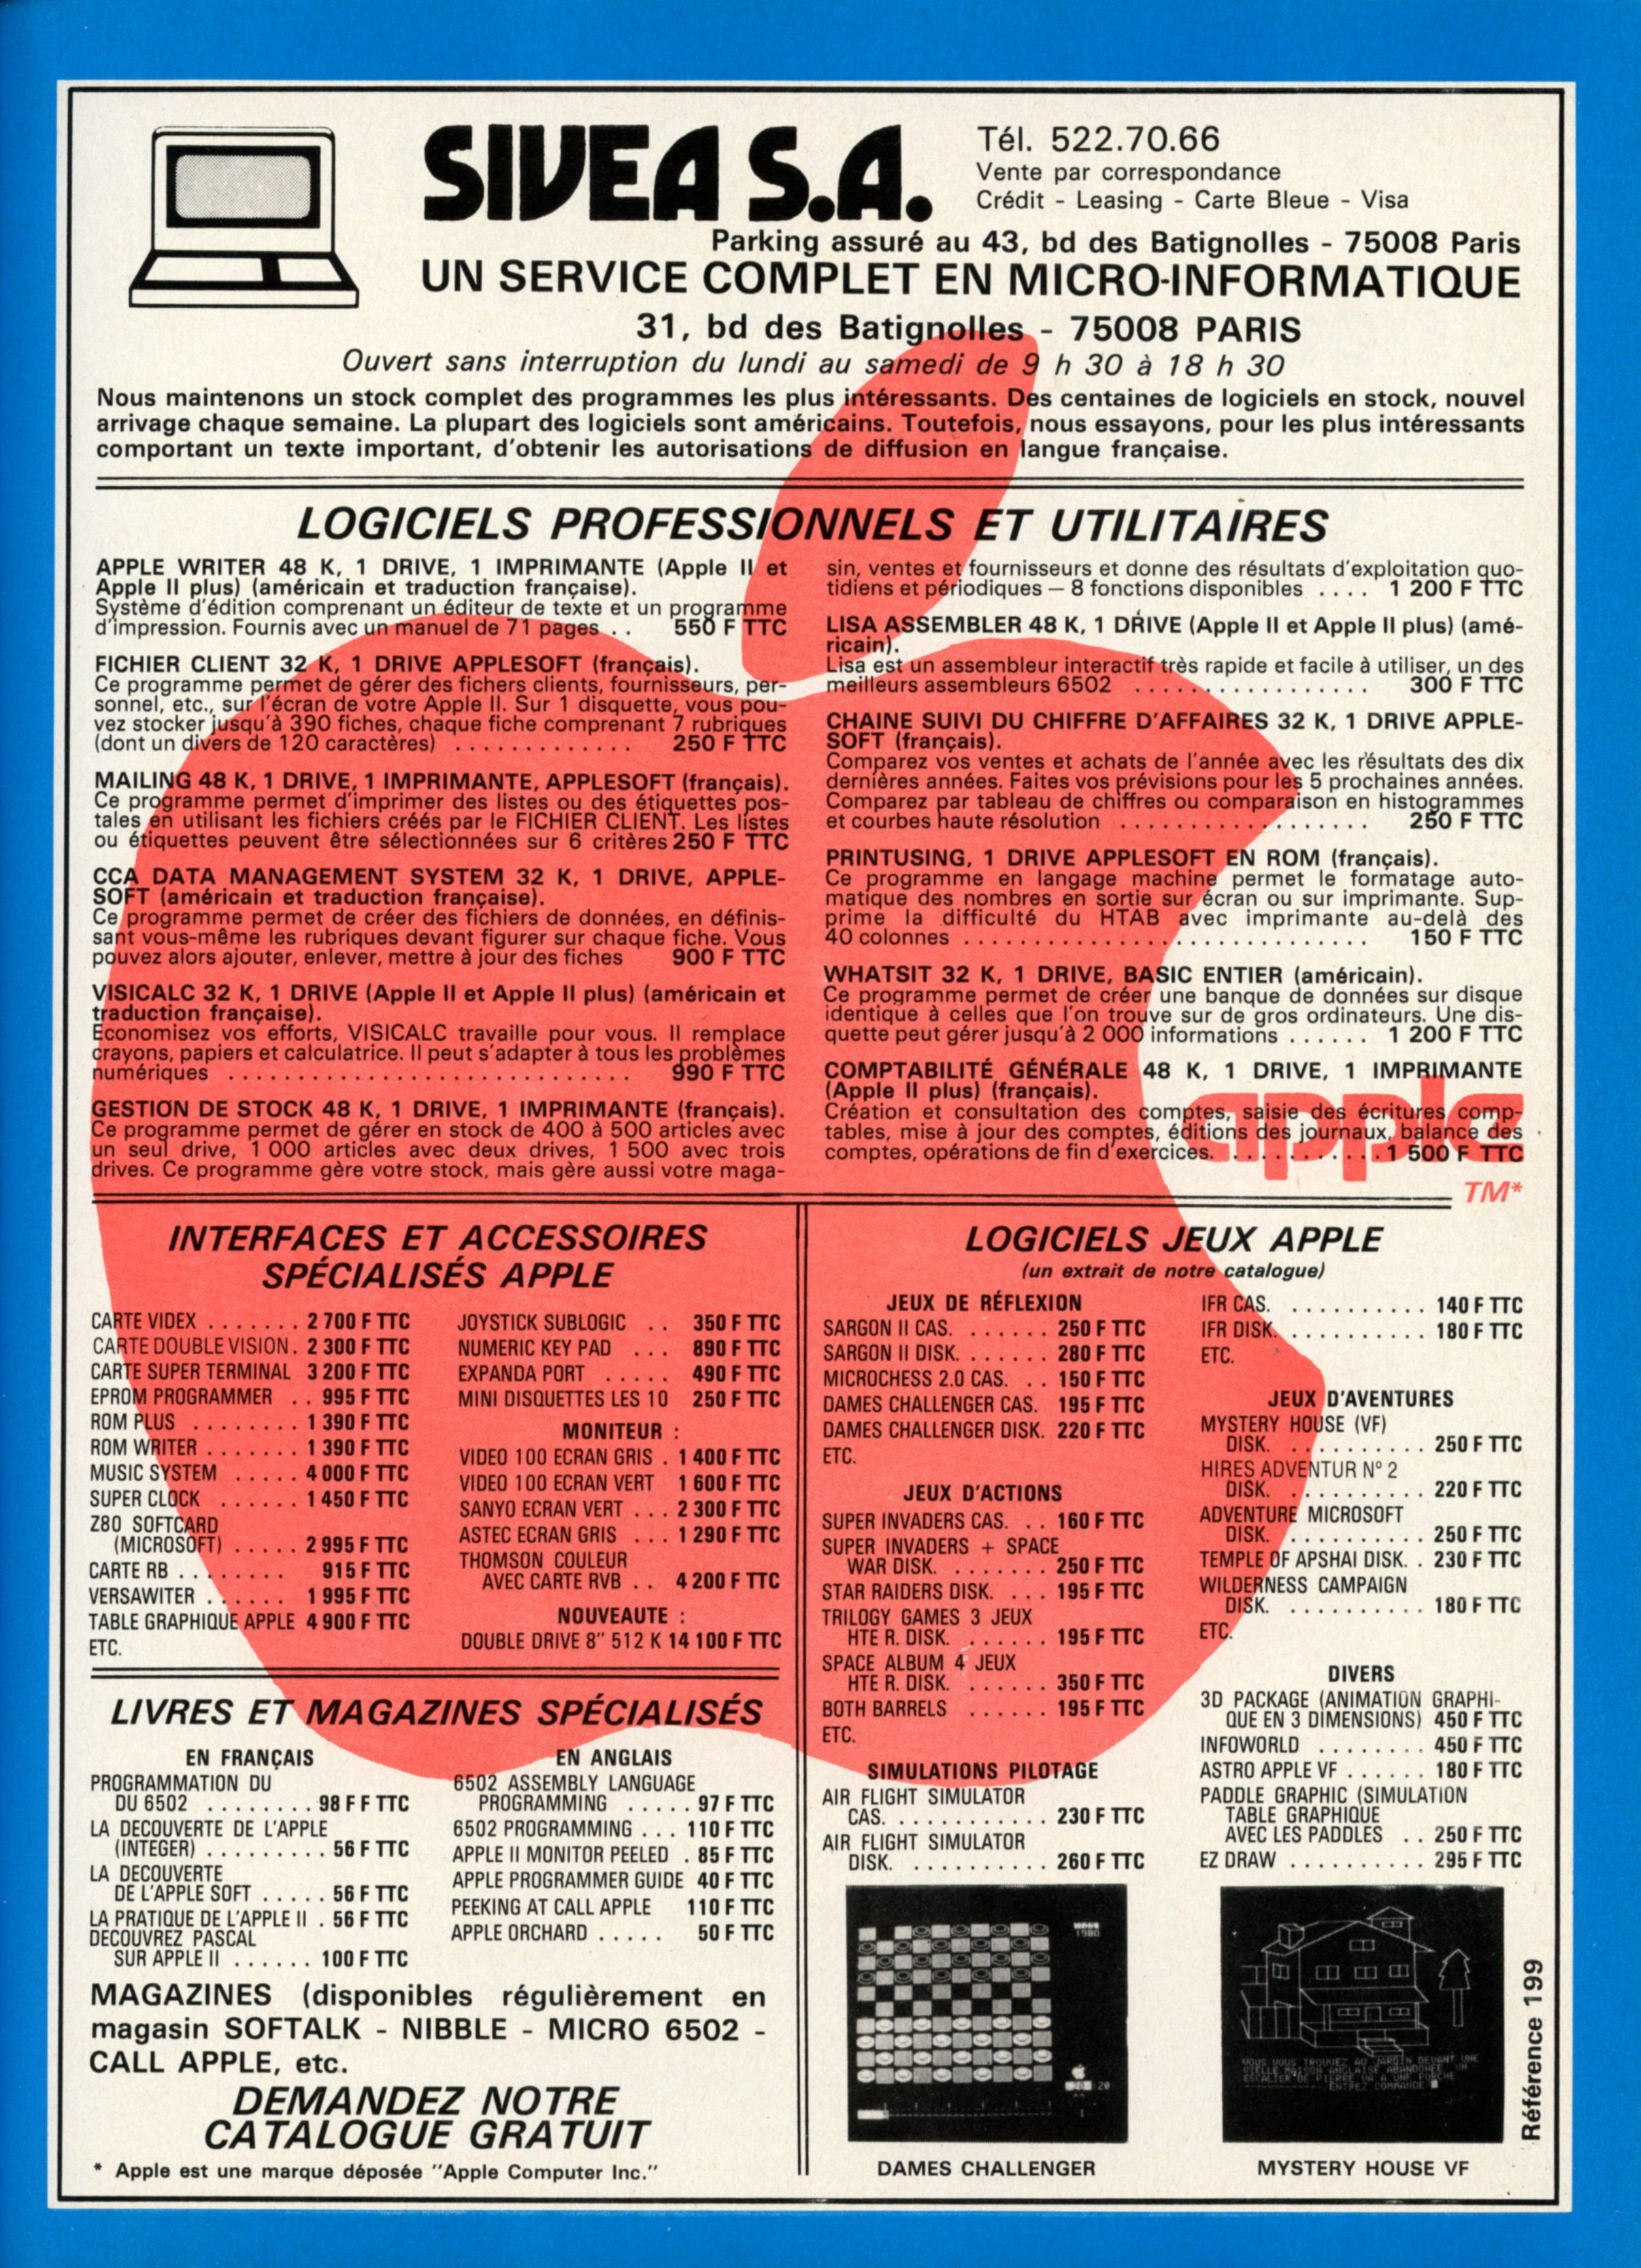