Your mission is to find and deactivate the central computer which controls a secret research establishment. But beware — it can defend itself!
(Continued from my previous post.)
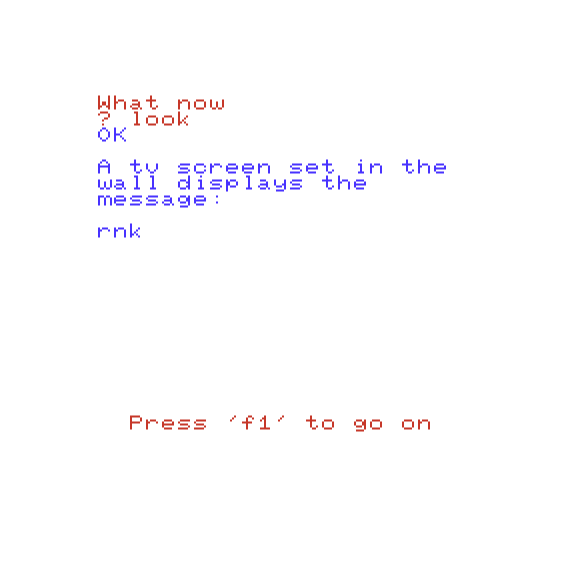
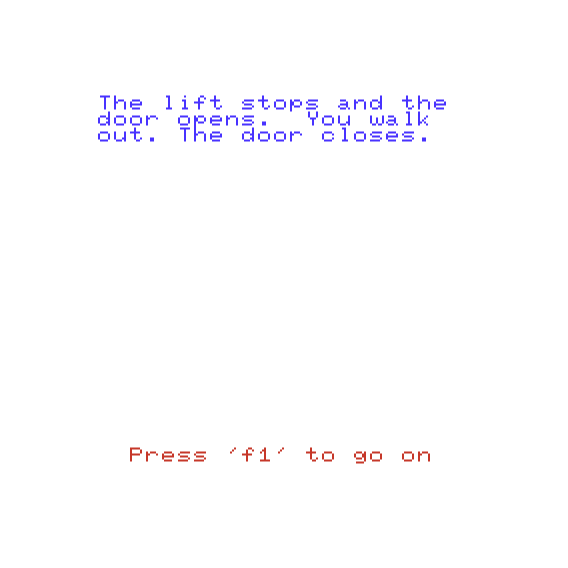
From last time: our protagonist had entered a room with a “blue lift” available and a postcard, mirror, and dead dog in the room. To see these things in the game you need to LOOK; typing LOOK then prompts (in some rooms) if you want to use a computer terminal. Using the terminal gives you what floor you’re on, although it can also cause a funky visual effect.
I also neglected to mention that for some reason we start with a screwdriver. (The only thing we could sneak past an initial screening? Always fun to go on secret missions equipped with almost nothing.)

The mirror is useful on an early puzzle, as is the screwdriver; the dead dog isn’t useful at all. The postcard says LOAD to KILL. This will be very important later. The screen upon entering the lift:
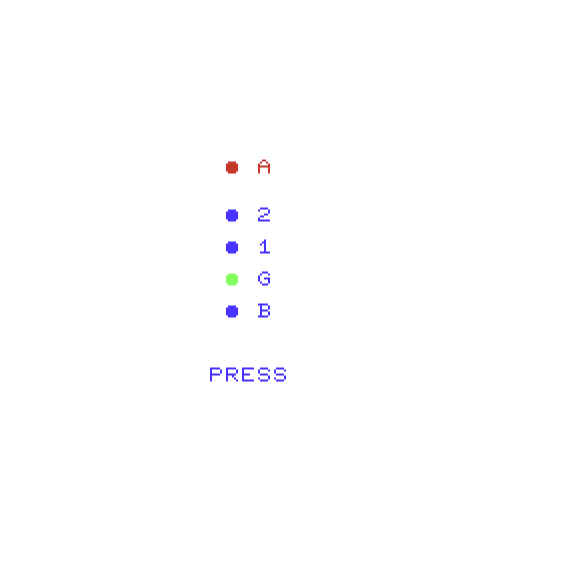
You just push the button B, G, 1, or 2 to operate it.
The complex is a tower with multiple lifts: a blue lift on the west side, a pink lift on the east side, and a green lift which will take the player to the end. A general map, although this is without the one-way arrows and other complications:
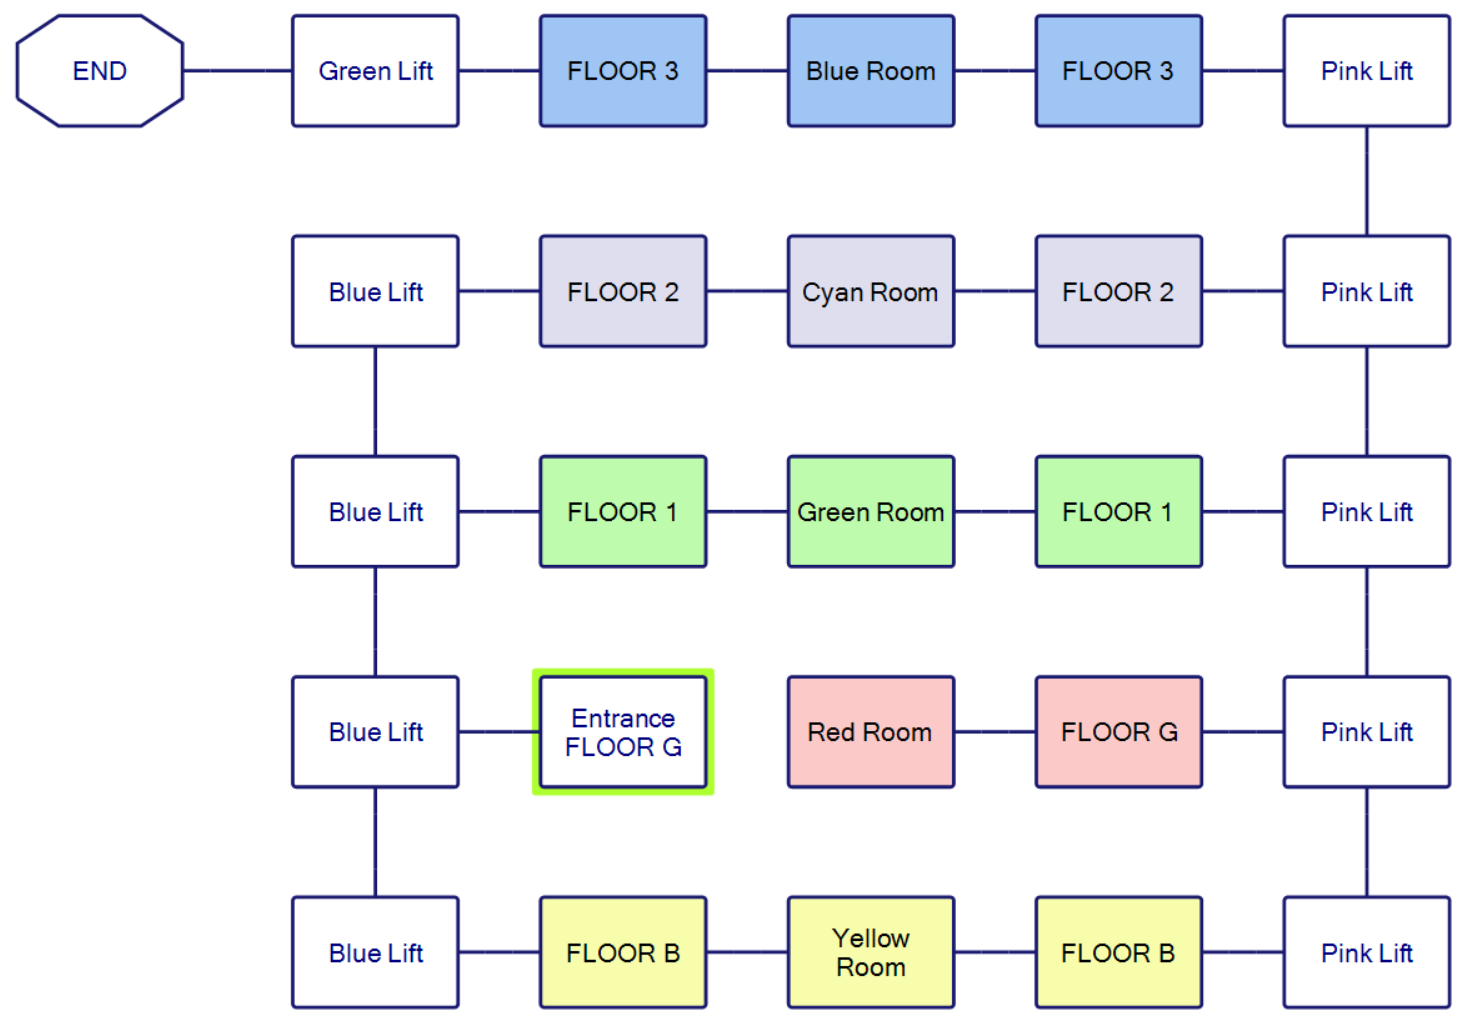
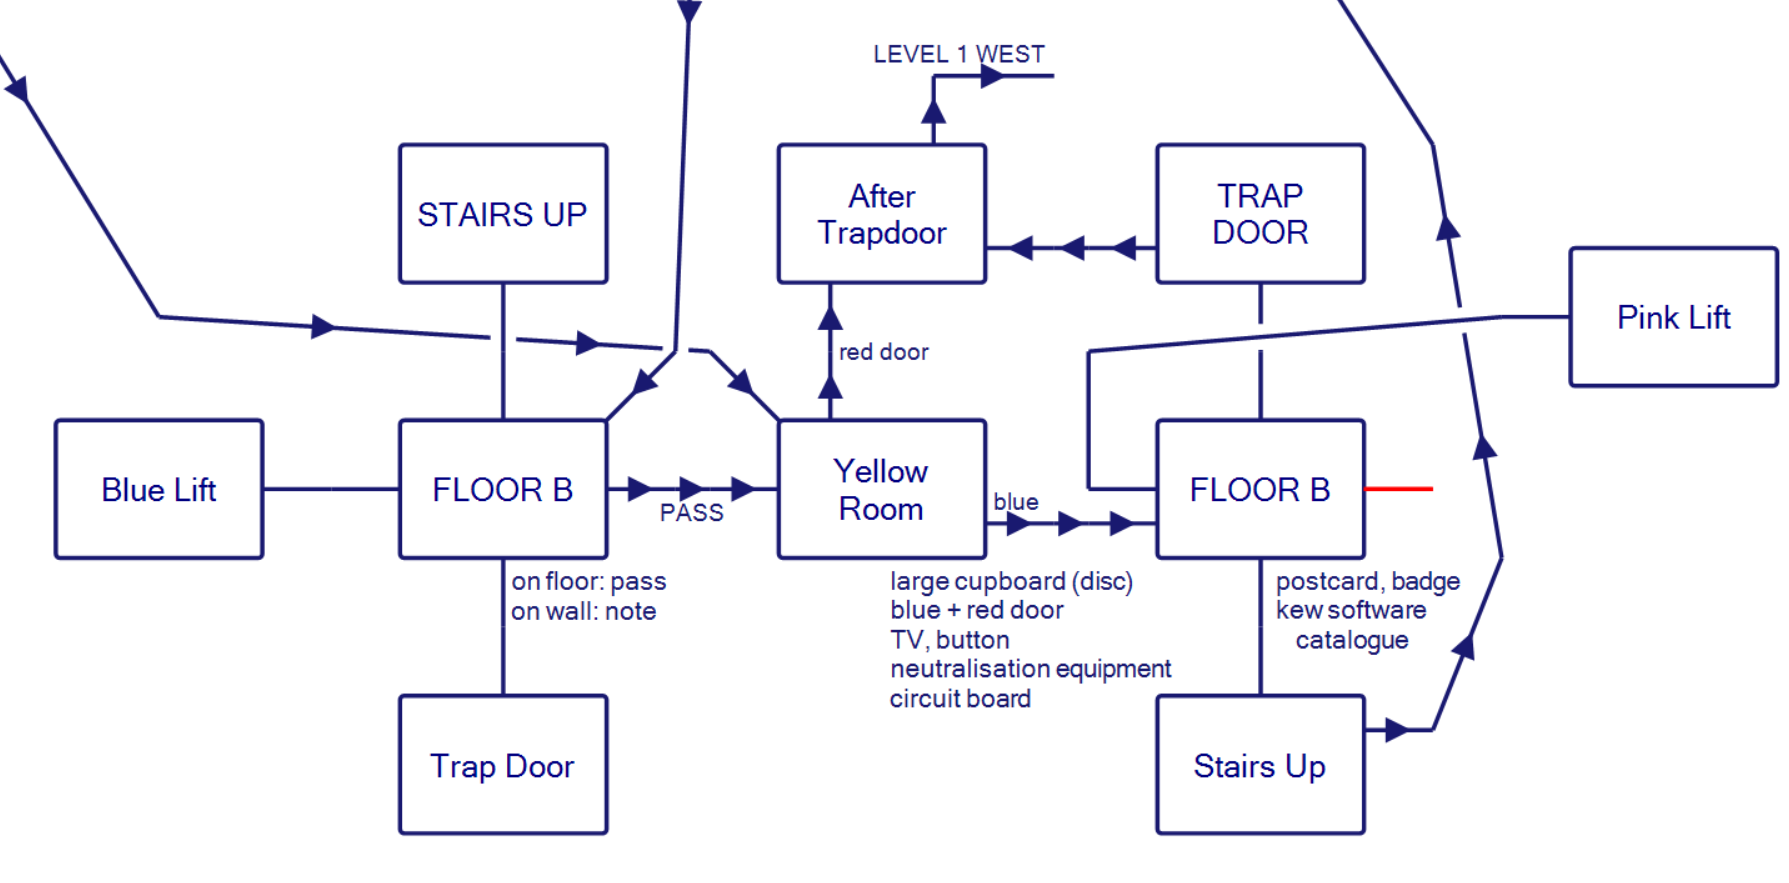
The problem is that the phrase “other complications” elides quite a lot. Here’s a zoomed out-view of the “real” map…
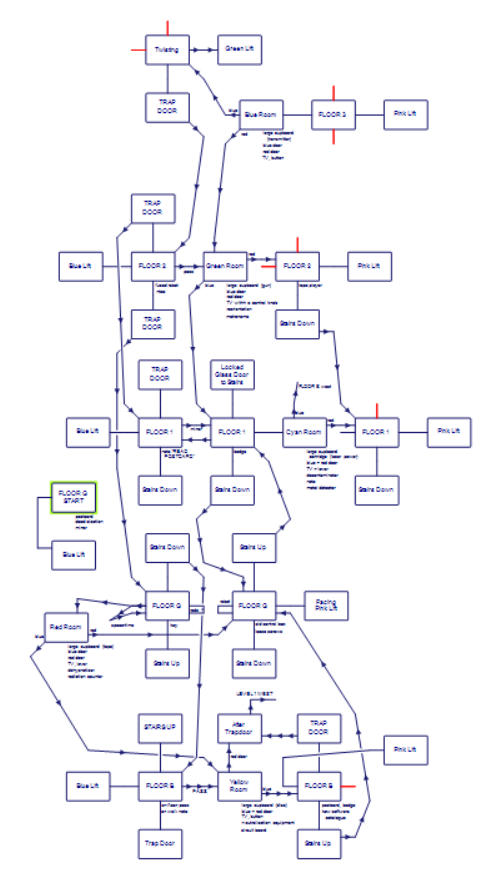
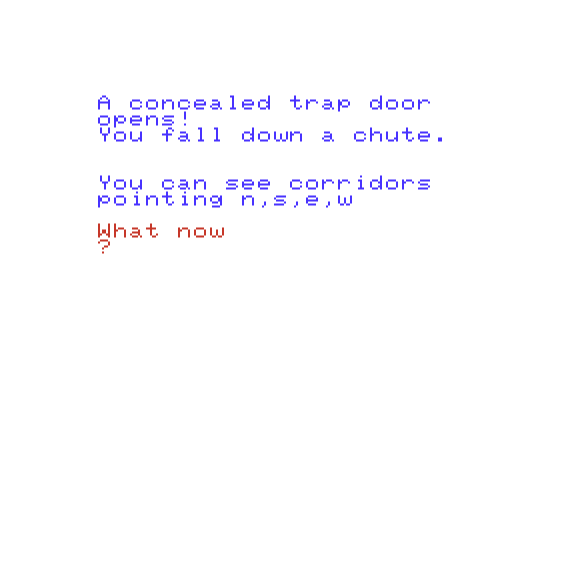
…but even on this one I’m missing some up/down connections. There are lots of “stairs” and “trap door” rooms which aren’t even really rooms proper even though they get displayed that way; when entering it you automatically go up or down a certain number of floors. I originally got very disoriented until I realized that the central “hall” of each floor is the only set of “real” rooms.

This looks off-center for good reason. I’ll get back to this later.
Here’s floor 1 (the floor above “ground”) to start with:
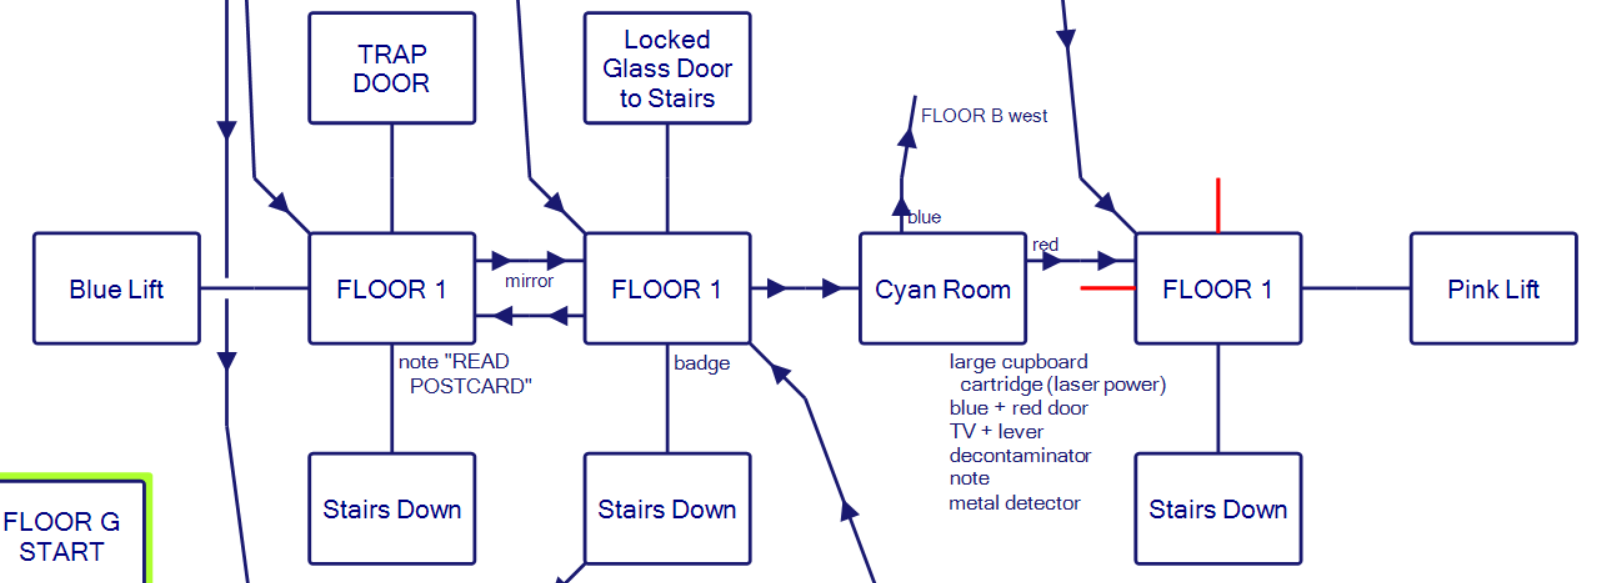
So on floor 1, you start in a regular corridor with the note READ POSTCARD and then going north falls down a trap door (which drops two levels) and going south leads to some stairs which get used automatically (dropping down one level). Try to go east and you are blocked by a laser beam unless you are carrying the mirror from the start.
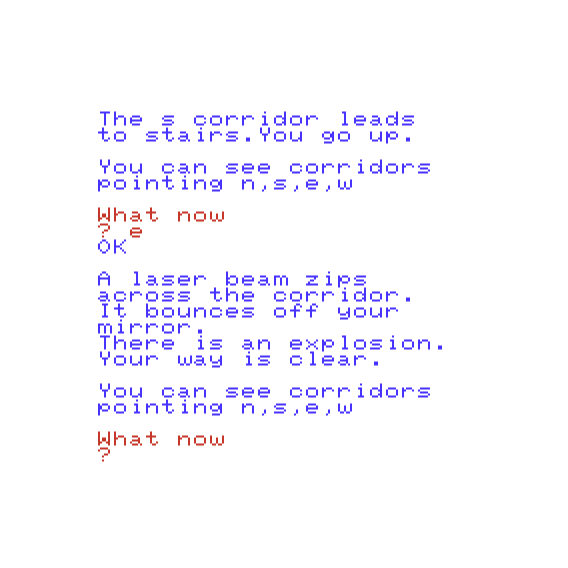
Fortunately (although it wasn’t clear to me yet until finishing the game) you can drop the mirror here and not touch it again, and pick up the item found by using LOOK (a badge). Going south leads to “stairs down” and going north leads to “a locked glass door leading to stairs” (remember that for later, along with the LOAD to KILL postcard and the weird off-center screenshot from earlier).
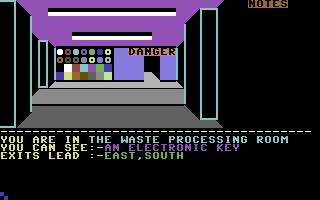
Going east again leads to the first of the “color rooms” of the game. They all are described in code the same way in order to save space, with slight variations.
Here’s the actual code in question. While there’s technically a parser and world model most aspects are being “faked” so to speak; a Scott Adams game would have each item implemented as an object in code whereas these are just text strings, with conditionals for customizing the various rooms.
5000 PRINT”you can see:”:print”a large cupboard, a blue door,”:print”a red door,”
5002 print”a tv with a “;
5004 ifq=1thenprint”button”:print”and neutralisation equipment.”:az$=”press”
5008 ifq=3thenprint”control knob,”:print”and reorientation equipment.”:az$=”turn ”
5010 ifq=4thenprint”button”:az$=”press”
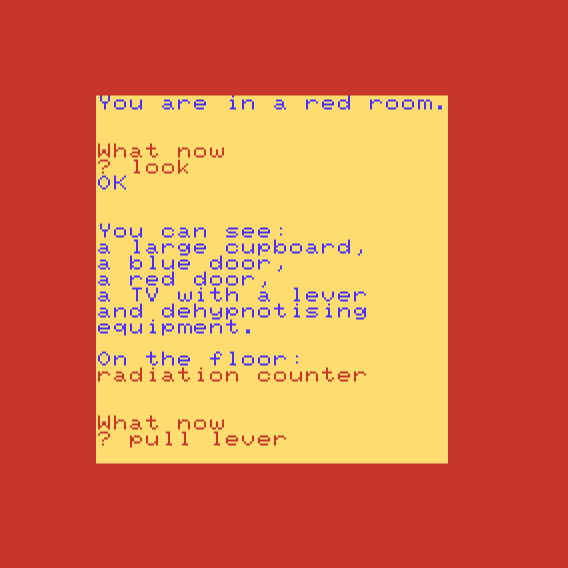
5012 ifq=6thenprint”lever”:print”and dehypnotising equipment.”:az$=”pull ”
5013 ifq=2thenprint”lever,”:print”decontaminator,”:printa$(47):az$=”pull “
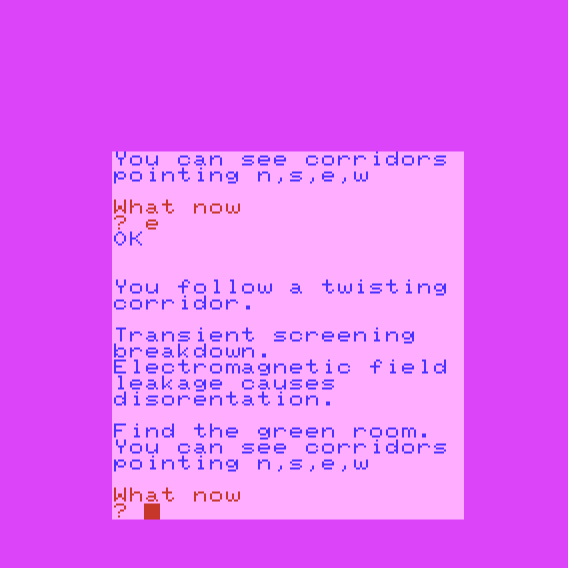
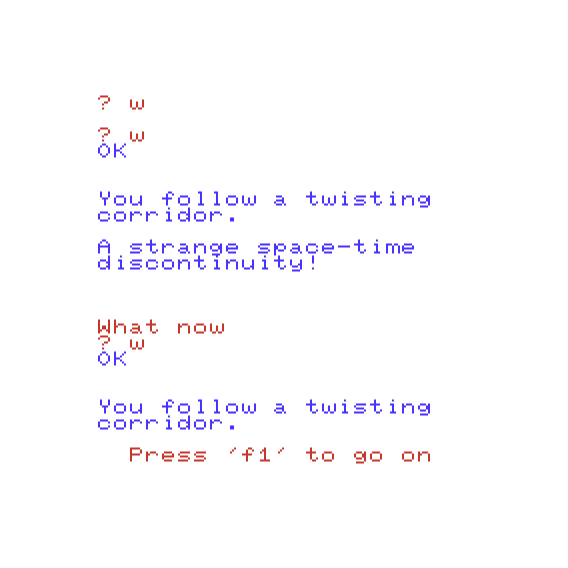
The room can have a “decontaminator” (this floor, floor 1), “neutralisation equipment” (basement), dehypnotiser (ground floor) or “reorientation equipment (floor 2). Each one clears up a general effect on the player. The TV effect with the strange text is undone via dehypnotiser. Some exits cause “disorientation”…
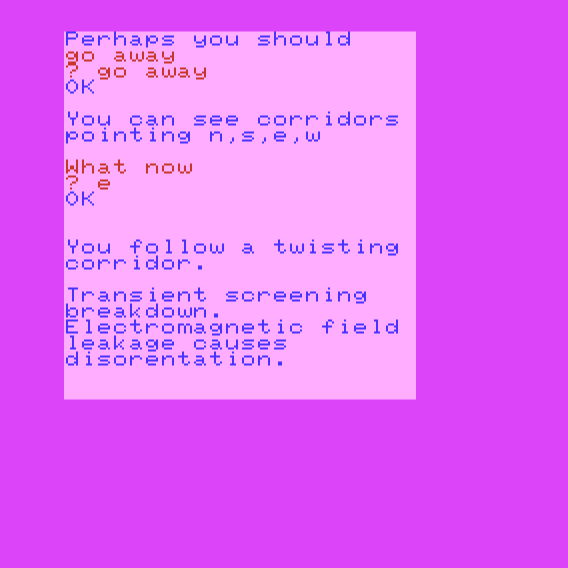
This is animated with the “text window” bouncing around the screen. I didn’t even know that was possible on the VIC-20.
…and that screen earlier that was off-center was a result of the orientation issue. It’s possible to keep playing (it just looks funny) but you do want the effect cleared up by the end of the game.
Going back to the big list of objects, there’s a TV with a gizmo you can push/pull/turn that will activate a puzzle. With the cyan room, “pull lever” will do the trick.

The game is prompting a button (1 through 6) as the answer. On the puzzle above, “1 over 8” is 9, and so 4 below that is 5, meaning the answer is 5. The puzzle gets selected randomly from a big list.
handy bunch: 5, because 5 fingers.
riap otherwise: the “otherwise” is indicating the “riap” gets flipped around to be “pair”, so the answer is 2.
square corners: 4. (They’re not all hard.)
roman start to vic: 5, because V is 5 in Roman numerals. This answer annoyed me the most as it could have been VI so I went with 6.
The randomization gives a true adventure-roguelike feel although if you play for long enough you start to see repeats.
Pushing the wrong button drops you down a trap door.
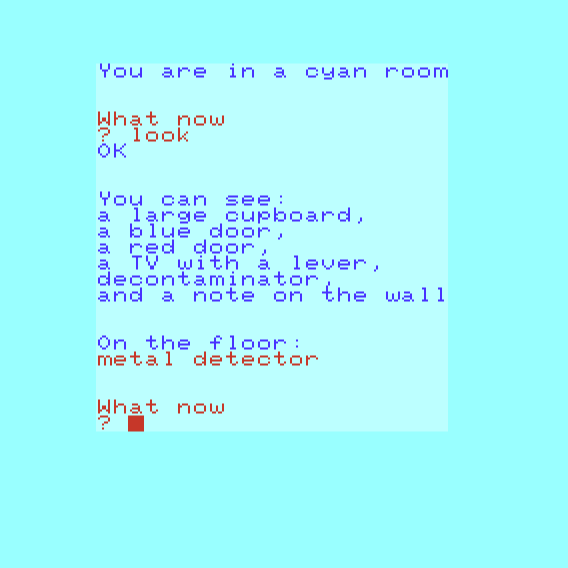
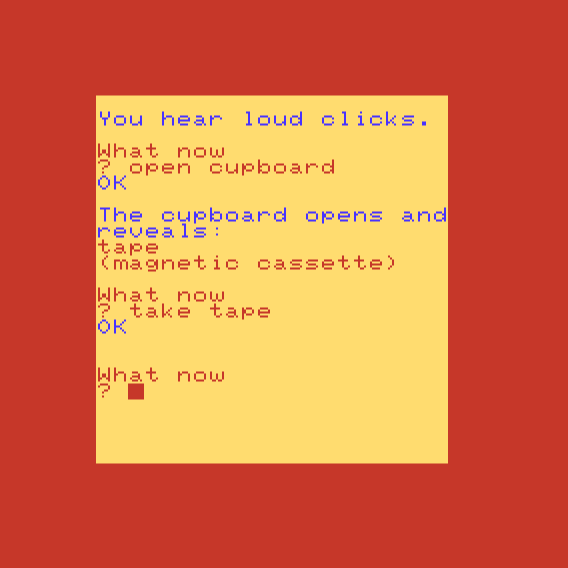
Pushing the right button causes “LOUD CLICKS” and the various doors to open. That is, the red door, blue door, and cupboard are now all accessible (they otherwise are shut tight). The red and blue doors simply lead to elsewhere (on floor 1, red goes to the far east of the floor next to the pink lift, and blue jumps down to the basement), and the cupboard has an item which may or may not be useful. The cyan room’s item (that is, the one on floor 1) is a laser power cartridge which is worth keeping. The cyan room incidentally also has an item on the floor (a metal detector) which you should completely ignore.
(Of course, I didn’t know when playing what I could ignore or not-ignore. This turned out to be particularly frustrating in that this game has a three item inventory limit. Even rooms have a three item limit, so if you try to drop something in a room that already has three items, you are not allowed to.)
Continuing our tour, let’s step back to the corridor prior to entering the cyan room and go down some stairs to Floor G. The blue lift only connects to the starting room, so you have to enter via going up or down or the pink lift. What’s even messier is that the two corridor rooms don’t even connect to each other:
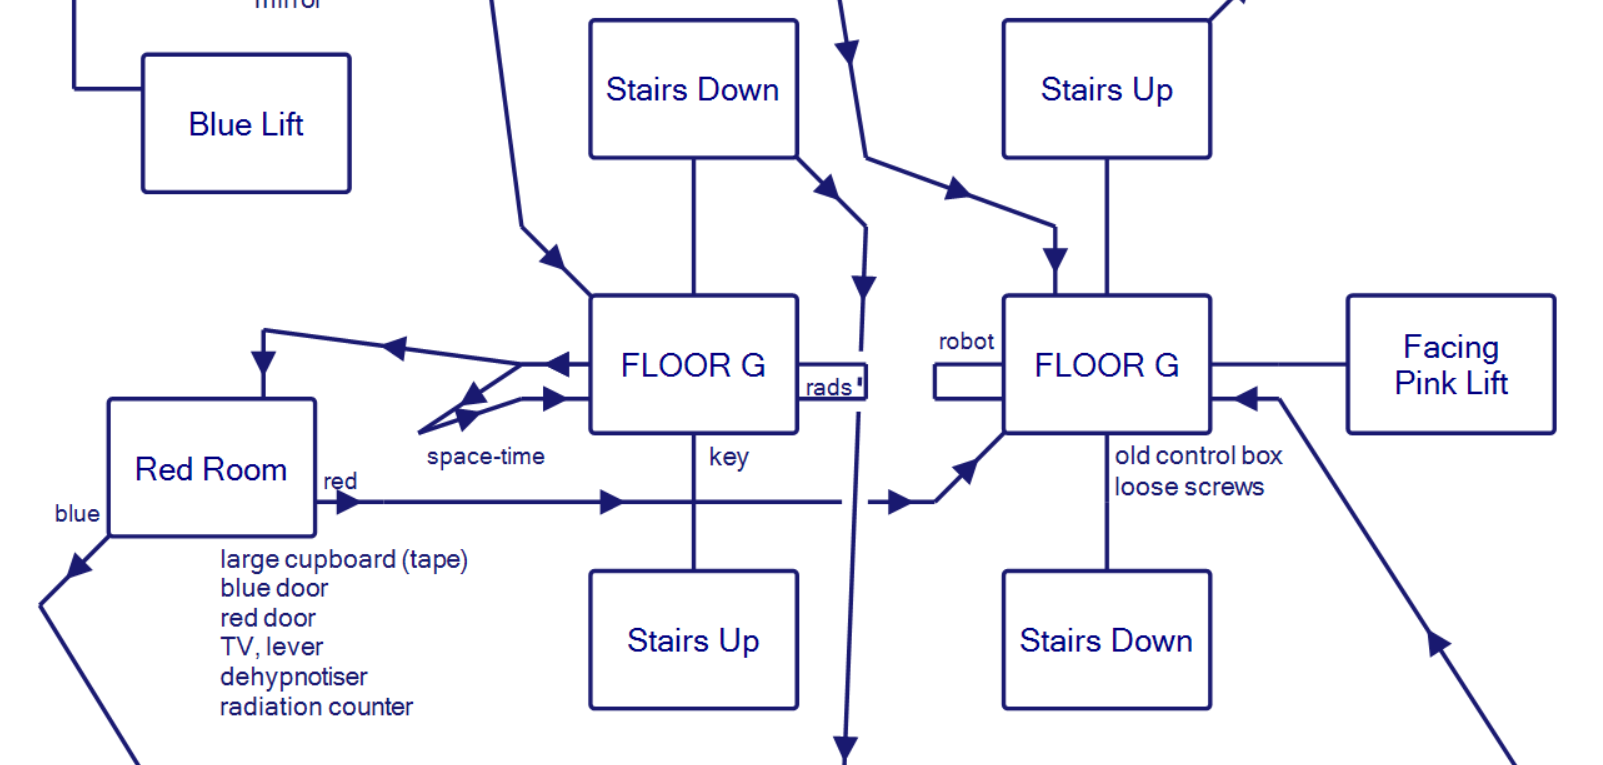
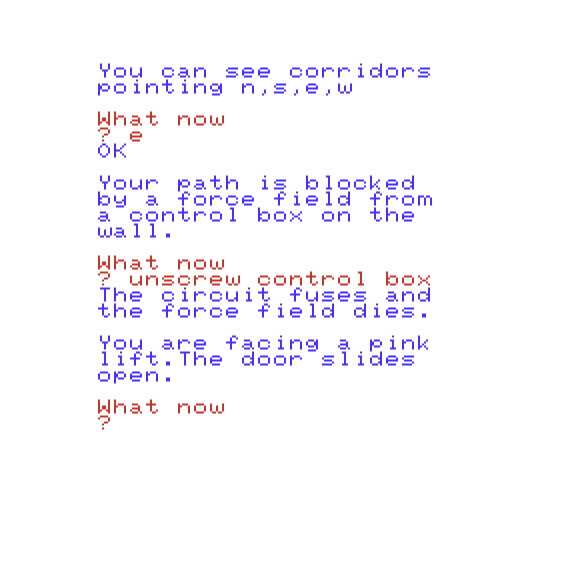
The east side (which you can reach going down stairs right where the mirror was used and we found the badge) has an “old control box” and some “screws”. If you try to go east you’ll get blocked by a force field. With the screwdriver from the start in hand you can UNSCREW BOX to get the forcefield down; the really wonky part is this doesn’t work until you’ve gotten stopped by the force field.
This takes you directly to the pink lift, which I’m still going to pass over in order to look at the west side of Floor G. North takes stairs down and south takes stairs up, like normal; to find the red room on this floor, you need to go west twice.
It took me a long time to find this in my playthrough, but I’m going to take care of it now.
The red room looks just like the cyan room, except it has a radiation counter instead of a metal detector (but similarly useless)…
…and solving the puzzle attached to the TV reveals a tape.
The radiation counter seems like it might be handy because going east (the last direction we haven’t tried) runs the player directly into some radiation. According to the source code, having the counter doesn’t matter.
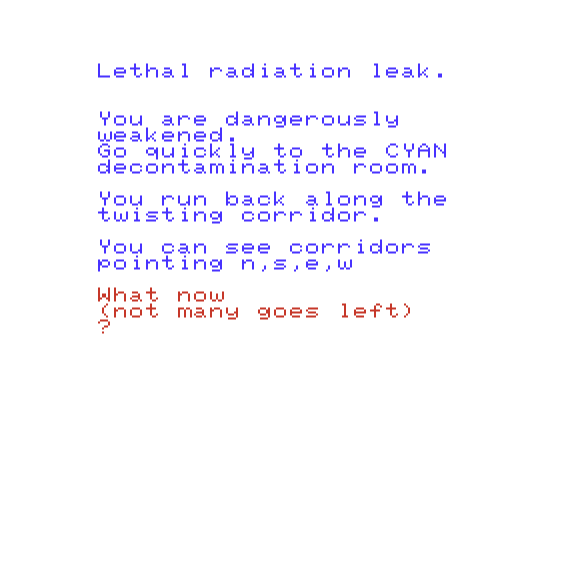
From here you get a time limit and you have to pop back to the floor above to enter the cyan room.
One last thing about the west side of Floor G: there is a key on the floor. The key is toxic…
deadly phylox germs on the key! find yellow room entrance.
…and just like the radiation, a counter starts where you need to find a particular room, in this case the yellow room in the basement. So let’s head down there next:
The room includes a “pass” which is needed to unblock passage east. (It also gets used equivalently on Floor 2, so you can’t just assume an object can be discarded right after use.) There you can find a yellow room.
The “neutraliation” is for the disease, although I think now is a good moment spring another surprise the game can have at random.
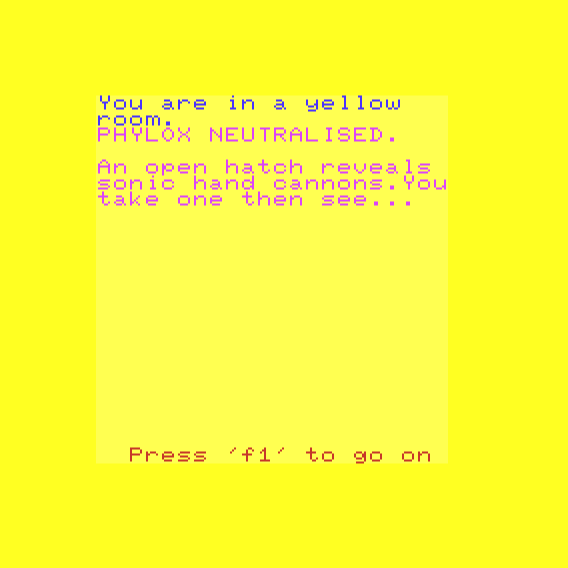
Sometimes, you get attacked by a robot when entering one of the color rooms. Notice you get dispensed a hand cannon at the start of the sequence.
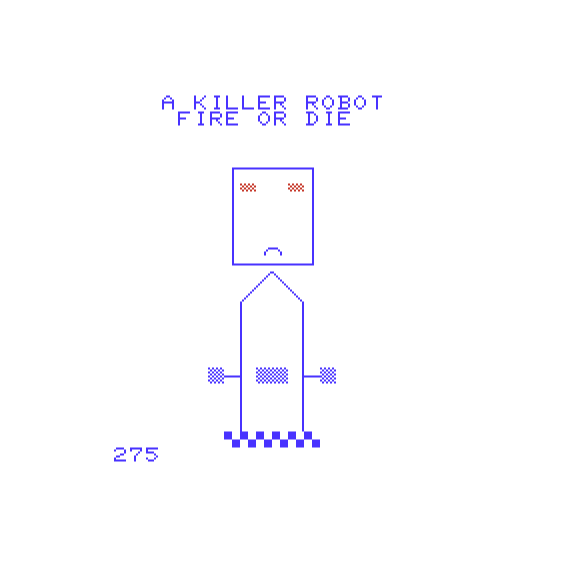
I had immense trouble here; any keypress I did seemed to cause death. I tried typing LOAD. I tried making sure I had the charger pack (maybe that would help with the hand cannon). I tried going through every letter on my keyboard and reloading with a save game state. I started to suspect maybe I was hitting a bug. I was not, but it would not be until much later that I would resolve this issue; since it appears at random I was able to juggle just avoiding having them show altogether. This isn’t silly for this game — my winning run ended up skipping quite a lot — for example, that key I mentioned, which requires decontamination to survive even being picked up? I tried it on the glass locked door, no dice; I tried it on other exits which also mention a locked door, and nothing happened there either. You don’t need the key at all; it is a red herring. Hence, I figured perhaps the robot fights could be evaded in a similar way.
One other item of note is that the basement is essentially the bottom floor (there’s a special floor at the end of the game although it’s unclear if it’s “beneath” or “sideways”). This means if you go down farther, you will get dropped into a special area. For example, you might wander into a room with a trap door, or you might push the wrong button at the color room puzzle (trap door) or you might even spend too many turns in a room trying to figure out the syntax for something (trap door, just at random it seems after X turns).
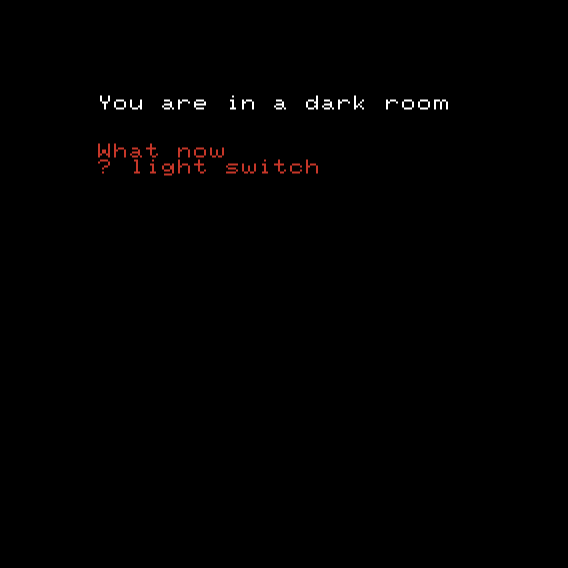
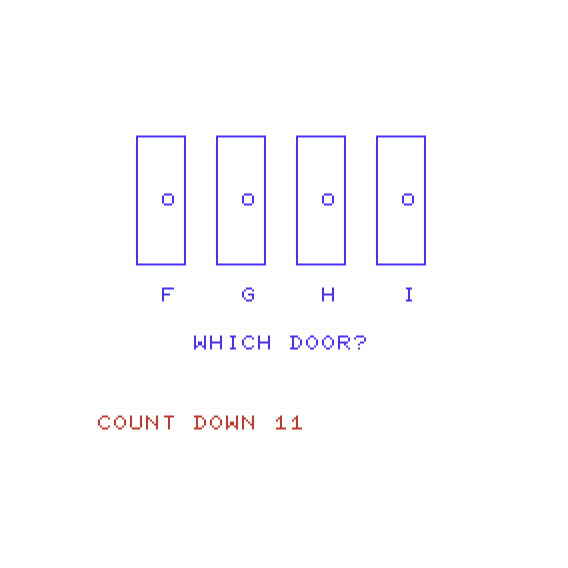
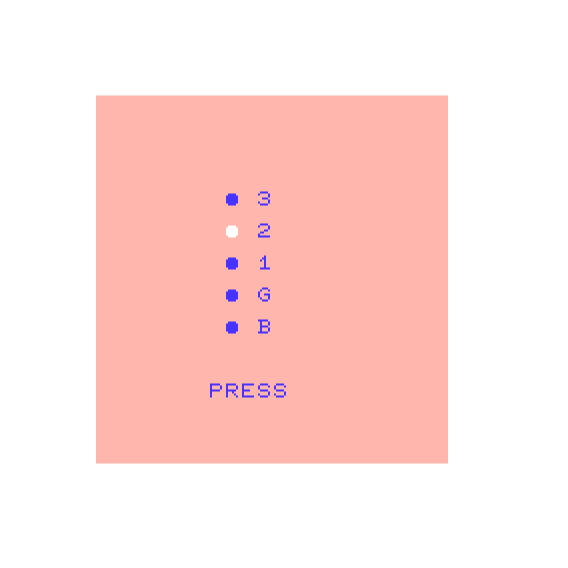
Here you need to (as shown) type LIGHT SWITCH to make any further progress. Then a TV shows a short sequence of letters, and four doors are revealed.
There are multiple variants, but the one here I was stuck on (even though I had the right answer, I couldn’t explain it). I checked on Bluesky, Mastodon, and Discord and got answers from all three (thanks to Tyler Bindon from Mastodon, Mike Piontek from Bluesky, and tjm from Discord); I think my problem was that the second screen is timed so I thought it would be something solvable quickly and also would generate a sequence that would keep going. This is not the case here.
ABCDEFGHIJKLMNOPQR
R (skip three letters) N (skip two letters) K (skip one letter) I. In case you get it wrong, you get a second puzzle, and if you get that one wrong, you get a “ceiling crush” effect and you die.
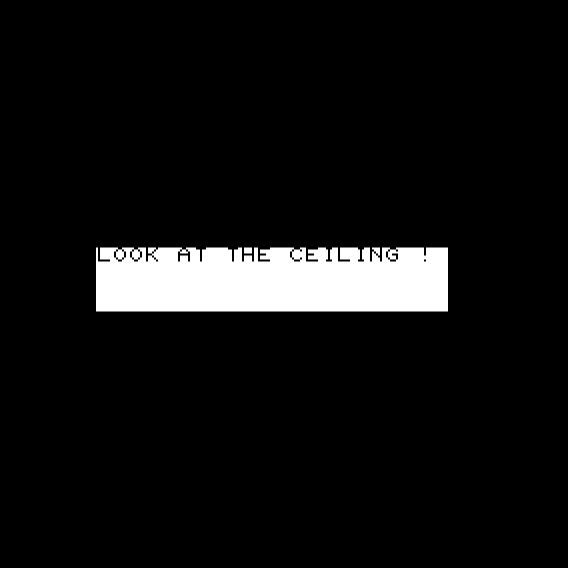
Animated!
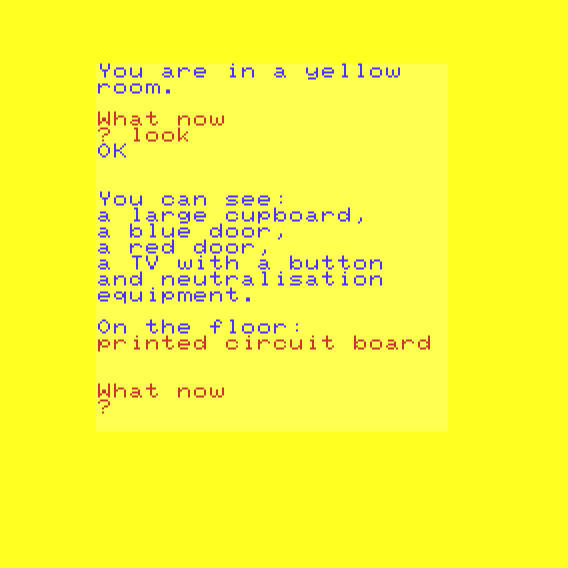
All of that material is completely optional. In fact, other than the pass at the start, you don’t need to go into the basement at all. The yellow room has a circuit board on the floor and a disc in the cupboard, and both seem like they would be useful defeating a rogue computer, but they are absolute red herrings. (I do want to emphasize how much easier the game is with me telling you this kind of thing; imagine you’re juggling an item limit of 3 this whole time and trying to pick up things like the disc you are sure are useful, while simultaneously getting dropped into trap doors for arbitrary reasons and getting attacked by robots that you can’t defeat.)
Time to hop up to Floor 2! At least this time there’s some reason to be up here.
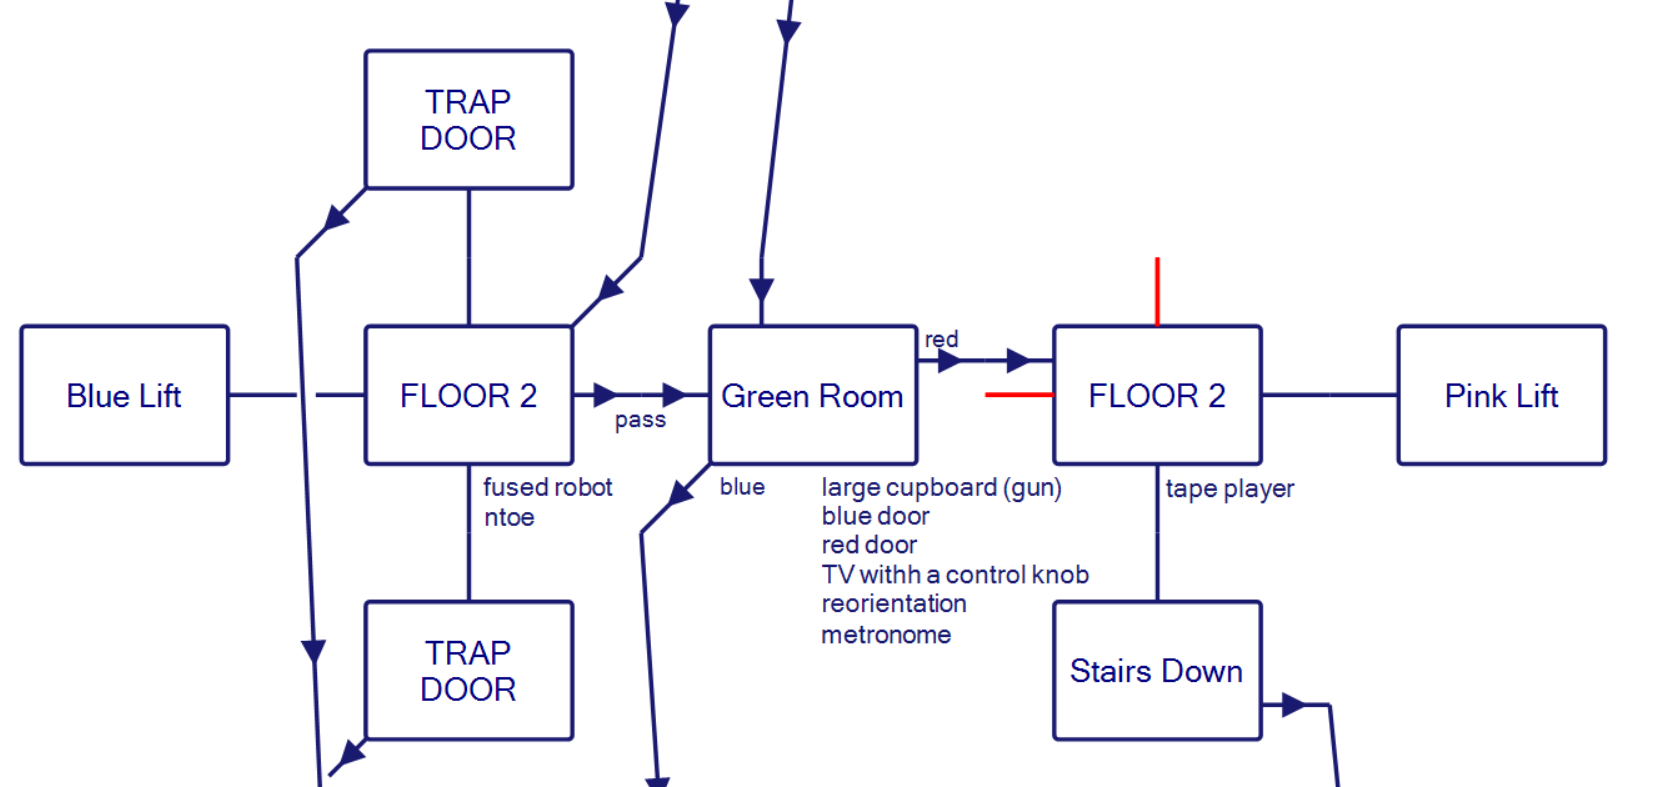
I haven’t been talking about them, but the red exits are dead ends like “a locked door” or “a killer robot lurks”. In both cases you might think there’s some way to handle them (like that deadly key) but they really are just dead ends.
The pass from the basement opens the green room on Floor 2.
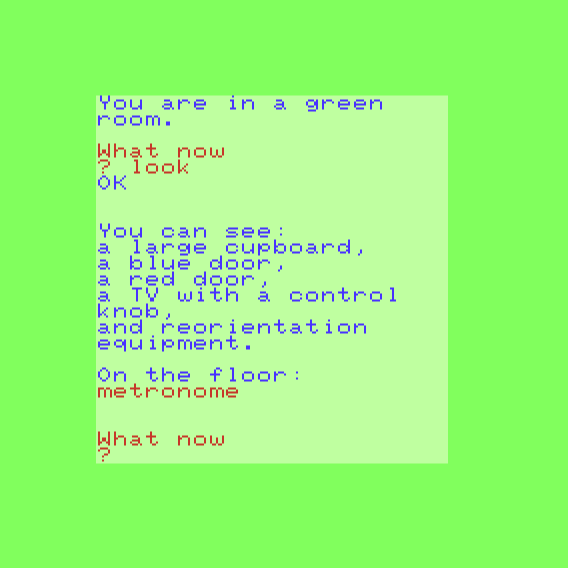
The metronome, of course, is useless, solving the puzzle opens the cupboard revealing a gun.
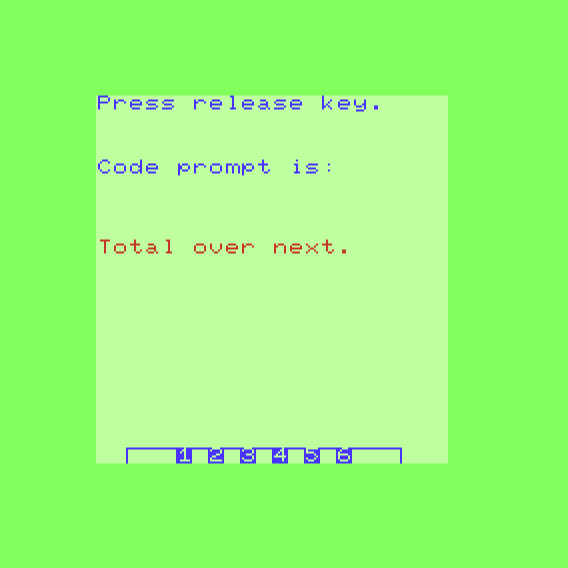
Sum 1+2+3+4+5+6 = 21 is the “total”, and the “next” after 6 is 7, and the “over” is division, so the puzzle is fishing for 21/7 = 3.
If you are holding the gun and the cartridge at the same time you can LOAD GUN to charge it. (The command here isn’t obvious hence I thought it is what the postcard was referring to.)
ok…gun loaded
Despite you having a gun already if you get into one of the robot scenes after there’s still the gun that gets dispensed (and still the issue where you need to hit the right keystroke).
Now it’s time for the last(-ish) floor, Floor 3. There is no button for it on the blue lift, so you have to ride the pink lift instead, and the lift won’t let you get to floor 3 unless you are carrying the badge.
The map here is a little more straightforward than the other levels. The red exits on the map below are locked doors. (Again, no luck with the key.)
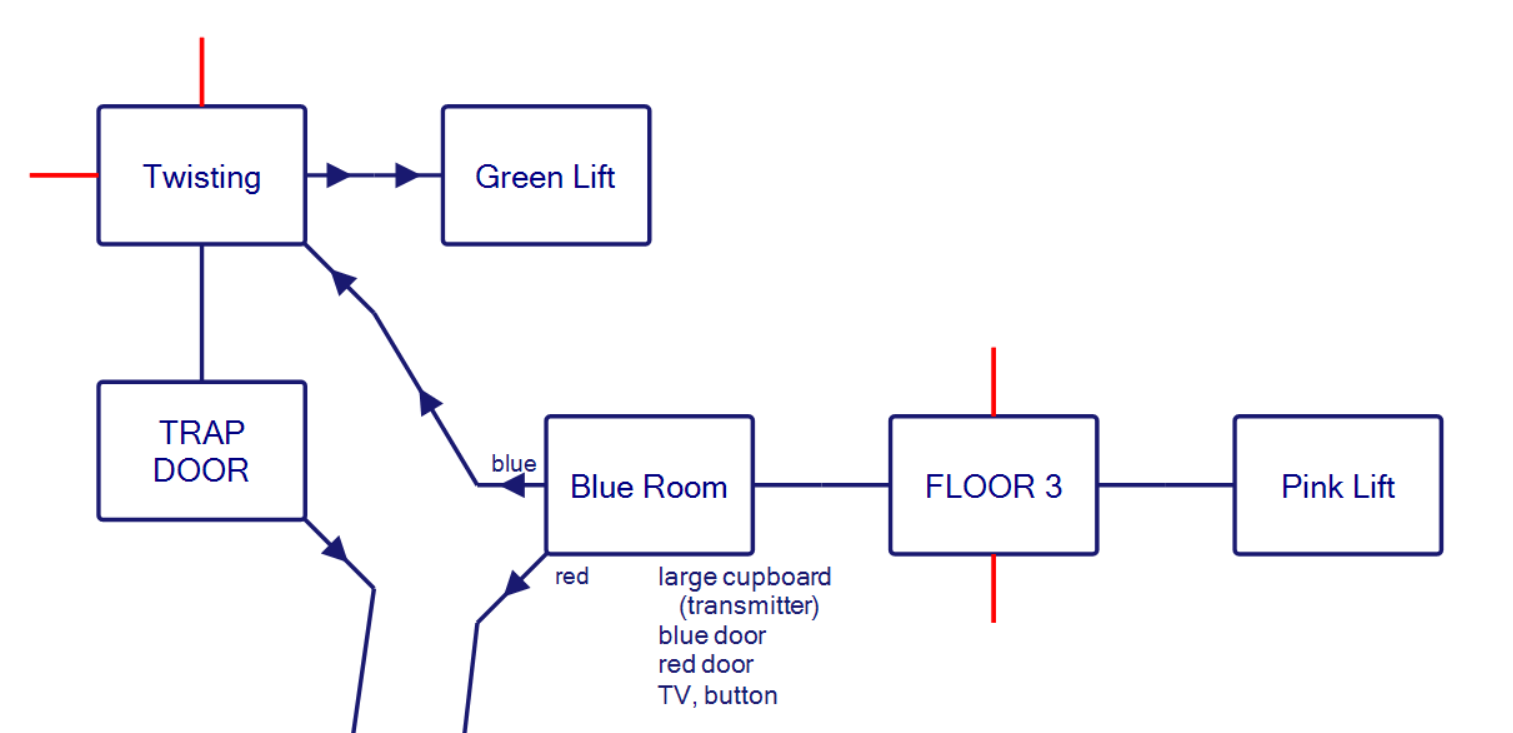
The blue room straightforwardly has a “transmitter” in the cupboard and just as straightforwardly the transmitter is useless. (I carried it around with me most of the map assuming it would have some effect.) Past that, assuming you don’t get tripped up by the geography, you can walk around a corner to find a third lift, a green lift. Try to enter the lift and a robot attacks, and there is no weapon given to you beforehand. The reason you need a charged gun is for this encounter.

It took a giant and absurd leap of insight to get through here. It would not take as big a leap for someone playing on actual hardware. You see, the VIC-20 has four “function keys”:
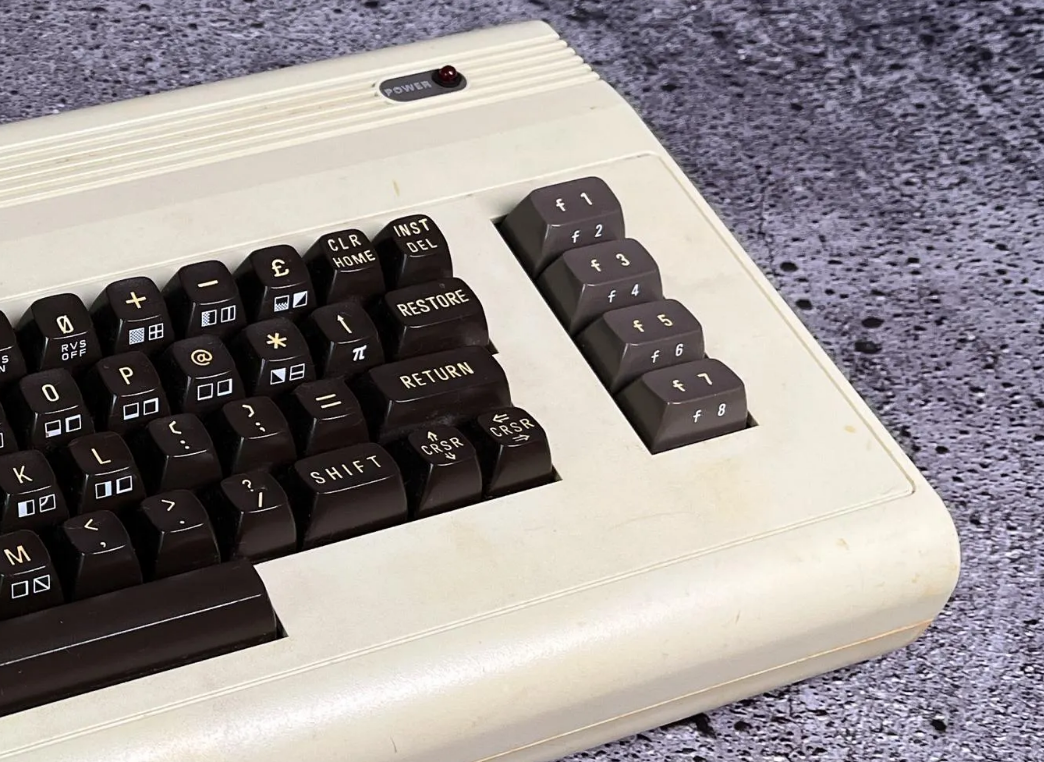
These keys will give text commands during normal BASIC operation of the computer. The F7 key gives the command LOAD.
The postcard was trying to hint that the way to kill the robots is to press the F7 key on the keyboard, which gives LOAD text in certain circumstances.

Pimania had a bit where you needed to hit the “pi” key on the ZX Spectrum keyboard but at least the button was marked that way! (And it was needed to start the game; it wasn’t in the middle of what seemed to be a different kind of puzzle.) From what I gather not everyone used or even understood the function key use. (The article I just linked includes the line “The four function keys on the right hand side of the VIC 20 are probably the most neglected part of the whole computer.”)
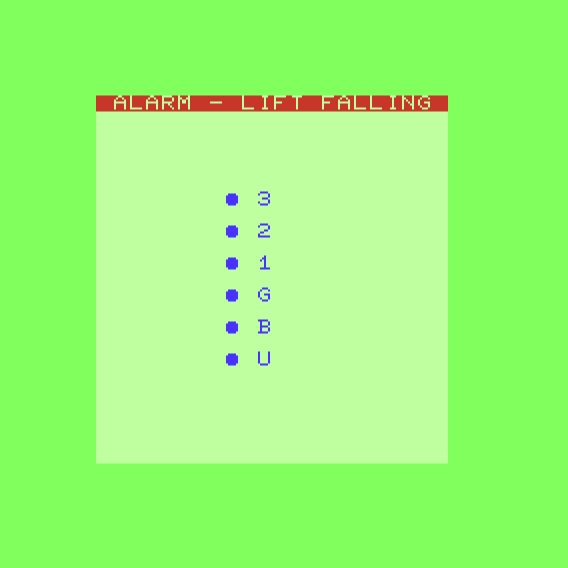
Past this, while in the green lift, no matter what button you push you plummet to the “U” floor.
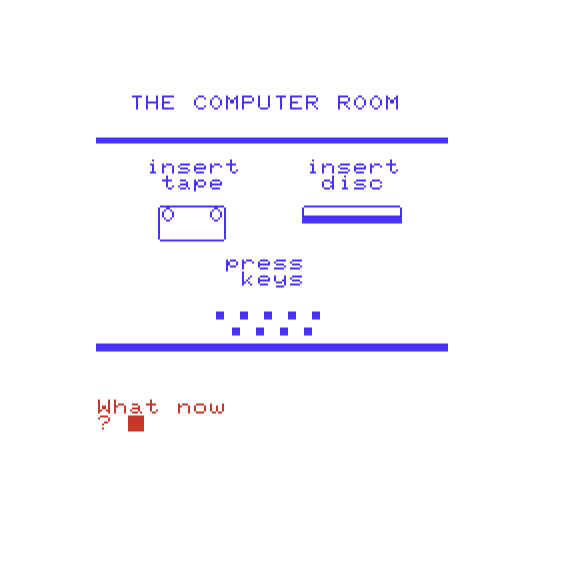
You do not want to use a disc. The way to win the game is INSERT TAPE.

Based on how hard I had to push to reach this screen, I was hoping for at least a laser show.
This is another case where I think a numerical rating would be deceptive; I’d probably rank it 1 out of 5 stars if I had to write a review on IFDB. However, I am in admiration of just how much complexity the author managed to stuff into so small a package, and just how far they were willing to go to toss in a little misdirection. The key in particular was what I call a second-level red herring, as in a red herring that keeps the joke going a bit longer (with the cure, plus what seem like potential uses which aren’t). Similarly, the fact LOAD GUN is required makes it seem like the postcard has been used already, even though it was hinting at an entirely different puzzle.
It is possible we may run into the author again. Sumlock did publish an adventure game of their own in 1984 called Salvage. It is for Commodore 64, but shares some resemblances to Secret Mission. In addition to the game having character art, you need to get the digits of a pass code (by collecting individual digits) in order to escape a shuttle.
The tape packaging of the original 1984 version actually comes with author names: A. Pomfret and T. Picking. I assume Pomfret is related to Mike and Tony of Sumlock (I would say maybe “A” is Tony but he was already at Ocean by then), but could Picking be the Kew Enterprises author? This will need further investigation when I reach that game in the future.
Coming up: a “holy grail” lost game that just got posted a few hours ago, if I can wrangle past the technical issues.

Actually you always needed some software to do something with the function keys, otherwise they were useless. F2, F4, F6 and F8 were especially bad, since you had to press SHIFT to access them.
Mapping LOAD to F7 seems extremely bespoke to me. I never was deep in the VC20 scene, always been a C64 guy, but at least there I never saw such a thing. This makes the puzzle just plain weird, not to say unfair. Putting it the other way round, even sitting in front of an original machine wouldn’t have helped me in any way. To map those keys you have to run the program first. Which can be done, of course, but is a chore.
That puzzle was everything you promised and brings to mind some other meta stuff like Simon the Sorcerer 3D and System’s Twilight.
“Mastadon” should be Mastodon.
roger roger