(Prior posts on Adventure Quest here.)
It is a good time once again to peruse the Scroll of Lore Dumping™ that was provided at the start of the game:
Take the Talisman to the Black Tower through the four elements twice. It can defeat the Demon Lord, but only a companion can bring victory at the end. The Talisman is nearby, but you will also need four Stones to gain entry and these are guarded by servants of the Demon. The blessing of Typo, God of Adventures, goes with you.
I technically have found all four stones (not all in the same save file, but I just need to go through the process). Even with those I still need to track down the exact location of the black tower. The scroll gives the super-structure of the game as a whole, which is important for wrapping things up. Namely, this is a biome journey that goes: earth – fire – air – water – earth – fire – air – water. Each of the later biomes has a warp back to its previous biome of the same element, in the form of an exit marked with a black dot; the landing point is marked with a white dot. Here’s a meta-map of the situation:
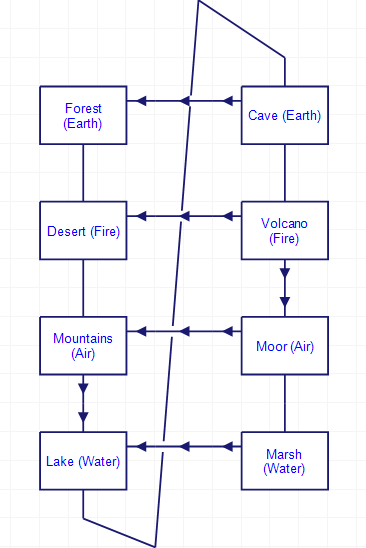
Some biomes let you travel back and forth (for example, you can go from the starting forest to the desert and back again) while some are one-way trips (to get to the mountains to the lake you have to use the rapids). The lamp seems to be oriented to only teleporting to the places on the left (except for the glitched moor trip, but I’ve since been back the normal way).
This is important in that the inventory limit of four is fairly restrictive. At the very least the endgame needs all four Stones plus a talisman, so doing some shuttling back and forth is a necessary part of the game, and in one case (as I’ll show today) you have to be careful with a particular puzzle in order to not shut off a method of passage.
Last time, I had two threads I was stuck on: finding anything else in the bleak moor, and getting by a dragon in the cave. While I used my teleport-glitch game to explore the bleak moor some first, I’m going to trace the path starting from the dragon as it will segue into the moor eventually.
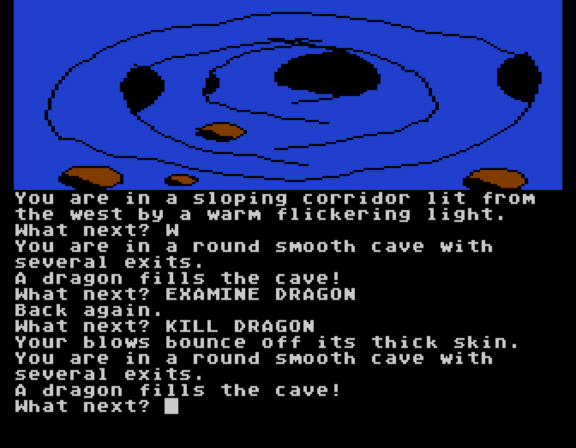
The dragon has the particular attribute of swallowing anything you throw at it, so I decided to do the equivalent of clicking on every item in a point-and-click adventure to see if anything would budge:
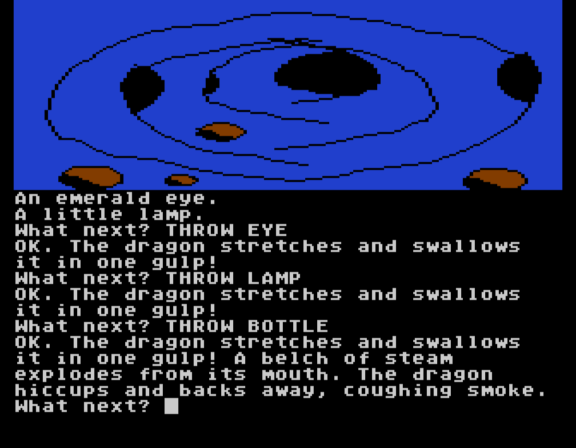
I suppose a bottle’s worth might be upsetting to a dragon if it was insulated really well so it didn’t turn into steam before even entering the gullet, but — well, I’ll accept it under the fantasy physics clause. At least I made it forward, enough to grab an egg from the dragon’s lair to the north, and to be able to enter a volcano crater to the west.
A map, to clarify:
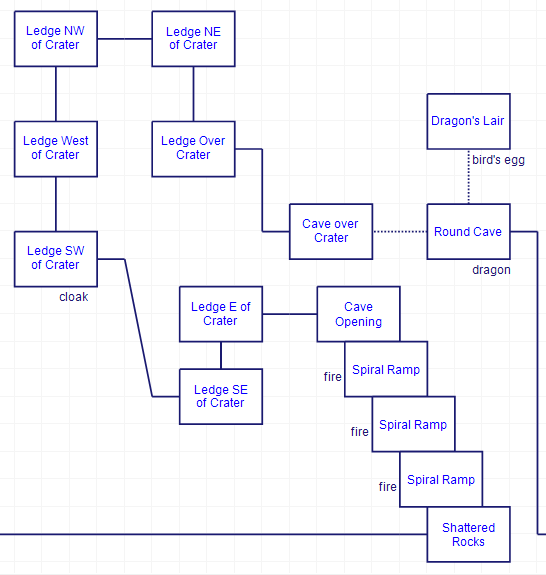
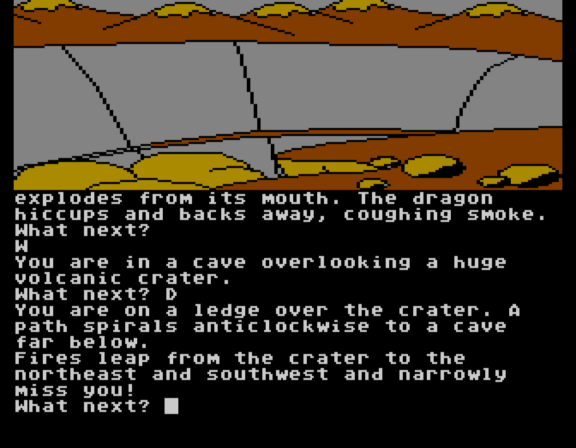
Starting from “Ledge Over Crater”, you need to make your way along the path while fireballs go whizzing by. This is just a simple timing puzzle where you need to wait one turn at each step before going on to the next one. Halfway through the trip you pick up an “insulated cloak”, which is good for the next obstacle, a “sheet of living flame” that harasses you as you go down some stairs.
At the very bottom there’s some burning coals where you need to THROW CLOAK in order to cover them and walk across. You can, importantly, TAKE CLOAK after you pass (even though the cloak isn’t
listed as an object in the room!) If you don’t take the cloak again and teleport out (or even just progress to the moor, which is a one way trip), then you are forever unable to get down past the living flame, meaning you’ve quite possibly softlocked your game, so be careful!
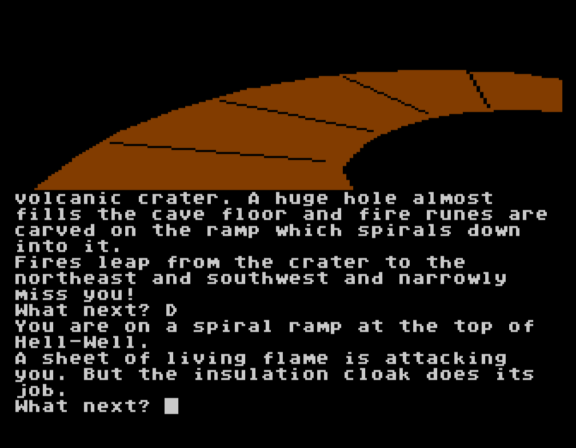
Also at the bottom you can find a burning nest, where the egg can be tossed in to summon a phoenix. The phoenix doesn’t follow you, although if visit the top of the crater again the phoenix will make a cameo, so it is clearly active. I suspect it is the “companion” from the scroll who will bring victory at the end.
There’s incidentally a black dot door to the north if you feel like warping back. To the west there’s a “rock bridge” which spans a chasm, and on the far end there’s the Sun-Stone.
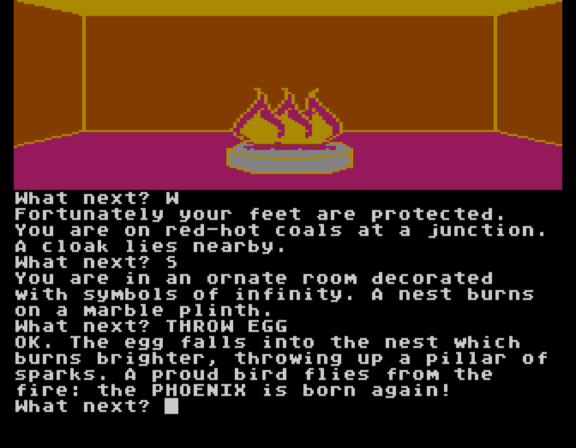
There’s also copyright protection. I went over details with Colossal Adventure so I won’t repeat them here. This time I managed to get the Lenslok software LensKey to work properly.
When trying to leave with the Sun-Stone, you are confronted with the Balrog.
Oh, you are at the balrog stage! That’s… let’s say… not one of the believable puzzle solutions in the game.
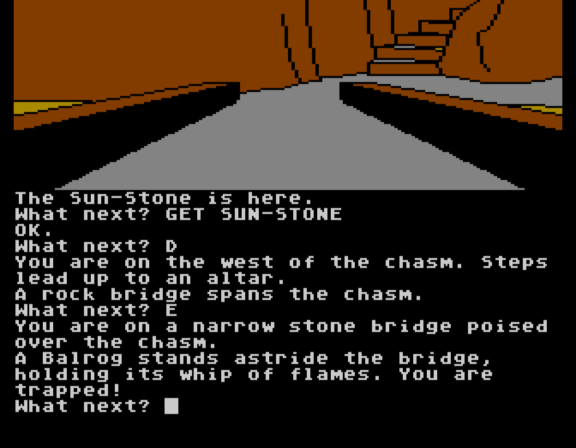
I did manage to solve it without hints, but I also knew enough Tolkien to imagine I was re-enacting the scene from the book. The movie version should give you a hint:
The visual depiction in the game is a bit off. It is meant to be a narrow, crumbly bridge, not a firm, solid one. Plus, we’re supposed to imagine ourselves as Gandalf with magic and so forth, and probably shout YOU SHALL NOT PASS for role-playing purposes which is how I figured this out:
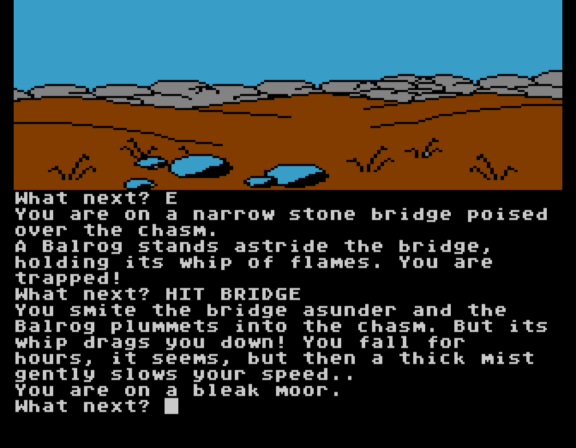
The version I was playing also describes the bridge as unstable if you examine it.
Especially without the EXAMINE description that’s not fair at all. The other wildly unfair puzzle also used external knowledge (OPEN SESAME). I sense a pattern.
Moving on: this lands you in the same place my glitched teleport did. The insulated cloak (assuming you remember to snag it up) prevents you from freezing as well as heat, so it makes the map much easier to create:

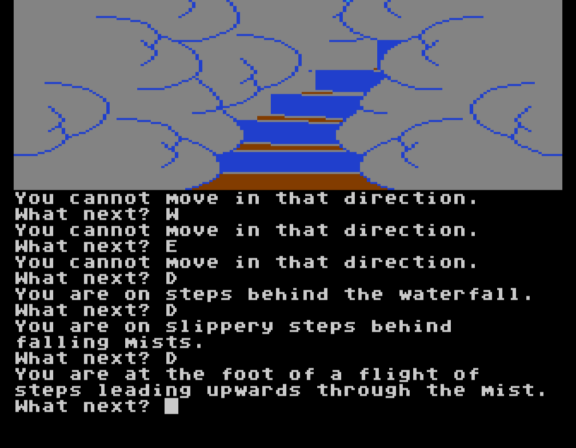
Other than the cold gimmick, and the Star-Stone at the barrow (which I mentioned last time), there’s no other gimmicks. For the Star-Stone you either need to teleport out via lamp or use the black-dot door to wrap; either way you go backwards, meaning if you forgot to grab the cloak, oops!
To the south there’s a stairway that leads you out of the cold-zone behind a waterfall…
…and into the eighth biome, a dank marsh.
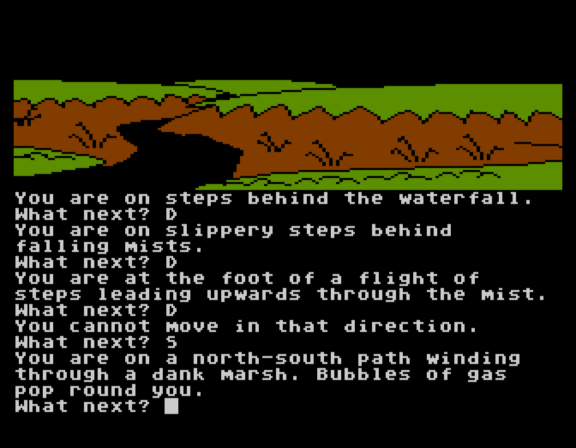
Just a few steps in there’s a circle of silent stones, where you are assaulted by “cold shadow ghosts”.
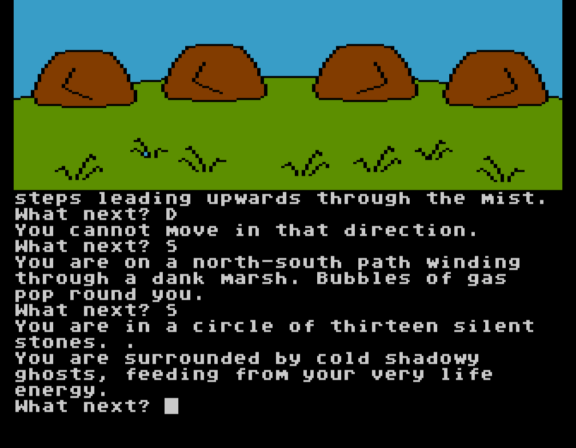
Fortunately, escape is just a manner of moving backwards two rooms to the waterfall. Going back to the circle, the ghosts are no longer there. (I wasted time at first fussing with the Talisman of Life, but it seems to have nothing to do with the puzzle.)
Moving forward, quicksand is many directions, but to the far east you can see light.
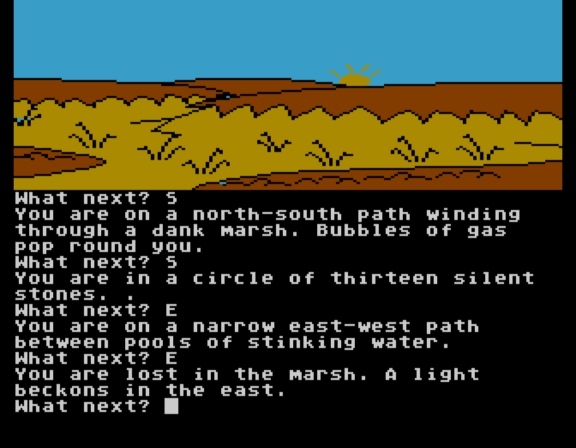
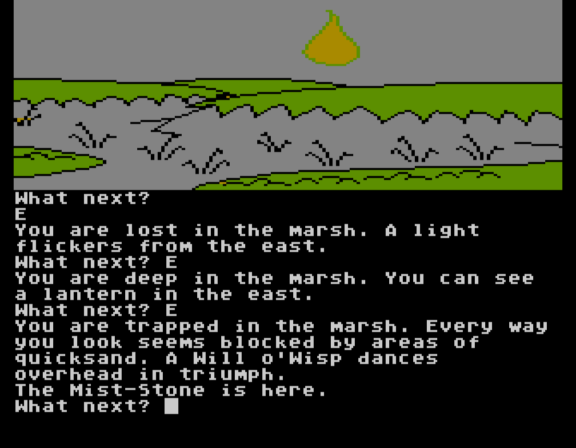
Once at the Mist-Stone you can just grab it and teleport out (any other direction leads to quicksand), so unless there’s something else that needs be done with the Will o’Wisp, its triumph is short-lived.
I still have more directions to explore to get out. I haven’t found the black-dot exit nor what I assume is the final biome transition, making it to the black tower. Given I have the four stones and am physically close to the end I think we’ll have a win soon, but I wouldn’t put it past this game to have a very long endgame to reckon with before the final showdown with AGALIAREPT.

a winner is me! writeup probably tomorrow
“For the Star-Stone you either need to teleport out via lamp or use the black-dot door to wrap; either way you go backwards, meaning if you forgot to grab the cloak, oops!”
Well, actually, no. This is just a minor thing and you already have beaten a game, so I think I can just point this out: looking at your map, you seem to have missed one direction from the hilltop. You were probably not checking the UP and the DOWN regularly for each room?
There’s also a way to survive the quicksand without teleporting, but you might have found out it later?
Also, there are a couple other things that could prevent you from freezing: sehvgf and oenmvre. Latter is also useful for the ghosts.
Brazier I found. Didn’t know about fruit. That’s interesting the multiple options they give there.
Jason, the modem interpreter of level 9 bypass the copy protections. Maybe we already discussed this and I don’t remember and you prefer a faithful approach.
I’ve found playing on an actual Atari emulator (using Altirra for this one) to be more pleasant than the Level 9 interpreter. The copy protection only happens for one moment (as I’m not using the regular save feature) so it isn’t enough of a hassle to worry over.
I remember sending off the postcard to Level 9 early in 1984 when I got stuck on Dungeon Adventure, the third of the Middle Earth trilogy. There is a room where you “keep bumping into things that you can’t see” and I just couldn’t se what to do. After about four months I finally caved in and could have kicked myself when I saw the solution. It must also be the only game with a salt pig in it.